





Your heat exchanger runs hotter than it should, your raw water flow feels weak, and you already suspect scale buildup is the culprit. The usual fix, a jug of muriatic or phosphoric acid, works fast but eats away at gaskets, zincs, and metal fittings while putting off fumes you don't want near your engine room or your skin. If you're searching for a non toxic way to remove marine scale from heat exchanger surfaces, you're right to look for an alternative before you reach for anything acid-based.
The good news is you don't need hazardous chemicals to dissolve calcium and mineral deposits. A properly formulated enzyme-based descaler breaks down scale at the molecular level without corroding copper, cupronickel, or rubber seals, and it won't trigger hazmat shipping restrictions or require gloves and goggles to handle safely.
This guide walks you through exactly how to flush and descale your heat exchanger the safe way, from diagnosing scale buildup to choosing the right raw water flush method, dwell times, and rinse steps. By the end, you'll have a repeatable process that restores cooling performance and protects your engine for the long run.
Why choose a non-toxic method for marine scale removal
Acid descalers get the job done, but they do it by attacking metal, not just scale. Muriatic and phosphoric acid can't tell the difference between calcium deposits and the copper-nickel walls of your heat exchanger, so every pass thins the metal a little more. Run that acid through often enough and you'll trade a scale problem for a pinhole leak problem, usually at the worst possible time offshore. A non-corrosive cleaner avoids that trade entirely by targeting mineral bonds instead of the metal itself.
A descaler that damages your heat exchanger while cleaning it isn't solving your problem, it's just delaying a more expensive one.
Safety matters just as much as equipment protection here. Acid fumes in a closed engine room are no joke, and most marine techs have at least one story about goggles fogging up or gloves failing mid-job. Products carrying an HMIS 0-0-0 rating carry zero health, flammability, or physical hazard score, which means you can pour, circulate, and flush without a respirator or a ventilation fan running the whole time. That rating isn't a marketing label, it's a documented safety classification you can verify before you ever open the container.
Shipping and storage add another practical reason to skip the acid. Hazmat-classified descalers come with shipping surcharges, limited carrier options, and storage restrictions that most boat owners never think about until they're trying to get a jug delivered to a marina. Non-hazardous formulas ship like any other liquid, sit safely on a shelf next to your other maintenance supplies, and don't require a hazmat placard on the truck.
Finally, whatever you flush out of your heat exchanger during a raw water flush often ends up back in the water column, directly or through bilge discharge. Choosing an ocean-safe cleaner means you're not trading one environmental problem for another every time you service your cooling system.
Step 1. Gather your tools and non-toxic descaler
Before you crack open the heat exchanger, lay out everything you need so you're not hunting for a hose clamp with descaler already circulating. A clean flush kit built for marine cooling systems, a bucket or reservoir, a small pump or your engine's own raw water pump, and enough non-toxic descaler to fill the exchanger's water side plus a little extra for circulation loss will cover most jobs.
Here's a basic checklist to work from:
- Non-toxic, enzyme-based marine descaler rated HMIS 0-0-0
- Bucket, jug, or dedicated flush reservoir
- Length of hose to bypass the raw water intake
- Hose clamps and a screwdriver or clamp driver
- Catch pan for any drips during disconnection
- Flashlight to inspect ports and passages before you start
Check your heat exchanger's water volume, usually listed in the manufacturer's manual, so you know how much descaler to mix. Most enzyme formulas work at full strength or a light dilution, so read the label rather than guessing.
Skip the respirator and chemical gloves. Since you're working with a non-hazardous cleaning chemical, standard work gloves are enough to keep your hands clean while you handle hoses and fittings.
Step 2. Isolate and prep the heat exchanger
Shut down the engine completely and let it cool before you touch anything. Working on a hot heat exchanger risks burns and can cause the descaler to flash off before it has time to work on the scale. Once the surface is cool to the touch, close the raw water intake valve so seawater can't flow into the system while you're flushing.
Disconnect the raw water lines
Locate the hose connections on the inlet and outlet side of the heat exchanger. Loosen the clamps, pull the hoses free, and set a catch pan underneath to handle any residual water. This is where your raw water flush setup earns its keep, since you'll route the flush hose into the same ports the seawater normally uses.
- Cap or clamp off the seacock line so it stays isolated
- Connect your flush hose to the inlet port
- Route the outlet hose into your bucket or reservoir for return flow
- Confirm every clamp is snug before adding fluid
A loose clamp during a flush turns a simple maintenance job into a wet, messy troubleshooting session.
Double-check that your enzyme-based descaler reservoir sits level and within reach of your pump, since you'll be circulating fluid through this loop for the next step.
Step 3. Circulate the descaler through the system
Fill your reservoir with the mixed descaler and start your pump. Let fluid move through the heat exchanger's water side at a slow, steady flow rather than blasting it through at full pressure. A gentle loop gives the enzyme-based descaler time to bond with mineral deposits instead of just rinsing past them, which matters more than raw flow rate here.
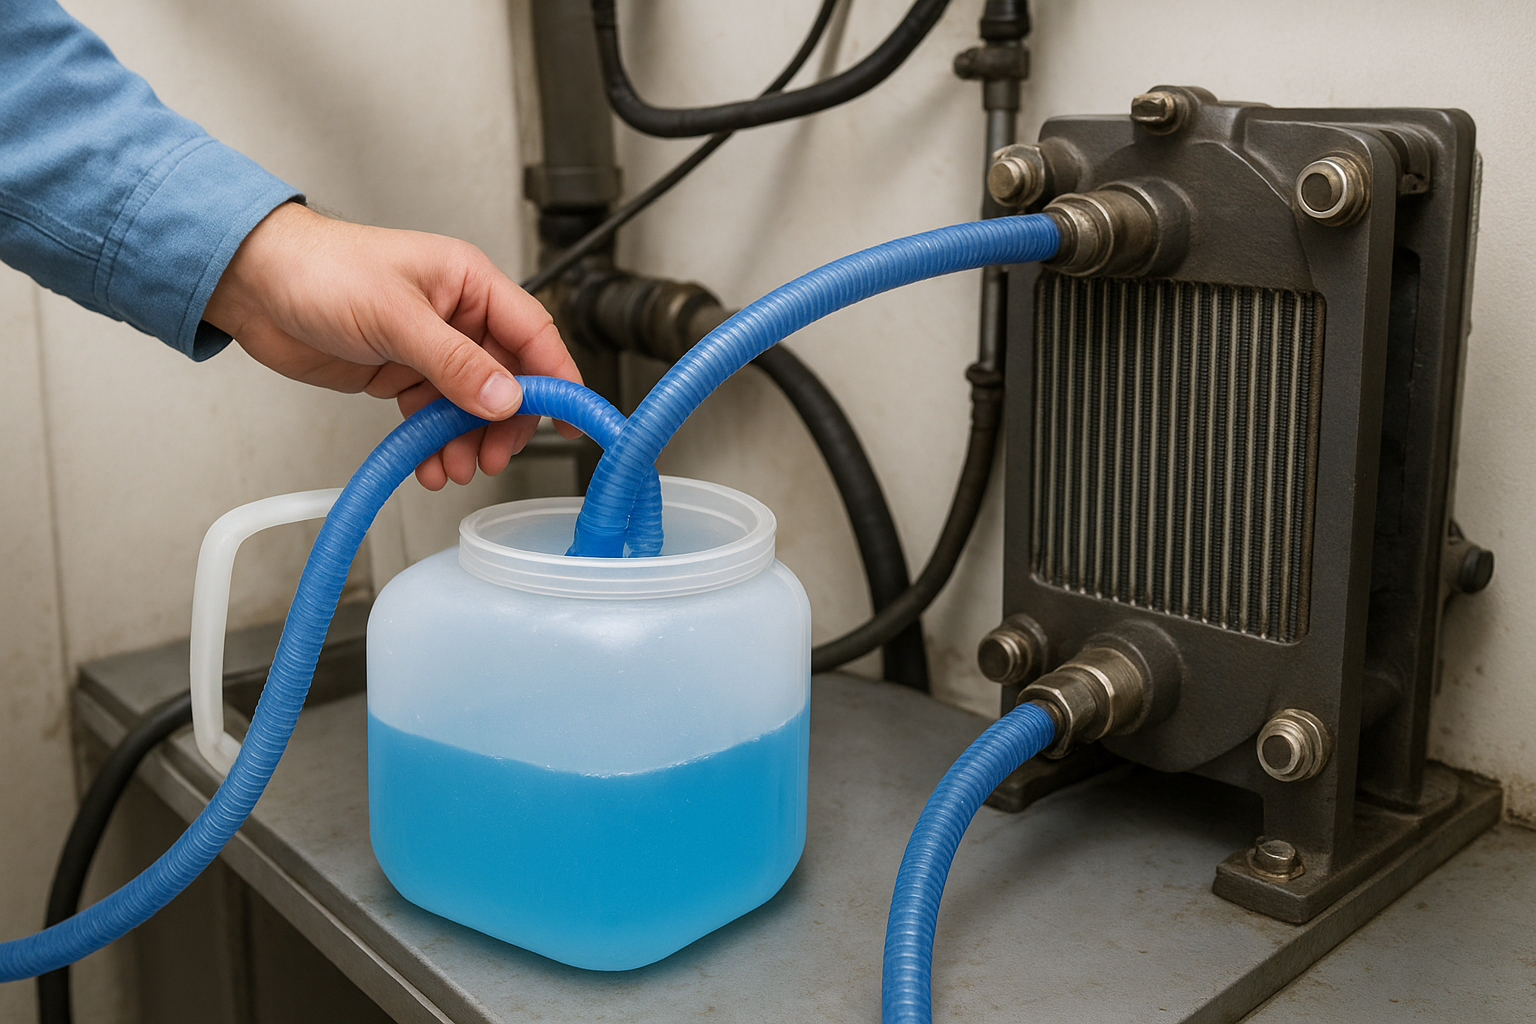
Set a realistic dwell time
Most non-toxic formulas need to sit and work, not just pass through once. Circulate for the time listed on your product label, typically somewhere in this range depending on scale severity:
- Light scale buildup: 30 to 45 minutes of circulation
- Moderate scale: 1 to 2 hours, checking flow resistance periodically
- Heavy, long-neglected scale: overnight soak with intermittent circulation
Patience does the work that acid used to do with brute force, just on a slower timeline.
Watch the return flow as it comes back into your reservoir. Cloudy or discolored fluid means the marine descaler is actively breaking down calcium and mineral deposits, which is exactly what you want to see. Clear fluid after a reasonable dwell time usually signals the scale has dissolved or the buildup was lighter than expected.
Keep an eye on your pump and hose connections throughout circulation. Since you're working with a non-corrosive cleaner, you don't need to worry about fumes building up in the engine room, but you still want to catch any leaks before they turn into a bigger cleanup.
Step 4. Flush, inspect, and reassemble
Once your dwell time is up, disconnect the descaler reservoir and run clean fresh water through the same loop for several minutes. This fresh water flush clears out dissolved mineral residue and any leftover enzyme solution before you put the system back into service. Watch the return water closely; it should run clear with no gritty sediment or cloudiness by the time you finish.
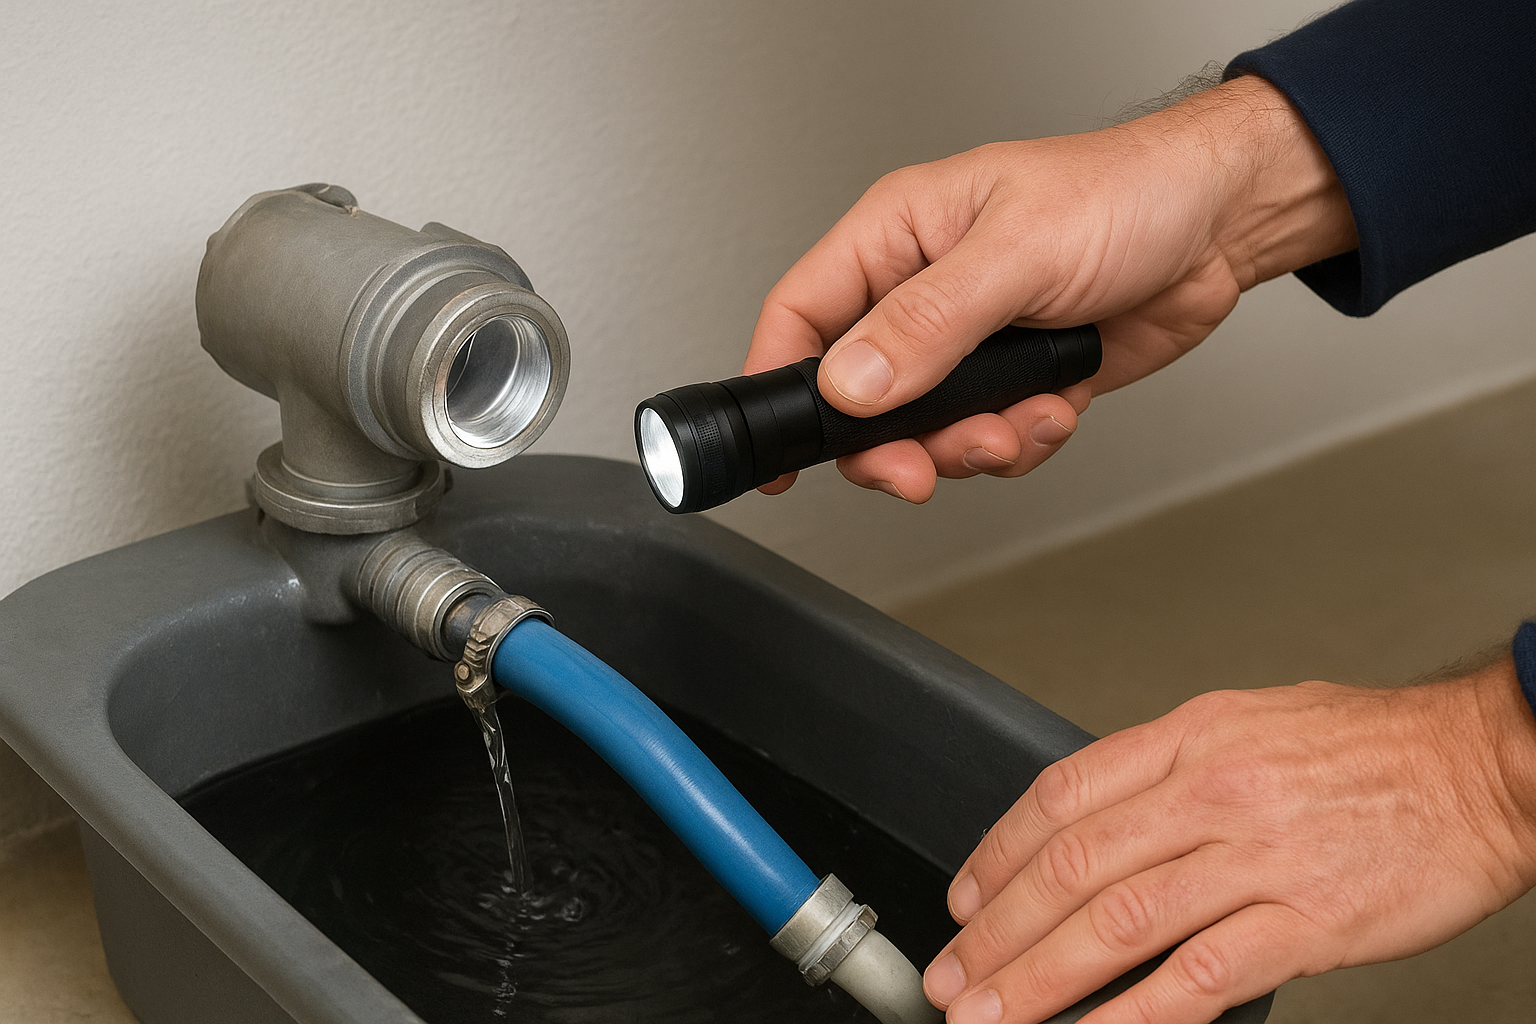
Inspect before you close it up
Grab your flashlight and check the inlet and outlet ports for any remaining scale flakes or discoloration. A quick visual check now saves you from reopening a reassembled heat exchanger later.
- Shine the light into each port and look for shine, not chalky buildup
- Feel for smooth metal along the accessible edges
- Confirm the catch pan shows clear runoff, not cloudy residue
If the ports look clean and the metal feels smooth, your non-corrosive cleaner did its job without a single acid burn.
Reassembling comes next. Reconnect the raw water hoses to their original ports, tighten every clamp, and open the seacock slowly while checking for leaks. Start the engine briefly at idle and confirm raw water flow returns to normal before you head back out on the water.
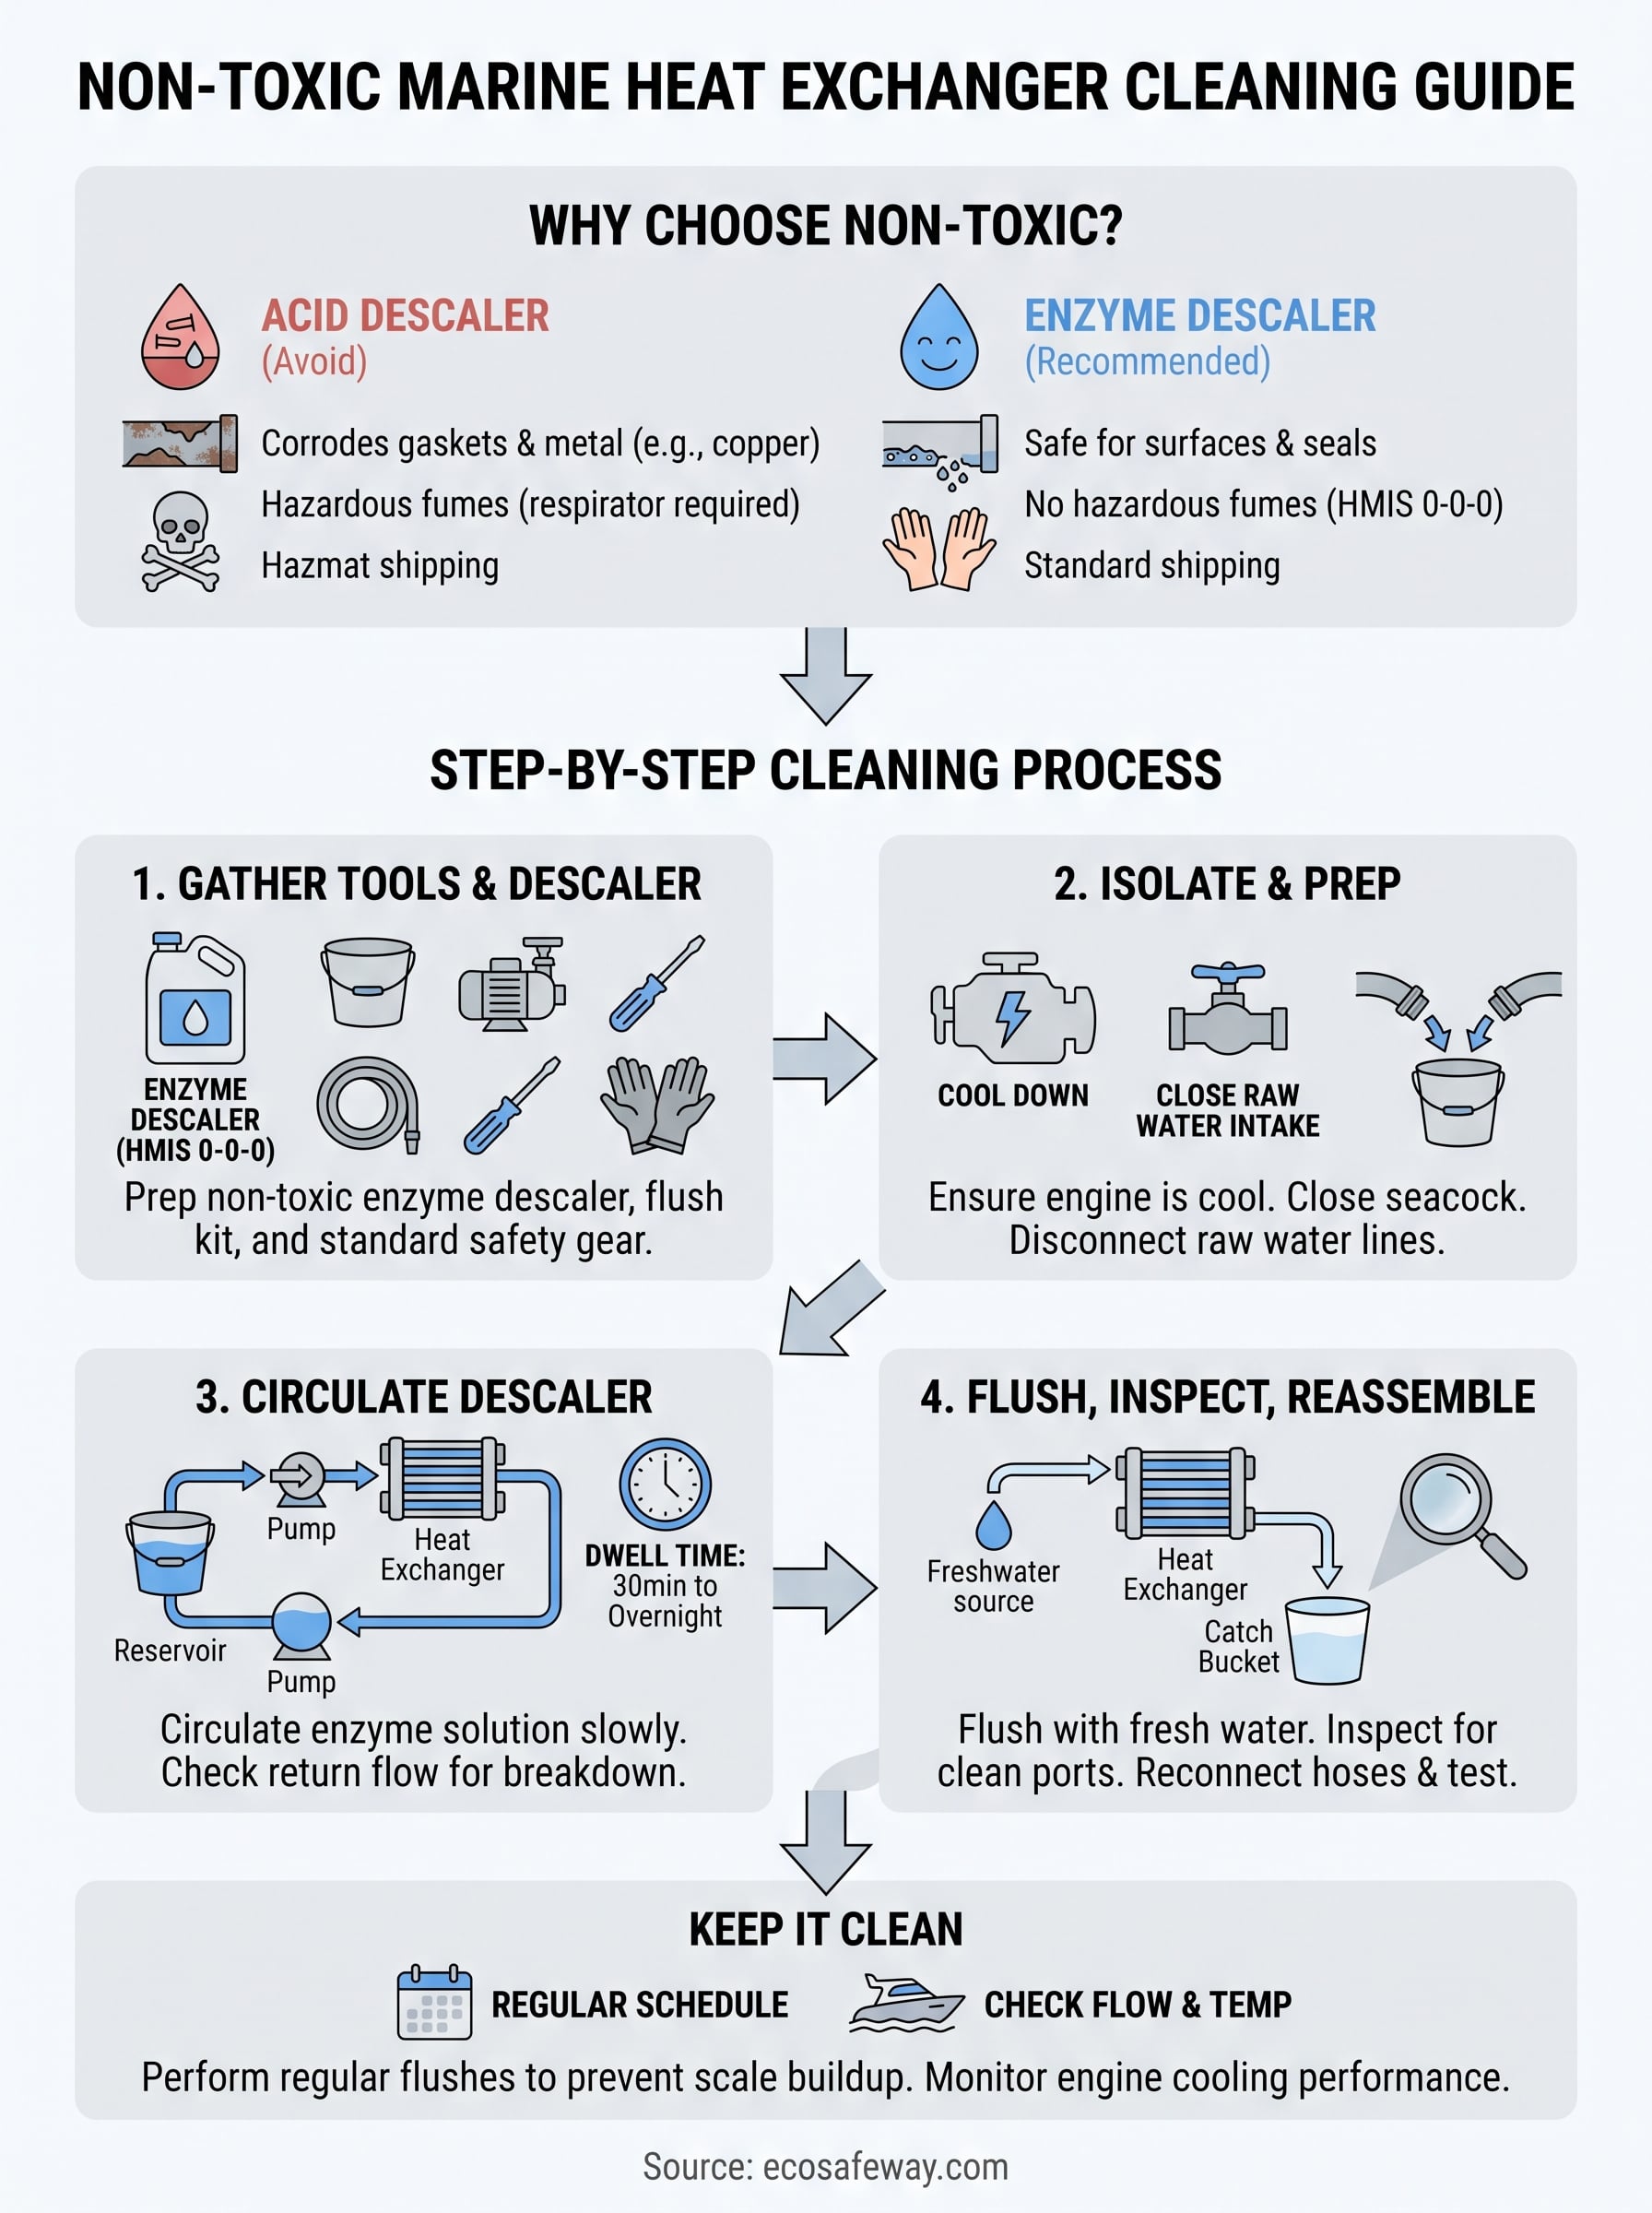
Keeping scale from coming back
Scale doesn't stop forming just because you flushed it out once. Raw water carries the same calcium and minerals every time it cycles through your engine, so build a regular flush schedule into your maintenance routine instead of waiting for temperatures to climb again. Boats running in hard water areas or sitting idle for long stretches scale up faster, so check flow and exhaust temperature every season rather than every few years.
Going forward, you already have the process down: isolate, circulate, flush, inspect. Keep a jug of non-toxic descaler on board so you're never tempted to reach for acid when you're short on time or dockside options. Your heat exchanger, your gaskets, and the water around your marina will all be better for it.
If you're ready to stock up, grab a raw water flush for boat engines and keep your cooling system running clean without the corrosion risk.


