





Your plate heat exchanger loses efficiency long before it fails. A thin layer of scale on those plates chokes heat transfer, forces your pumps to work harder, and drives up energy bills month after month. If you're searching for a plate heat exchanger cleaner that actually removes mineral deposits without eating through gaskets or plate materials, you already know the acid-based products on the market create as many problems as they solve.
This guide gives you a straight answer: how to strip scale and biofilm from plate heat exchangers using a non-corrosive descaler that won't damage stainless steel, titanium, or nitrile gaskets. You'll learn what actually causes fouling in these systems, how to tell when cleaning is overdue, and why acid-free formulations now outperform traditional hydrochloric or phosphoric acid flushes in real-world facility settings.
We'll walk through the full process step by step, from isolating and flushing the unit to selecting the right concentration and dwell time for your fouling level. You'll also see how an HMIS 0-0-0 rated cleaner simplifies handling and shipping compared to hazardous acid products, and why that matters for HVAC technicians, facility managers, and marine engineers who need results without the regulatory headaches.**
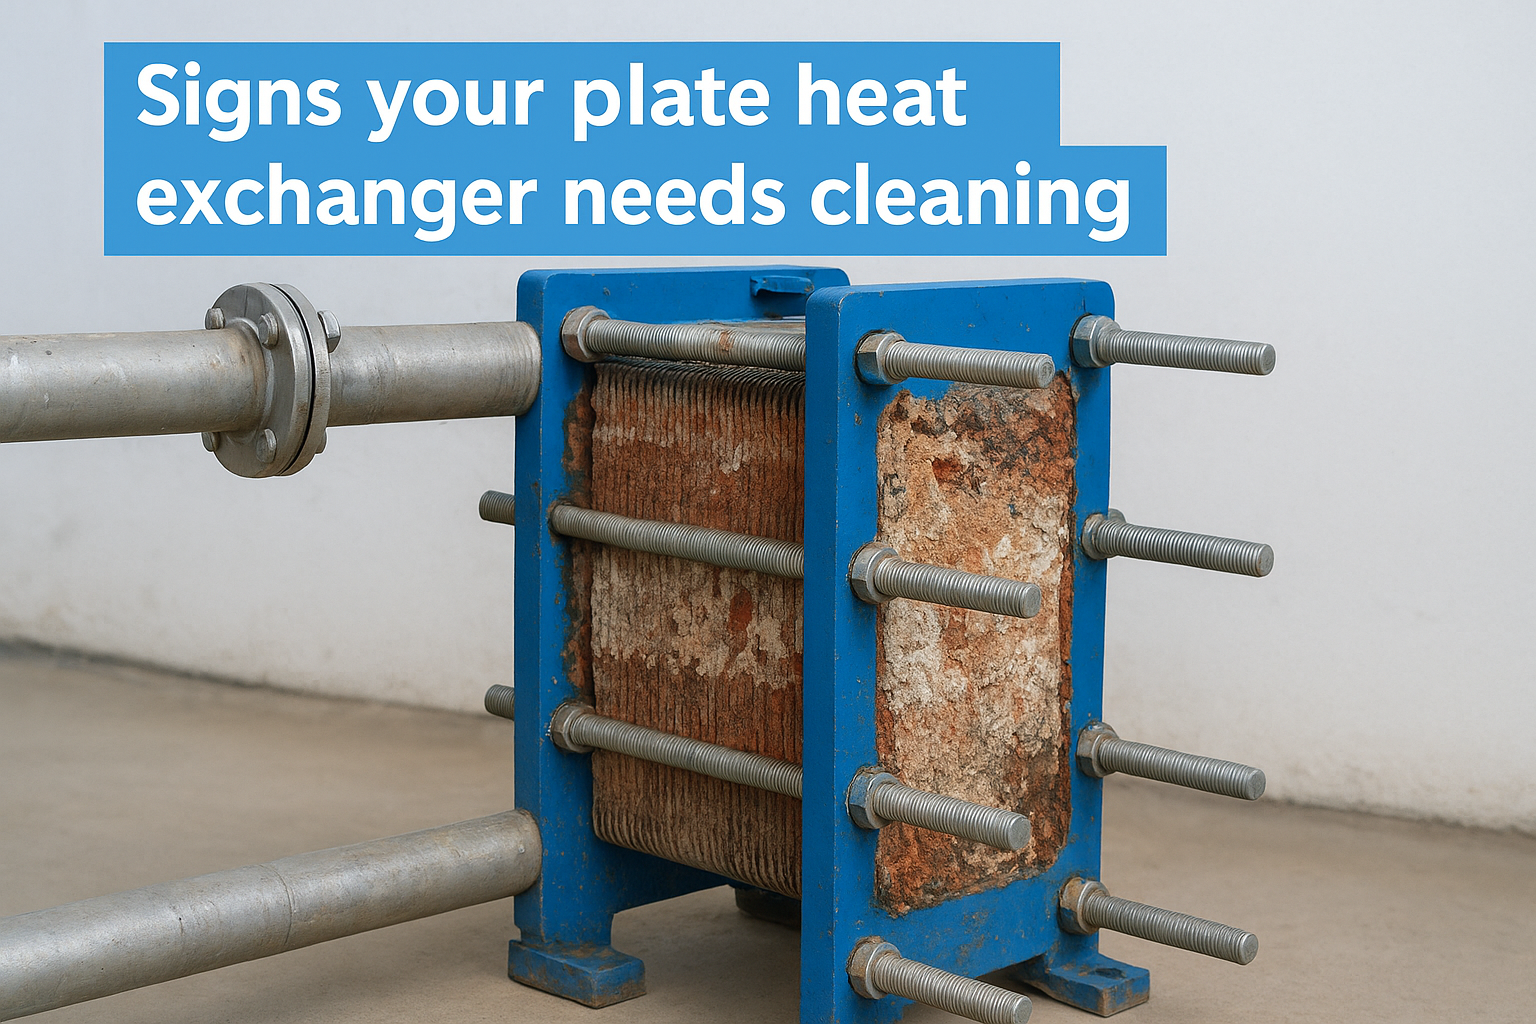
Signs your plate heat exchanger needs cleaning
Fouling builds gradually, so most facility teams don't notice a problem until efficiency has already dropped 15% or more. Catching the early warning signs saves you from emergency shutdowns, warped plates, and the higher cost of aggressive acid treatments later. Here's what to watch for before you reach for a plate heat exchanger cleaner.
Watch your approach temperature climb
Approach temperature is the gap between your target outlet temperature and what the unit actually delivers. When scale coats the plate surface, it acts as an insulating barrier that slows heat transfer between the two fluid streams. A unit that used to hit its setpoint now runs two, five, even ten degrees short, and your system compensates by burning more fuel or electricity to make up the difference.
A widening temperature gap is scale talking to you before the exchanger fails on you.
Track this number weekly if you can. Most building automation systems already log supply and return temperatures, so pulling a trend line takes minutes. Once the approach temperature drifts more than 10% from commissioning baseline, schedule a cleaning before it drifts further.
Track pressure drop across the unit
Pressure differential between the inlet and outlet ports tells you how much the flow channels have narrowed. Clean plates create a predictable, low resistance path. Scaled or biofouled plates force fluid through tighter gaps, and your pressure drop climbs as a result. A 10 to 15% increase over your baseline reading is your cue to inspect. Anything beyond 25% usually means the unit is fighting hard enough to strain gaskets and pump seals.
Install pressure gauges on both sides of the exchanger if your system doesn't already have them. They cost far less than an unplanned pump replacement, and they give you hard numbers instead of guesswork when deciding whether it's time for a non-corrosive descaler.
Listen for pump strain and reduced flow
Pumps working against a fouled exchanger draw more current and often run louder than usual. Operators sometimes notice a faint cavitation sound or vibration that wasn't there a few months ago. Reduced flow rate through the unit, confirmed by your flow meter or by simply noticing slower recovery times on hot water or process fluid, points to the same root cause: narrowed channels from mineral scale or organic buildup.
Inspect the plates directly when you can
Once you open the unit, visual confirmation is straightforward. Look for these physical indicators:
- White, gray, or rust-colored flaking on the plate surface (calcium and magnesium scale)
- A slimy or slippery film, especially near the cooler end of the exchanger (biofilm)
- Uneven discoloration between plates, suggesting inconsistent flow distribution
- Pitting or etching, which often means a previous cleaning used a harsh acid product
| Symptom | Likely Cause | Action |
|---|---|---|
| Approach temperature drifting up | Scale insulating plate surface | Schedule cleaning within 1-2 weeks |
| Pressure drop up 10-25% | Channel narrowing from scale/biofilm | Plan cleaning at next maintenance window |
| Pressure drop over 25% | Severe fouling or blockage | Clean immediately, inspect gaskets |
| Visible flaking or film on plates | Mineral scale or biofilm | Full disassembly and soak cleaning |
| Pitting or discoloration | Prior acid damage | Switch to acid-free formulation |
Don't wait until the unit stops performing altogether. Persistent fouling doesn't just cost you energy, it shortens the working life of gaskets and plates that are expensive to replace.
Step 1. Shut down and isolate the exchanger
Before any cleaning solution touches the plates, you need to take the exchanger fully offline. Rushing this step is how technicians get scalded by residual hot fluid or send cleaning chemical backward into a live process line. A proper shutdown protects both you and the unit, and it sets up every later step, from soaking to reassembly, to go smoothly.
Power down and lock out the system
Start by shutting off the pumps feeding both the hot and cold sides of the exchanger. Follow your facility's lockout/tagout procedure so nobody restarts the unit while you're mid-cleaning. Confirm the pumps have actually stopped, not just the control signal, since some VFD-driven pumps coast for several seconds after the command shuts off.
A heat exchanger you haven't fully isolated isn't ready for cleaning, it's ready for an accident.
Close and tag the isolation valves
Next, close the inlet and outlet valves on both fluid circuits. This physically separates the exchanger from the rest of your piping system so cleaning solution stays contained and process fluid can't contaminate your flush. Tag each valve as you close it, especially in facilities where multiple technicians might touch the system during a shift change.
Drain and depressurize before opening anything
Once isolated, drain both sides completely. Open a bleed valve or vent port to release trapped pressure before you disconnect any fittings or start unbolting the frame. Skipping this step is the most common cause of chemical splash injuries during heat exchanger service.
Run through this checklist before moving to Step 2
- Pumps stopped and locked out on both circuits
- Inlet and outlet valves closed and tagged
- Both sides drained of process fluid
- Pressure released through a bleed or vent point
- Area around the unit clear of ignition sources if you're using a solvent-based product
- Personal protective equipment on hand, even though a non-corrosive descaler rated HMIS 0-0-0 needs far less gear than a hydrochloric acid flush
Gathering this information now also tells you whether you're dealing with a plate-and-frame unit you can disassemble for a soak, or a brazed exchanger that requires circulation cleaning instead. That distinction shapes which approach you'll take in the next step.
Step 2. Choose a safe descaling solution
Once the exchanger is isolated and drained, the product you pour in next determines whether you get clean plates or a damaged unit. Hydrochloric and phosphoric acid blends dissolve scale fast, but they also attack brazing joints, pit stainless steel, and swell nitrile gaskets over repeated use. Picking a non-corrosive descaler built for plate heat exchangers avoids that trade-off entirely, and it's the single most important decision in this whole process.
The right descaler removes scale without removing years off your exchanger's service life.
Match the formulation to your fouling type
Calcium and magnesium scale respond well to a mild acid-free or citric-based chemistry that breaks the mineral bond without generating the fumes or hazmat shipping restrictions that come with stronger acids. Biofilm and organic buildup need a formulation with some enzymatic or surfactant action layered in, since acid alone won't touch a slime layer. Check your plate material before you buy anything. Titanium plates tolerate a wider range of chemistries than aluminum-brazed units, so a product safe for one system isn't automatically safe for another.
Confirm the HMIS rating before you order
An HMIS 0-0-0 rated cleaner carries no health, flammability, or physical hazard rating, which means no respirator, no acid-resistant gloves beyond basic protection, and no hazmat paperwork slowing down your shipment. That matters if you're managing a marina, a hospital boiler room, or a data center cooling loop where hazardous chemical storage triggers its own compliance headaches. Compare what you're currently using against the criteria below before your next purchase.
| Feature | Traditional Acid Descaler | Acid-Free / Non-Corrosive Descaler |
|---|---|---|
| HMIS Rating | Often 2-3-0 or higher | 0-0-0 |
| Gasket compatibility | Degrades nitrile/EPDM over time | Safe for common gasket materials |
| Plate material risk | Pitting on stainless, corrosion on titanium alloys | Minimal to none |
| Shipping requirements | Hazmat fees, restricted carriers | Standard ground shipping |
| PPE needed | Acid gloves, goggles, respirator | Basic gloves and eye protection |
| Disposal | Regulated neutralization required | Biodegradable, EPA compliant |
Buy enough concentrate to fully submerge the plate pack or fill your circulation loop, and check the manufacturer's EPA Safer Choice status if environmental compliance factors into your procurement decision. Under-buying means diluting mid-clean, which weakens the solution right when it needs full strength to cut through heavy scale.
Step 3. Circulate or soak the cleaning solution
With the descaler selected and the exchanger isolated, you now have two ways to apply it: circulation through the sealed unit, or a full soak after disassembly. Which one you pick depends on your exchanger type and how far the fouling has progressed.
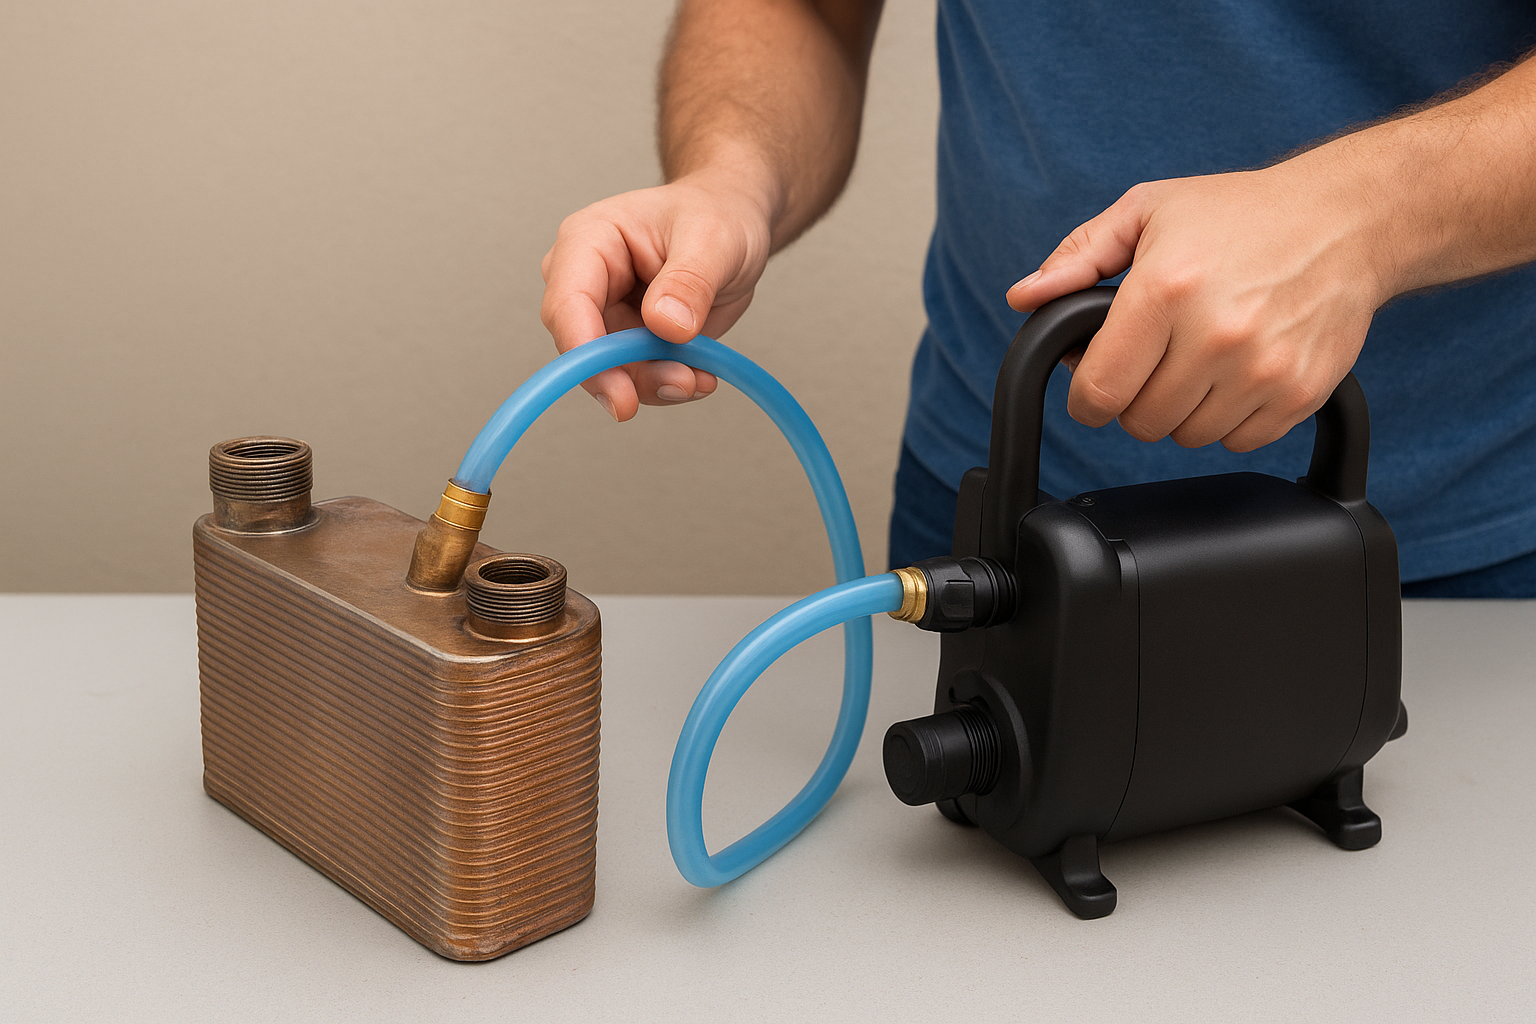
Circulate the solution through brazed or welded units
Brazed and welded plate exchangers can't be opened for a soak, so you'll connect a portable cleaning pump to the inlet and outlet ports and run the non-corrosive descaler in a closed loop. Set the pump to a moderate flow rate, enough to keep solution moving across every channel without introducing air pockets that leave dry spots untouched. Circulate for 2 to 4 hours for light to moderate scale, checking the return line periodically for color change or reduced turbidity as an indicator that deposits are dissolving.
Circulation only works if the solution actually reaches every channel, dead legs don't get clean on their own.
Soak plate-and-frame packs for stubborn scale
Disassembled plate-and-frame units give you the option of a static soak, which usually clears heavier fouling faster than circulation alone. Submerge the entire plate pack in a tank filled with your plate heat exchanger cleaner solution, making sure each plate is fully covered and separated enough for solution to contact both sides. A soak of 4 to 8 hours handles most calcium and magnesium scale, while heavier biofilm buildup may need an overnight soak with periodic agitation.
Set dwell time and concentration based on fouling severity
Concentration and contact time both matter more than temperature with an acid-free formulation, so don't compensate for a weak mix by overheating the solution. Use this as a starting reference, then adjust based on visual inspection partway through:
| Fouling Level | Concentration | Circulation Time | Soak Time |
|---|---|---|---|
| Light scale | 5-10% solution | 1-2 hours | 2-4 hours |
| Moderate scale | 10-15% solution | 2-4 hours | 4-8 hours |
| Heavy scale/biofilm | 15-20% solution | 4-6 hours | Overnight |
Check the plates or return line every couple of hours rather than walking away for the full duration. Pulling a sample plate midway through a soak tells you whether you're on track or need another cycle before moving to rinsing.
Step 4. Rinse and neutralize the system
Once your plate heat exchanger cleaner has broken down the scale, every trace of it needs to come out before the unit goes back into service. Leftover solution mixed with dissolved minerals can redeposit on the plates as it dries, undoing the work you just did. This step is quick compared to the soak or circulation phase, but skipping it is one of the fastest ways to end up cleaning the same unit again in three months.
Flush thoroughly with clean water
Drain the spent cleaning solution completely, then run fresh water through the plates or tank at a moderate flow rate for at least 15 to 20 minutes. For circulation-cleaned brazed units, connect your portable pump to a clean water source and flush in the same direction you circulated the descaler, then reverse the flow for a second pass to dislodge anything trapped in dead spots. Plate-and-frame packs should get a direct spray rinse on both sides of each plate, since a quick dunk in a rinse tank often misses tight corners near the gasket grooves.
A rinse that looks clean isn't the same as a rinse that's neutral.
Test pH before you call it done
Check the rinse water pH with basic test strips as it exits the unit. Because Eco Safeway's descalers are acid-free and biodegradable, you're not fighting the aggressive pH swings that come with hydrochloric or phosphoric acid products, but confirming a neutral reading still matters for gasket longevity and downstream equipment. If the outflow reads outside a neutral range, keep flushing. There's no separate neutralizing agent to mix in, which saves you a step compared to acid-based cleaning protocols that require a dedicated neutralizer before disposal.
Inspect plates for leftover residue
Before reassembly, run your hand or a soft brush across a sample of plates to check for any remaining film. Look specifically at the corrugated ridges, where dissolved scale tends to collect during rinsing. A residue-free surface should feel smooth and slightly tacky rather than gritty. Document what you find with a quick photo if your facility keeps maintenance records, since that baseline helps you judge fouling progression at your next inspection.
Dispose of rinse water properly
Because the solution is EPA compliant and non-hazardous, disposal is simpler than with regulated acid waste, but check your local wastewater discharge rules before pouring anything down a drain.
Step 5. Reassemble and test performance
With the plates rinsed and residue-free, reassembly determines whether your cleaning effort actually holds up under pressure. Rushing the bolt pattern or reusing a stretched gasket undoes everything you accomplished in the last four steps, so treat this stage with the same care as the teardown.
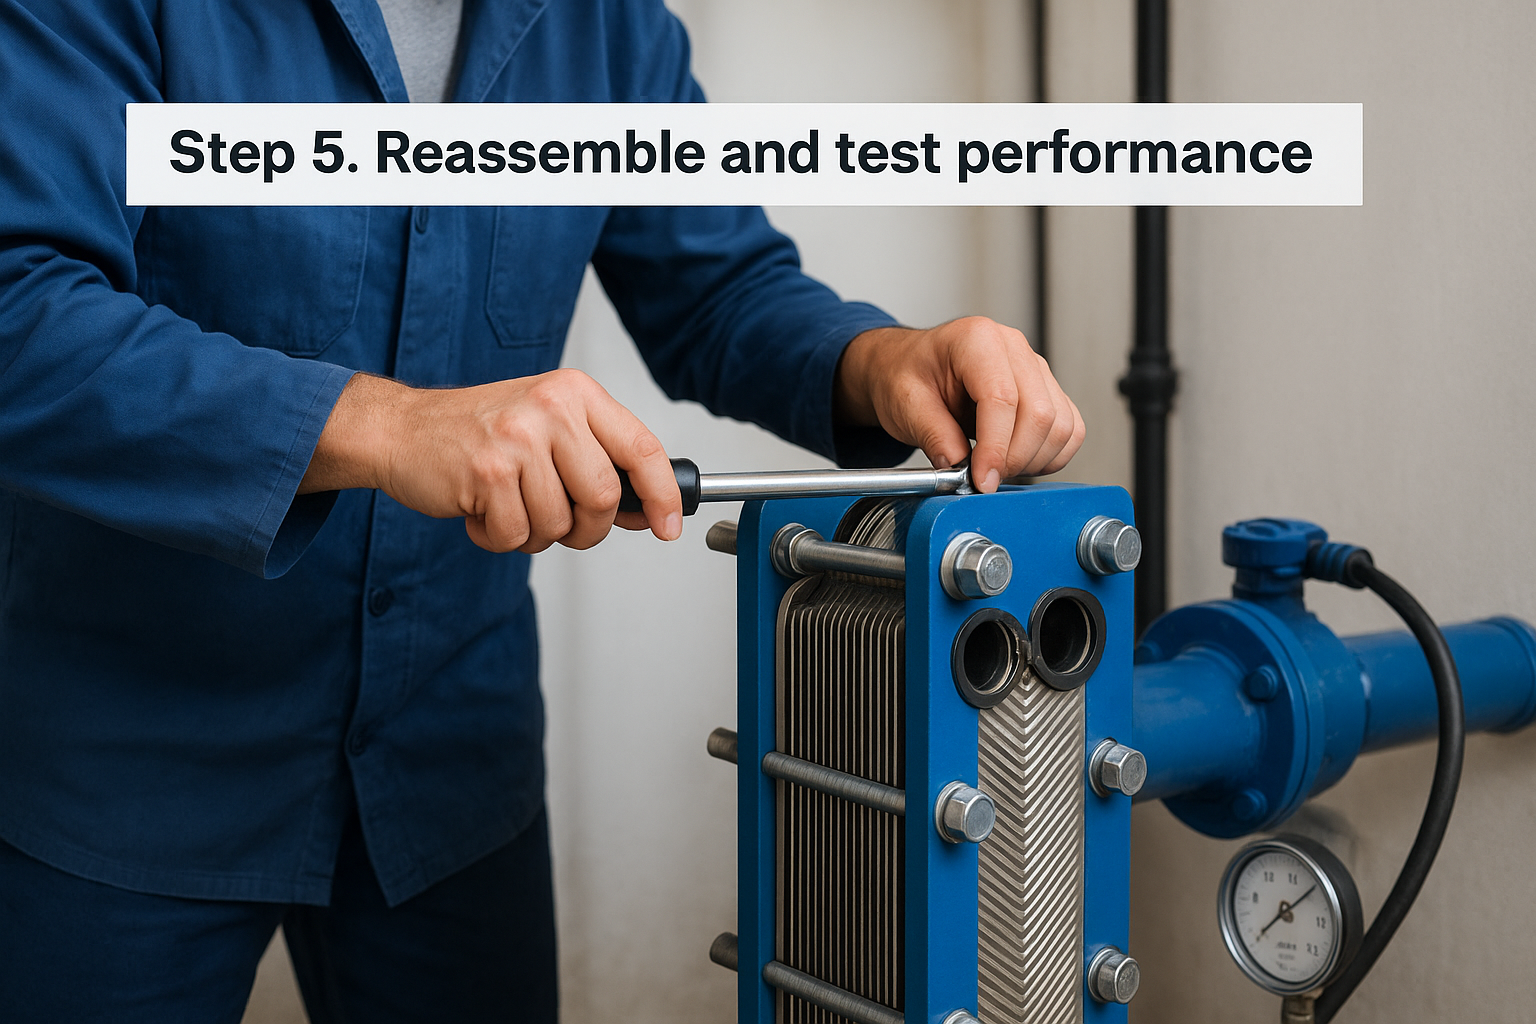
Torque plates to spec, not by feel
Align every plate in its original sequence, since plate-and-frame units are engineered with specific flow patterns that don't tolerate random reordering. Inspect each gasket for cracking, compression set, or swelling before reinstalling it, and replace any that look questionable rather than betting on one more cycle. Tighten the compression bolts in a star pattern to the manufacturer's specified dimension, checking the plate pack width with a tape measure or dial indicator rather than guessing by feel. Uneven torque creates leak paths that show up the moment you repressurize the system.
A perfectly clean plate pack still fails if the gaskets aren't seated right.
Restart slowly and check for leaks
Open the isolation valves gradually rather than all at once, letting the exchanger fill and pressurize in stages. Watch the gasket lines and port connections closely during this first fill, since a slow weep is far easier to catch and fix before you bring the pumps up to full flow. Once the unit holds steady pressure for several minutes with no visible seepage, restart the pumps on both circuits and remove your lockout tags.
Compare performance against your baseline
Run the system for 20 to 30 minutes, then pull the same readings you tracked before cleaning: approach temperature and pressure drop across the unit.
| Metric | Before Cleaning | Target After Cleaning |
|---|---|---|
| Approach temperature | Drifted 10%+ from baseline | Within 1-2 degrees of commissioning spec |
| Pressure drop | 10-25%+ above baseline | Back to original commissioning range |
| Pump current draw | Elevated | Returns to normal load |
If the numbers land close to your original commissioning data, the cleaning worked. If pressure drop or approach temperature still lag, a second circulation cycle with fresh plate heat exchanger cleaner solution is worth running before you assume mechanical failure elsewhere in the system.
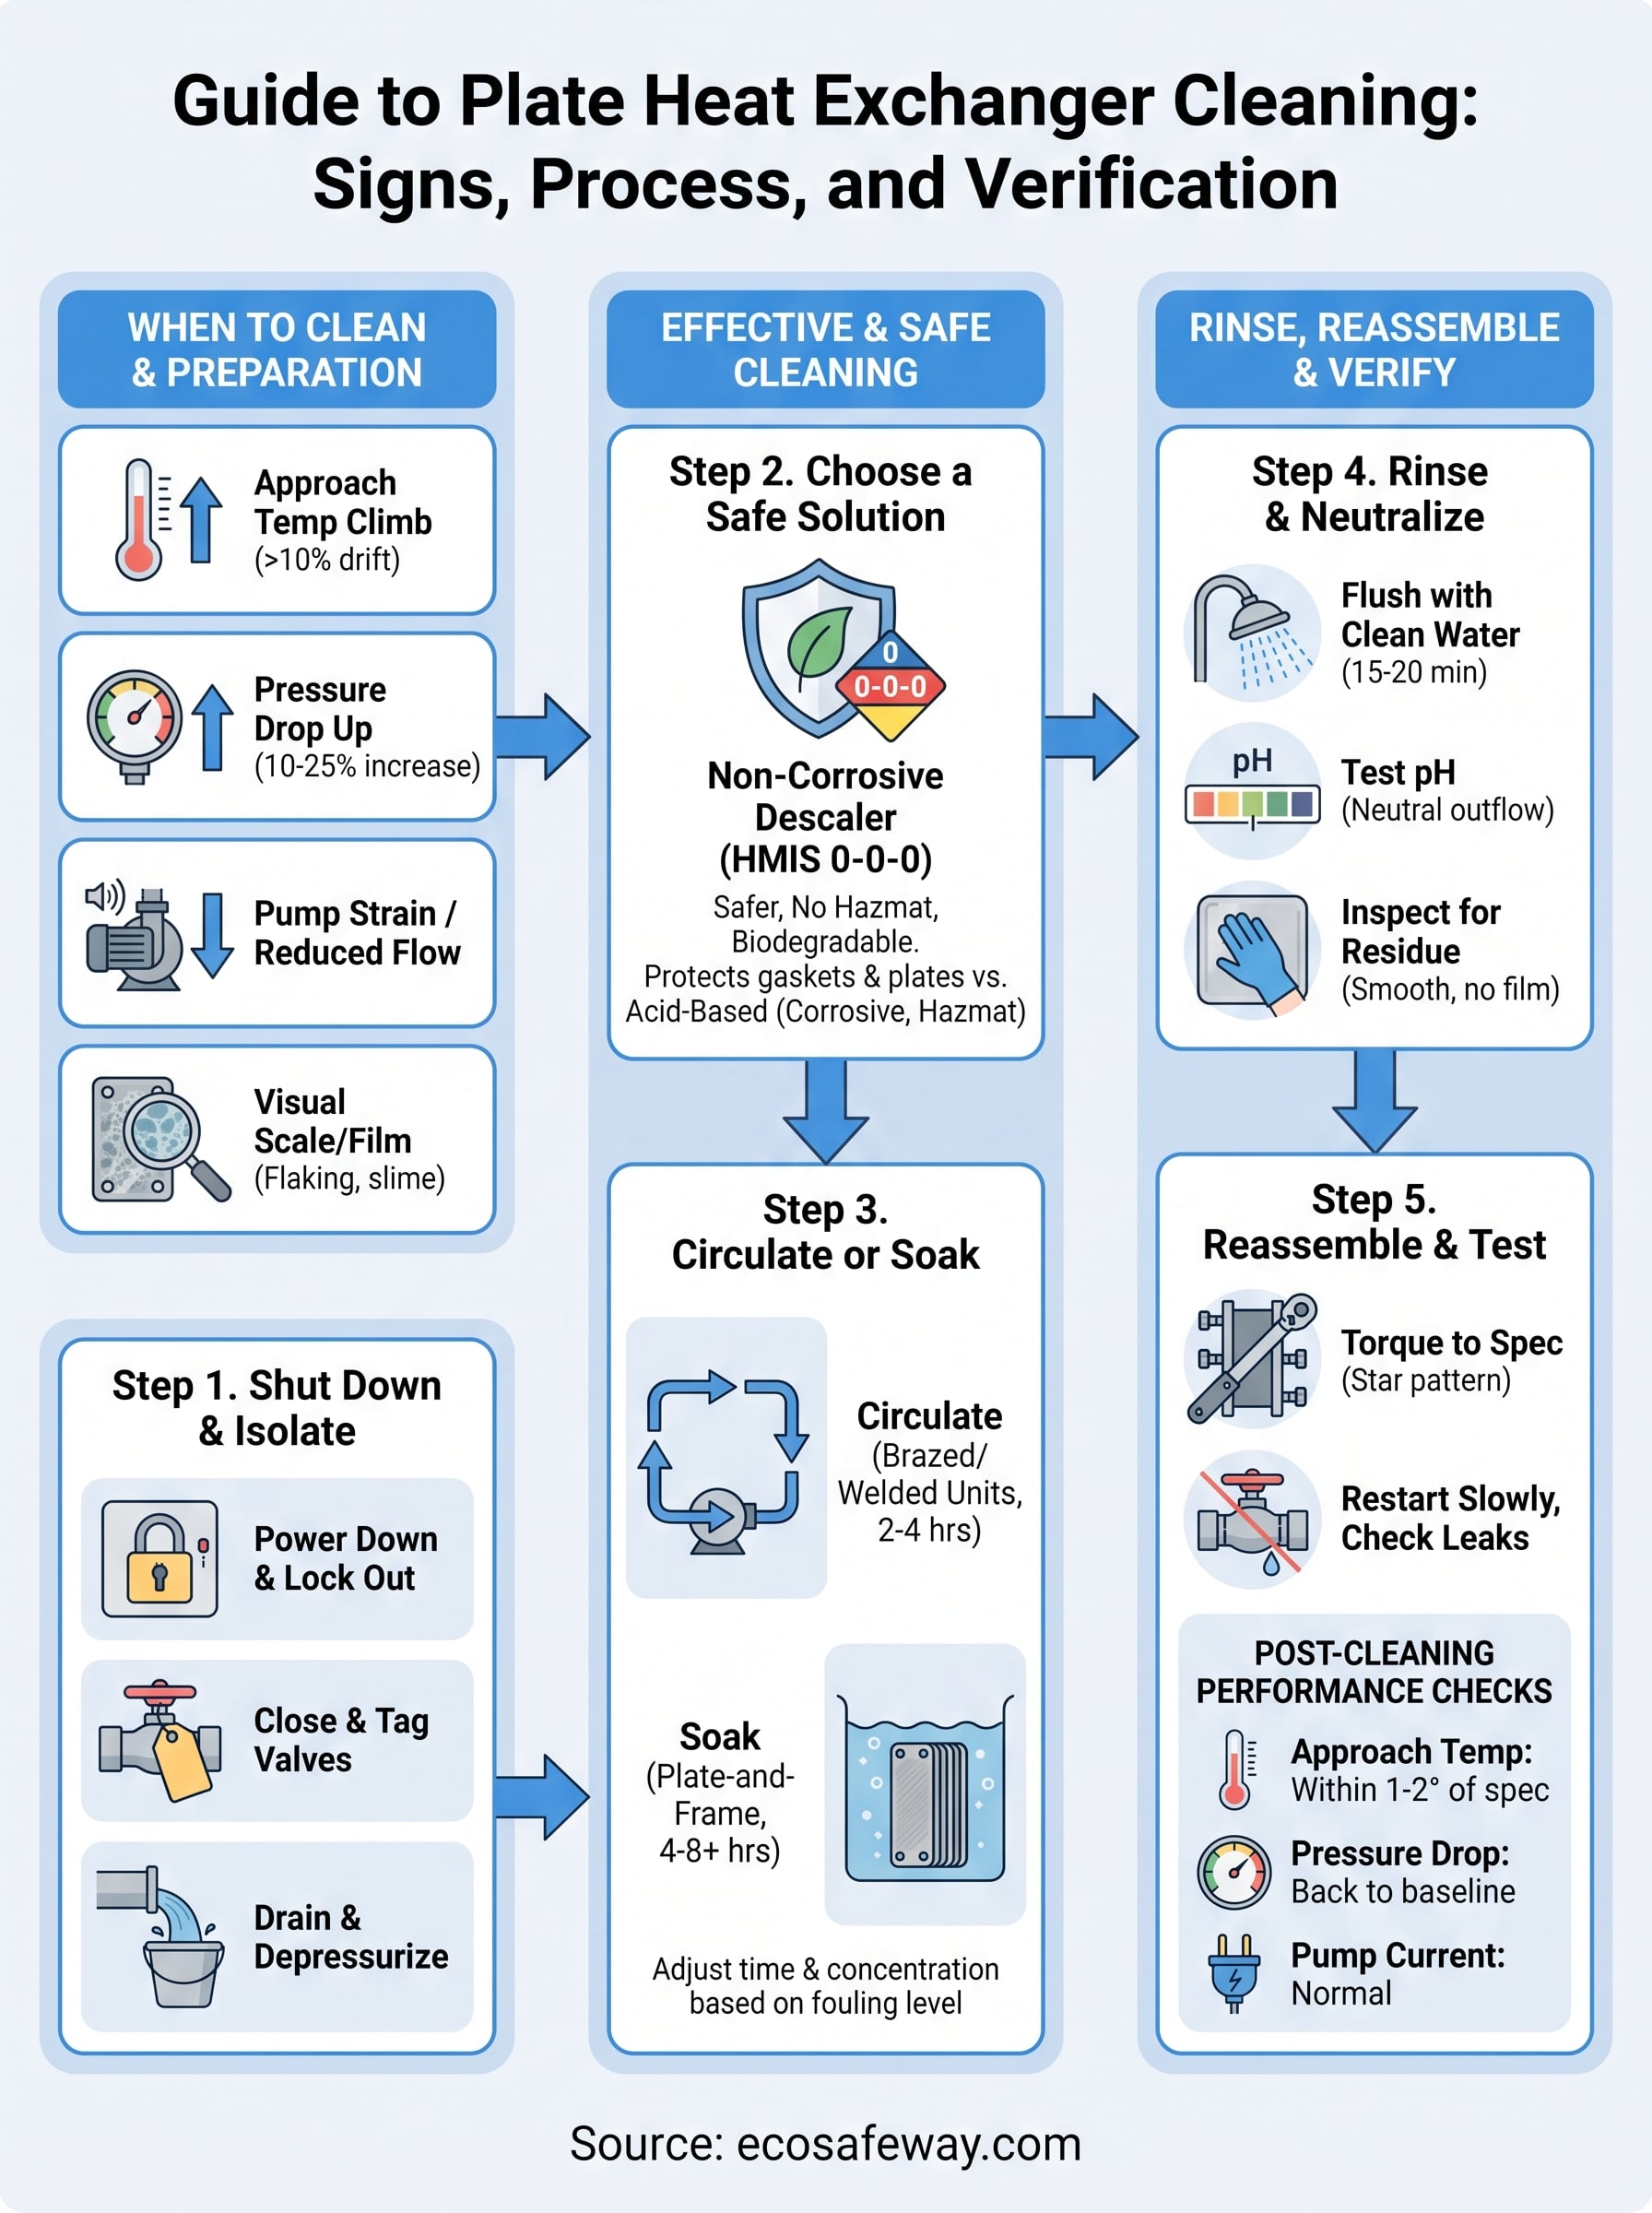
Keeping your heat exchanger running efficiently
Scale buildup is predictable, and so is the fix. Track your approach temperature and pressure drop, clean before the numbers drift too far, and choose a non-corrosive descaler that protects gaskets and plates instead of eating through them. That's the whole difference between a five-year plate pack and one you're replacing every eighteen months.
Most facility teams that switch away from acid flushes never go back. The HMIS 0-0-0 rating means no hazmat paperwork, no respirators, and no worrying about a spill damaging equipment nearby. Your maintenance crew handles it like any other cleaning product, and your plates come out clean without the pitting that shortens their working life.
If your plate heat exchanger shares a loop with a chiller, condenser, or cooling tower, don't stop at the exchanger itself. Check out our industrial HVAC and cooling tower descaler to keep the rest of your system scale-free too.


