





Scale buildup inside a heat exchanger doesn't announce itself until your energy bills climb or the system starts throwing temperature alarms. By the time you notice reduced output, mineral deposits and biofilm may already be coating the tubes, cutting heat transfer efficiency by 20% or more. Heat exchanger cleaning isn't optional maintenance, it's the difference between equipment that lasts fifteen years and one that fails in five.
If you're here, you need a real plan: what tools to use, which chemicals actually dissolve scale without eating through your tubes, and how to tell mechanical cleaning from chemical circulation cleaning. This guide walks through both approaches, including when to run an acid-based descaler versus a gentler enzymatic treatment, and how to judge when the job calls for a professional service instead of a weekend DIY project.
We'll cover how to spot the early warning signs of fouling, the step-by-step process for a chemical flush, and how non-corrosive, non-hazardous cleaners can get scale off your coils and tubes without the safety risks or hazmat shipping headaches that come with traditional acid cleaners. You'll walk away knowing exactly how to restore performance and protect your equipment long term.
What you need before cleaning a heat exchanger
Gathering the right supplies before you start saves you a second trip to the supply closet and keeps the job safe. Heat exchanger cleaning goes faster and produces better results when you've laid out tools, protective gear, and cleaning chemicals ahead of time, rather than improvising halfway through a teardown.
Tools and safety gear
Most jobs need the same core kit, whether you're servicing a shell-and-tube condenser or a plate exchanger on a boat engine. Pull these together before you shut anything down:
- Adjustable wrenches, socket set, and gasket scraper for disassembly
- A submersible pump or circulation pump for chemical flushing
- Buckets, hoses, and a containment tray to catch runoff
- Nylon brushes or a tube brush kit sized to your tube diameter
- Flashlight or borescope for inspecting internal fouling
- Gloves and eye protection (lighter-duty than what acid cleaning demands)
Choosing your cleaning chemical
This is where most people get it wrong. Traditional acid descalers dissolve scale fast, but they also pit copper and eat through aluminum fins if you leave them circulating too long, and they usually ship as hazmat with special handling requirements. A non-corrosive cleaner rated HMIS 0-0-0 removes the same calcium and mineral deposits without the corrosion risk, and it ships like any other liquid.
The right descaler removes scale without removing years from your equipment's service life.
Know your water chemistry
Hard water systems with high calcium content need a different dwell time than systems fouled mostly by biofilm or organic debris. If you're unsure, a quick water test kit tells you whether you're dealing with scale, algae, or both, which determines whether you reach for a descaling solution or an enzyme-based treatment instead.
Step 1. Shut down and isolate the system
Power down the system completely before you touch a single bolt. Shutting down the system means killing electrical power at the breaker, not just switching off a control panel display, since pumps can kick back on during a maintenance cycle if you skip this step. Lock out the breaker if your facility uses lockout/tagout procedures, and tag it so nobody flips it back on while you've got the heat exchanger open.
Next, isolate the exchanger from the rest of the loop. Close the inlet and outlet valves on both the process side and the cooling side, then bleed off residual pressure through a drain valve or bleed screw before you disconnect anything. On marine engines, this means closing the raw water intake and disconnecting the flush hose setup so seawater doesn't backfill while you work.
A heat exchanger you haven't fully isolated will fight you at every step of the cleaning process.
Drain the unit completely into your containment tray. Leftover fluid mixed with your descaling solution changes concentration and dwell time, which throws off results before you even start cleaning.
Step 2. Inspect for scale, debris, and fouling
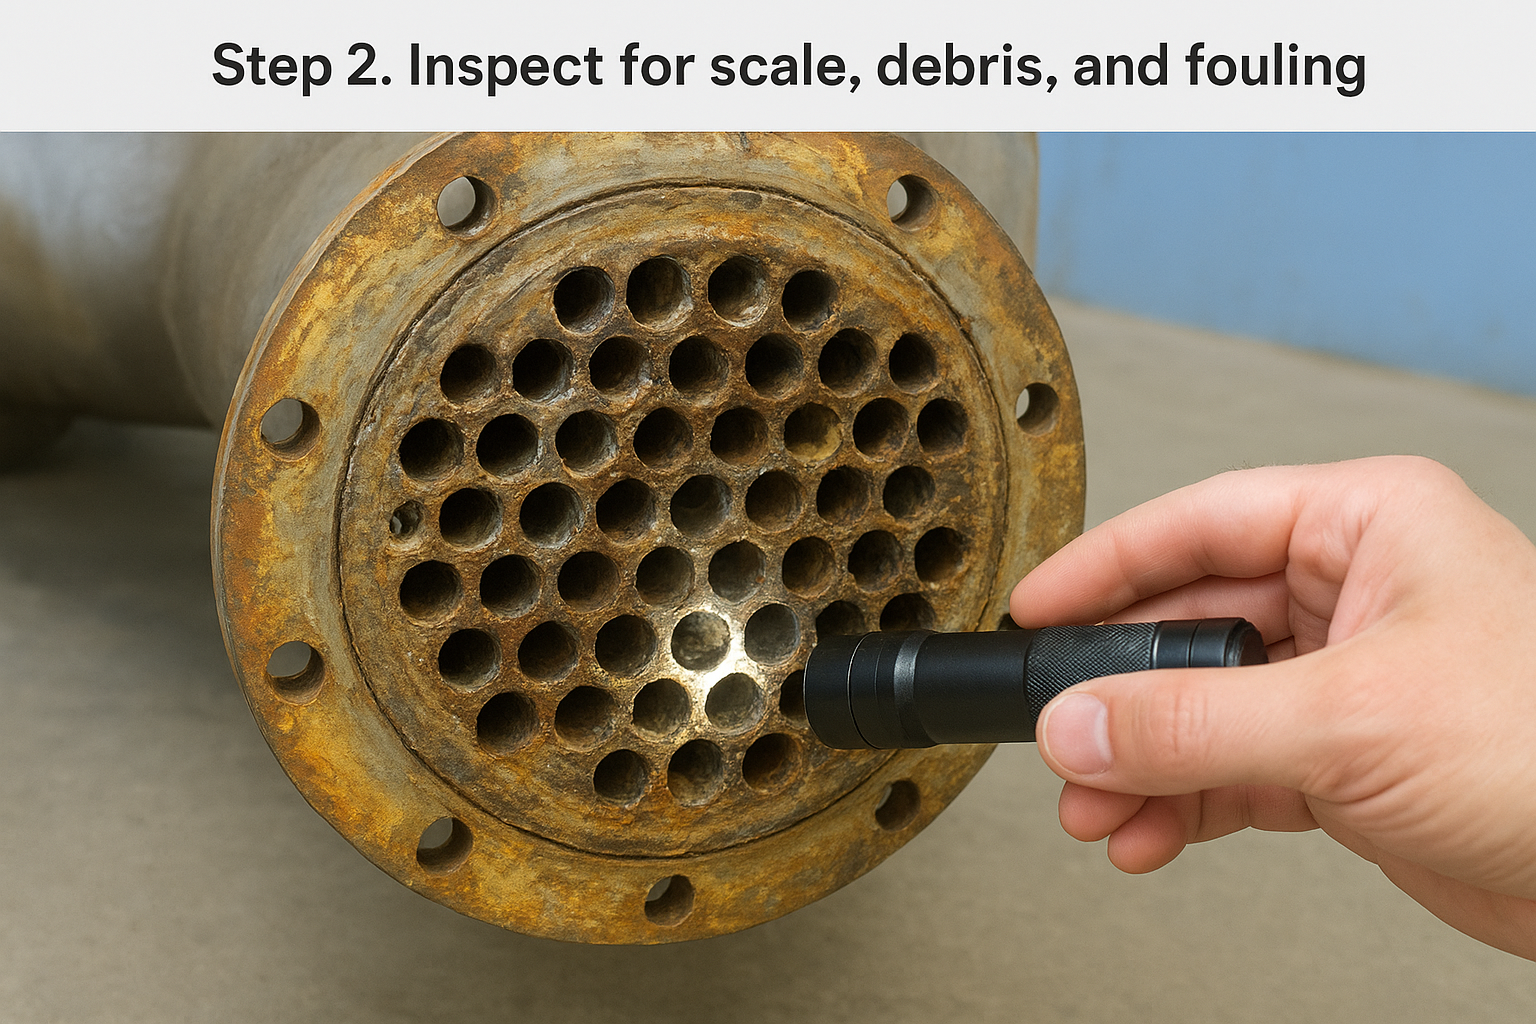
Open the end caps or remove the bonnet and take a real look before you clean anything. Inspecting for scale tells you whether you're facing a light mineral film or a half-inch crust that's choking flow through the tubes, and that difference changes your entire cleaning approach.
What to look for
Run a flashlight or borescope down each tube pass and check for these signs:
- White or gray crust (calcium and magnesium scale)
- Rust-colored flaking (corrosion from a previous acid cleaning)
- Slimy black or green coating (biofilm or algae growth)
- Loose sediment or debris blocking tube entrances
- Pitting or thinning on tube walls
What you find during inspection determines the chemistry, not the other way around.
Scrape a small sample from a tube wall if you can't tell scale from biofilm by sight alone. Hard, brittle deposits dissolve with an acid-based or non-corrosive cleaner; soft, slimy fouling responds better to an enzyme treatment. Photograph the worst tubes before you start scrubbing. Those photos become your baseline for judging whether the cleaning actually worked once you're done.
Step 3. Clean with a non-toxic descaler or flush
Once you know what you're dealing with, mix your descaling solution according to the fouling severity you found in Step 2. A light scale film needs a weaker concentration than a half-inch crust, and running everything at full strength wastes product without speeding up the job.
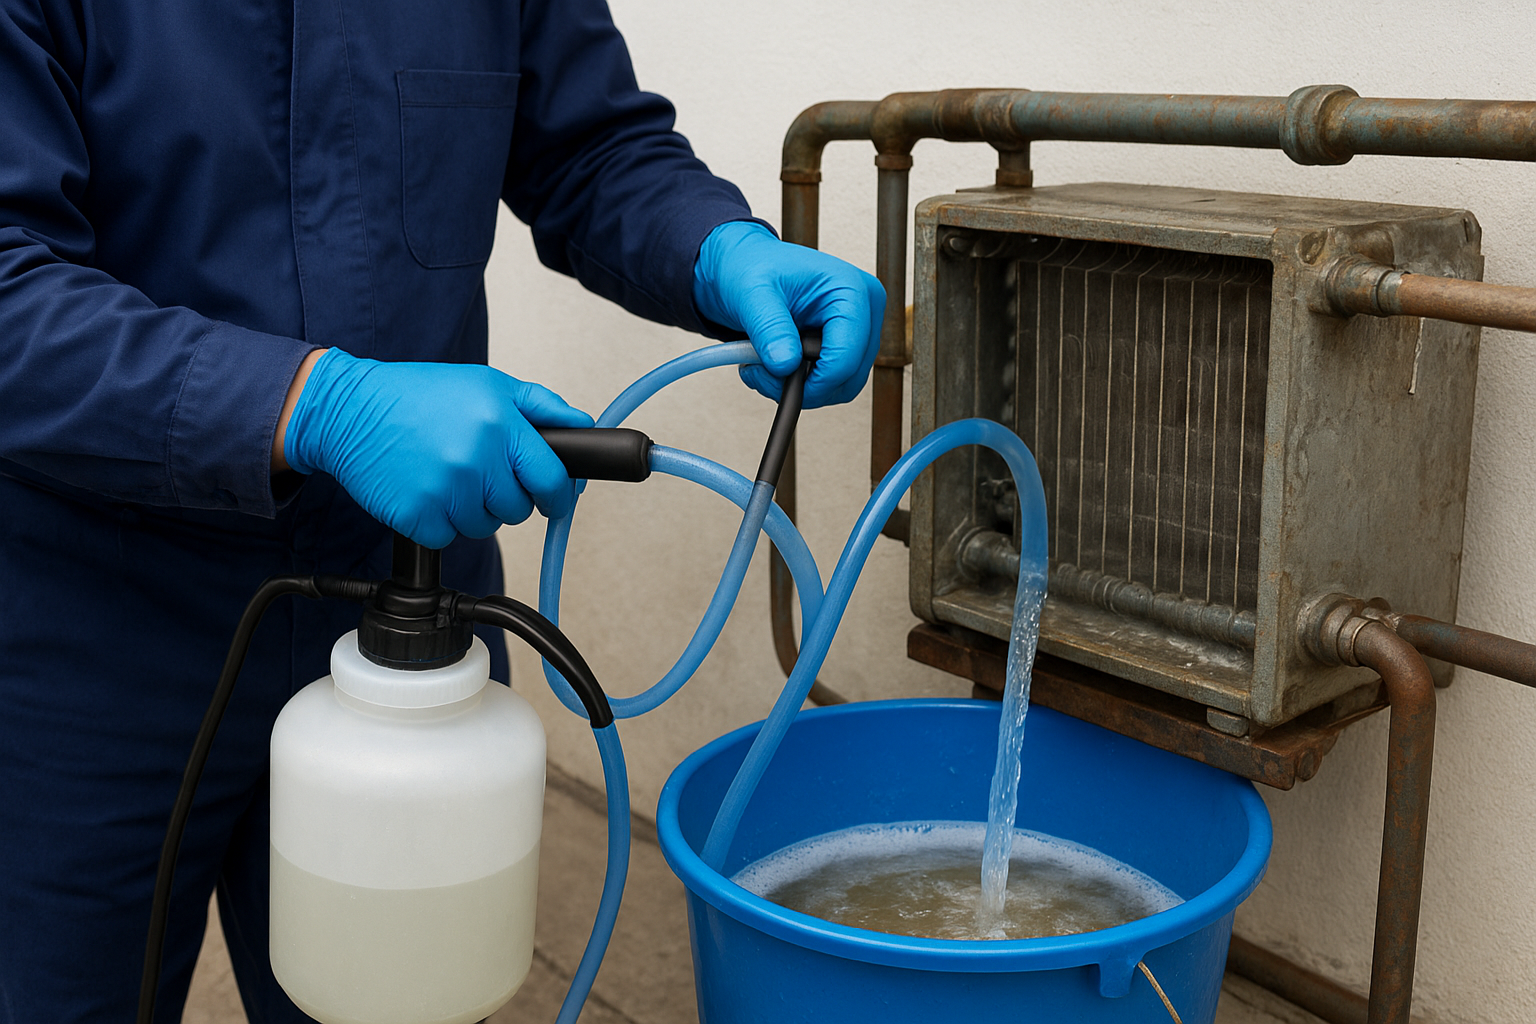
Circulating the cleaner
Connect your pump inline and circulate the solution through the exchanger rather than letting it sit static. Circulation moves fresh chemical across the deposits continuously, which cuts dwell time significantly compared to a soak.
Light scale: 1 part cleaner to 4 parts water, circulate 45-60 minutes
Heavy scale: 1 part cleaner to 2 parts water, circulate 90-120 minutes
Biofilm/organic fouling: enzyme treatment, circulate 2-4 hours
A non-corrosive descaler working slower still beats an acid cleaner that damages your tubes faster.
Watching for results
Check the return line periodically for color change or grit, both signs the chemical flush is actively breaking deposits loose. Stop circulating once the runoff clears, since extended circulation past that point cleans nothing new and just burns time.
Step 4. Rinse, reassemble, and restart the system
Flush the exchanger with clean water immediately after the cleaning cycle ends. Rinsing the system thoroughly matters more than most people expect, since leftover cleaning solution mixed with fresh water can still react with metal surfaces or throw off water chemistry once the loop is back online. Run at least two full rinse cycles, checking that the drained water comes out clear and pH-neutral before moving on.
Reassembly checklist
Work through disassembly steps in reverse, and don't skip the small details:
- Replace gaskets rather than reusing compressed ones
- Torque bolts to manufacturer spec, not by feel
- Reconnect valves in the original orientation
- Confirm drain plugs and bleed screws are sealed
Skipping a new gasket to save ten dollars costs a lot more the day it leaks.
Bringing the system back online
Open isolation valves slowly and let the system fill before restoring full pressure. Remove your lockout tag, restore power, and watch startup closely for leaks, unusual noise, or pressure spikes. Bleed any trapped air from high points in the loop. On marine engines, confirm raw water flow returns to normal before running the engine under load, since a raw water flush done right leaves no air pockets to cause overheating later.
Keeping your heat exchanger running efficiently
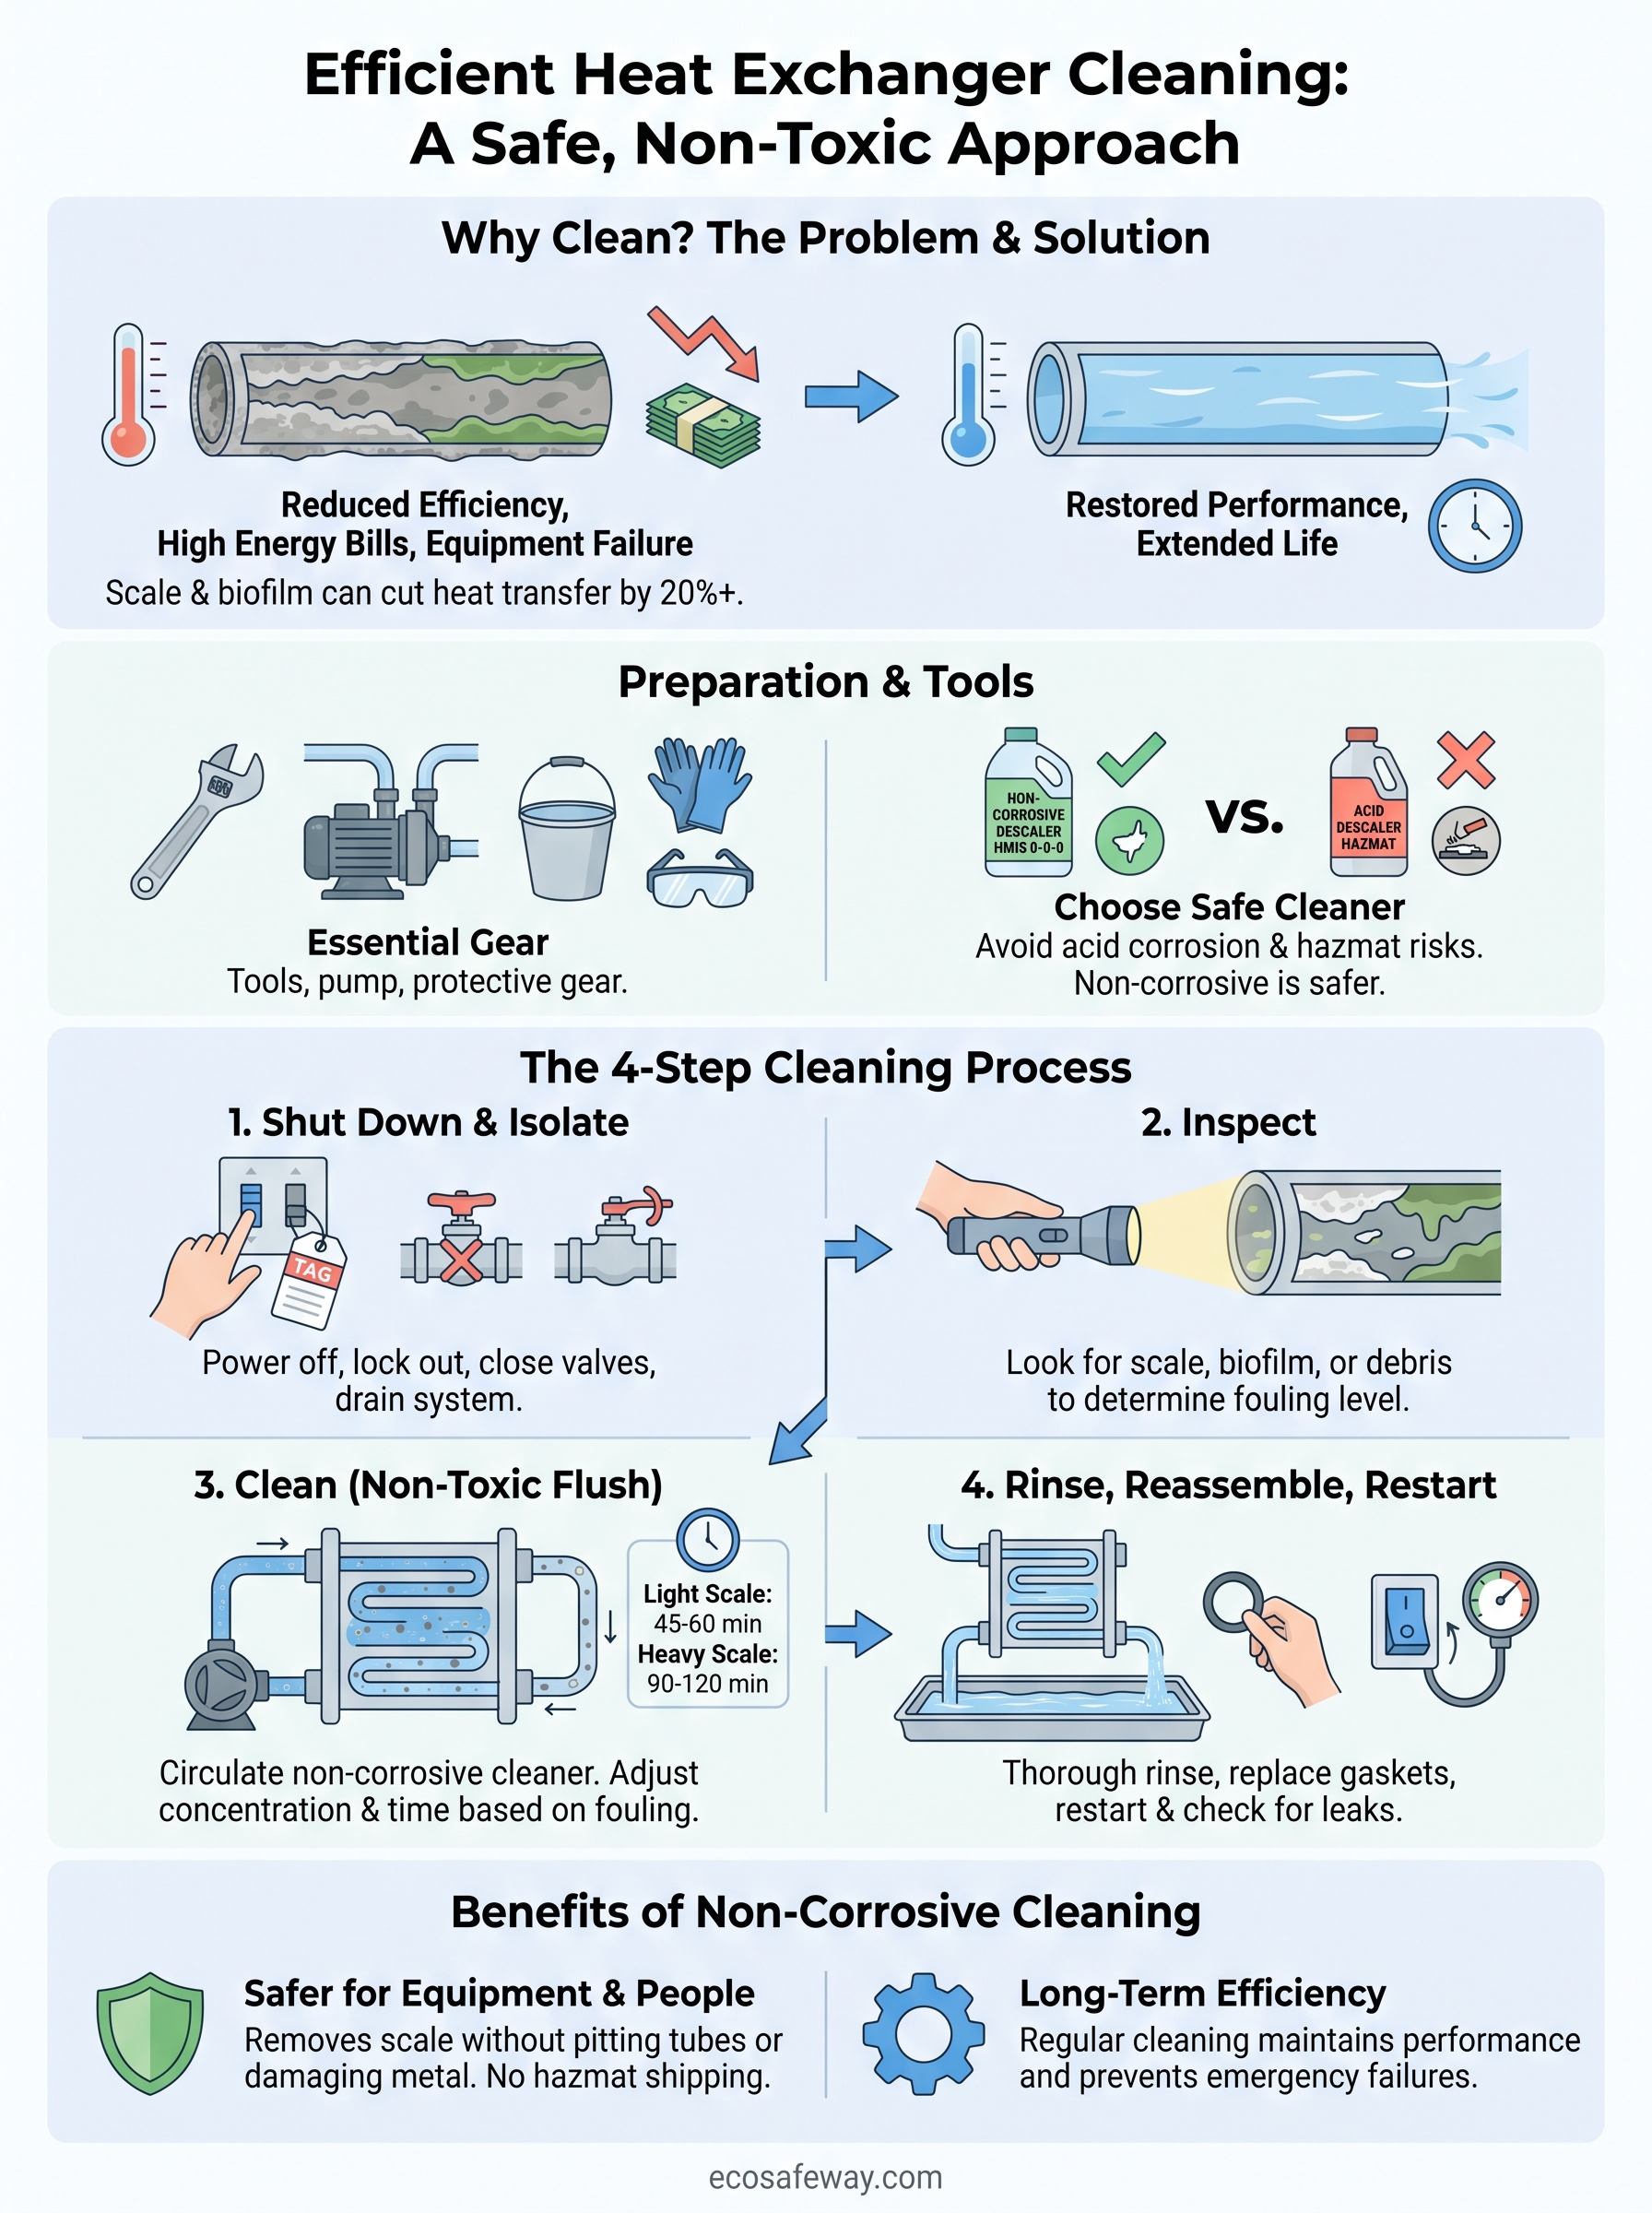
Regular cleaning beats emergency repairs every time. Heat exchanger cleaning on a set schedule, whether that's quarterly for a cooling tower or after every haul-out for a marine engine, catches scale before it turns into a half-inch crust that chokes flow and forces a shutdown. Skip the guesswork of matching acid strength to fouling type, and skip the hazmat paperwork that comes with traditional descalers.
Sticking with a non-corrosive cleaner protects your tubes, your technicians, and your shipping department all at once. You get the same scale removal without pitting copper, damaging aluminum, or triggering special handling requirements at the dock or loading bay.
If your raw water cooling system is due for service, don't wait for the temperature alarm to tell you. Check out our raw water flush for boat engines and get ahead of the scale before it costs you a repower.


