





A dirty condenser coil forces your AC to work harder, driving up energy bills and shortening the life of the compressor. If you've noticed weaker cooling, warm air blowing when it shouldn't be, or a spike in your electric bill, condenser cleaning is probably overdue. Most homeowners and facility techs put this off because they assume it requires a service call, but with the right approach you can handle it yourself in under an hour.
This guide walks you through exactly how to clean a condenser coil safely, step by step. You'll learn what tools to gather, how to shut down power correctly, and the cleaning technique that removes dirt, pollen, and grease buildup without bending the delicate aluminum fins. We'll also cover the precautions that matter most: avoiding high-pressure water on the wrong angle, skipping harsh acid-based sprays, and protecting nearby landscaping or equipment.
We'll also point out where a non-corrosive coil cleaner makes the job faster and safer than scrubbing alone, especially for coils caked in years of grime. By the end, you'll know how to keep your system running efficiently between professional tune-ups, and how to spot the signs that tell you it's time to clean again.
What you need before you start
Gathering everything upfront saves you from tracking mud through the house halfway through the job. Most of these items are already in your garage, and the rest cost less than a service call would.
Tools and supplies checklist
- Garden hose with a standard nozzle (avoid pressure washers, they can bend fins)
- Fin comb to straighten bent aluminum fins if needed
- Soft-bristle brush for loosening caked-on debris
- Screwdriver or nut driver to remove the outer cabinet panel
- Shop vacuum with a brush attachment for dry debris
- Safety glasses and work gloves
- A non-corrosive coil cleaner rated for HVAC condensers
- Plastic sheeting or a tarp to protect nearby plants and landscaping
Choosing the right cleaner matters
Here's where most DIY cleanings go wrong: people reach for whatever degreaser or acid-based coil spray they find at the hardware store. Those products often contain hydrofluoric or phosphoric acid, which eats through grime fast but also corrodes aluminum fins over time and creates runoff that's harmful to soil and groundwater. You want a formula that's phosphate-free and won't demand gloves, a respirator, or hazmat disposal just to use safely in your own backyard.
A coil cleaner that needs a hazmat label isn't one you want dripping onto your lawn or your hands.
Look for a cleaner labeled HMIS 0-0-0, meaning it carries zero health, flammability, and physical hazard ratings. That certification tells you the product won't off-gas fumes, won't damage the coil's protective coating, and rinses clean without leaving a residue that attracts new dirt. It's a small detail that determines whether your condenser lasts another five years or corrodes prematurely.
Step 1. Shut off power to the condenser
Skipping this step is how people end up with a story about a fan blade and a lost fingertip. Before you touch anything on the unit, kill power at two separate points so there's no chance of the compressor kicking on while your hands are inside the cabinet.
Find the disconnect switch
Most outdoor condensers have a disconnect box mounted on the wall right next to the unit. Pull the switch or breaker lever out completely; don't just flip it, remove it so it can't accidentally get bumped back into place.
Cut power at the breaker panel too
Go to your main electrical panel and switch off the breaker labeled for the AC or condenser. Flip the thermostat to "off" as an extra precaution, since some systems will still call for cooling even with the disconnect pulled.
Two shutoffs, not one: the disconnect box and the breaker panel, every single time.
Wait five minutes before opening the cabinet. Capacitors inside can hold a charge even after power is cut, and that stored voltage is exactly why you leave the electrical components alone and focus only on the coil and fins during this condenser cleaning job.
Step 2. Remove the outer casing and clear debris
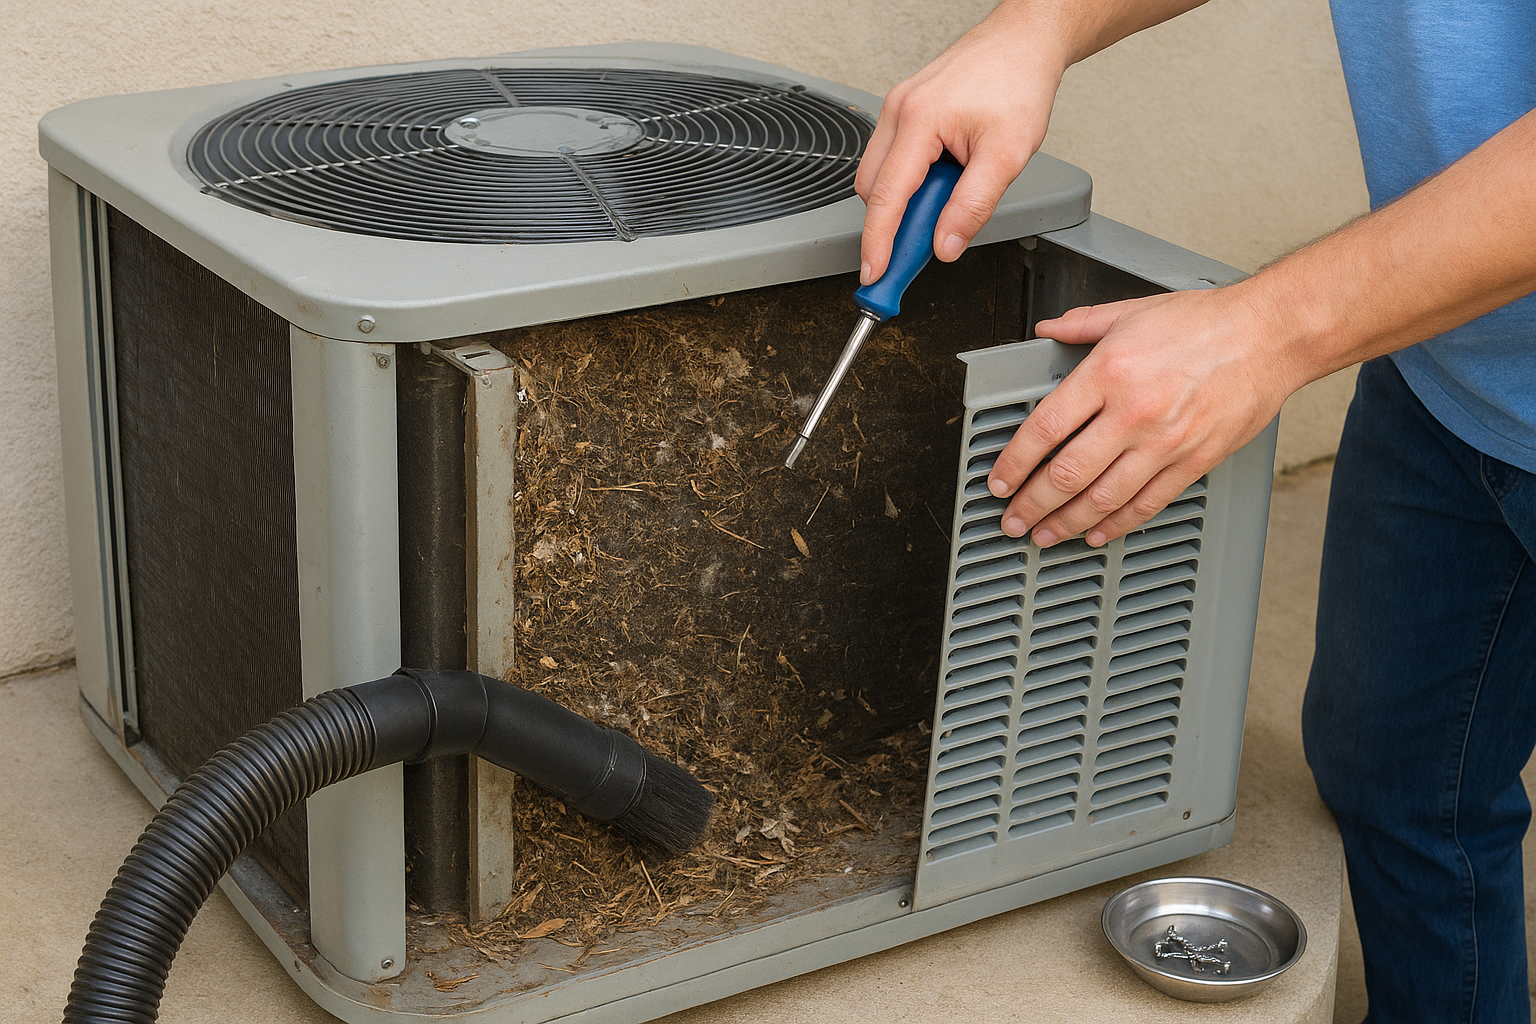
With power confirmed off, pull the top grille or side panels using your screwdriver or nut driver. Most residential units have four to six screws holding the top fan shroud in place, and a couple more securing the side panel that exposes the coil. Set the screws somewhere you won't lose them, a magnetic parts tray or an old cup works fine.
Clear loose debris first
Before any liquid touches the coil, get the dry stuff out. Leaves, grass clippings, and cottonwood fluff pack into the fins and turn to sludge the moment you spray them. Use your shop vacuum with a brush attachment to lift out loose debris, then go over the fins gently with the soft-bristle brush, brushing in the direction of the fins, never across them.
Vacuum first, spray second, or you're just making mud inside your condenser.
Check the fins while you're in there
Look closely at the aluminum fins for bent or crushed sections. Run your fin comb along any damaged rows to straighten them back into alignment. Bent fins block airflow just as much as caked dirt does, so this five-minute check pays off in cooling performance later.
Step 3. Apply a safe coil cleaner
Once the loose debris is gone, it's time to break down the sticky film that vacuuming alone can't touch. Spray your non-corrosive coil cleaner evenly over both sides of the coil, working from top to bottom so the foam has time to travel down through the fins as it works.
Let the foam do the work
Good coil cleaners are formulated to expand into a foam that lifts grease and grime out of tight fin gaps without any scrubbing. Give it 10 to 15 minutes of contact time, and don't let it dry out in direct sun; if the unit sits in full afternoon light, work in the shade or wait for evening.
The foam should do the scrubbing, not your brush.
Skip anything that needs a warning label
If a cleaner's label mentions acid, corrosive fumes, or hazmat handling, put it back on the shelf. An HMIS 0-0-0 rated formula breaks down oil and mineral buildup just as effectively, without pitting the aluminum or leaving runoff that damages nearby grass, mulch, or soil under the unit.
Step 4. Rinse, dry, and reassemble the unit
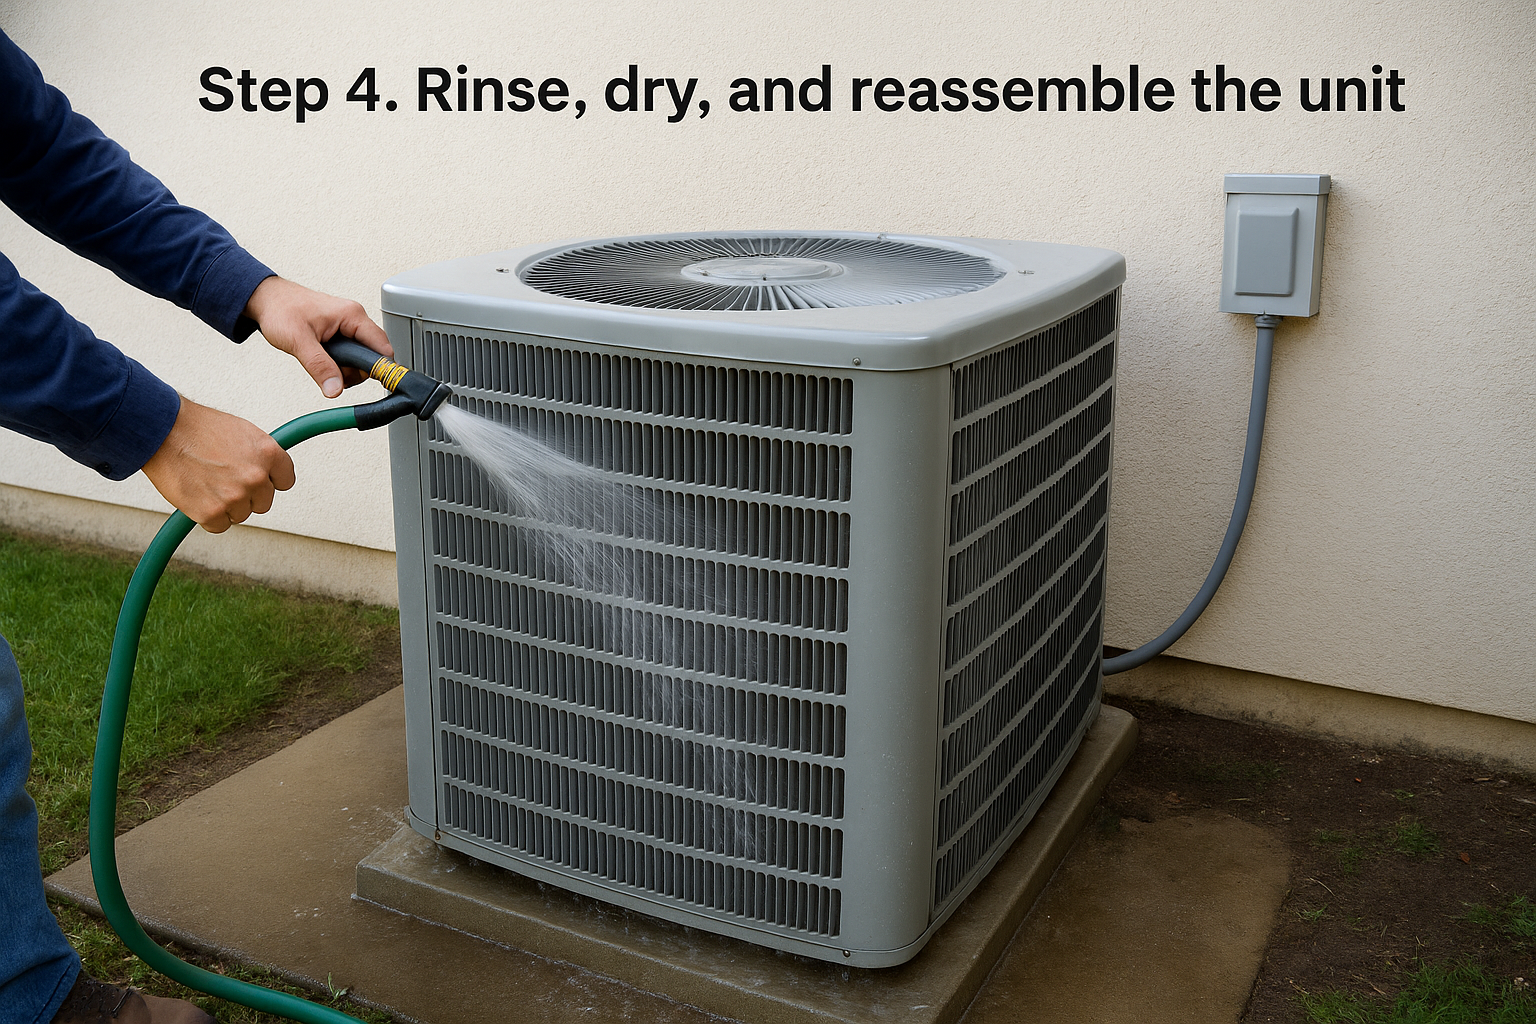
Once the cleaner has had its 10 to 15 minutes to work, rinse the coil with your garden hose on a gentle stream, never a pressure washer setting. Spray from the inside out, opposite the direction airflow normally travels, so you push loosened grime out and away from the fins instead of deeper into them.
Watch the runoff
Keep an eye on the water draining out from under the unit. If it's still running gray or cloudy after a full rinse, give it a second pass. Clean runoff is your signal that the coil is actually clear, not just rinsed on the surface.
Clear runoff means a clean coil; cloudy water means you're not done yet.
Let it dry before you close it up
Give the unit 20 to 30 minutes to air dry before reattaching panels. Closing up a damp cabinet traps moisture against electrical components and invites corrosion. Once dry, replace the side panel and top shroud, tighten every screw you set aside earlier, and restore power at the breaker panel first, then the disconnect switch. Flip the thermostat back to cool and confirm the fan spins and cold air returns within a few minutes.
Keeping your condenser running clean year after year
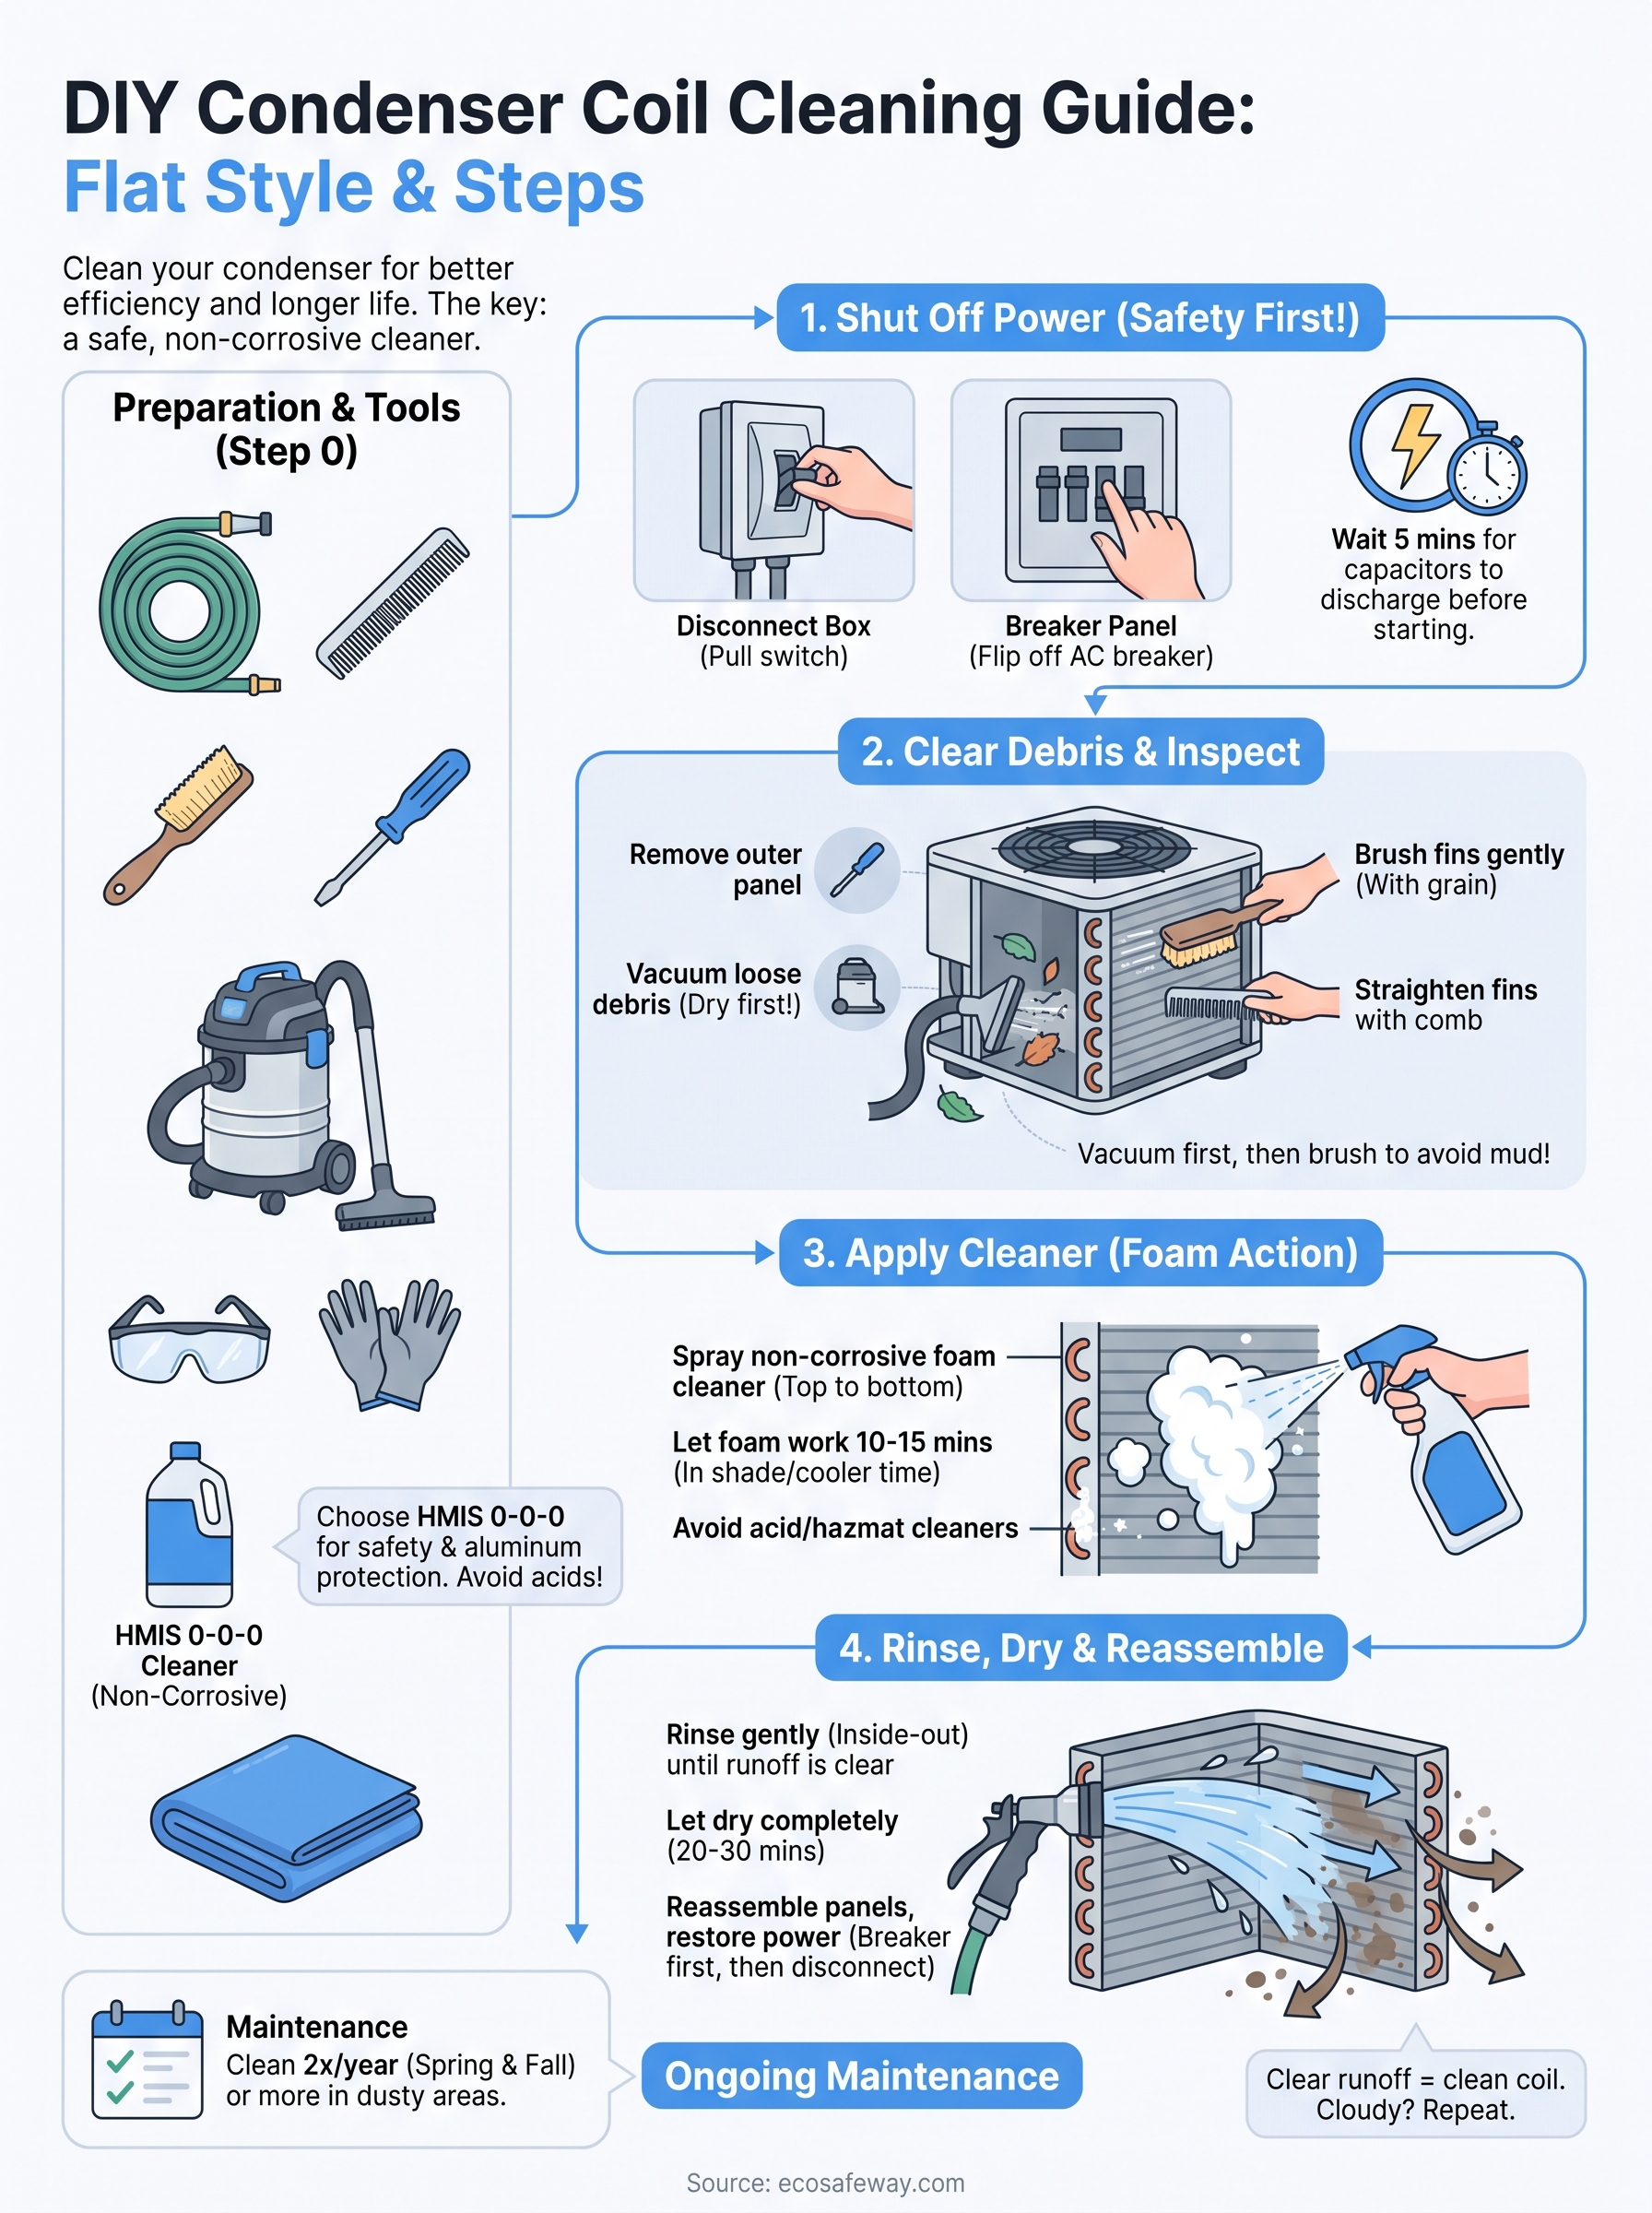
A clean coil isn't a one-time fix, it's a habit. Plan on this condenser cleaning routine twice a year, once before cooling season ramps up and once after, more often if you're near construction dust, cottonwood trees, or a gravel driveway that kicks up debris. Between full cleanings, a quick visual check and a rinse with the hose keeps buildup from hardening into the fins.
The biggest factor in how well this holds up isn't your technique, it's your cleaner. Acid-based sprays that eat through grime also eat through aluminum over time, which is why so many DIY jobs end with pitted fins a year later. Stick with a non-corrosive coil cleaner rated HMIS 0-0-0, and you protect the coil while you clean it instead of trading one problem for another.
If you want the same foam-action formula used in this guide, check out Eco Safeway's condenser coil cleaner built for exactly this job.


