





Dirty HVAC coils cost you money every single day they go uncleaned. Scale, grime, and biological buildup on evaporator and condenser coils force your system to work harder, driving up energy consumption by as much as 30% according to the U.S. Department of Energy. Knowing how to clean HVAC coils the right way protects your equipment, restores airflow, and keeps energy bills in check.
The problem is that many traditional coil cleaners rely on harsh acids or corrosive chemicals that eat away at fin surfaces and create serious safety hazards for maintenance crews. That trade-off, clean coils now, damaged equipment later, doesn't have to exist. At Eco Safeway, we manufacture HMIS 0-0-0 rated condenser coil cleaners that are non-toxic, non-corrosive, and biodegradable, so you get professional-grade results without the chemical risk.
This guide walks you through the full coil cleaning process step by step, from identifying when your coils need attention to choosing the right cleaning method for evaporator and condenser coils alike. Whether you're a facility manager handling routine maintenance or a technician servicing commercial systems, you'll leave with a clear, repeatable process you can put to work immediately.
Safety and prep checklist
Before you learn how to clean HVAC coils, you need to prepare your workspace and gather the right equipment. Skipping the prep stage is one of the most common mistakes maintenance crews make, and it leads to chemical burns, electrical hazards, or bent fin surfaces that reduce airflow. A few minutes of solid preparation upfront prevents hours of troubleshooting later, so treat this checklist as non-negotiable before you touch any part of the system.
Personal protective equipment (PPE)
Even when you use a non-toxic, HMIS 0-0-0 rated coil cleaner, you should still protect your eyes and skin from foam, rinse water, and debris dislodged during the cleaning process. Standard acid-based coil cleaners demand full chemical-resistant gear, respirators, and careful disposal procedures. Non-corrosive formulas let you work more comfortably while still keeping basic personal protection in place.
Switching to a non-corrosive, non-toxic coil cleaner eliminates the need for hazmat-level PPE, which cuts prep time and reduces risk for your entire maintenance team.
Recommended PPE for coil cleaning:
- Safety glasses or goggles to protect your eyes from spray and dislodged debris
- Nitrile gloves to keep cleaning solution off your skin during application and rinsing
- Closed-toe shoes to protect your feet near condensate pans or drainage areas
- Dust mask or N95 respirator if the coils show heavy biological growth or visible mold accumulation
Tools and supplies you'll need
Having everything staged before you power down the unit cuts your total cleaning time significantly and keeps you from leaving access panels open longer than necessary. Gather all supplies in one spot before you begin so the job runs without interruption.
Here's what to have on hand before you start:
| Item | Purpose |
|---|---|
| Non-toxic coil cleaner | Dissolves scale, grease, and biological buildup without corroding fins |
| Garden hose or low-pressure sprayer | Rinsing condenser coils after treatment |
| Soft-bristle brush or fin comb | Removing loose debris and straightening bent fins |
| Flashlight or work light | Inspecting coil surfaces in low-light spaces |
| Screwdriver set | Removing access panels on both units |
| Bucket and rags | Catching condensate and wiping surrounding surfaces |
| Wet/dry vacuum | Clearing drain pans and removing standing water |
Step 1. Shut off power and open panels
Cutting power before you do anything else is the single most important action in the entire coil cleaning process. Both the condenser and air handler units carry live voltage even when the thermostat is set to "off," so you must physically disconnect power at the source before removing any panels or applying any coil cleaner.
Locate and cut power at the disconnect box
Your outdoor condenser unit has a dedicated disconnect box mounted on the exterior wall nearby. Open the box, pull the disconnect block or flip the breaker, and confirm the unit is fully de-energized before you proceed. For the indoor air handler, find its dedicated circuit breaker in your main electrical panel and switch it to the off position. If your panel labels are unclear, use a non-contact voltage tester to confirm no power is flowing before you touch anything inside the cabinet.
Never rely on the thermostat alone to cut power. The thermostat controls the call for operation, not the flow of electricity to internal components.
Remove access panels safely
Once power is confirmed off, use your screwdriver to remove the access panels on both the condenser and air handler units. On condenser units, this typically means removing the top grille and side panels. On air handlers, look for a front or side panel that exposes the evaporator coil and condensate drain pan. Set all screws in a small container so nothing gets lost mid-job. With panels open, use your flashlight to inspect coil surfaces before you apply any solution, which is where knowing how to clean HVAC coils properly pays off immediately.
Step 2. Clean the outdoor condenser coil
The outdoor condenser coil sits exposed to the elements year-round, which means it collects grass clippings, cottonwood, dirt, and airborne debris faster than any other part of your system. Start here because the condenser is the most accessible coil and gives you a clear sense of how much buildup your system has accumulated before you move indoors.
Clear loose debris from the exterior
Before you apply any cleaning solution, remove the top grille and fan assembly if your unit design allows it, or at minimum sweep away all loose material from the fin surfaces with a soft-bristle brush. Work from top to bottom so dislodged debris falls away from the unit rather than into the drain pan. Bent fins block airflow significantly, so use a fin comb to straighten any damaged areas before you proceed to the wet cleaning stage.
Apply cleaner and work it through the fins
Spray your non-toxic coil cleaner directly onto the fin surfaces from the inside of the unit outward, which pushes contaminants away from the coil rather than deeper into it. Apply the solution generously and allow it to dwell for the time specified on the product label, typically five to ten minutes, so it can break down grease and mineral scale without scrubbing.
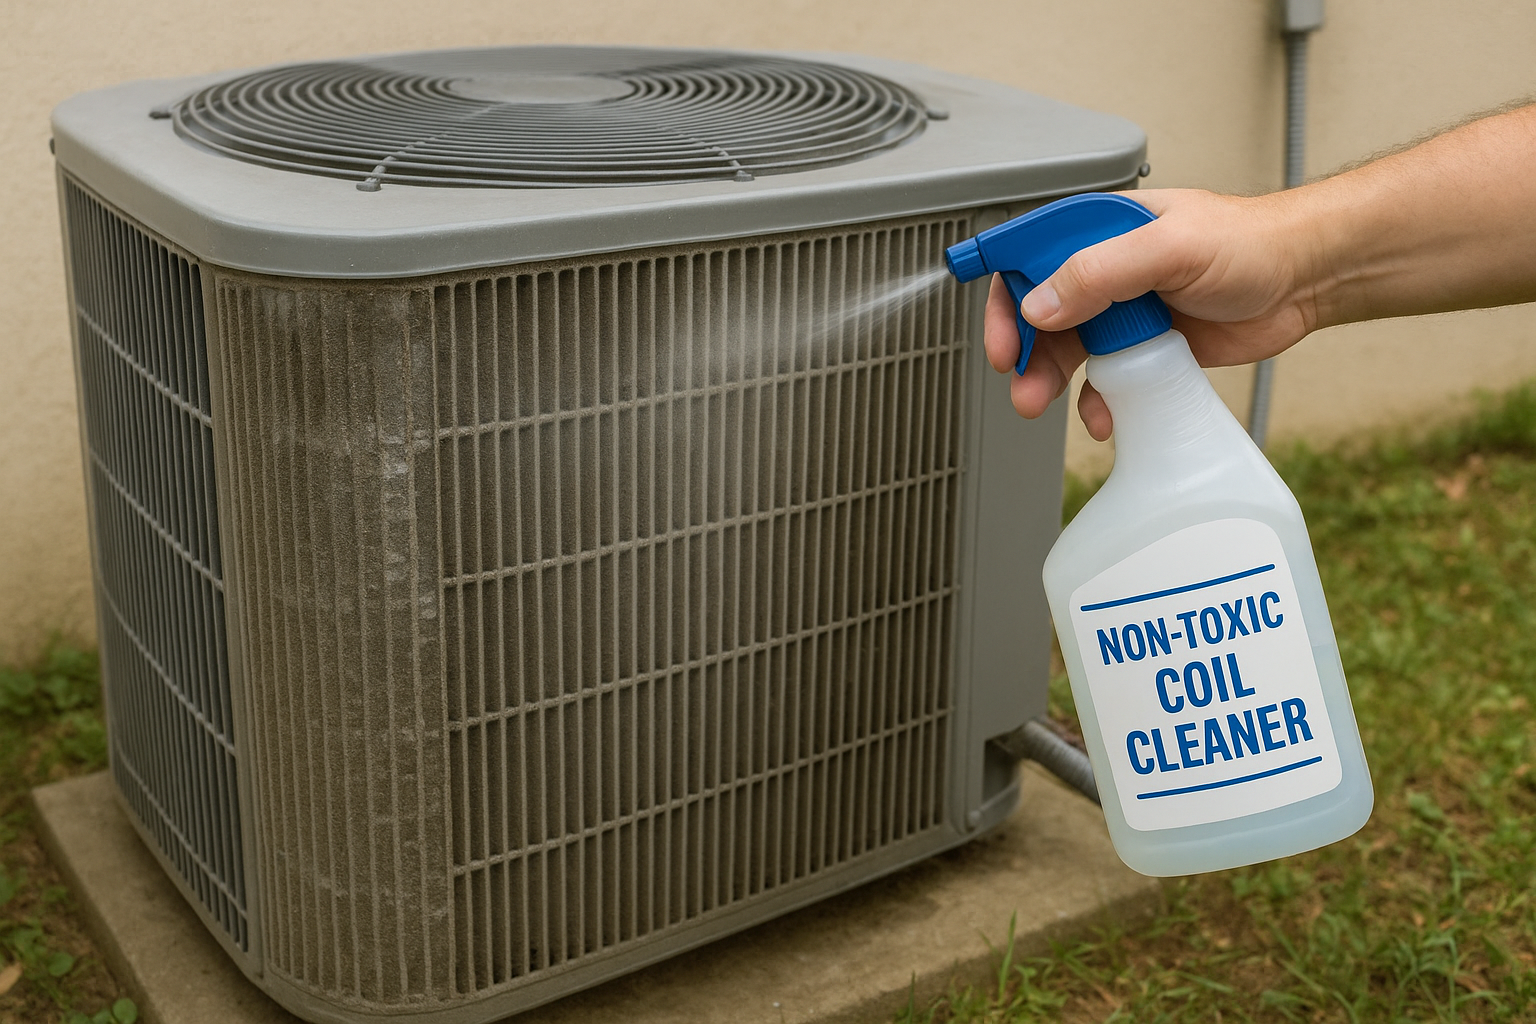
Rinsing from the inside out is the most effective method because it follows the natural airflow direction through the coil and forces buildup to exit on the exterior side.
Follow the dwell time with a low-pressure rinse using a garden hose, keeping the nozzle angle consistent with the fin direction to avoid bending the aluminum surfaces.
Step 3. Clean the indoor evaporator coil
The indoor evaporator coil runs colder and in tighter quarters than the condenser, which makes it a prime surface for moisture-driven buildup including mold, mildew, biological slime, and dust matted by condensation. This is often the most neglected step in how to clean HVAC coils because the evaporator is harder to access, but it has an outsized impact on your indoor air quality and system efficiency.
Access the evaporator coil safely
With the air handler's access panel already removed from Step 1, use your flashlight to examine the full coil face before applying any solution. Look for matted debris between the fins, visible discoloration from mold growth, and standing water or residue in the condensate drain pan directly beneath the coil. If you see significant biological growth, a no-rinse self-rinsing coil cleaner is your best option here, because rinsing inside an air handler requires more careful water management than rinsing an outdoor condenser unit.
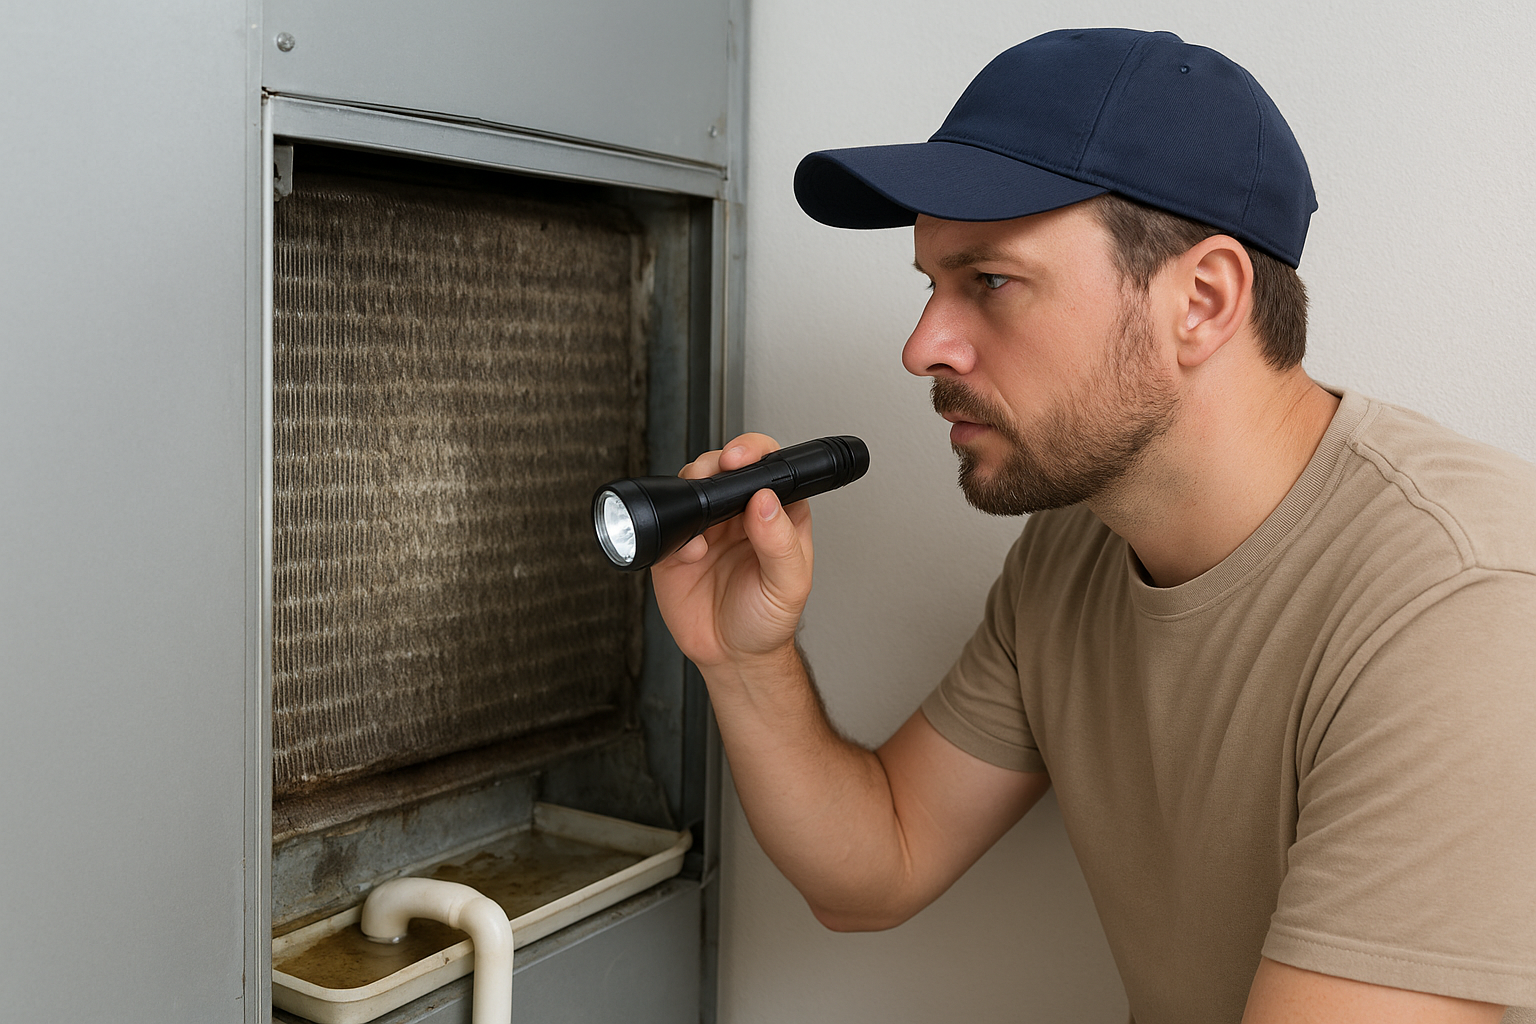
Non-corrosive, no-rinse coil cleaners are ideal for evaporator coils because the condensate cycle naturally carries the loosened residue into the drain pan, eliminating the risk of water damage to surrounding components.
Apply cleaner and treat the drain pan
Spray your non-toxic coil cleaner evenly across the entire fin surface, working from top to bottom. Allow it to dwell fully per the label, then clear the drain pan of any standing water or debris using your wet/dry vacuum. Wipe the pan walls clean and confirm the drain line flows freely before moving to the next step.
Step 4. Rinse, reassemble, and test
With both coils cleaned and the drain pan cleared, you're in the final stage of how to clean HVAC coils correctly. Before you button anything up, take one last pass with your flashlight over both coil surfaces to confirm no cleaner residue or loosened debris remains on the fins. Any leftover material can restrict airflow or re-deposit onto coil surfaces once the system restarts.
Confirm drainage and reinstall panels
Your condensate drain line needs to flow freely before you close the air handler. Pour a small amount of water into the drain pan and watch it exit through the line without pooling. If it backs up, use a wet/dry vacuum to clear the line from the drain outlet before you seal the cabinet. Once drainage is confirmed, reattach all access panels and secure every screw you removed during disassembly so the cabinet seals properly and airflow routes correctly through the system.
A loose or improperly seated access panel on an air handler creates bypass air that drops system efficiency immediately, so confirm every panel is fully seated before you restore power.
Restore power and run a performance check
Flip the breakers back on at both the disconnect box and your main electrical panel, then set your thermostat to cooling mode. Allow the system to run for 10 to 15 minutes and check for improved airflow from supply registers, a steady temperature drop across the return and supply air, and no unusual sounds from either unit. A noticeable improvement in airflow is the clearest sign your cleaning succeeded.
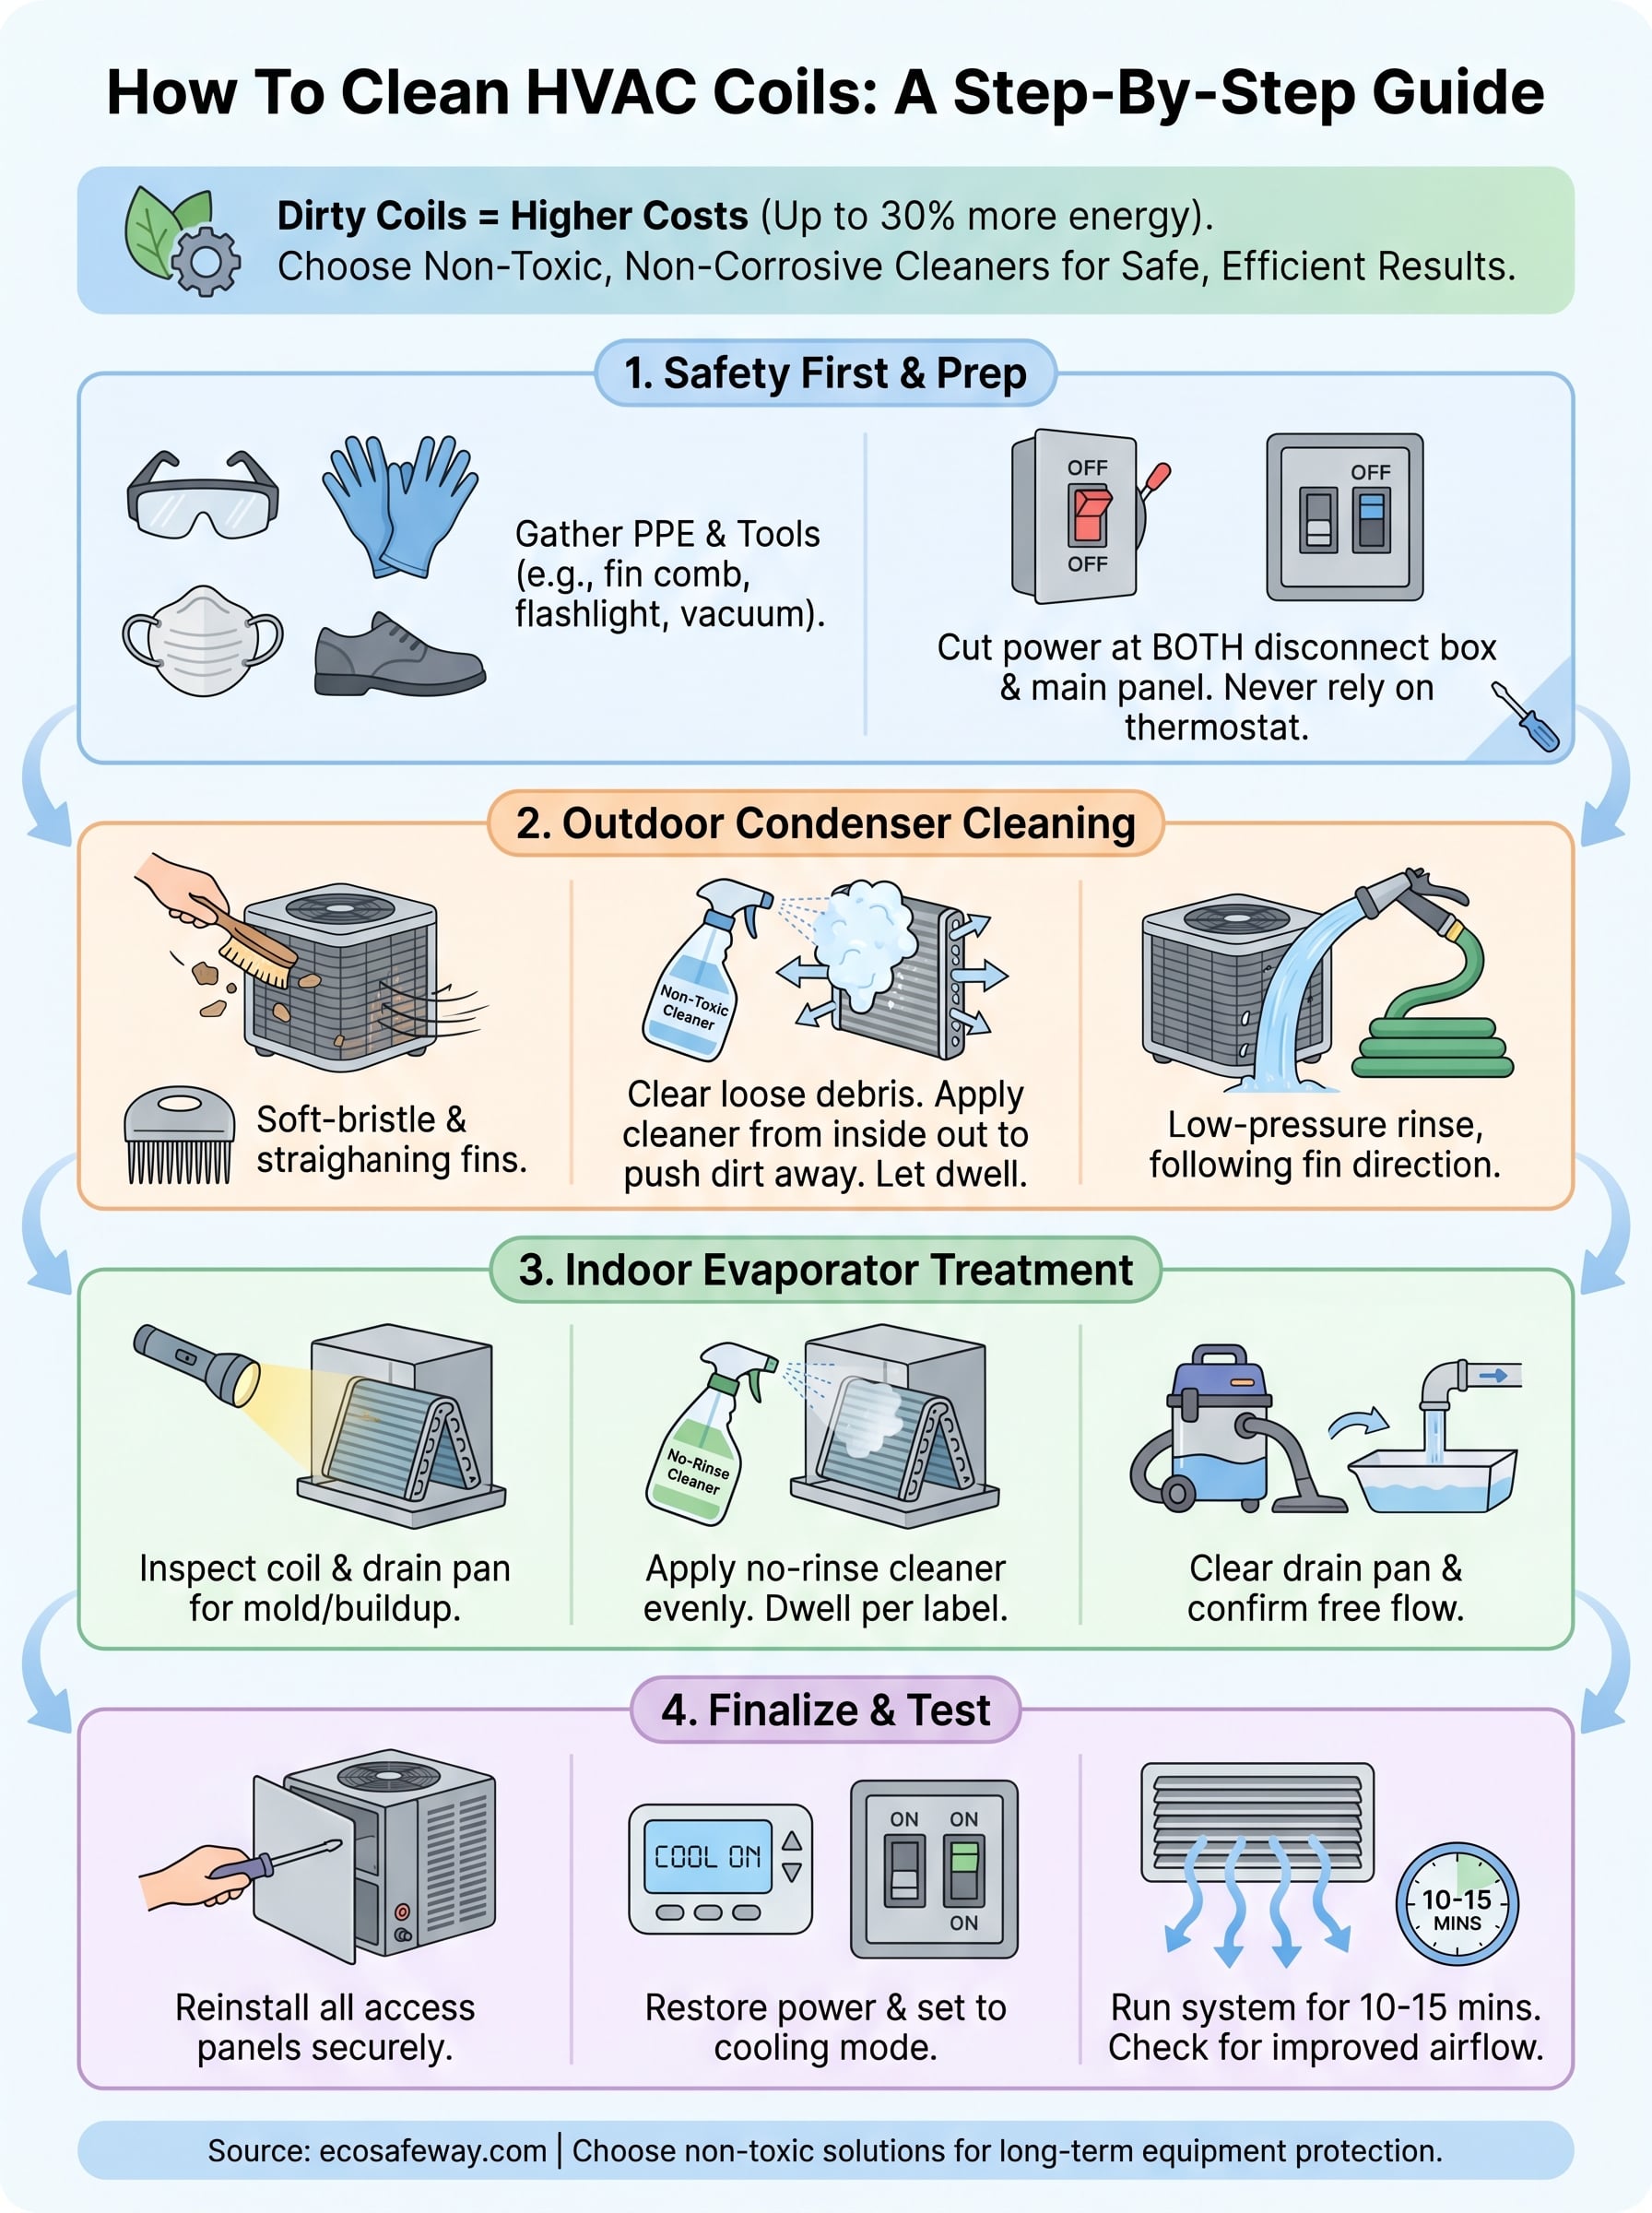
Keep your HVAC coils clean year-round
Knowing how to clean HVAC coils is only half the battle. The other half is building a consistent maintenance schedule that prevents the kind of heavy buildup that takes a full afternoon to clear. Plan on cleaning your condenser coil at least once per season and your evaporator coil once or twice per year, with more frequent checks if your system runs in a dusty or high-humidity environment.
Your choice of cleaner matters as much as your cleaning frequency. Acid-based formulas degrade aluminum fins over repeated use, shortening the lifespan of expensive equipment and adding disposal headaches your team doesn't need. Switching to a non-toxic, non-corrosive solution protects your coils through every cleaning cycle without creating new problems.
If you want a coil cleaner that's safe for your equipment, your crew, and the environment, try Eco Safeway's commercial HVAC coil cleaning solution and see the difference a non-corrosive formula makes on your next maintenance run.


