





Skip boat maintenance for one season and you'll pay for it the next: corroded fittings, a scaled-up raw water system, stained teak, and an engine that hesitates on startup. Most of that damage is preventable with a routine you actually follow, not a vague promise to "check the boat more often."
This checklist gives you the specific tasks that keep a vessel running well, in the order that matters. You'll find guidance on engine flushing, hull and deck cleaning, teak care, bilge upkeep, and the seasonal jobs owners tend to forget until something breaks. Each tip is built around what actually damages boats over time: saltwater buildup, mineral scale, mildew, and corrosion from harsh chemicals that eat away at metal and gelcoat as fast as the grime they're supposed to remove.
We'll also flag where non-toxic, non-corrosive cleaners do a better job than traditional acid-based products, since what you use matters as much as how often you use it. Twelve tips, no fluff, just the maintenance work that keeps your boat in the water and out of the repair shop.
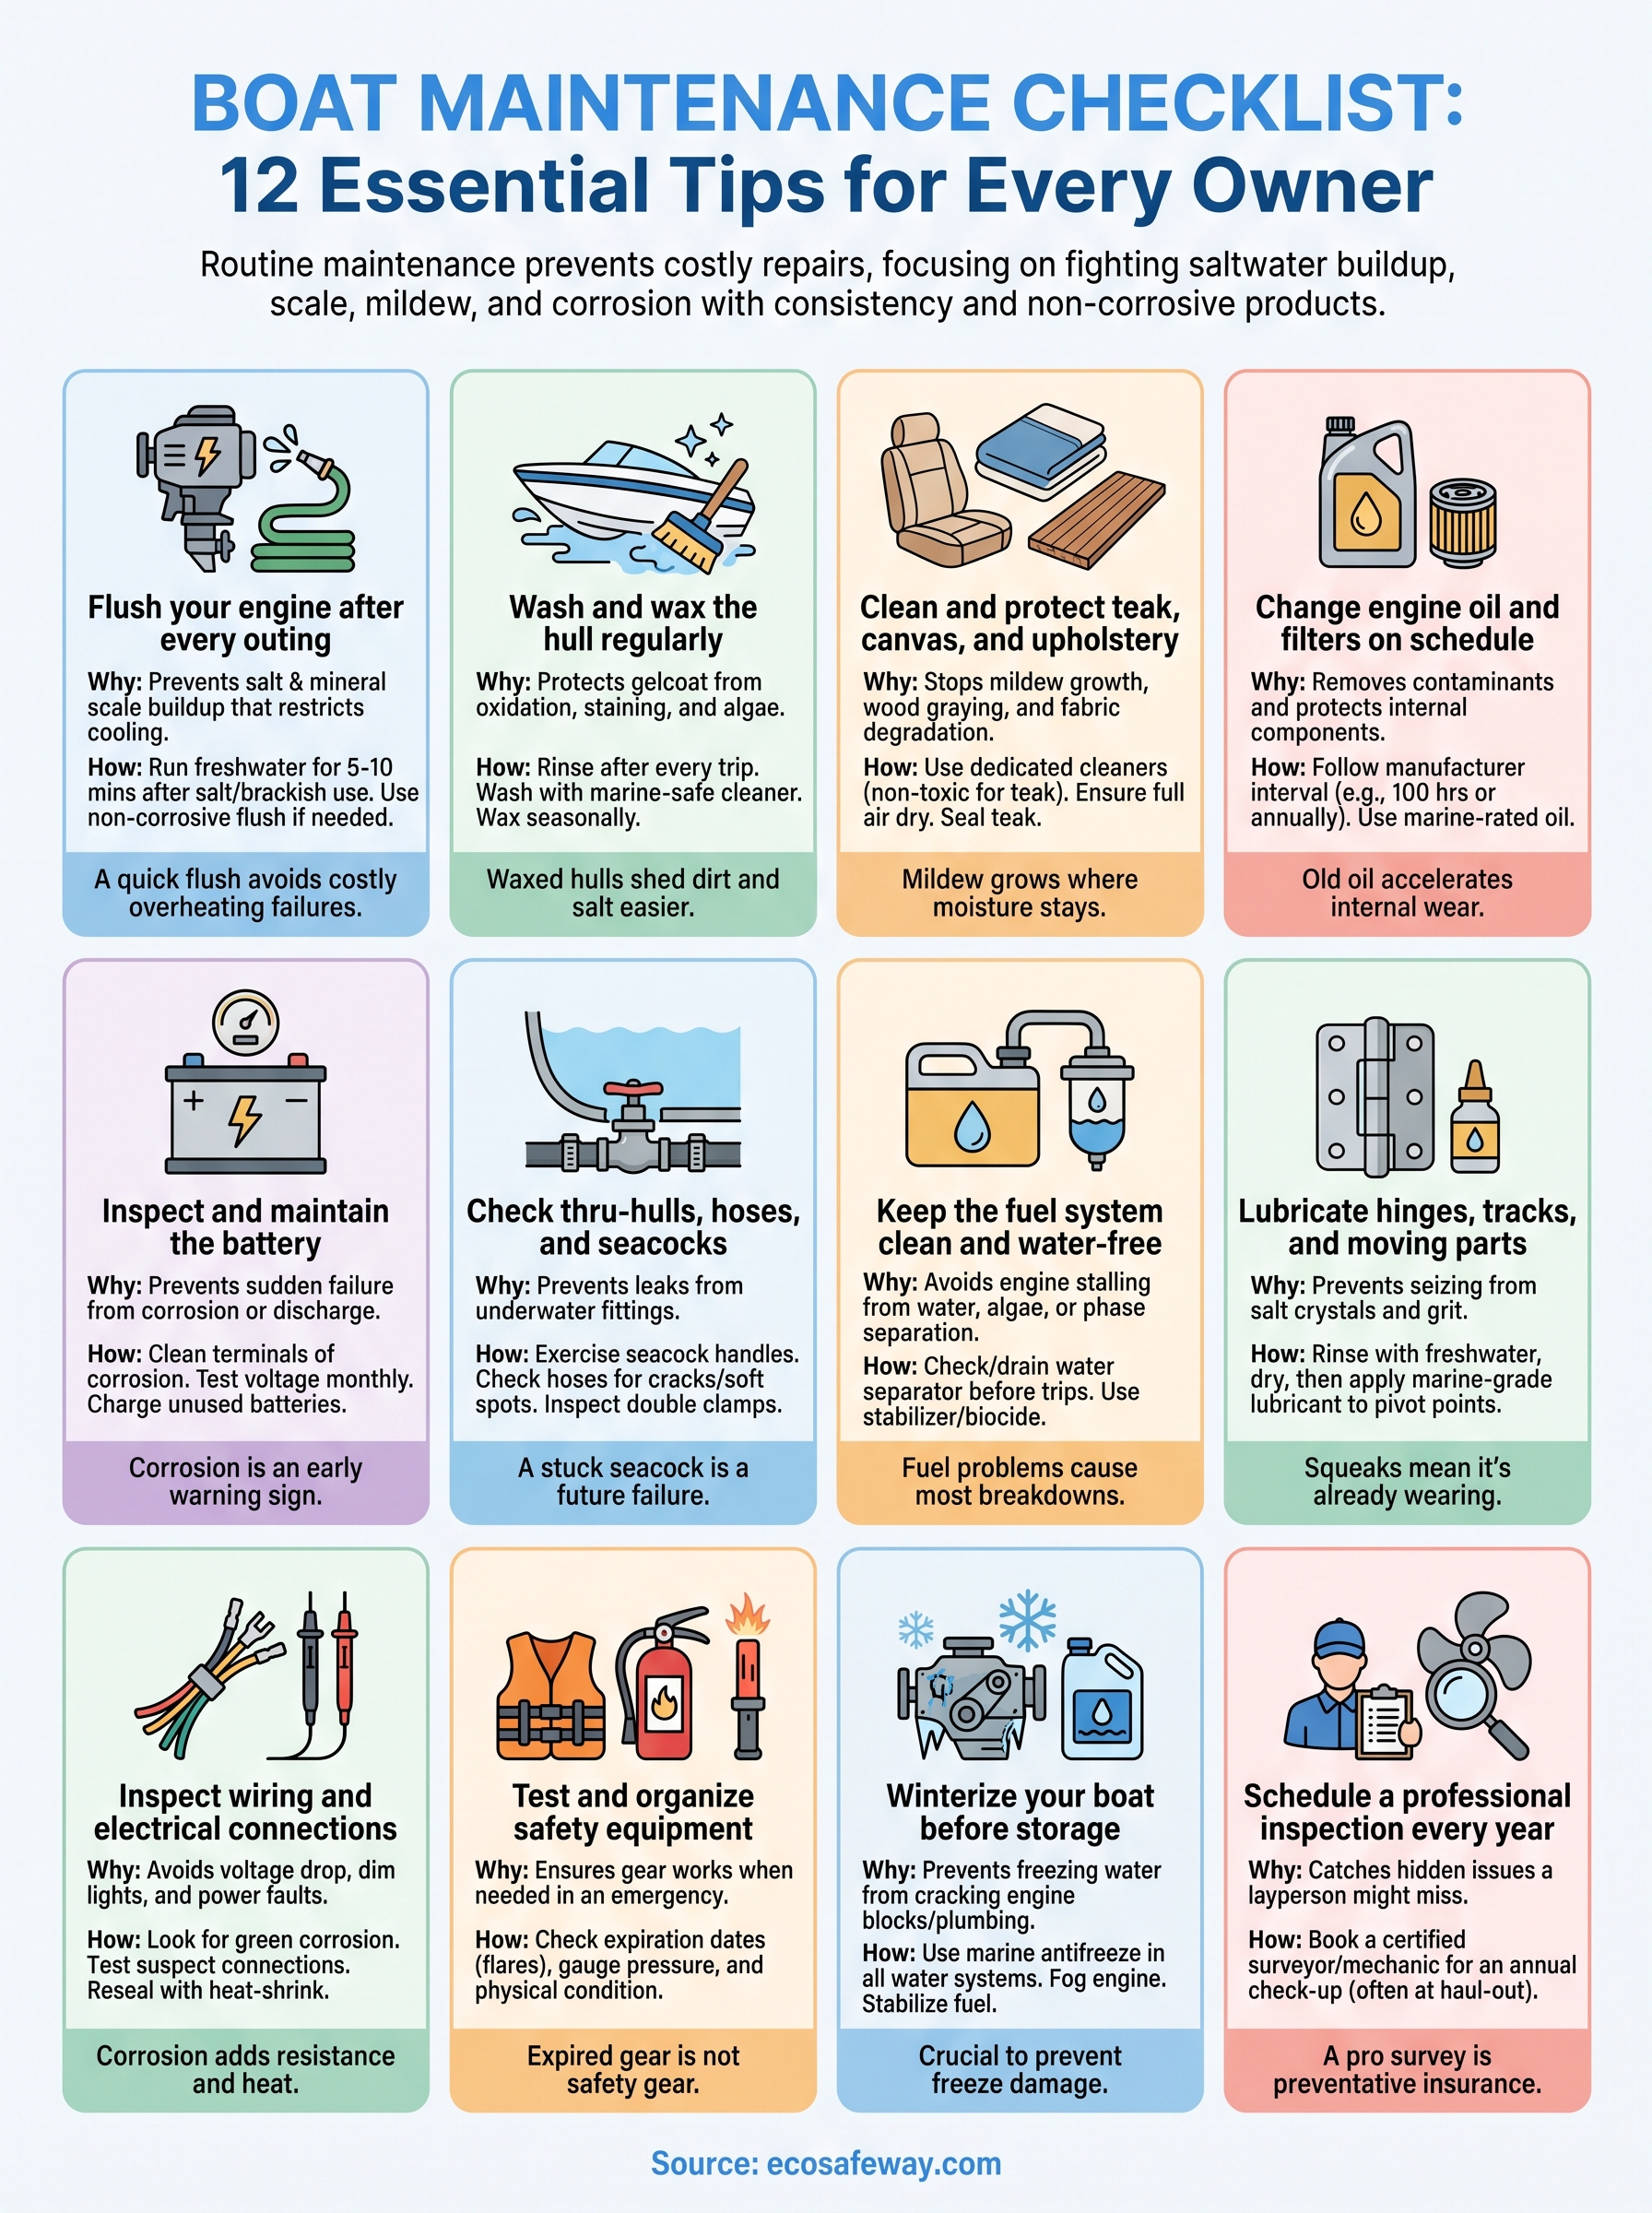
1. Flush your engine after every outing
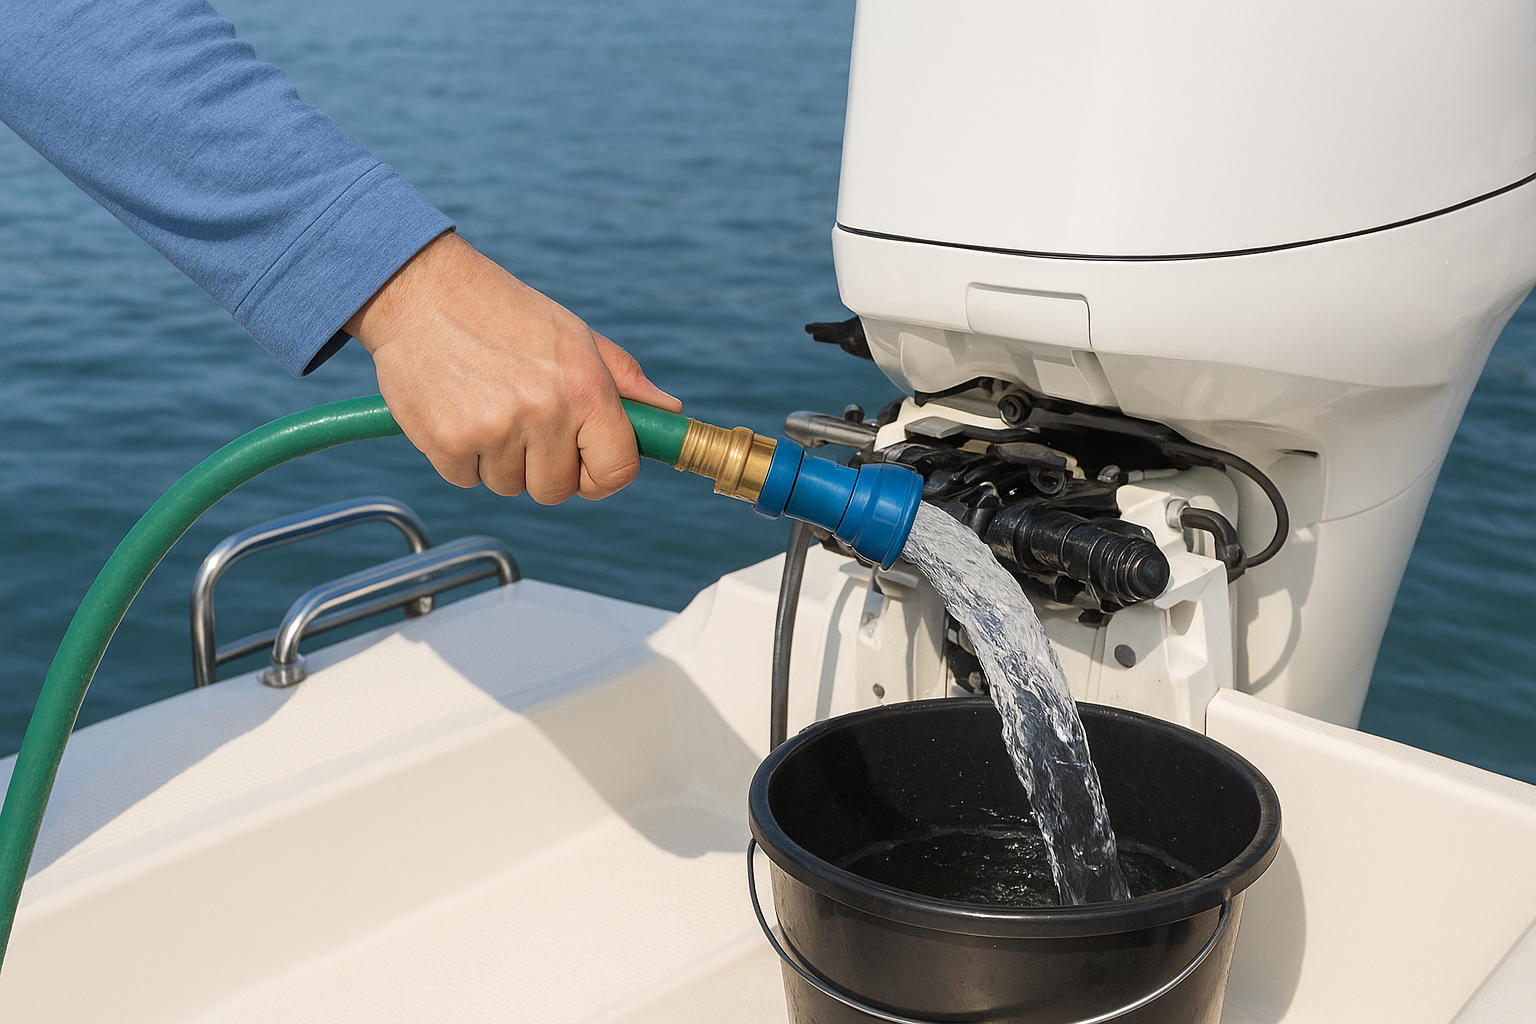
Saltwater is the single biggest threat to any inboard, sterndrive, or outboard engine, and flushing is the one habit that does more for boat maintenance than almost anything else on this list. Every time you run your engine in salt or brackish water, mineral deposits and salt crystals start forming inside the raw water cooling passages. Left alone, that buildup restricts water flow, raises engine temperature, and eventually causes overheating failures that cost thousands to repair. A five-minute flush after each trip stops that process before it starts.
How to do it
Most outboards and sterndrives have a built-in flush port that connects to a garden hose, while inboard engines typically need a raw water flush kit or a dedicated flushing system plumbed into the intake. Run fresh water through the system for at least five to ten minutes with the engine idling, long enough to fully displace the salt water sitting in the cooling passages. If your engine has visible scale buildup already, a flush solution formulated to dissolve mineral deposits will do a better job than plain fresh water alone, since it actually breaks down what's already stuck to the passage walls instead of just rinsing around it.
The five minutes you spend flushing after a trip is cheaper than the engine rebuild you'll need without it.
How often to do it
Flush after every single outing in salt or brackish water, no exceptions. Freshwater boaters can get away with less frequent flushing, but even then, a monthly flush during boating season helps clear out any sediment or debris that's made its way into the system. If you've noticed your engine running hotter than usual or you can see scale on removable components, that's your signal to do a deeper descaling flush rather than a quick rinse.
What you'll need
Here's what a proper flushing setup looks like for most owners:
- Garden hose and flush adapter that matches your engine's flush port or ear muffs for outboards without a built-in port
- A non-corrosive descaling flush solution to dissolve existing scale without attacking impellers, gaskets, or aluminum components the way acid-based flushes can
- A bucket or reservoir if your flush kit is designed for a recirculating treatment rather than a straight hose connection
- Basic hand tools to access flush ports that aren't immediately visible on some inboard installations
Traditional descalers rely on hydrochloric or phosphoric acid, which does clear scale but also corrodes rubber impellers, aluminum housings, and gasket materials over repeated use. That's a real cost when you're replacing impellers every season instead of every few years. A non-toxic, non-corrosive flush gets the same mineral deposits out of your cooling system without the collateral damage, and it doesn't come with the hazmat shipping restrictions or protective gear requirements that acid products do. For most owners, that difference alone justifies switching your flush routine before scale becomes an overheating problem you can't ignore.
2. Wash and wax the hull regularly
A clean, waxed hull isn't just about looks. Gelcoat protection determines how fast your boat oxidizes, stains, and grows algae below the waterline. Salt film left on the hull attracts grime and holds moisture against the surface, which accelerates oxidation and makes future cleaning harder every time you skip a wash. Waxing seals the gelcoat so dirt, UV rays, and waterline grime can't grab hold the way they do on bare, oxidized fiberglass.
How to do it
Rinse the hull with fresh water after every trip to knock off salt before it dries and bonds to the surface. For the deeper clean, wash with a marine-safe hull cleaner and a soft-bristle brush or mitt, working from the top down so dirty runoff doesn't re-stain sections you've already cleaned. Pay extra attention to the waterline, where fuel residue, algae, and mineral staining build up fastest. Once the hull is dry, apply a marine wax or sealant in thin, even coats, then buff it out to restore shine and give the surface a slick finish that sheds water and grime.
A waxed hull sheds dirt and salt before they ever get the chance to stain.
How often to do it
Rinse after every outing in salt water. Wash the full hull every one to two weeks during boating season, and wax it every three to four months, or at the start and midpoint of your season at minimum. Boats kept in the water full-time need more frequent washing than trailered boats, since constant water contact speeds up staining and growth.
What you'll need
- Soft-bristle brush or wash mitt designed for gelcoat, not stiff bristles that scratch
- A non-corrosive, biodegradable hull cleaner that lifts waterline stains without etching gelcoat or harming marina water
- Marine wax or sealant rated for fiberglass or gelcoat surfaces
- Applicator pads and microfiber towels for wax application and buffing
Skip harsh degreasers and acid-based hull cleaners where you can. They strip wax faster than they clean, leaving gelcoat exposed and more vulnerable to the next round of staining.
3. Clean and protect teak, canvas, and upholstery
Teak, canvas, and upholstery take the worst of the sun, salt, and mildew, yet owners often treat them as afterthoughts compared to hull and engine work. Teak cleaning matters because untreated teak greys out, splits, and loses the grip texture that makes it safe to walk on when wet. Canvas and upholstery fare just as poorly when salt and moisture sit in the fibers, breeding mildew stains that never fully bleach out once they set.
How to do it
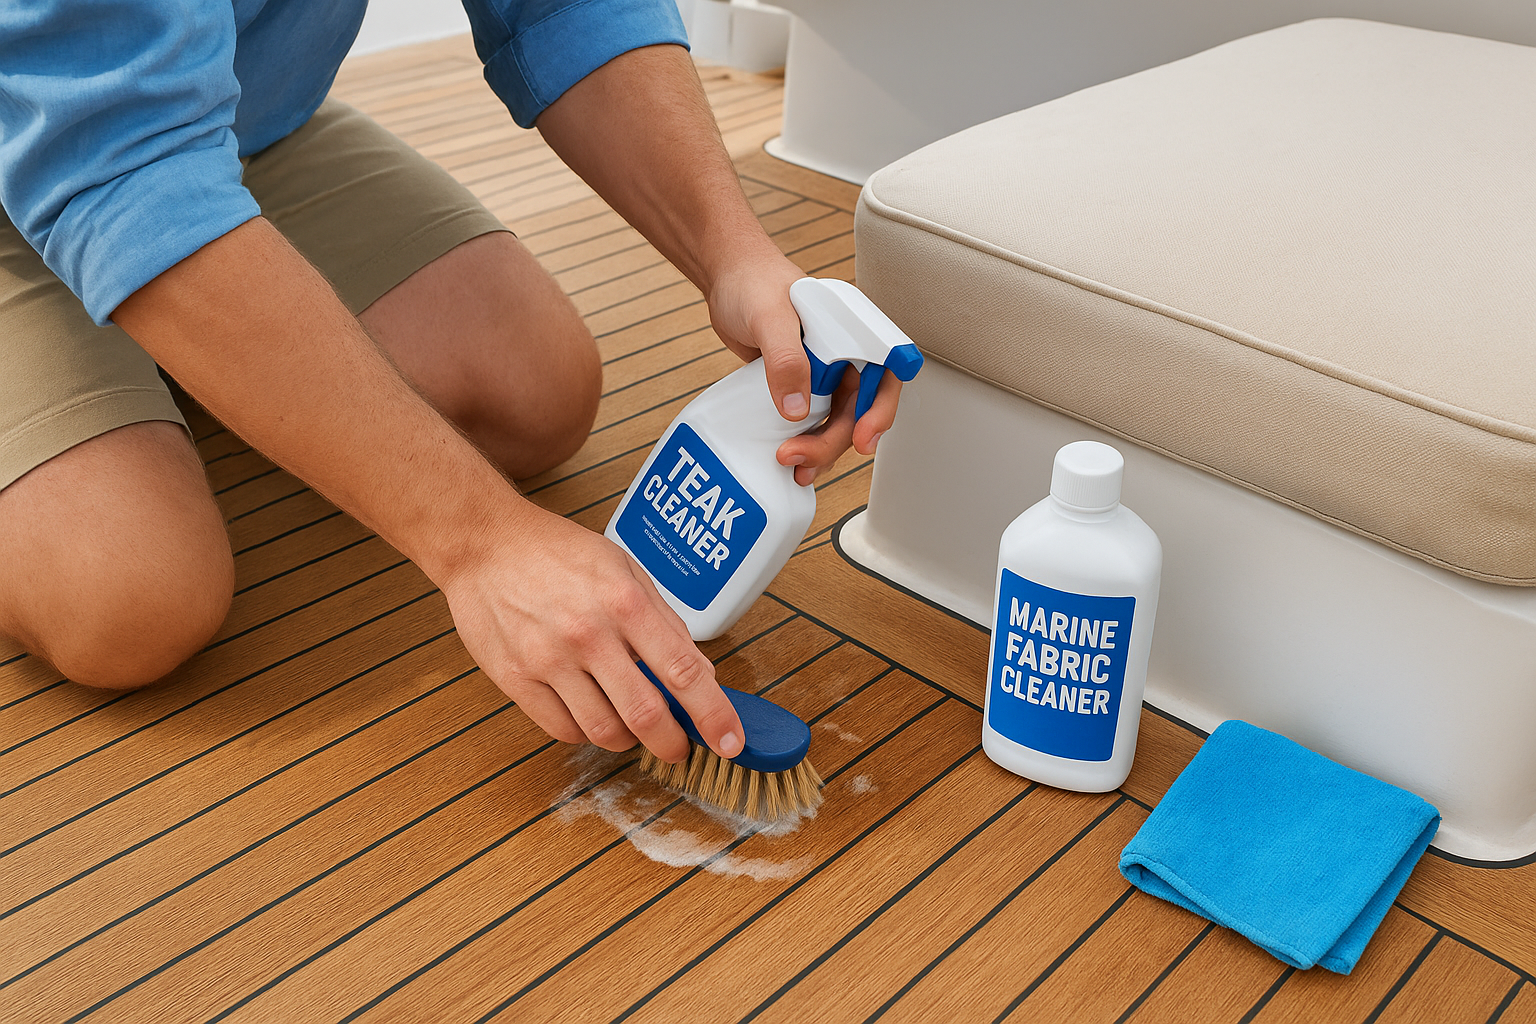
Start teak with a dedicated teak cleaner rather than household bleach, which strips natural oils and speeds up graying. Scrub lightly with the grain using a soft brush, rinse thoroughly, then apply a teak sealer or oil if you want a finished look rather than the natural silver-grey patina. For canvas and upholstery, brush off loose dirt first, then wash with a mild marine fabric cleaner and a soft brush, working in sections and rinsing as you go so soap doesn't dry into the weave. Let everything air dry fully before storing covers or cushions, since sealing in moisture is exactly what starts mildew growth.
Mildew doesn't grow because your boat gets wet, it grows because something stays wet.
How often to do it
Wipe down canvas and upholstery after any trip where they got soaked or salt-sprayed. Do a full teak cleaning every two to four weeks in season, and a deeper clean with sealing or oiling twice a year, typically at the start and end of the boating season. Check upholstery for mildew spots monthly, since catching it early means a quick wipe instead of a full scrub.
What you'll need
- Soft-bristle brush for teak and fabric, kept separate from hull brushes
- Non-toxic teak cleaner and sealer or oil, avoiding bleach-based products that dry out wood fibers
- Marine fabric cleaner safe for vinyl, canvas, and Sunbrella-type material
- Microfiber towels and a dry, ventilated space for full air drying
Bleach-heavy teak cleaners and harsh fabric detergents work fast but leave wood dry and fabric stiff over repeated use, shortening the life of both.
4. Change engine oil and filters on schedule
Oil breaks down faster in marine engines than most owners expect, since constant load, heat cycling, and moisture intrusion all speed up the process. Engine oil changes keep contaminants and combustion byproducts from grinding away at bearings and cylinder walls, and skipping even one cycle lets acidic buildup start corroding internal components you can't inspect without tearing the engine apart. This is one of the most overlooked parts of boat maintenance, largely because the engine still runs fine right up until it doesn't.
How to do it
Warm the engine first so oil flows freely and carries more sediment out with it, then drain using a pump extractor or the drain plug, depending on your engine's setup. Replace the oil filter every time you change oil, never reuse one, and check the drain plug or dipstick O-ring for wear before reinstalling. Fill with marine-rated oil matching your engine manufacturer's viscosity spec, then run the engine briefly and recheck the level once it settles.
An engine that runs on old oil is already wearing out parts you haven't seen yet.
How often to do it
Follow your engine manufacturer's interval, typically every 100 hours of run time or once per season, whichever comes first. Boats that sit unused for long stretches still need an annual change, since moisture and acids build up in stored oil even without engine hours. Check the level before every outing regardless of your change schedule.
What you'll need
- Marine-grade oil matched to your engine's viscosity and API rating
- A replacement oil filter specific to your engine model
- An oil extractor pump or drain pan for clean removal without spills into the bilge
- Nitrile gloves and rags for handling used oil and filters safely
Used oil and filters count as hazardous waste, so plan to drop them at a marina collection point or auto parts store rather than tossing them in regular trash.
5. Inspect and maintain the battery
A dead battery strands more boaters than any mechanical failure, and most of that comes down to skipped maintenance rather than a bad unit. Battery maintenance matters because marine batteries face constant vibration, temperature swings, and deep discharge cycles that regular car batteries never see. Corrosion at the terminals is usually the first sign something's wrong, and if you catch it early, a quick cleaning is all it takes to keep power flowing to your electronics, bilge pump, and starter when you need them most.
How to do it
Start by disconnecting the negative terminal first, then the positive, before you clean anything. Check terminals and cable ends for corrosion buildup, that white or greenish crust that forms from battery gas reacting with moisture, and scrub it off with a wire brush and a baking soda solution. Rinse with fresh water, dry thoroughly, then coat terminals with dielectric grease or a corrosion-inhibiting spray before reconnecting, positive first this time. Check the electrolyte level on non-sealed batteries and top off with distilled water if plates are exposed, and test voltage with a multimeter to confirm the battery holds a full charge.
A battery that fails always sends warning signs first, most owners just aren't looking.
How often to do it
Inspect terminals and connections monthly during boating season, and test voltage before any trip longer than a day. Fully charge batteries left unused for more than two weeks, since self-discharge accelerates plate sulfation and shortens lifespan fast. Replace batteries every three to five years even if they still hold a charge, since capacity drops well before total failure.
What you'll need
- Wire brush and baking soda for terminal corrosion removal
- Multimeter to check voltage and confirm charging system performance
- Dielectric grease or terminal protector spray to slow future corrosion
- Distilled water for topping off non-sealed battery cells
- A marine battery charger or maintainer rated for your battery type, whether flooded, AGM, or gel
Skip household corrosion removers with harsh acids near battery terminals. They can pit metal contacts and leave residue that speeds up the next round of buildup instead of preventing it.
6. Check thru-hulls, hoses, and seacocks
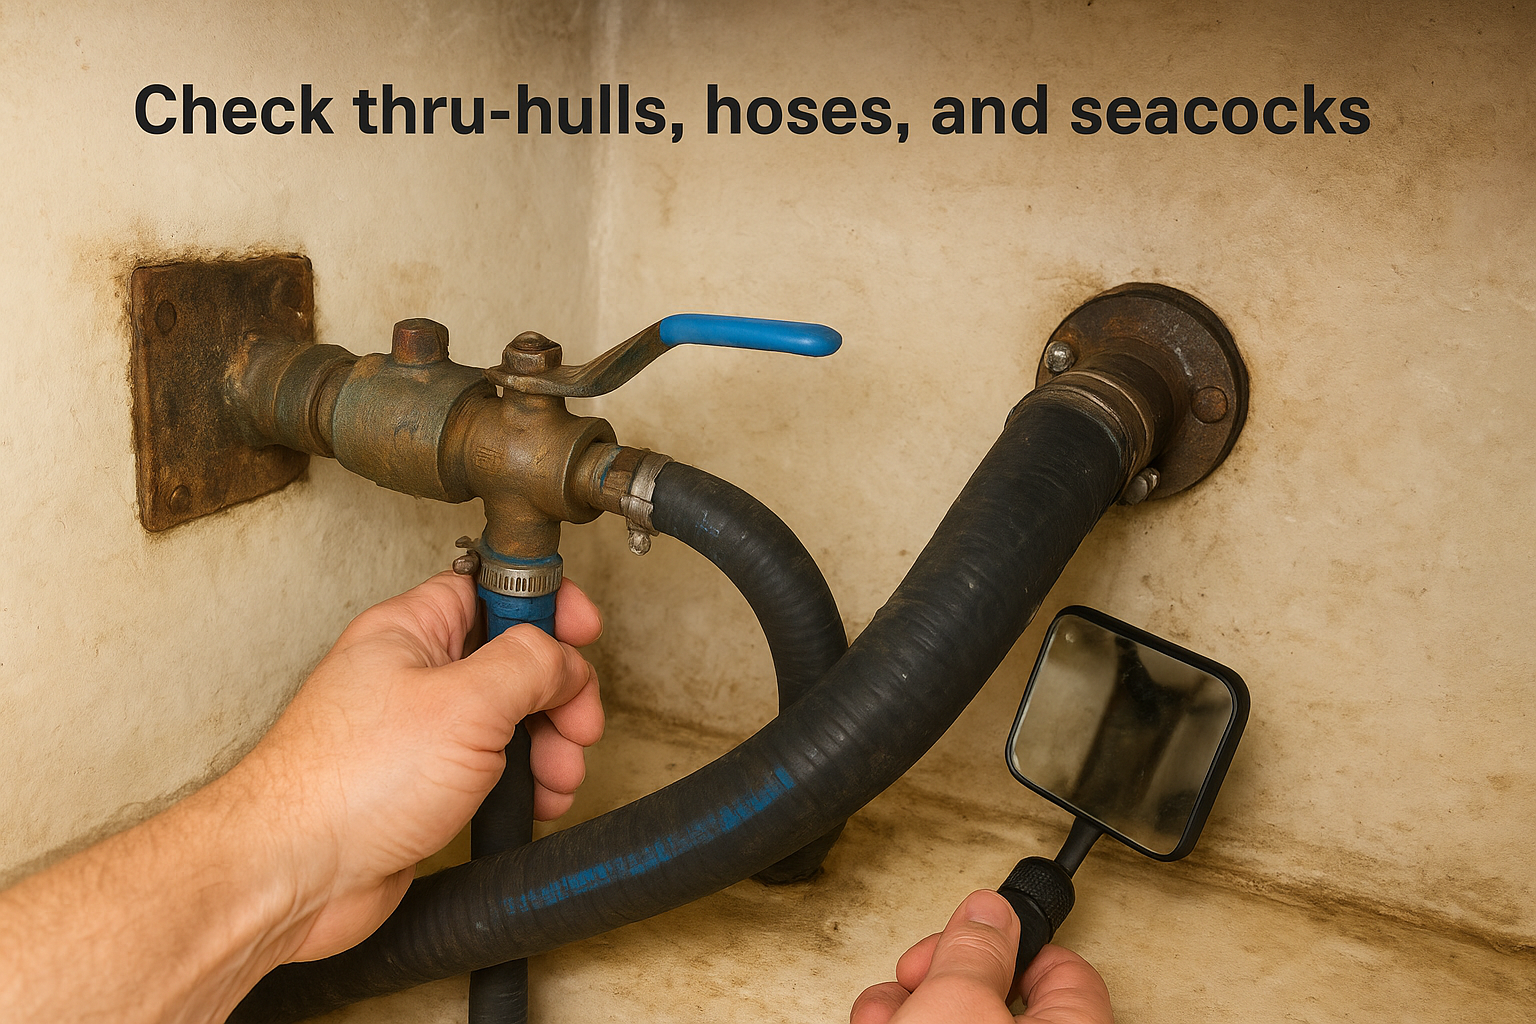
Every hole below the waterline is a potential leak waiting for a failed hose clamp or a seized seacock, and most boats have a dozen or more of them for engine intake, bilge discharge, sink drains, and toilet plumbing. Seacock inspection matters because these fittings sit underwater and out of sight for months at a time, and a hose that's been slowly weeping or cracking rarely announces itself until it fails outright. This is the part of boat maintenance that doesn't feel urgent until the bilge pump can't keep up with what's coming in.
How to do it
Work through each thru-hull from inside the boat, checking that the seacock handle moves freely through its full range rather than sticking halfway. Squeeze hoses along their length, feeling for soft spots, cracking, or bulging near the clamps, since that's where failure usually starts. Confirm every hose has two stainless clamps, not one, and that clamps show no rust bleeding through the bands. Check the exterior thru-hull fittings for cracking around the hull penetration and clear any marine growth blocking the opening.
A seacock that won't turn is a seacock that will fail exactly when you need it to close.
How often to do it
Inspect every thru-hull, hose, and seacock at the start of each season before the first launch, and again mid-season if the boat stays in the water. Exercise seacock handles monthly so they don't seize from mineral buildup or corrosion between uses. Any haul-out is a good time for a full check, since you have direct access to fittings you can't reach from inside.
What you'll need
- Flashlight and mirror to inspect fittings in tight bilge spaces
- Marine grease for lubricating seacock handles and keeping them free-moving
- Spare stainless hose clamps to replace any showing rust or fatigue
- A non-corrosive descaler to clear mineral scale from seacock bores without pitting bronze or stainless fittings
Acid-based cleaners left near bronze seacocks accelerate dezincification, a corrosion process that weakens the fitting from the inside while it still looks fine from the outside.
7. Keep the fuel system clean and water-free
Marine fuel systems fight condensation, ethanol-blended gas, and long idle periods that regular cars never deal with. Fuel system maintenance matters because water in the tank feeds algae growth in diesel systems and phase separation in gas engines, both of which clog filters and starve the engine right when you're trying to get underway. A boat that stalls out on the water usually has a fuel problem, not an engine problem, and most of those problems start with moisture nobody caught in time.
How to do it
Check the water separator filter for any visible moisture at the bottom of the bowl before every outing, and drain it if you see a layer forming below the fuel. Add a fuel stabilizer to gas tanks that sit for more than a few weeks, since ethanol blends absorb moisture and break down faster than straight gasoline. For diesel tanks, dose with a biocide periodically to keep algae from establishing in the fuel itself, not just the filter. Replace primary and secondary fuel filters on schedule rather than waiting for a clog to force the issue, and keep tanks topped off during storage to minimize the air space where condensation forms.
Water in the fuel tank doesn't sink your boat, it just strands it somewhere inconvenient.
How often to do it
Check the water separator before every trip and drain it whenever moisture appears. Replace fuel filters once per season or every 100 hours, whichever comes first, and dose diesel tanks with biocide every three to six months depending on usage. Add stabilizer any time the boat will sit unused for more than a month.
What you'll need
- Spare fuel filters matched to your engine, both primary and secondary
- Fuel stabilizer rated for marine ethanol-blend gasoline
- Diesel biocide treatment to prevent algae growth in diesel tanks
- A fuel/water separator filter housing if your boat doesn't already have one installed
- Absorbent pads for containing any spillage during filter changes
A filter change takes fifteen minutes. A fuel pickup clogged with algae or a carburetor gummed up with stale ethanol takes a lot longer, and usually happens at the worst possible moment.
8. Lubricate hinges, tracks, and moving parts
Every moving part on a boat fights the same enemy: salt crystals working their way into joints and grinding away at metal every time something opens, closes, or slides. Hinge and track lubrication matters because hatches, door latches, seat swivels, outboard tilt mechanisms, and window tracks all seize up the same way, slowly, until one day the hatch that used to swing open needs two hands and a curse word. Skipping this step doesn't just cost convenience, it accelerates wear on parts that are expensive to replace once they're pitted or bent from being forced.
How to do it
Rinse each hinge, track, or slide with fresh water first to flush out any salt or grit sitting in the mechanism, since lubricating over dirt just grinds it deeper into the metal. Let everything dry, then apply a marine-grade lubricant made for saltwater exposure, working it into the pivot points, tracks, and any exposed threads. Wipe off excess so it doesn't attract dust and grime, and cycle the part through its full range a few times to work the lubricant in evenly.
A hinge that squeaks is a hinge that's already losing its fight against salt.
How often to do it
Lubricate high-use hinges and tracks, like companionway doors, hatch lifts, and stanchion bases, every two to four weeks during boating season. Outboard tilt and steering linkages need attention monthly at minimum, since they carry more load than a simple latch. Give everything a full lubrication pass before storage and again at the start of the season, since parts that sit unused for months seize up faster than ones in regular motion.
What you'll need
- Marine-grade lubricant formulated to resist saltwater wash-off, not a household spray lubricant
- A small brush or applicator for working lubricant into tight hinge pins and track channels
- Fresh water and a rinse hose to clear salt before applying lubricant
- Clean rags for wiping excess and preventing grime buildup
Household lubricants break down fast in salt air and often attract more dirt than they repel, leaving you reapplying every week instead of every month.
9. Inspect wiring and electrical connections
Marine wiring lives in one of the harshest environments any electrical system faces, with vibration, humidity, and salt air working together to corrode connections that would last decades on land. Electrical system maintenance matters because a corroded connection doesn't always fail outright, it just adds resistance, which means dimmer lights, a bilge pump that runs slower than it should, or a starter that cranks weaker every month until it finally doesn't crank at all. Catching corrosion early is far cheaper than tracing a mystery electrical fault at the dock.
How to do it
Go through the panel first, checking that every breaker and fuse holds firm and shows no discoloration from overheating. Follow wiring runs into the bilge and engine compartment, looking for green corrosion on connectors, chafed insulation where wires rub against a bracket, or crimps that have started to pull apart. Test any suspect connection with a multimeter for voltage drop rather than guessing from appearance alone, since corrosion can hide inside a crimp that still looks fine on the outside. Reseal any exposed connection with heat-shrink butt connectors and dielectric grease instead of electrical tape, which traps moisture rather than keeping it out.
Corrosion inside a connector costs you power long before it costs you a connection.
How often to do it
Check the panel and accessible connections monthly during the season, and do a full bilge and engine compartment wiring inspection at haul-out or spring commissioning. Anytime you notice flickering lights, a slow-cranking starter, or an electronic device acting erratically, treat that as a sign to check wiring immediately rather than waiting for the next scheduled look.
What you'll need
- Multimeter for voltage drop testing across suspect connections
- Heat-shrink butt connectors and a heat gun or lighter for sealing repairs
- Dielectric grease to coat connections against future moisture intrusion
- Wire brush or contact cleaner for clearing light corrosion before resealing
- Flashlight and inspection mirror for tracing runs through tight bilge and compartment spaces
Skip standard electrical tape for anything below deck. It looks like a fix, but moisture works underneath it within a season, and you'll be back at the same connection sooner than you'd like.
10. Test and organize safety equipment
Safety gear that's expired, corroded, or buried under a pile of dock lines does nothing for you in an emergency. Safety equipment checks matter because flares degrade, fire extinguisher gauges drift into the red, and life jackets lose buoyancy foam over years of sun exposure without ever looking obviously bad. This part of boat maintenance doesn't prevent wear on the boat itself, but it's the difference between a manageable problem on the water and one that turns dangerous fast.
How to do it
Pull every life jacket out and check for cracked straps, waterlogged foam, or faded buckles that won't hold under load. Check the fire extinguisher gauge, shake dry-chemical units to keep the powder from settling, and confirm the pressure needle sits in the green range. Inspect flares and signal devices for the printed expiration date, since expired flares can misfire or fail to ignite when you actually need them. Test the horn, navigation lights, and VHF radio with a quick radio check, and confirm the bilge pump activates automatically when the float switch triggers.
Safety gear you haven't checked in a year isn't safety gear, it's a guess.
How often to do it
Run a full safety equipment check at the start of each season before your first trip out. Do a quick visual pass on life jackets and the fire extinguisher gauge monthly, and replace flares before their printed expiration date rather than after. Test the bilge pump float switch every time you're in the bilge for another task, since it's easy to check and easy to forget.
What you'll need
- Current, unexpired flares rated for your boating area
- A fire extinguisher gauge check, with a spare extinguisher aboard if yours is near expiration
- Properly fitted life jackets for every person aboard, checked for wear
- A working horn, whistle, or air horn as a sound-producing device
- A spare VHF radio battery or handheld backup in case the primary unit fails
Most of this gear needs replacement on a schedule, not a repair, so budget for it the same way you budget for oil changes.
11. Winterize your boat before storage
Cold snaps do more damage in one freeze than a season of normal wear, and skipping winterization is one of the costliest mistakes in boat maintenance. Water left in engine blocks, raw water systems, or plumbing lines expands as it freezes and cracks whatever's holding it, whether that's a cast iron block or a plastic fitting. Winterizing your boat properly protects every system that holds water, not just the engine, and it's far cheaper than the repair bill for a cracked block discovered next spring.
How to do it
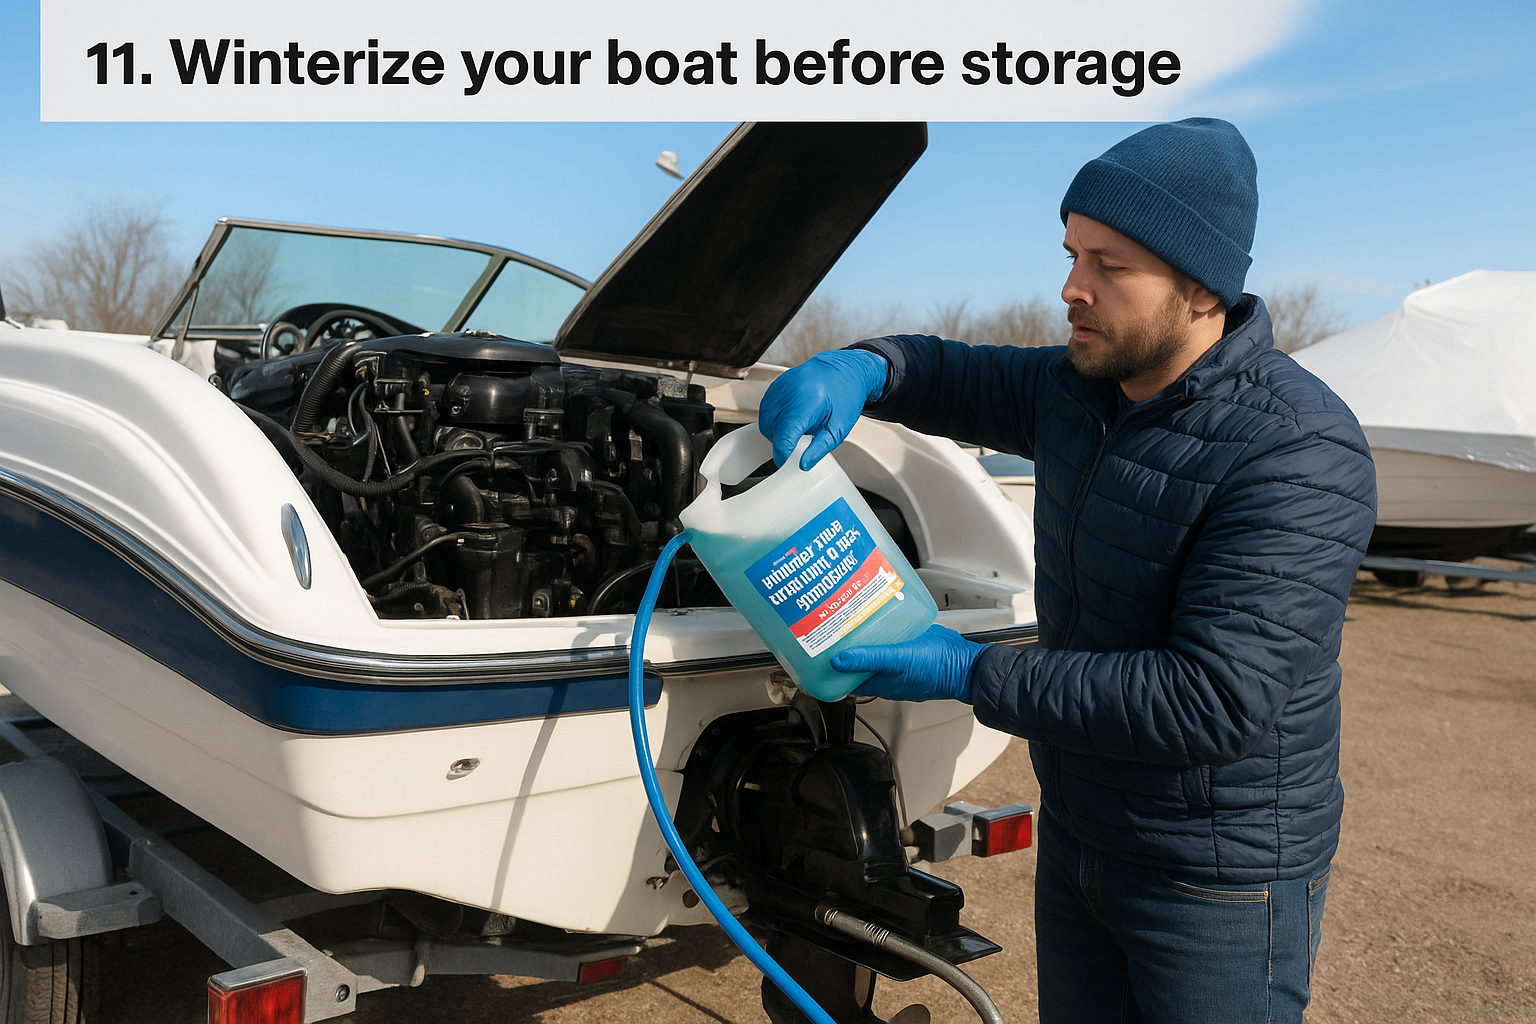
Start by running fresh water through the raw water system, then follow with antifreeze rated for marine engines, never automotive antifreeze, pushed through until it flows from every exhaust or discharge port. Drain the water heater, holding tank, and fresh water lines completely, then add antifreeze to any plumbing that can't be fully drained. Fog the engine cylinders if it's a gas outboard or sterndrive, change the oil so acidic contaminants don't sit in the block all winter, and stabilize the fuel tank before topping it off. Remove the battery for indoor storage or connect it to a maintainer.
Winterizing isn't optional if freezing temperatures are even a possibility where you store the boat.
How often to do it
Winterize once per year before the first hard freeze in your area, and don't wait for the forecast to confirm it. Boats stored in heated indoor facilities can skip full winterization but still benefit from a fuel and battery check. Recommission everything in spring before the first launch, reversing each step you took in fall.
What you'll need
- Marine-grade propylene glycol antifreeze, non-toxic and safe for onboard systems
- Fuel stabilizer for the tank
- Engine fogging oil for cylinders on applicable engines
- A battery maintainer for off-season storage
- Shrink wrap or a breathable cover to keep moisture and debris out over winter
Skip cheap automotive antifreeze. It's toxic to handle and illegal to discharge through bilge pumps, unlike marine-rated versions built for exactly this job.
12. Schedule a professional inspection every year
Even owners who handle every task on this list well still miss things a trained eye catches immediately. Professional boat inspection matters because a surveyor or certified mechanic checks systems you can't fully evaluate from the deck, like compression readings inside cylinders, moisture readings inside a hull laminate, or corrosion happening below a waterline you never see except at haul-out. Catching a problem at year one costs a few hundred dollars in repairs. Catching the same problem at year five, after it's spread, costs a new engine or a hull repair that keeps you out of the water for a season.
How to do it
Book a certified marine surveyor or a mechanic familiar with your engine brand, and schedule the inspection around a haul-out so they get full access to the hull, running gear, and thru-hulls. Ask for a written report, not just a verbal rundown, so you have a record to compare against next year's findings. Walk the boat with them if you can, since they'll often point out wear patterns and explain what to watch between visits, which teaches you more than any checklist alone.
A written survey catches the failure you can't see coming, which is exactly the one that costs the most.
How often to do it
Schedule a full professional inspection annually, timed with your haul-out or spring commissioning. Boats used commercially or those over ten years old benefit from a mid-season check as well, since older hulls and engines show wear faster than newer ones. Insurance carriers often require a survey every few years anyway, so pair your maintenance inspection with that requirement when the timing lines up.
What you'll need
- A certified marine surveyor or engine-specific mechanic with documented credentials
- Maintenance records from the past year, including oil changes, filter swaps, and any repairs
- A haul-out slot booked in advance, since yards fill up fast during peak spring and fall windows
- Budget set aside for follow-up repairs the inspection is likely to surface
Treat the inspection fee as insurance against the far larger bill a missed problem eventually sends you.
Building a maintenance routine that sticks
None of these twelve tasks are complicated on their own. What separates a boat that lasts decades from one that's constantly in the shop is whether you do them on schedule, every season, without waiting for a warning sign. Consistency beats intensity here. A five-minute flush after every trip protects your engine more than one heroic descaling job after years of neglect.
Start small if the full list feels like a lot. Pick the two or three tasks you've been skipping, engine flushing and battery checks are usually the biggest offenders, and build those into muscle memory first. The rest follows once the habit sticks.
What you use matters as much as how often you use it, especially on raw water systems where acid-based descalers quietly wear down impellers and fittings you just replaced. If your cooling system needs attention now, start with a raw water flush for boat engines built to clear scale without corroding anything it touches.


