

If you've ever wondered how to clean a commercial ice machine, you're already ahead of most operators who wait until slime buildup or off-tasting ice forces their hand. Scale, mold, and bacteria accumulate fast inside ice machines, and a dirty unit doesn't just produce contaminated ice. It shortens compressor life, drives up energy costs, and can put you on the wrong side of a health inspection.
The good news: cleaning a commercial ice machine isn't complicated. It just requires the right process, the right frequency, and, critically, the right cleaning solution. Most manufacturer guides recommend acid-based descalers that can corrode internal components over time and require protective gear to handle. That's where a safer approach matters.
At Eco Safeway, we manufacture non-toxic, HMIS 0-0-0 rated ice machine cleaners that remove scale and buildup without corroding nickel, copper, or stainless steel, and without exposing your staff to hazardous chemicals. This guide walks you through every step: draining, descaling, sanitizing, and reassembling your machine so it runs efficiently and produces clean, safe ice every time.
What you need before you start
Before you run through how to clean a commercial ice machine, gather everything in one place. Starting mid-process to hunt down a brush or a second rinse bottle wastes time and increases the chance of skipping a critical step. Having your supplies staged before shutdown also means your machine spends less downtime out of service, which matters on a busy day.
Cleaning and descaling solutions
The most important choice you make is which cleaner you use. Many ice machine descalers contain phosphoric or sulfamic acid. These work on mineral scale, but they also corrode nickel-plated evaporators, attack copper fittings, and require your staff to wear gloves and eye protection. A non-toxic, HMIS 0-0-0 rated descaler removes calcium and lime deposits without those risks. Your technician handles it bare-handed and disposes of it without hazmat concerns.
Switching to a non-corrosive descaler protects your evaporator plating long-term, which directly reduces your repair and replacement costs.
Your cleaning kit also needs a food-safe sanitizer approved for ice machine use. Check the NSF/ANSI 51 standard for approved sanitizer types that meet your local health code requirements.
Tools and equipment checklist
Beyond the chemistry, you need the right physical tools in hand before you power down. Here is what to have ready:
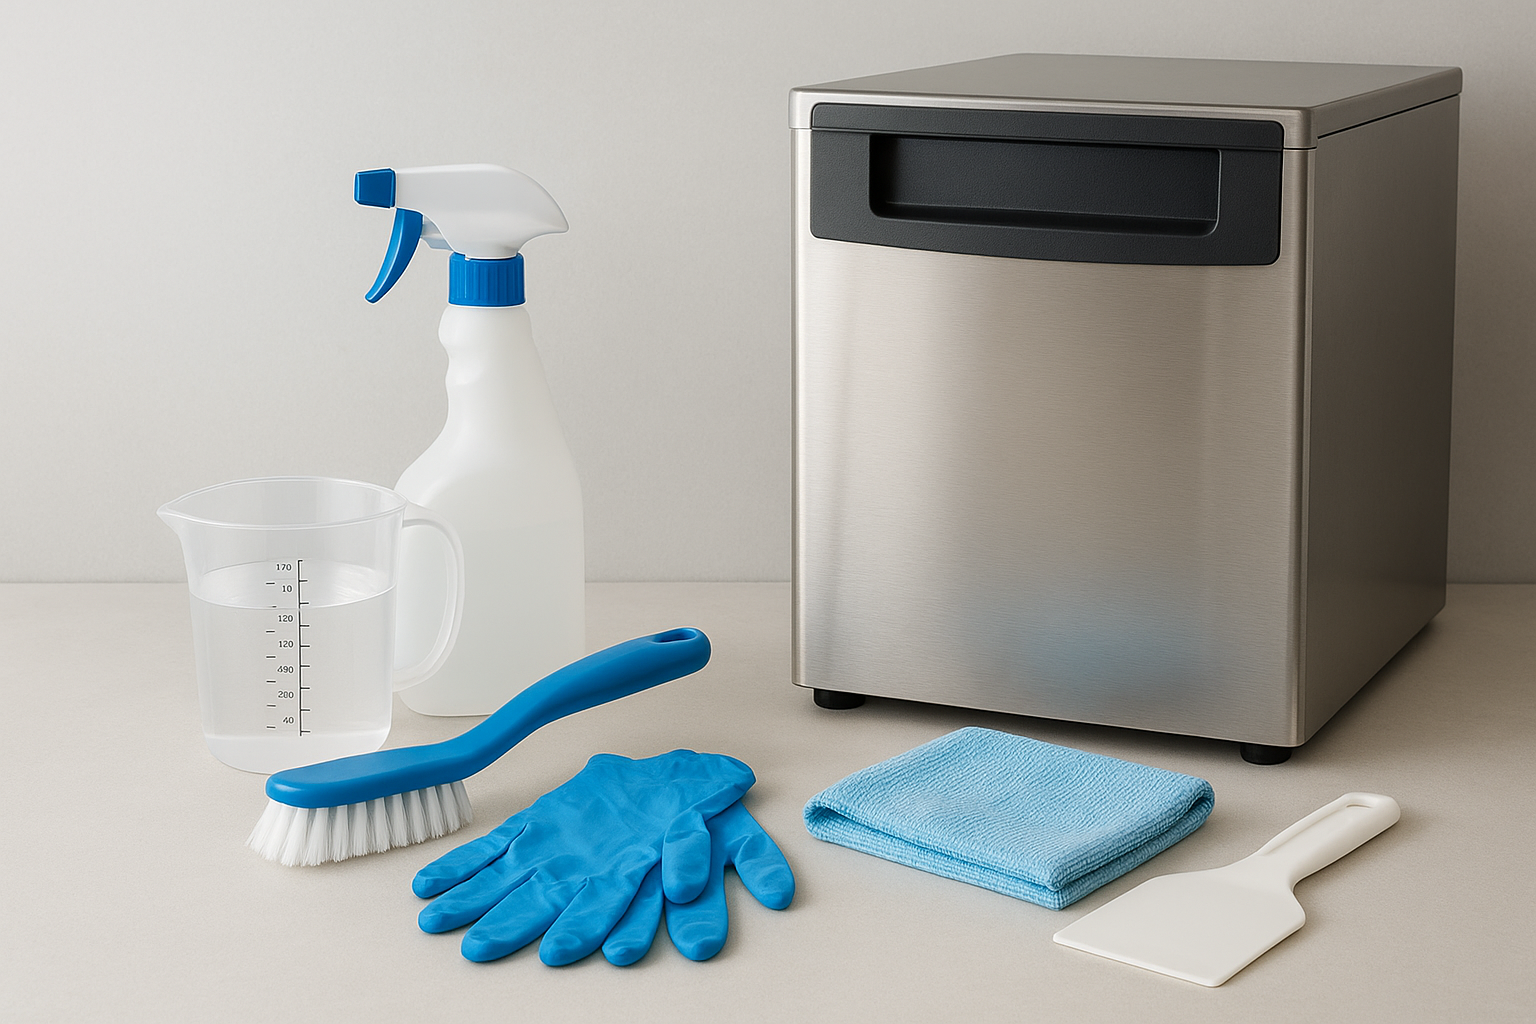
- Soft-bristle ice machine cleaning brush
- Clean cloths or single-use food-service wipes
- Plastic scraper for stubborn deposits on bin walls
- Measuring cup or graduated container for diluting solutions
- Nitrile gloves (good hygiene practice regardless of cleaner toxicity)
- Clean bucket for rinse water
- Your machine's manufacturer manual for model-specific component access and dilution ratios
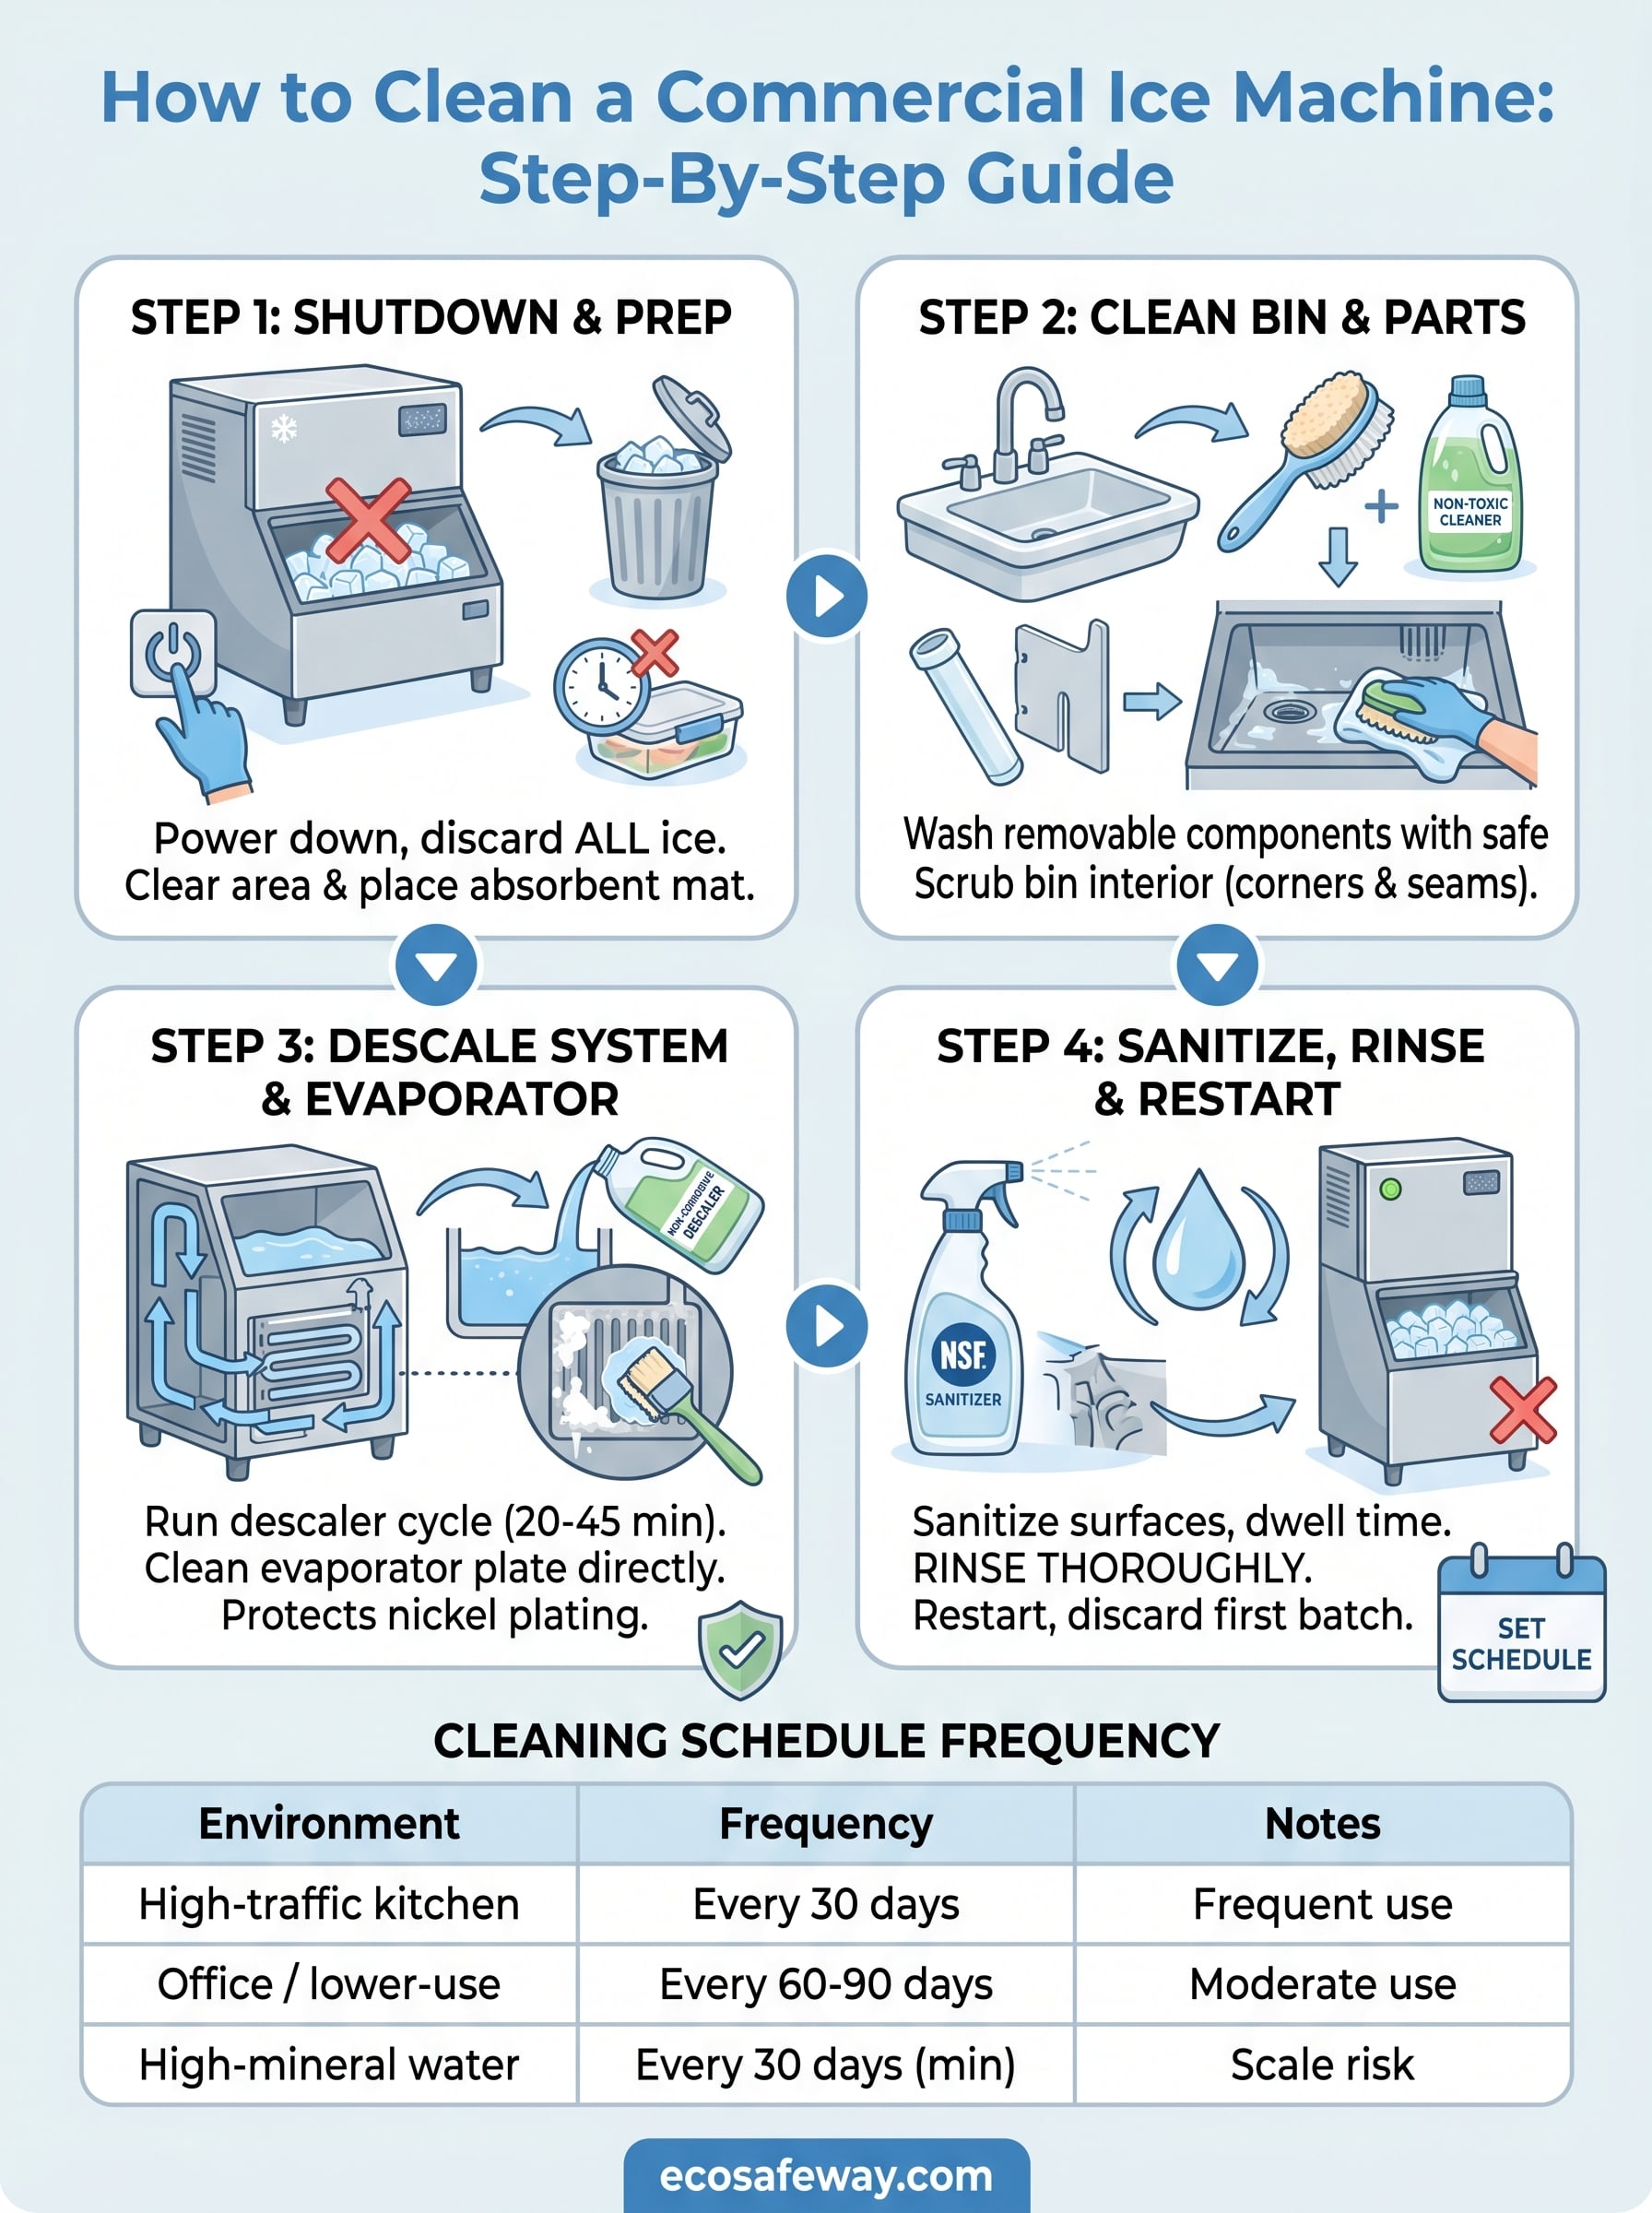
Step 1. Shut down, empty ice, and prep the area
Starting the process correctly sets you up for every step that follows. When you learn how to clean a commercial ice machine, the shutdown sequence is where most operators cut corners and create problems later.
Power down and remove all ice
Set the machine to wash or clean mode if your model has one, or switch it to the off position. Never start cleaning while the unit is still in a freeze cycle. Pull all remaining ice out of the bin and discard it. This ice has been sitting in a unit you're about to treat with cleaning solutions, and serving it afterward is a health risk you don't want to take.
Discard all ice before cleaning begins, no matter how recently the machine cycled. There are no exceptions to this step.
Clear and protect the surrounding area
Remove any food or containers stored near the machine before you start. Prep the space with these quick actions so you're not scrambling mid-clean:
- Place an absorbent mat on the floor beneath the unit to catch drips during descaling and rinsing
- Turn off the water supply line once the machine finishes its current cycle
- Keep your cleaning supplies staged nearby but away from the open ice bin
Step 2. Clean the bin and removable food-contact parts
With the machine powered down and the ice discarded, the bin and all removable food-contact components are your first cleaning target. These surfaces accumulate slime, mold, and mineral residue faster than most operators expect because they sit in a constantly wet, cold environment. Cleaning them properly is a critical part of how to clean a commercial ice machine correctly.
Remove and wash removable components
Pull out every removable part your machine allows: the ice bin divider, water distribution tubes, drop zone, and any plastic panels or trays. Wash each piece with your non-toxic ice machine cleaner diluted per the manufacturer's instructions, then scrub with a soft-bristle brush.
Never use abrasive scrub pads on food-contact plastic. They create micro-scratches that trap bacteria and make future cleanings harder.
Rinse each component thoroughly with clean water, then set the parts aside to air dry on a clean surface before reassembly.
Scrub the bin interior
Apply your diluted cleaning solution directly to the bin walls and floor using a clean cloth. Work from top to bottom so you push residue downward toward the drain. Pay extra attention to corners and seams, where biofilm builds up fastest. Rinse the entire interior thoroughly before moving to the next step.
Step 3. Descale the water system and evaporator safely
Descaling is what separates a thorough cleaning from a surface-level wipe-down. Mineral scale builds up inside your water distribution system and evaporator plate even when the machine looks clean from the outside. Left unchecked, that buildup forces your compressor to overwork and shortens the machine's lifespan.
Run the descaling solution through the water system
Pour your non-toxic descaler into the water reservoir at the dilution ratio your manufacturer specifies. Engage the machine's clean cycle, which circulates the solution through the system. Let it run for the full recommended cycle time, typically 20 to 45 minutes depending on your model.
Using a non-corrosive descaler here protects your evaporator's nickel plating, which acid-based products gradually strip away with repeated use.
The clean cycle pushes solution through several key components:
- Water inlet valve and float
- Distribution tubes
- Sump and drain lines
Clean the evaporator plate directly
After the cycle completes, apply diluted descaler directly to the evaporator plate using a soft cloth or brush. This surface is one of the most critical parts of how to clean a commercial ice machine correctly, because scale buildup here reduces heat transfer efficiency and strains the entire refrigeration system.
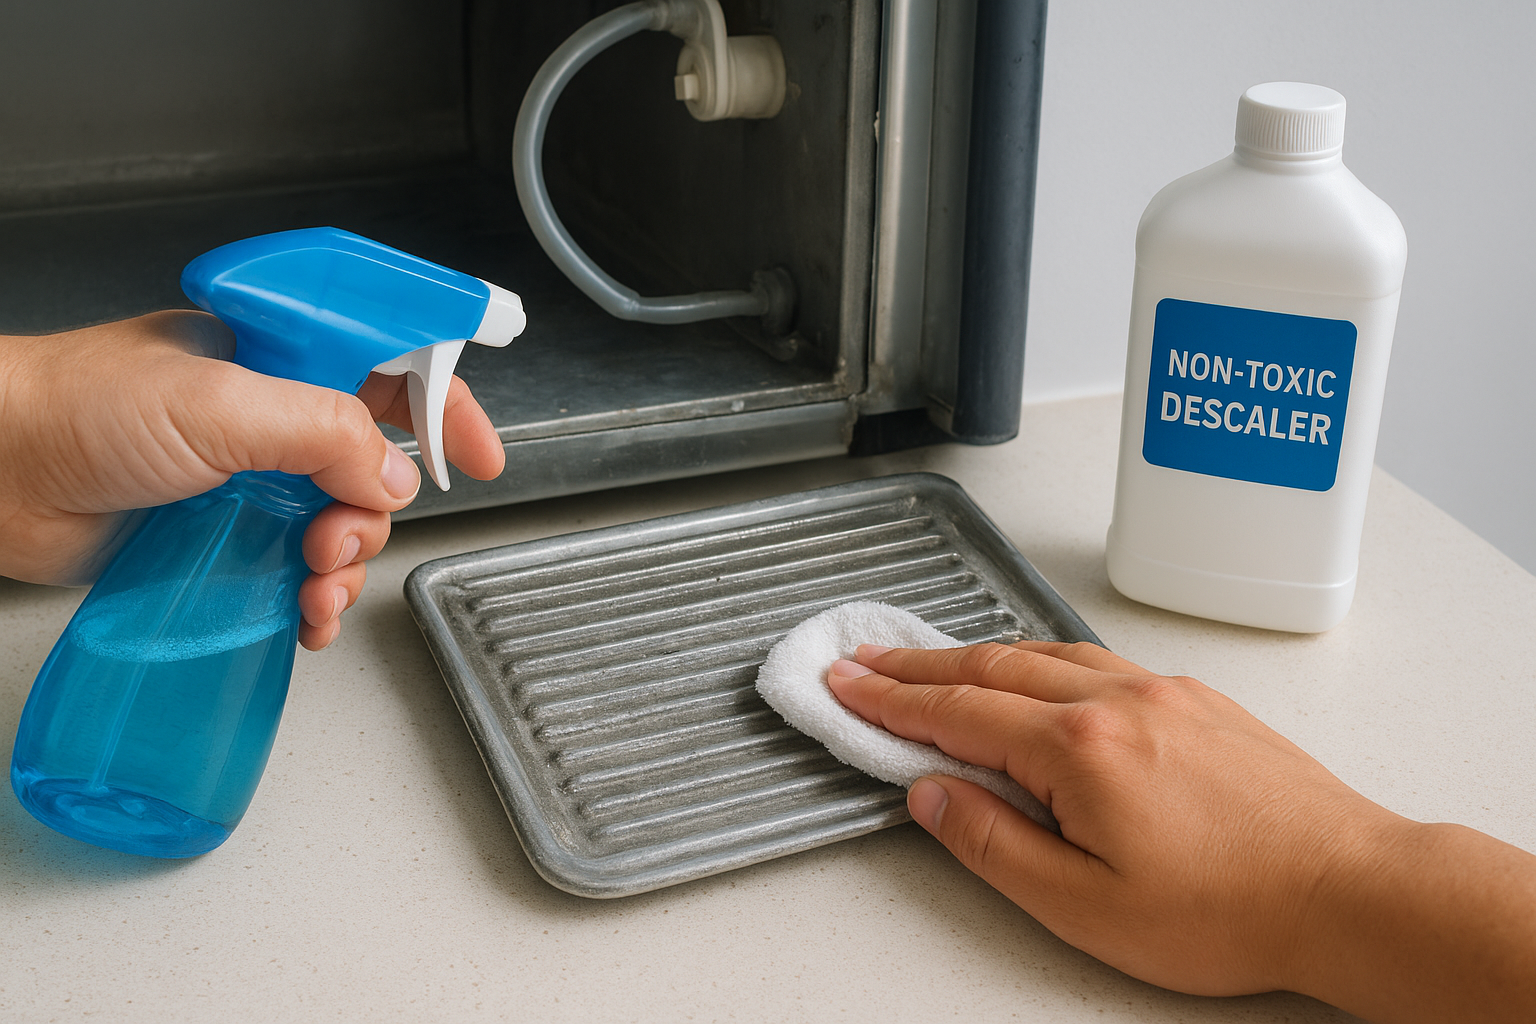
Let the solution dwell for five to ten minutes, then wipe and rinse the plate thoroughly with clean water before you move to sanitizing.
Step 4. Sanitize, rinse, restart, and set a schedule
Descaling removes mineral buildup, but sanitizing kills the bacteria and mold that descalers don't address. This step is what completes how to clean a commercial ice machine correctly, because it closes the gap between a unit that looks clean and one that actually produces safe, uncontaminated ice. Once sanitizing and rinsing are complete, you restart the machine and commit to a regular schedule.
Sanitize and rinse all internal surfaces
Apply your NSF-approved sanitizer to the evaporator, bin walls, and water system components at the correct dilution. Let it dwell for the time listed on the product label, typically two to five minutes, then rinse every surface with clean, potable water until no sanitizer residue remains. Skipping the rinse is a health code violation waiting to happen.
Never skip the final rinse. Sanitizer residue in contact with ice is a direct food safety hazard.
Restart and set your cleaning schedule
Reassemble all components, restore the water supply, and power the machine back on. Discard the first full bin of ice produced after cleaning. Then lock in your cleaning frequency using this simple reference:
| Machine Location | Recommended Cleaning Frequency |
|---|---|
| High-traffic commercial kitchen | Every 30 days |
| Office or lower-use environment | Every 60 to 90 days |
| High-mineral-content water area | Every 30 days minimum |
Keep it clean going forward
Now that you know how to clean a commercial ice machine from start to finish, the key is consistency. A machine you clean on schedule lasts longer, uses less energy, and stays out of trouble during health inspections. Scale and biofilm don't wait for a convenient time to build up, so your cleaning calendar shouldn't wait either. Log each cleaning with the date, the technician, and the products used so you have a record ready when an inspector asks.
Your choice of cleaner matters just as much as your schedule. Acid-based descalers wear down evaporator plating over repeated use, adding repair costs that offset any savings you thought you were getting. A non-toxic, nickel-safe formula protects your equipment while keeping your staff safe and eliminating hazmat handling headaches. If you're ready to make the switch, start with Eco Safeway's food-safe ice machine cleaner and descaler and see the difference a non-corrosive formula makes.