





Data center uptime depends on cooling, and cooling depends on clean coils. But if you've ever pulled a CRAC or CRAH unit apart after a few years of service, you've probably seen the damage that acid-based coil cleaners leave behind: pitted aluminum fins, white corrosion spots, rust streaks, and coils that lose heat transfer efficiency faster than they should. Learning how to clean CRAC and CRAH units without corrosion matters because the wrong cleaner can shorten equipment life just as fast as neglecting maintenance altogether.
This guide walks you through a cleaning process built around non-corrosive coil cleaners instead of the harsh acids and caustic solvents that ship with hazmat placards and eat away at aluminum, copper, and coated fins over time. You'll get a step-by-step coil cleaning process covering pre-cleaning inspection, safe chemical application, rinse procedures, and drying steps that protect coil integrity, preserve heat transfer, and restore airflow efficiency while still cutting through grease, biofilm, and mineral buildup.
We'll also cover why HMIS 0-0-0 rated cleaners matter for facility teams working inside live data center environments, where worker safety and equipment protection carry equal weight. By the end, you'll have a repeatable preventive maintenance routine that keeps your CRAC and CRAH units, along with their evaporator and condenser coils, running at peak efficiency without trading corrosion risk for clean coils.
Why CRAC and CRAH units are prone to corrosion
Computer room air conditioning (CRAC) and computer room air handler (CRAH) units run nonstop, which means their evaporator and condenser coils sit in a constant cycle of condensation, dust accumulation, and temperature swings that leave aluminum fins vulnerable to rust and pitting alike. That combination creates ideal conditions for galvanic and pitting corrosion, especially on the thin aluminum fins that make up most coil surfaces, and any resulting scale or residue chips away at heat exchange and airflow efficiency. Add an acid-based cleaner into that mix, and you're accelerating a process that was already working against the metal.
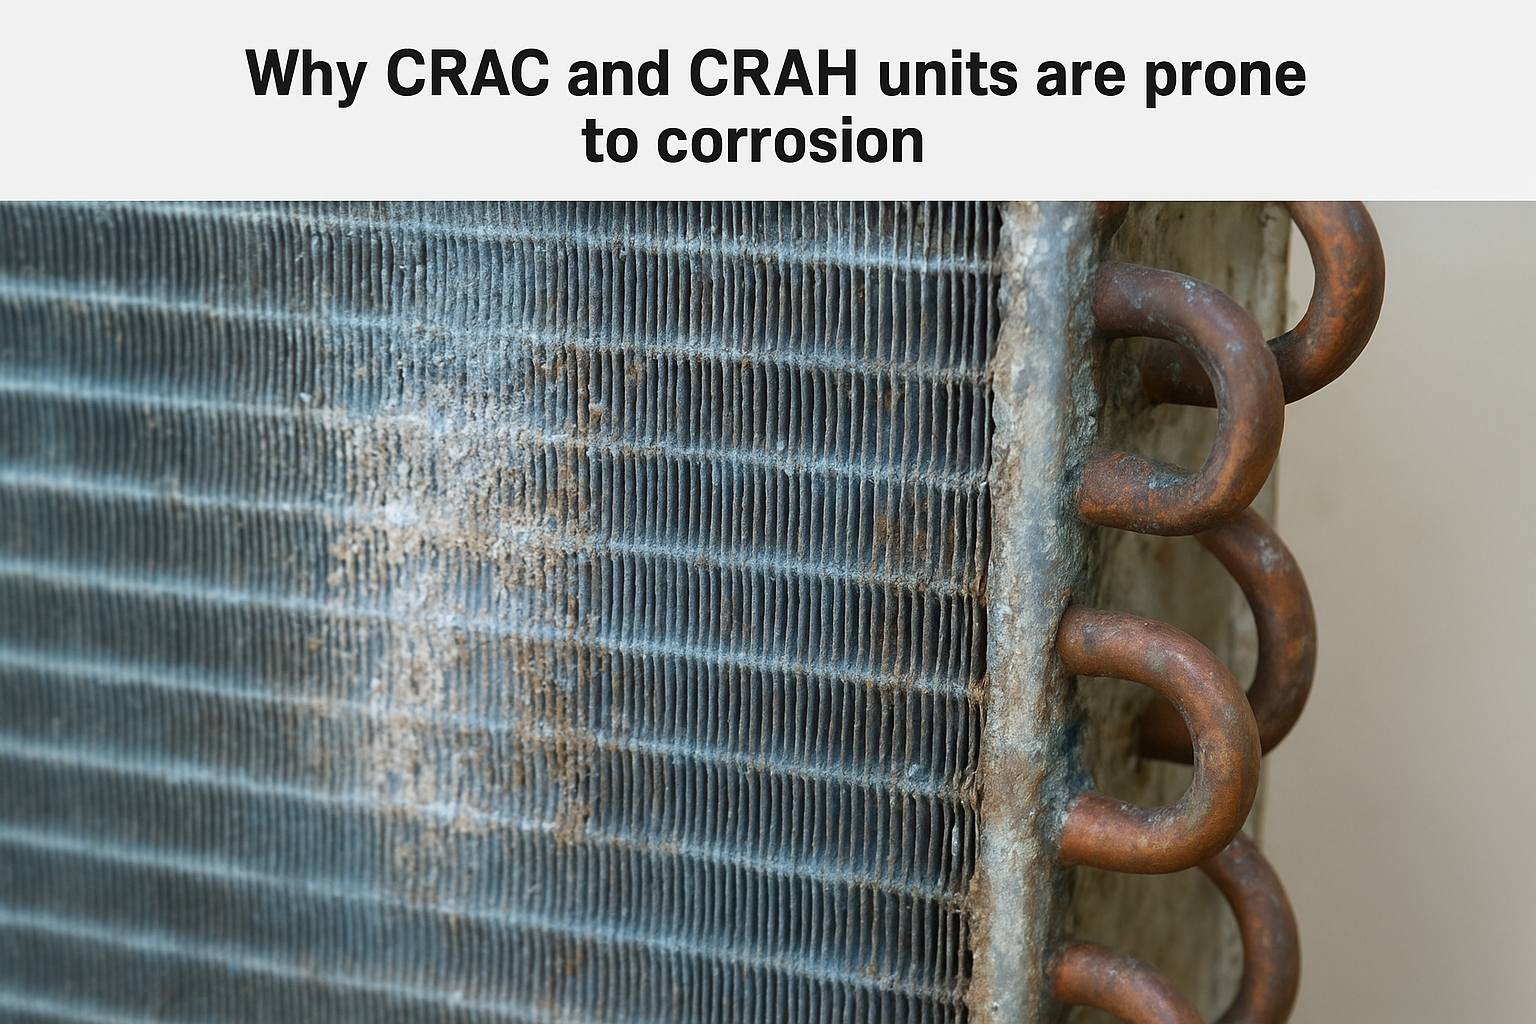
Acid cleaners strip protective oxide layers
Aluminum naturally forms a thin oxide layer that resists corrosion, but most traditional coil cleaners used on commercial HVAC units and everyday AC units alike contain hydrofluoric or hydrochloric acid strong enough to strip that layer away in seconds. Once it's gone, the bare metal reacts with airborne moisture and dissolved minerals, and pitting starts almost immediately. Copper tubing fares a little better, but dissimilar-metal contact between copper and aluminum still sets up galvanic corrosion whenever an aggressive cleaner disturbs the surface chemistry.
Strip the protective oxide layer off aluminum coils, and you're not cleaning the equipment, you're aging it years in a single service call.
Humidity and mineral buildup compound the problem
Data centers run tight humidity control, but condensate still forms on coil surfaces during normal operation, and that moisture carries dissolved minerals from makeup water. Over time, those minerals deposit as scale, and scale traps moisture against the metal longer than a dry surface would. Facilities in regions with hard water see this compounding effect faster, which is exactly why choosing a non-corrosive coil cleaner upfront matters more than reacting to damage later.
| Coil material | Common corrosion risk | Trigger |
|---|---|---|
| Aluminum fins | Pitting, white oxide spots | Acid cleaners, stripped oxide layer |
| Copper tubing | Galvanic corrosion | Dissimilar-metal contact, moisture |
| Coated coils | Coating breakdown | Solvent-based cleaners |
Step 1. Power down and prepare the unit
Before you touch a single coil, cut power to the CRAC or CRAH unit at the disconnect and confirm lockout with a meter, not just a glance at the control panel. Data center facility teams often run redundant cooling paths, so verify with your building management system that shutting down this unit won't push another one past its capacity while you work. Powering down safely also protects the fan motors and electronics from accidental moisture exposure once you start applying cleaner.
Once the unit is de-energized, pull the access panels and set them aside where they won't get scratched or lost. Check your maintenance log for the last service date and note any prior corrosion issues on the coil face, since that history tells you whether you're dealing with routine dust or a coil that's already compromised. Lay down absorbent pads or a drop cloth under the unit if it sits on a raised floor, because even non-corrosive coil cleaner can seep into cable trays below and cause headaches later. Gather your PPE and tools now instead of mid-job.
Pre-clean checklist:
- Lockout/tagout confirmed
- Redundant cooling verified
- Access panels removed
- Drop cloth or floor pads placed
- Gloves, eye protection, sprayer ready
Step 2. Clear debris and dust from coils and cabinet
Dust acts like insulation on a coil face, blocking airflow and forcing the unit to work harder before you even apply cleaner. Start with a soft-bristle brush or a vacuum fitted with a brush attachment, working in the direction of the fins rather than across them. Bent fins restrict airflow just as much as dust does, so patience here saves you a repair job later; keep a fin comb on hand to straighten any fins you do bend.
Vacuum before you spray anything wet
Skipping this step turns loose dust into mud once cleaner hits the coil, and that mud is harder to rinse out than dry debris ever was. Run a HEPA-filtered vacuum across the coil face, the cabinet interior, and the drain pan before any liquid touches the unit.
Vacuum first, spray second. Wet dust turns into sludge that clogs drain pans and hides new corrosion until it's too late.
Check the cabinet for accumulated grime
Besides the coil, look at the blower housing, condensate pan, and cabinet walls. Grease and biofilm build up in corners fans don't reach, and that buildup feeds bacteria and odor problems down the line. Wipe accessible metal surfaces with a dry cloth before moving to Step 3.
Step 3. Apply a non-corrosive coil cleaner
With the coil dry and dust-free, mix or load your non-corrosive coil cleaner according to the label, using a low-pressure pump sprayer rather than a hose-end sprayer that can push liquid past the coil into electronics. Look for a formula rated HMIS 0-0-0, which tells you the product carries no health, flammability, or physical hazard rating and won't damage aluminum fins or copper tubing on evaporator or condenser coils alike the way acid-based cleaners do; many non-corrosive formulas also include a mild biocide and descaling agent to control biofilm and mineral scale in one pass.
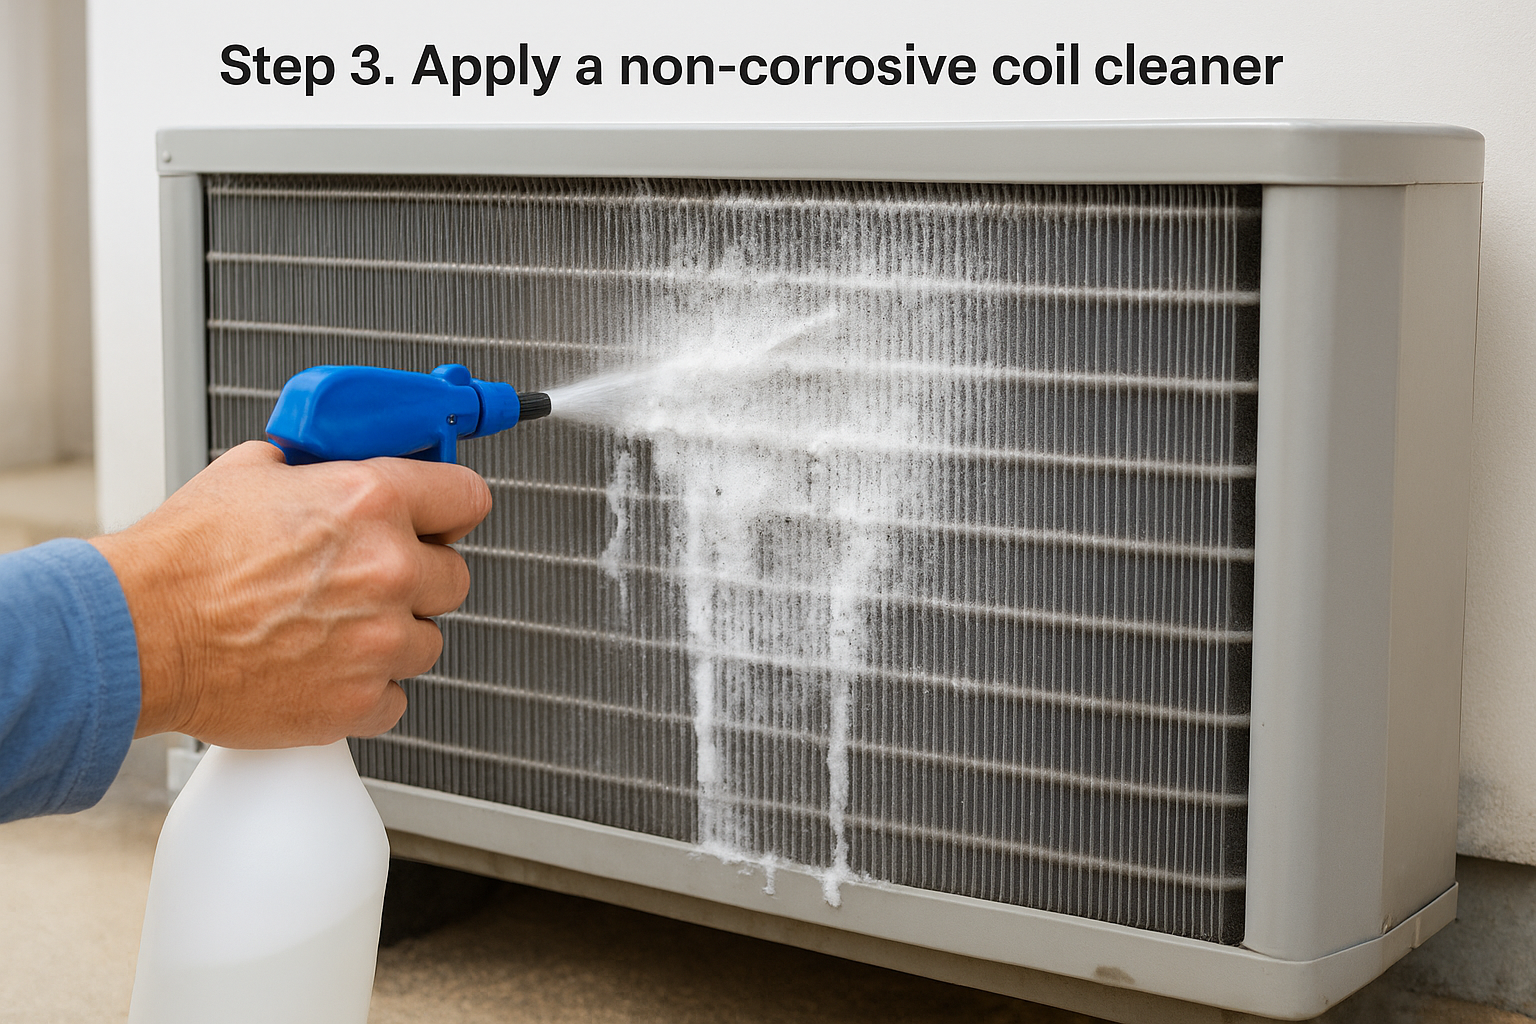
A cleaner that's tough on grease but gentle on metal isn't a compromise, it's the whole point of choosing a non-corrosive formula.
Coat evenly, then let it work
Spray from top to bottom so the cleaner flows with gravity through the fin channels instead of pooling unevenly. Cover the full coil face, then step back and give the product its full dwell time, usually 5 to 10 minutes depending on the formula, so enzymes and surfactants can break down grease and biofilm without you scrubbing or adding mechanical stress to the fins.
Skip the acid brushes and wire tools
Resist the urge to speed things up with a wire brush or an acid-dip pad. Both strip protective coatings and scratch soft aluminum, undoing the corrosion protection you just built in.
Step 4. Rinse, inspect, and clean drain components
After the dwell time passes, rinse the coil with low-pressure water, working top to bottom again so loosened grease and biofilm flow down into the drain pan instead of re-depositing on the fins. Skip high-pressure rinsing here, since forceful water can bend fins just as easily as rough brushing does. Rinse thoroughly until runoff comes out clear, not cloudy or discolored.
Inspect the coil face before closing up
With the coil clean and wet, this is your best chance for an HVAC technician to spot early pitting, coating breakdown, or bent fins missed earlier. Run your fingers gently along a few fin rows and look for white residue, which usually signals leftover mineral scale rather than new corrosion.
A five-minute inspection after rinsing catches problems while they're still cheap to fix, not after they've spread across the whole coil.
Don't skip the drain pan and line
Condensate drain pans collect the same grease and biofilm that build up on coils, and clogged lines cause overflow long before anyone notices reduced cooling. Flush the drain line and pan with the same non-corrosive cleaner, then clear any standing water before reassembling panels and restoring power.
Keeping your cooling units corrosion-free
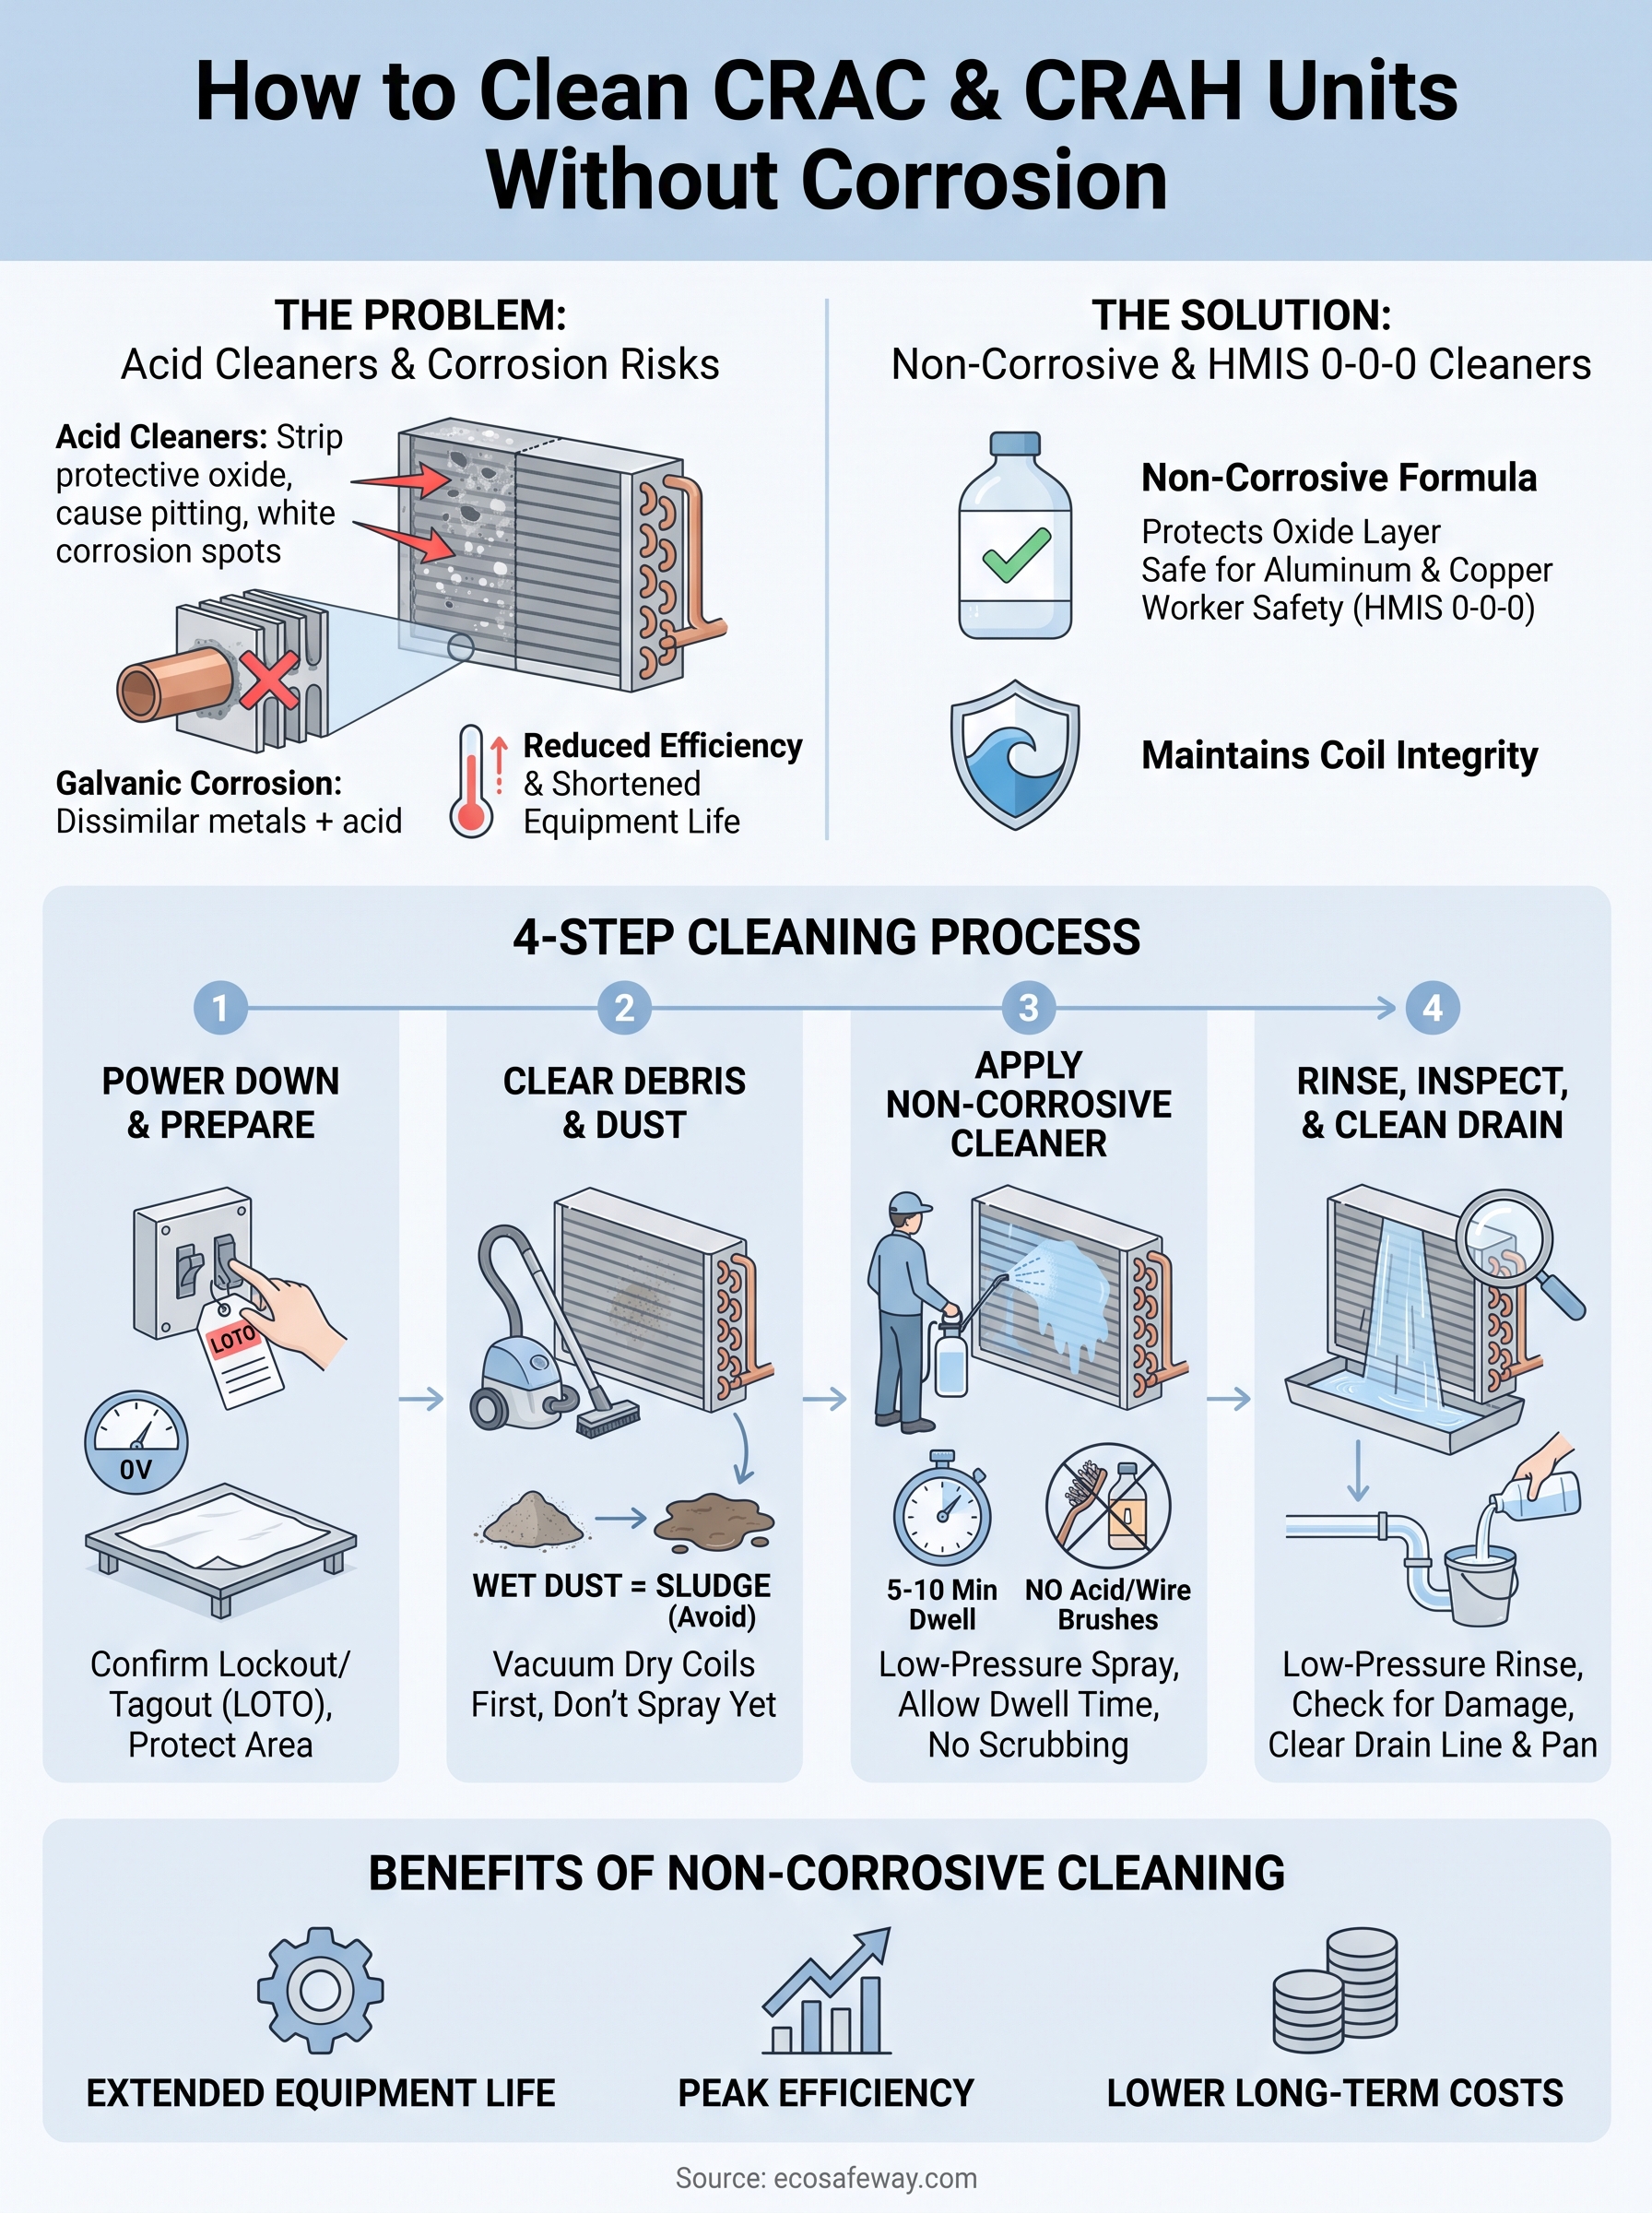
Corrosion isn't an inevitable cost of running CRAC and CRAH units around the clock. It's usually the result of reaching for a cleaner that trades short-term speed for long-term coil damage. Sticking to a repeatable process, powering down safely, clearing debris before any liquid touches the coil, applying a non-corrosive formula, and rinsing thoroughly, protects your aluminum fins and copper tubing while still delivering the clean, high-airflow coils your cooling capacity depends on.
Make this coil cleaning routine part of your regular preventive maintenance schedule rather than a reaction to rising discharge temperatures. Non-corrosive coil cleaners cost a little more upfront than acid-based products, but they save you the far higher cost of premature coil replacement and unplanned downtime in a facility where every degree of cooling margin matters. If you're ready to build this process into your next service cycle, check out Eco Safeway's data center HVAC cleaner and coil descaler, formulated specifically to clean CRAC and CRAH coils without corroding them.


