

A dirty evaporator coil doesn't announce itself with a warning light. It shows up as higher energy bills, rooms that won't cool properly, and an AC system grinding harder than it should. Learning how to clean an evaporator coil is one of the most effective ways to keep your HVAC system running efficiently, and it's a task most people can handle without calling a technician.
The catch? Many common coil cleaners rely on harsh acids or corrosive chemicals that eat away at aluminum fins, create toxic fumes, and introduce safety risks you shouldn't have to deal with. At Eco Safeway, we manufacture HMIS 0-0-0 rated coil cleaners that deliver professional-grade results without damaging your equipment or exposing you to hazardous substances.
This guide walks you through the full process, from accessing your evaporator coil to choosing the right cleaning method and solution. Whether you're a facility manager maintaining commercial units or a homeowner tackling routine AC maintenance, you'll find clear, practical steps to get the job done safely and effectively.
Before you start: safety and supplies
Rushing into coil cleaning without preparation is how you damage equipment or hurt yourself. Evaporator coils sit inside an air handler cabinet, which means you're working near electrical components, razor-sharp aluminum fins, and potentially moldy debris. Taking five minutes to gather the right supplies and follow basic safety steps will make the whole process faster, cleaner, and less likely to result in a service call.
Safety precautions
Before you open any access panel, shut off power to the HVAC unit at the circuit breaker, not just at the thermostat. The thermostat only stops the call for cooling. It does not cut electrical power to the unit itself. Give the system at least 30 minutes to cool down before you start. Coil fins are sharp enough to cut through skin easily, so wear cut-resistant gloves for the entire job. If there's visible mold or heavy debris buildup, add a dust mask or N95 respirator. Avoid acid-based coil cleaners in enclosed spaces since they release fumes that irritate airways and can corrode surrounding metal over time.
Choosing a non-toxic, HMIS 0-0-0 rated coil cleaner eliminates fume risk entirely, so you don't need respiratory protection just to clean a coil.
Supplies checklist
Having everything within reach before you start keeps the job from stalling halfway through. Here is what you need:
- Screwdriver set (flathead and Phillips for panel removal)
- Soft-bristle brush or fin comb for dry debris removal
- Wet/dry vacuum with a soft brush attachment
- Pump sprayer or spray bottle for applying cleaner
- Non-toxic coil cleaner (HMIS 0-0-0 rated, no-rinse or self-rinsing formula preferred)
- Clean rags or microfiber cloths
- Cut-resistant gloves
- Flashlight or portable work light for visibility inside the cabinet
Keep a drain pan or absorbent towels positioned under the coil area before you apply any liquid. Drips are guaranteed, and catching them early prevents water damage to surrounding components.
Step 1. Inspect and access the evaporator coil
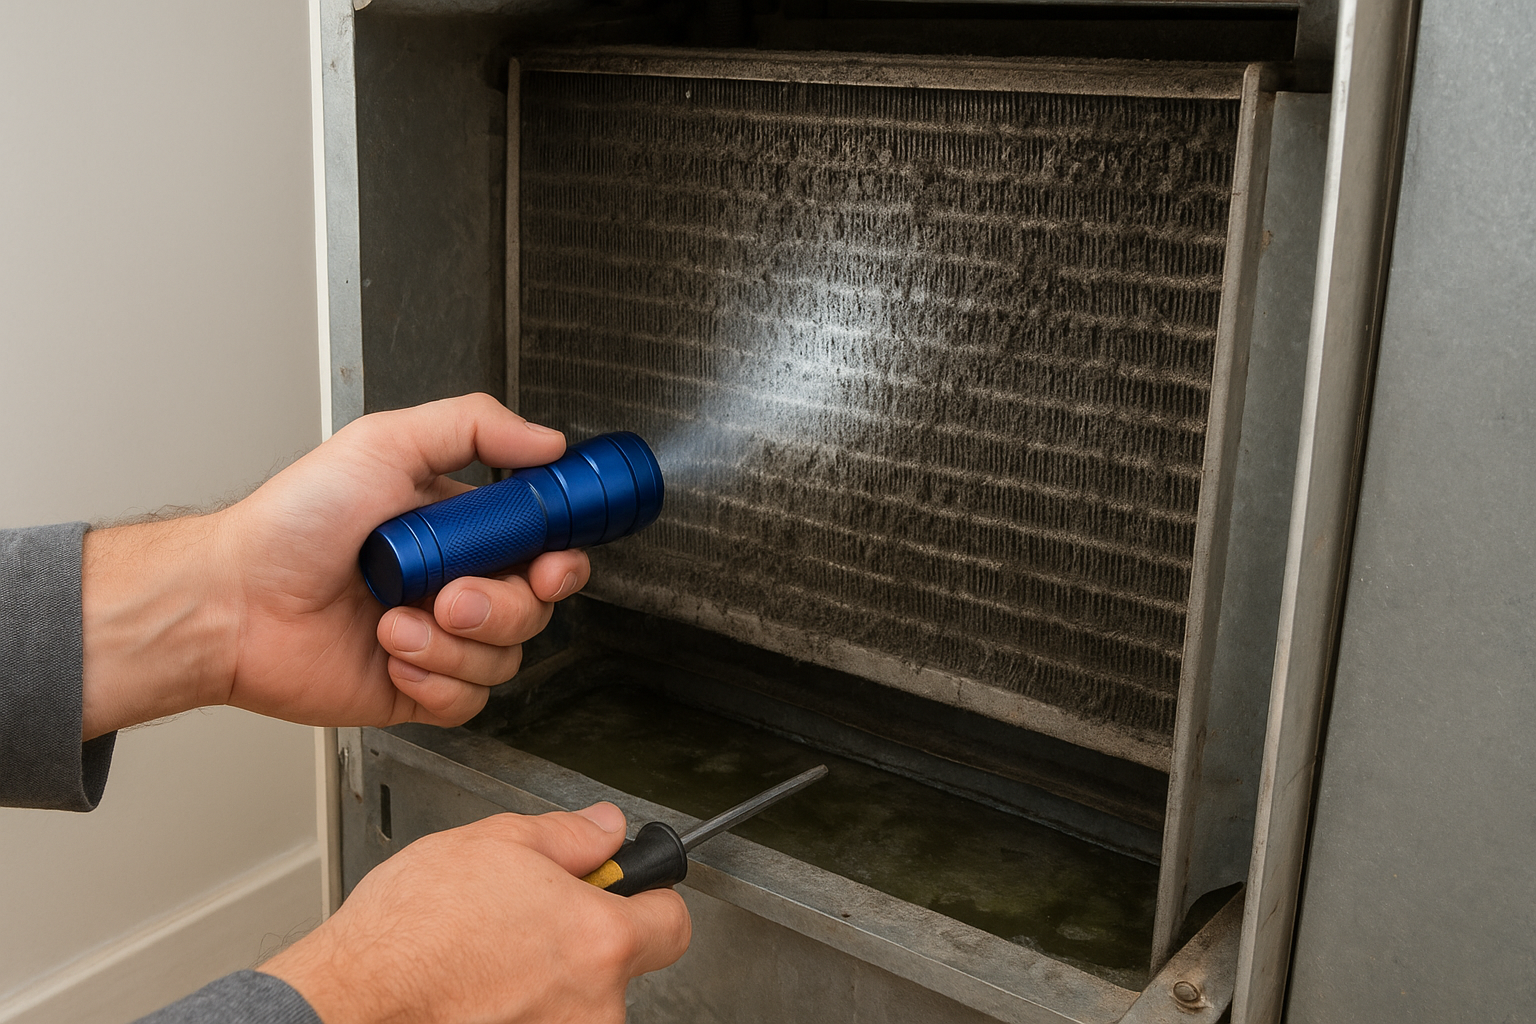
Before you apply any cleaner, you need to locate your evaporator coil and get a clear view of its condition. Most residential and light commercial air handlers have the evaporator coil sitting above or below the blower compartment, typically enclosed behind a metal access panel. With the power off at the breaker, use your screwdriver to remove the panel screws and set the panel aside carefully.
What to look for during inspection
Once the panel is off, shine your flashlight directly at the coil surface. Heavy dust accumulation, visible mold growth, or bent fins all signal that the coil needs attention before you work through how to clean an evaporator coil step by step. Bent fins restrict airflow and reduce cooling efficiency even after cleaning, so use a fin comb to straighten them before you apply any liquid.
If you spot significant mold or ice buildup, let the coil thaw completely and dry before moving forward. Cleaning a frozen coil damages the fins and wastes your cleaner.
Check the condensate drain pan sitting below the coil while you are in there. A pan full of standing water or slime indicates a partially blocked drain line, which you should clear before you proceed to the next step.
Step 2. Dry clean dust and debris
Dry cleaning comes first because applying liquid cleaner to a heavily dusty coil pushes debris deeper into the fins rather than removing it. Starting dry ensures your wet cleaning step actually reaches the coil surface and works efficiently.
Vacuum the coil surface
Attach the soft brush attachment to your wet/dry vacuum and run it lightly across the coil fins in a top-to-bottom direction, following the fin orientation. Never push the nozzle sideways across fins; that bends them. Work slowly so the vacuum draws out dust rather than redistributing it. Pay extra attention to lower sections of the coil where debris accumulates as return air pulls in particulates over time.
Keeping your vacuum strokes aligned with the fin direction is the single best way to avoid accidental fin damage during this stage of how to clean an evaporator coil.
Brush out stubborn buildup
Some matted dust or debris won't release with vacuuming alone. Use a soft-bristle coil brush to gently loosen those areas before running the vacuum over them a second time.
Brush in short, straight strokes parallel to the fins. Avoid circular scrubbing motions, which compact debris further into the coil and bend the aluminum fins rather than pulling buildup out.
Step 3. Wet clean and rinse the coil
With dust and debris removed, you're ready for the wet cleaning phase, which handles biological growth, grease, and mineral deposits that a vacuum can't reach. This step is the core of how to clean an evaporator coil effectively, and the cleaner you choose makes a significant difference in both results and safety.
Apply the coil cleaner
Load your pump sprayer with a non-toxic, HMIS 0-0-0 rated coil cleaner and apply it evenly across the entire coil surface. Work from top to bottom, holding the nozzle 6 to 8 inches from the fins to avoid bending them with spray pressure. Cover the entire coil face, including edges and any recessed sections.
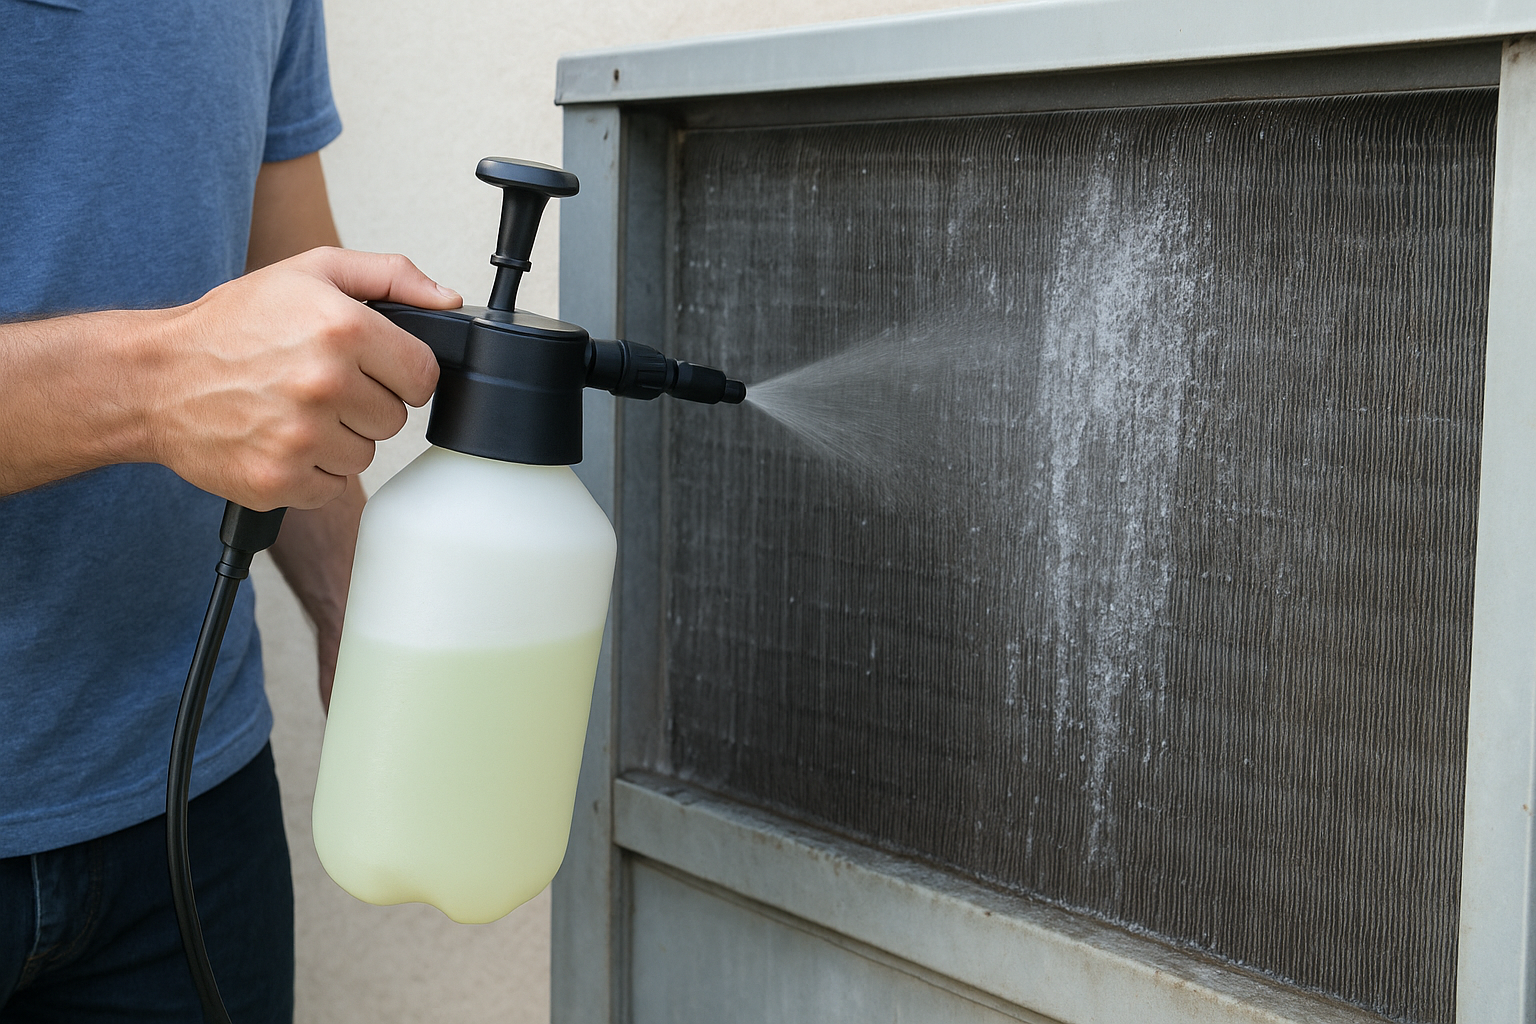
A self-rinsing or no-rinse formula simplifies cleanup significantly since condensate draining off the coil during normal operation flushes the cleaner away without extra effort from you.
Let the cleaner work and rinse
Allow the cleaner to dwell on the coil surface for 5 to 10 minutes so it can fully break down buildup and residue. For heavily soiled coils, a second application after the first dwell period produces noticeably better results.
After the dwell time, rinse the coil gently with low-pressure water from a spray bottle or garden sprayer set to a light stream. Always spray in the same direction as the fins to avoid bending them during rinsing.
Step 4. Finish up and prevent future buildup
Once rinsing is complete, give the coil 5 to 10 minutes to air dry before you close the access panel. Reassembling while the coil is still wet traps moisture inside the cabinet, which encourages mold growth and undoes the cleaning work you just completed. Check the condensate drain line one more time to confirm water flows freely through it before you move on.
Reassemble and restore power
Replace the access panel and all screws firmly before restoring power at the breaker. Turn your thermostat to a cooling setting and let the system run for 10 to 15 minutes. Listen for any unusual sounds and confirm that cool air is reaching your vents. A properly cleaned coil will drop supply air temperature noticeably compared to before the service.
Build a maintenance schedule
Knowing how to clean an evaporator coil is only useful if you do it consistently. Most residential units benefit from a full coil cleaning once per year, typically before cooling season starts. Commercial and high-use systems need attention more frequently to maintain performance and avoid buildup between service visits.
| System Type | Recommended Cleaning Frequency |
|---|---|
| Residential central AC | Once per year |
| Light commercial unit | Every 6 months |
| Heavy commercial or industrial | Every 3 months |
Sticking to a regular cleaning schedule can reduce energy consumption by up to 15% and extends equipment lifespan significantly.

Clean coils, better cooling
Following this process for how to clean an evaporator coil puts you back in control of your system's performance. A clean coil transfers heat more efficiently, reduces the workload on your compressor, and delivers the cooling output you're paying for. Skipping or delaying coil maintenance is one of the fastest ways to accumulate unnecessary repair costs and watch energy bills climb without any change in comfort.
The cleaning method you use matters just as much as how often you do it. Acid-based and corrosive cleaners damage aluminum fins over time, shorten equipment lifespan, and create safety risks during application. Choosing a non-toxic, biodegradable formula protects both your coil and the people working near it.
If you're maintaining commercial HVAC equipment and want a cleaner that works without the hazmat handling, check out Eco Safeway's commercial HVAC coil cleaning solution for a professional-grade, equipment-safe option built for regular use.