





You crank the engine and the raw water flow looks weak, temps creep up, and you already suspect the culprit: barnacles and scale clogging the cooling passages. Most guides on how to remove barnacles from engine cooling system without acid jump straight to muriatic acid or hydrochloric blends, which eat through impellers, gaskets, and heat exchanger metals just as fast as they eat scale. That's a real risk to your engine, not just an inconvenience.
There's a better path. Enzyme and mineral-dissolving flush treatments break down calcium deposits and barnacle growth through chemistry that targets the buildup, not your metal components. These formulas circulate through the raw water system, soften the scale, and let you flush it out without corrosion, fumes, or hazmat handling on your dock.
This guide walks through the actual step-by-step flushing process, what signs tell you it's time to descale, and which non-acid products get results comparable to traditional acid treatments. You'll also learn how to protect impellers and heat exchangers long term, so barnacle buildup stops being a recurring repair bill every season.
Why avoid acid when descaling your cooling system
Acid works fast on scale, and that's exactly why so many boat owners reach for it first. But muriatic acid and hydrochloric blends don't stop at calcium deposits. Once that acid hits your raw water passages, it keeps reacting with bronze impellers, aluminum housings, rubber gaskets, and heat exchanger cores. You trade one problem for another: clean tubes today, pitted metal and leaking seals six months from now.
What acid does to your engine components
Corrosive descalers etch metal surfaces at the microscopic level, even in diluted form. That etching weakens impeller vanes, accelerates zinc anode consumption, and can eat through thin-walled heat exchanger tubes long before you'd expect a replacement. Gasket material softens and swells on contact with strong acids, which means you're often looking at a full re-seal job on top of the descaling work you set out to do.
A descaler that dissolves scale but also weakens your impeller and heat exchanger hasn't solved your problem, it's just delayed a more expensive one.
Handling, shipping, and compliance headaches
Beyond the metal damage, acid-based products carry real handling risk. Muriatic acid needs gloves, eye protection, and ventilation just to use safely on a dock or in a marina slip. Shipping it means hazmat fees and restrictions, and disposal often requires neutralization before it can go down a drain legally. Non-toxic descaler formulas built on enzymes and mineral-chelating chemistry skip all of that. Products carrying an HMIS 0-0-0 rating, like the ones Eco Safeway formulates, ship without hazmat surcharges and store safely aboard without special containment.
| Factor | Acid-Based Descaler | Non-Acid Enzyme Flush |
|---|---|---|
| Metal corrosion risk | High | None |
| PPE required | Gloves, goggles, ventilation | Not required |
| Hazmat shipping | Yes | No |
| Disposal | Neutralization needed | Biodegradable |
| Gasket/seal damage | Common | None |
For a boat owner trying to protect an investment, not just clear a clog, that difference matters more than a slightly faster reaction time.
Step 1. Gather your non-acid flushing supplies
Before you touch a hose, get your supplies staged so the flush goes in one continuous session instead of three trips back to the marine store. The centerpiece is a non-corrosive marine descaler formulated for barnacle and scale removal, like Eco Safeway's eco-friendly marine descaler and Barnacle Buster alternative, which handles calcium buildup and organic growth without the fumes or PPE an acid product demands. Skip anything labeled muriatic or hydrochloric, no matter how fast the label promises results.
The right supplies turn a messy acid job into a clean, repeatable maintenance task you can do dockside in an afternoon.
Here's what you need on hand before you start:
- Non-acid descaler concentrate (enough for your engine's raw water volume, check the label ratio)
- A 5-gallon bucket or flush tank with a lid
- A short section of flexible hose that fits your raw water intake
- Hose clamps to seal connections during recirculation
- A small submersible or hand pump if your setup doesn't rely on the engine's own impeller to circulate
- Freshwater source for the final rinse
- A flashlight and mirror for inspecting the heat exchanger inlet afterward
Quality matters here more than quantity. Grabbing a jug of dish soap or a generic all-purpose cleaner won't touch mineral scale, and you'll waste a flush cycle finding that out. Stick with a descaler engineered specifically for cooling system deposits, and confirm the concentrate ratio for your engine size before you mix anything.
Step 2. Set up a closed-loop recirculation flush
Disconnect the raw water intake hose right after the seacock and cap or clamp off the seacock itself so no water enters from outside while you work. Route the loose end of that hose into your bucket of mixed descaler solution, then run a second hose from the exhaust side of the raw water pump, or from the heat exchanger outlet, back into the same bucket. This creates a closed-loop recirculation system that keeps the descaler contained and moving through the exact passages where barnacles and scale have built up.
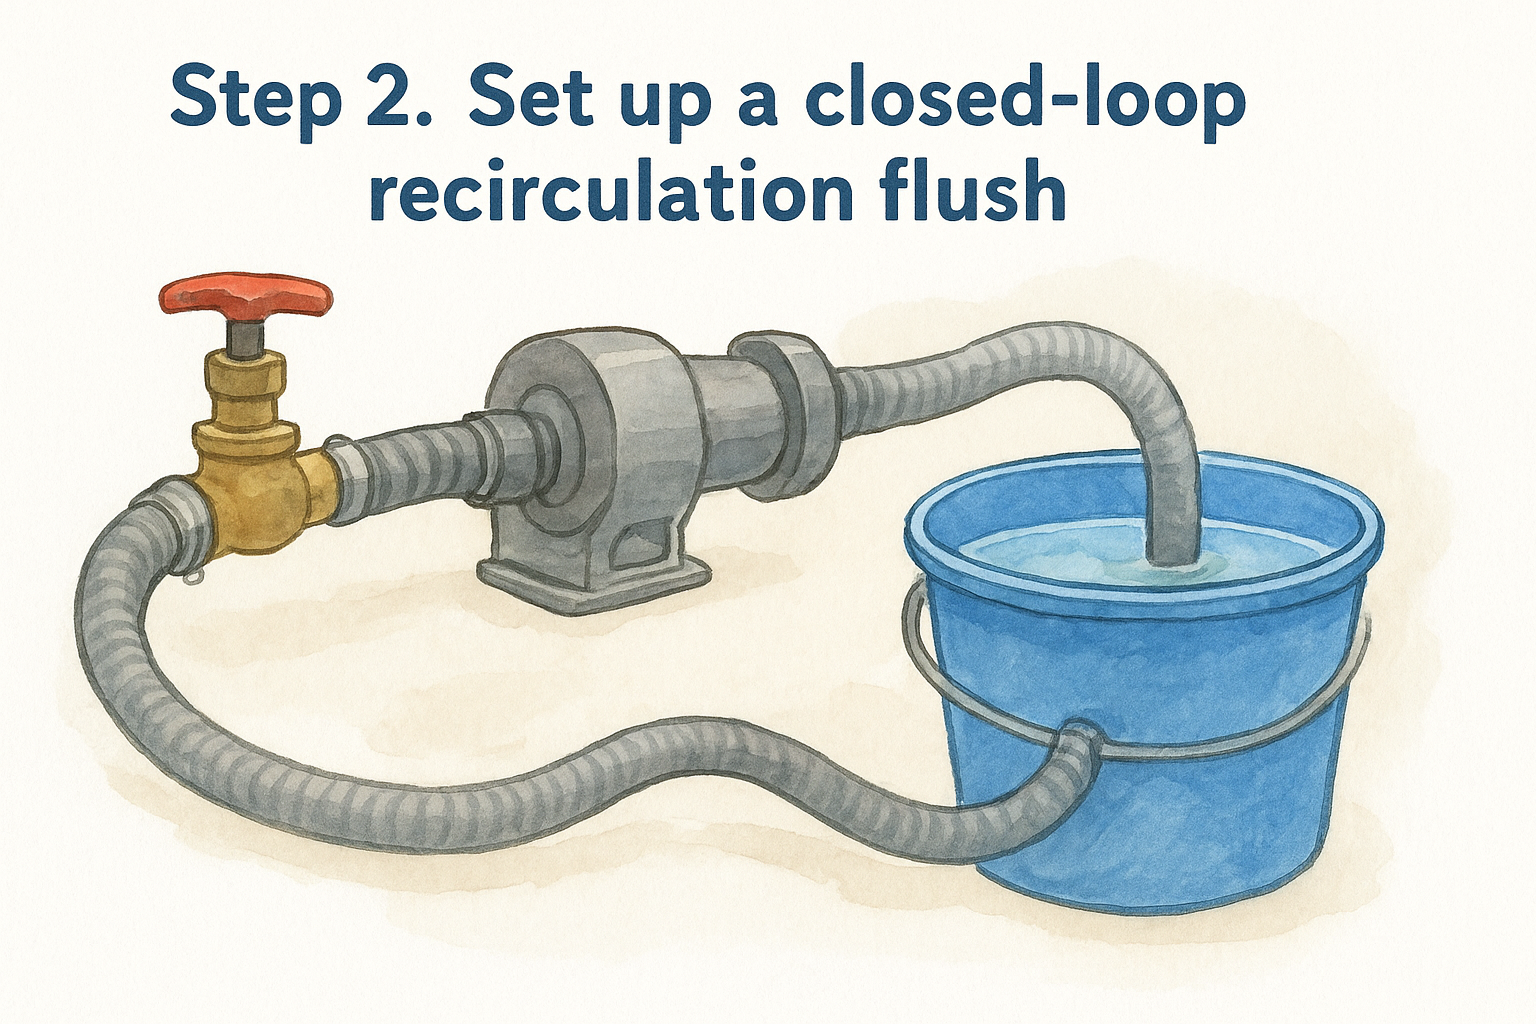
Closing the loop means the descaler works on your cooling passages instead of draining straight into the harbor.
Here's the setup sequence to follow:
- Shut the seacock and disconnect the intake hose downstream of it.
- Submerge that hose end in the bucket holding your mixed descaler.
- Run a return hose from the discharge point back into the same bucket.
- Secure every connection with hose clamps so nothing pops loose under pump pressure.
- Confirm the bucket holds enough solution to keep both hose ends submerged throughout the cycle.
Double-check clamp tightness before you start the engine or auxiliary pump. A loose fitting means descaler spraying across your engine bay instead of circulating through the cooling passages, and it means starting the whole setup over.
Step 3. Circulate the descaler to dissolve barnacles and scale
Start the engine at idle, or run your auxiliary pump if you're not relying on the engine's own impeller, and let the mixed solution begin moving through the closed loop. Keep the RPMs low. You're not trying to push water fast, you're giving the enzyme and mineral-dissolving chemistry time to break down calcium deposits and loosen barnacle shells stuck to the tube walls. Watch your temperature gauge the entire time, and shut everything down immediately if it climbs, since a fully clogged passage can still overheat a pump running dry in spots.
Circulation time depends on how bad the buildup is, and guessing wrong wastes solution or leaves scale behind. Use this as a starting reference:
- Light scale, recent buildup: 30 minutes
- Moderate barnacle and mineral buildup: 45 to 60 minutes
- Heavy, years-old buildup: 90 minutes, with a fresh batch of solution halfway through
The descaler isn't done working until the solution itself looks cloudy with dissolved mineral and organic debris, not just when the timer runs out.
Check the bucket periodically. Discoloration, floating debris, and a chalky texture in the solution all tell you the descaler concentrate is actively pulling scale off the passage walls. If the liquid stays perfectly clear after 30 minutes, your engine likely didn't need descaling as urgently as you thought, or your mix ratio was too weak for the job.
Step 4. Flush the system and inspect water flow
Once circulation time is up, shut the engine down and disconnect your closed-loop hoses. Reconnect the raw water intake to the seacock the way it came, open the seacock, and run the engine at idle with a freshwater rinse, ideally with a salt remover for marine systems, flowing through the same passages you just treated. This clears out dissolved scale, loosened barnacle debris, and any remaining descaler concentrate before it has a chance to sit and recrystallize somewhere downstream.
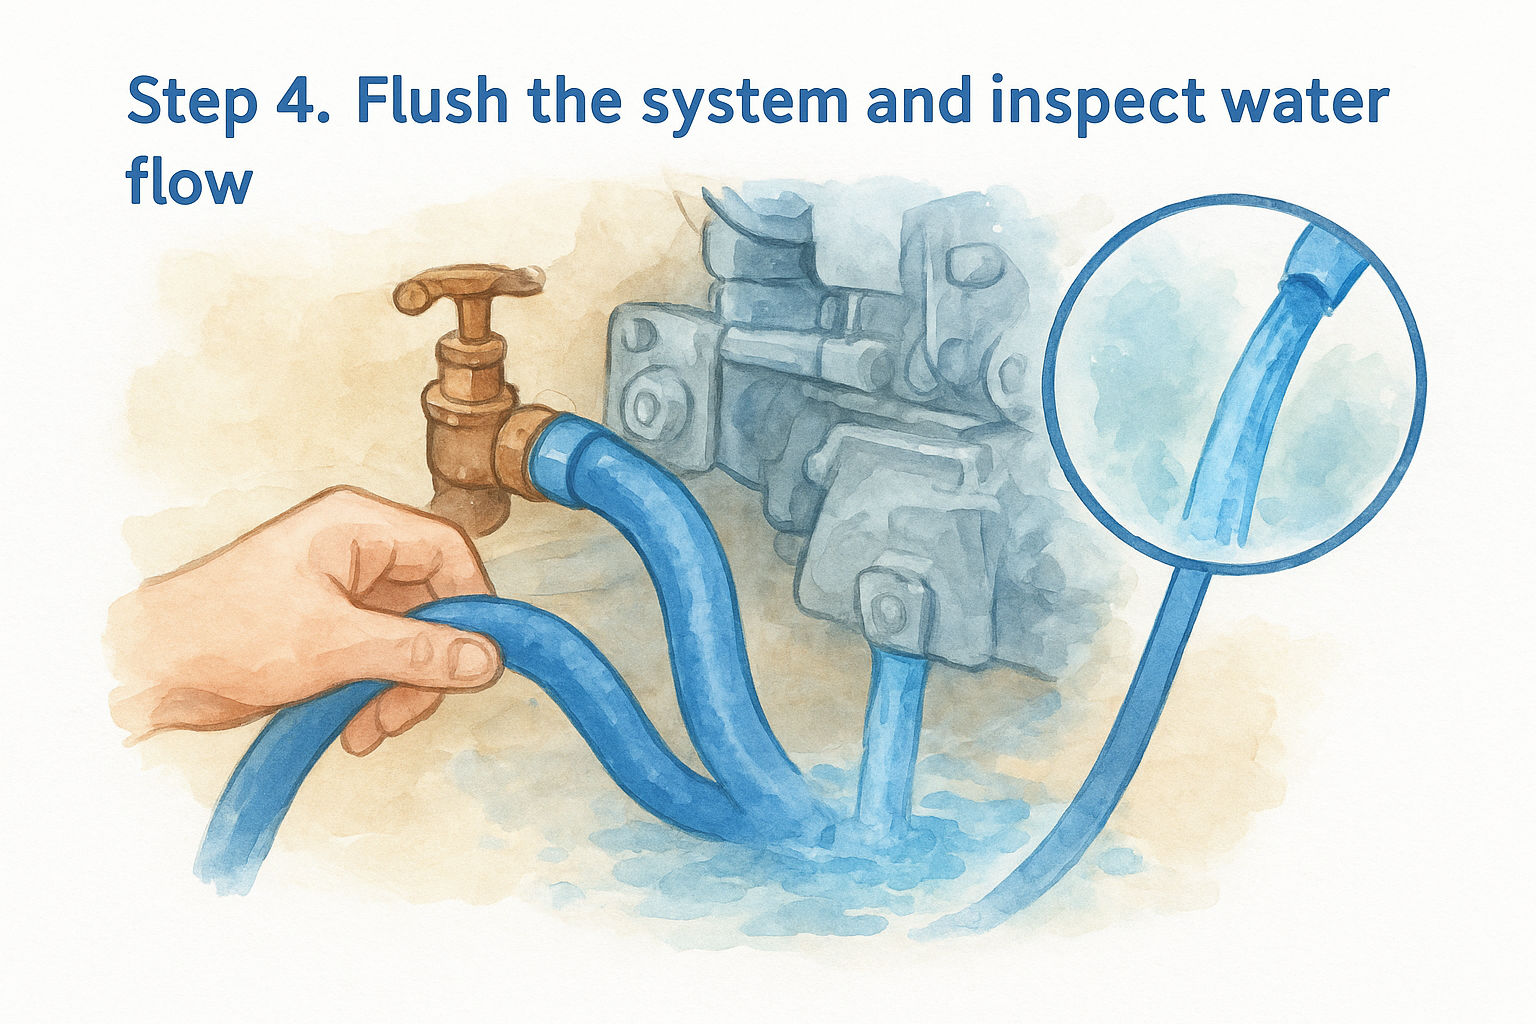
Watch the raw water discharge closely
Check the exhaust or raw water discharge port for a strong, steady stream. That flow rate tells you more than any gauge on the dash. A weak trickle after a full flush cycle usually means a stubborn clog remains further down the line, past where the descaler could effectively reach.
If the discharge stream looks thin after flushing, don't run the engine hard, run the flush again instead.
Inspect what the descaler pulled loose
Use your flashlight and mirror to look into the raw water intake and heat exchanger inlet. You're checking for leftover shell fragments or a chalky film that didn't fully dissolve.
- Strong, consistent discharge stream: system is clear, safe to run under load
- Weak or intermittent stream: repeat Step 3 with fresh solution
- Visible fragments at the inlet: manually clear debris before restarting
This inspection step catches problems while you still have your tools out, not after you're already back out on the water with rising temps.
Step 5. Prevent future barnacle and scale buildup
Clearing the clog once only buys you a season if you skip the maintenance habits that keep barnacles from colonizing your raw water passages again. Preventive flushing on a set schedule, rather than waiting for temps to spike, is the difference between a five-minute dockside routine and another full descaling job next year. Run a diluted maintenance dose of your non-acid descaler through the system every 60 to 90 days in warm water regions, and every season change in cooler climates.
Prevention costs you fifteen minutes a month. A neglected cooling system costs you an overheated engine at the worst possible moment.
Build a maintenance schedule you'll actually follow
Most boat owners skip prevention because it feels optional until the engine overheats. Treat it like an oil change instead, something scheduled, not something reactive.
- Monthly in tropical or subtropical waters: quick flush with diluted descaler
- Quarterly in temperate climates: full circulation cycle
- Before winterizing: complete flush and inspection
- After extended dock time: check intake screens for barnacle attachment before they migrate downstream
Protect the intake before growth starts
Organic growth usually starts at the seacock strainer and raw water intake before it ever reaches your heat exchanger. Keeping that strainer clean and treating the intake area with the same non-corrosive marine descaler you used for the flush stops barnacles from ever establishing a foothold deep in the cooling passages, saving you from repeating Steps 1 through 4 every few months.
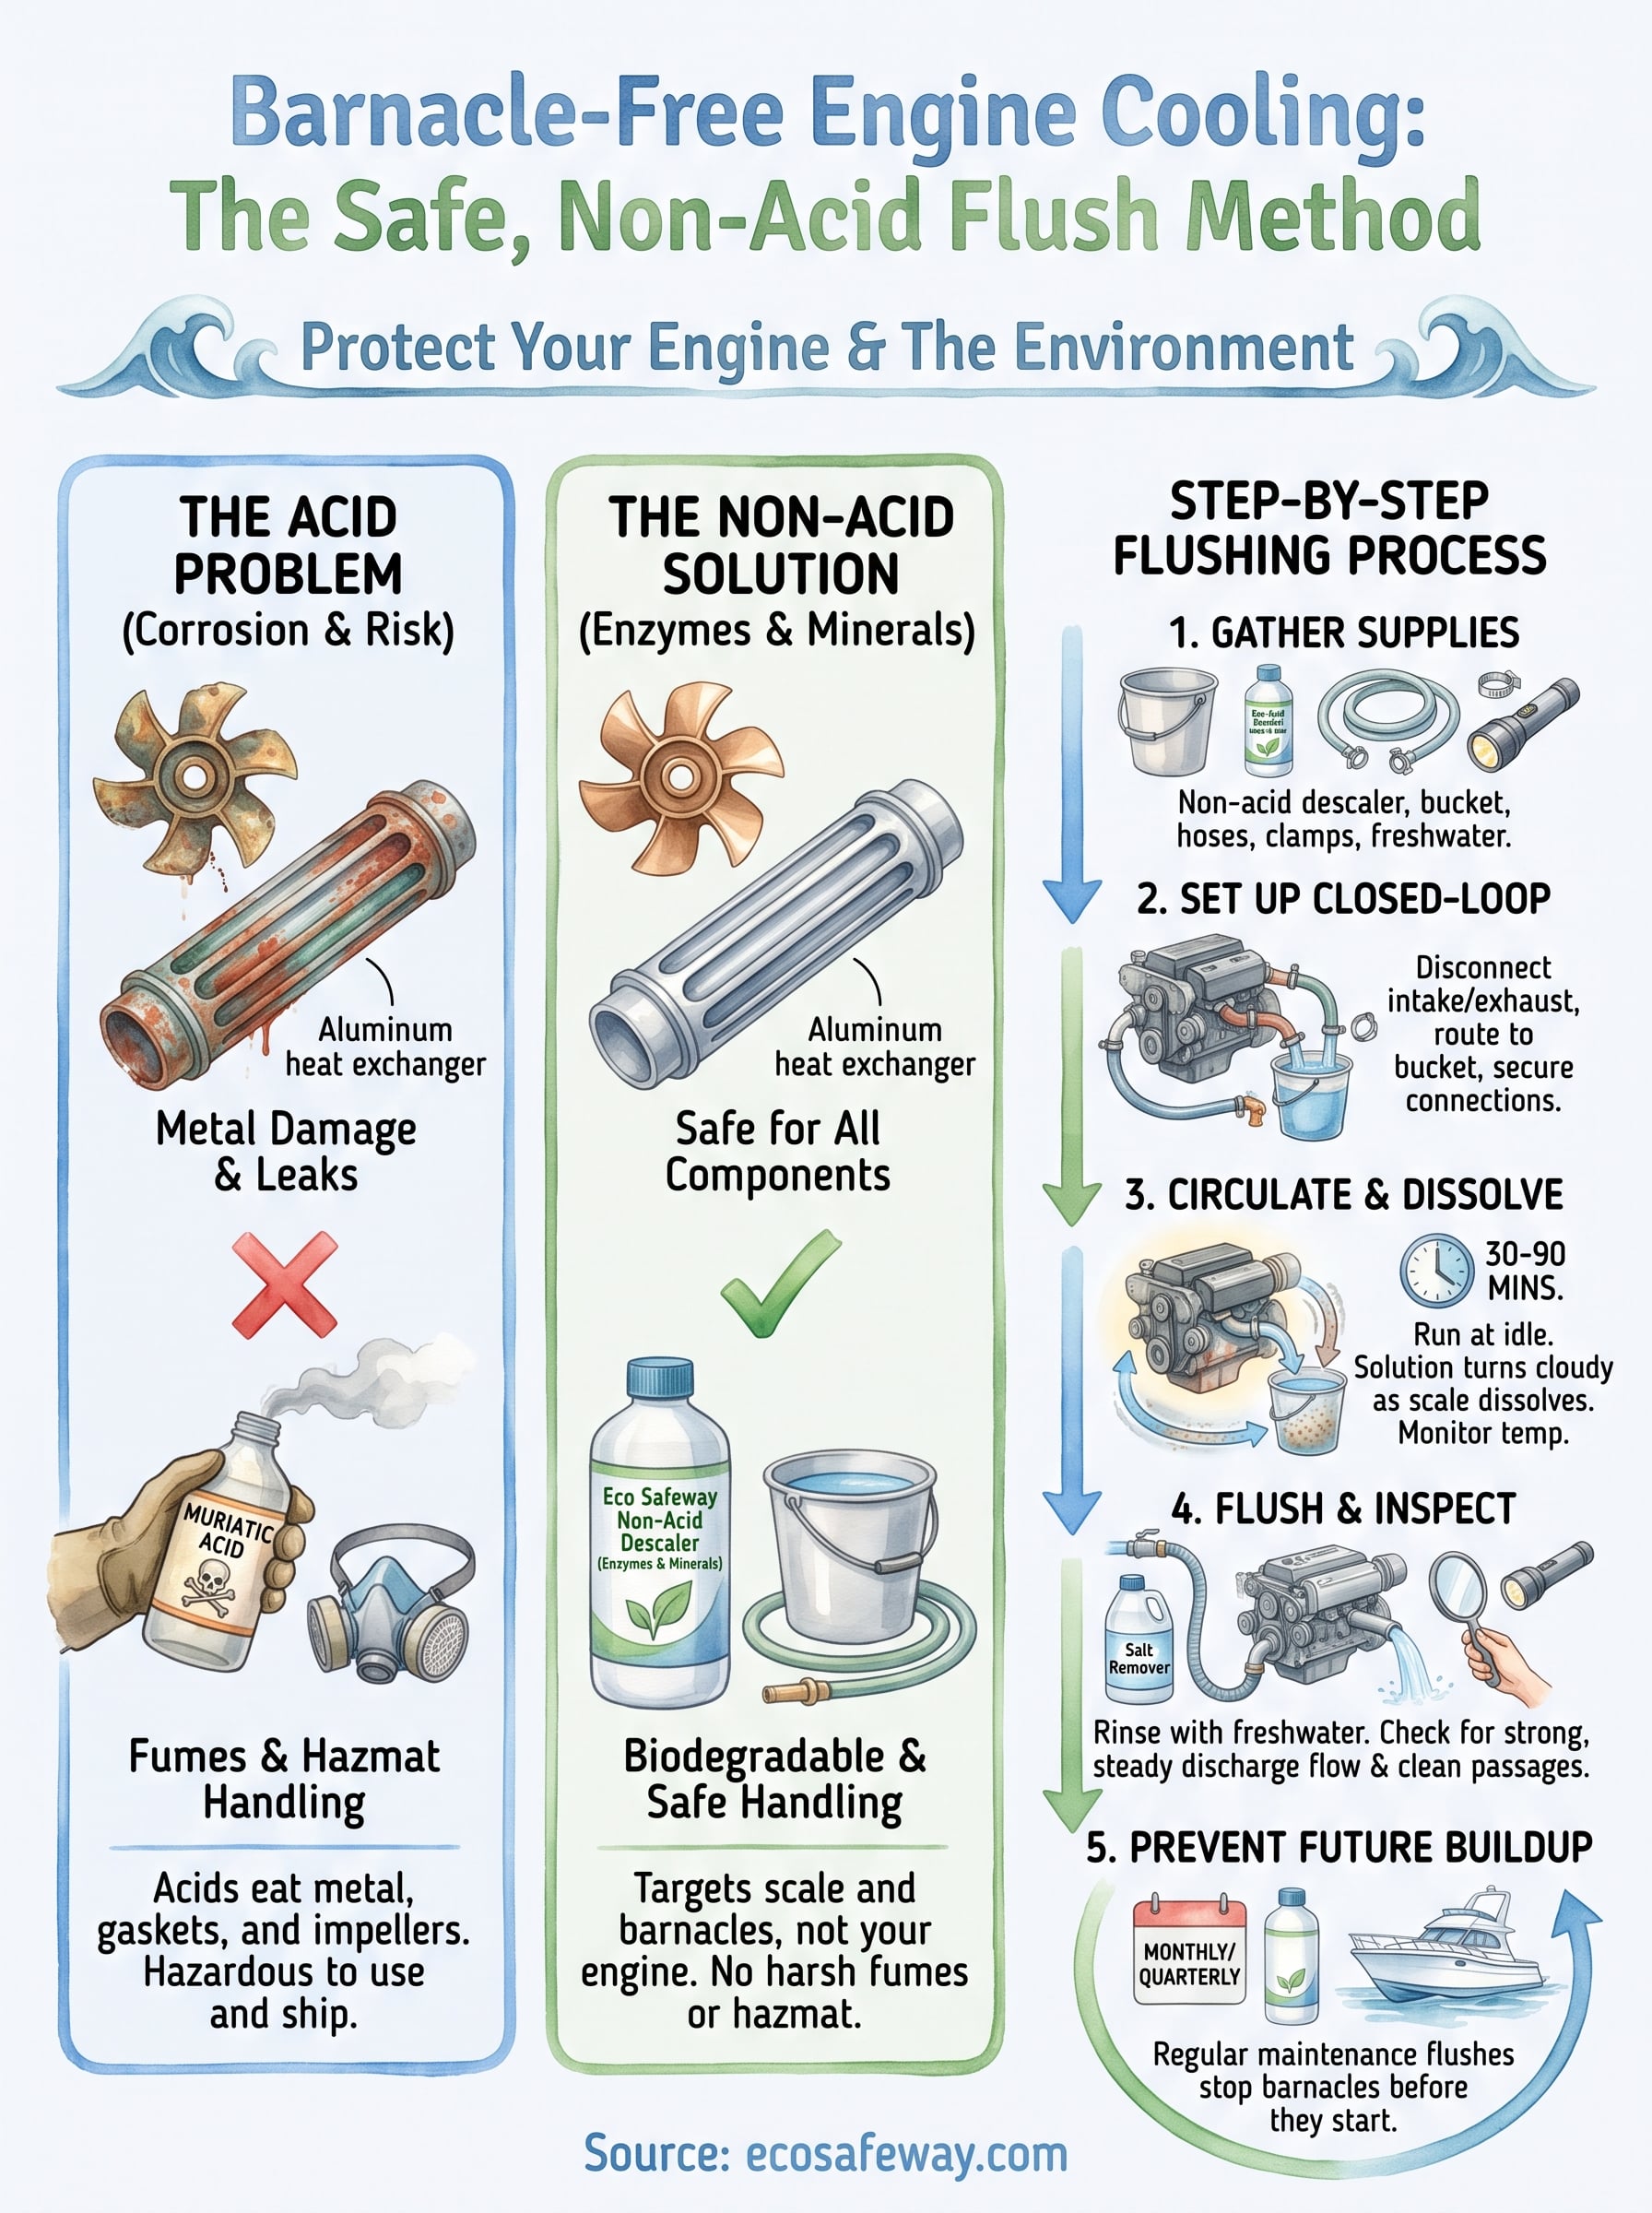
Keeping your cooling system clear season after season
Barnacles and scale don't stand a chance against a proper non-acid flush routine, and now you've got the full process: gather the right descaler, close the loop, circulate, flush, inspect, and repeat on a schedule instead of waiting for a temperature spike. Skipping acid doesn't mean skipping results. It means protecting the impeller, heat exchanger, and gaskets you'd otherwise be replacing after a corrosive treatment did its damage alongside the scale.
Make this a seasonal habit, not a crisis response. A quick dockside flush every few months costs you almost nothing compared to a stuck thermostat or a cracked heat exchanger tube discovered mid-cruise. Keep your supplies stocked, keep the strainer clean, and your raw water passages stay open all season long.
When you're ready to build that routine, start with the raw water flush treatment for marine engine descaling built for exactly this job.


