





The short answer on how to clean a swamp cooler: unplug it, shut off the water, drain the tank and pull out the pads. Soak or rinse the pads in a 50-50 mix of white vinegar and water. Soak the tank and tray with distilled white vinegar for about an hour, scrub off the mineral film and flush the pump and lines. Rinse everything, let it dry and reassemble. Plan on about an hour for a portable unit and somewhat longer for a window or roof unit.
A swamp cooler cools by pulling air through wet pads, so whatever is in the water ends up in the cooler. Hard-water minerals crust over the pads and block airflow. Standing water grows mold and slime in the tank. You notice it as weak cooling, a musty smell, a pump that struggles or water that overflows the tray.
This guide starts with what you need and how often to clean, then walks through four steps: powering down and pulling the pads, cleaning the pads, scrubbing the tank and lines, and reassembling. It also covers vinegar versus CLR, heavy scale and end-of-season storage. Eco Safeway makes descalers and an evaporative cooler cleaner, so we also tell you when vinegar is not enough.
What to know before you clean a swamp cooler
Cleaning a swamp cooler takes basic household tools, white vinegar and about an hour. The main decisions are which cleaner to use, how often to do it and how to stay safe around water and electricity.
Gather your tools and cleaner
Distilled white vinegar is the safest starting cleaner for pads, tank and tray. Gather these before you open the cabinet:
- Distilled white vinegar and a bucket
- A soft brush and a plastic scraper
- Rubber gloves and eye protection
- A garden hose or a sink with clean water
- A wet/dry vacuum for loose debris
- A screwdriver or nut driver for the panels
- Replacement pads, if yours are old
Avoid surface cleaners, solvents and harsh chemicals on the cabinet. Warm water and a damp cloth are enough for the exterior.
Set a cleaning schedule
How often you clean depends on how hard your water is and how much you run the unit. This schedule combines common manufacturer and university guidance:
| When | What to do |
|---|---|
| Start of season | Clear debris from the pan, check belt tension, install new or cleaned pads, test the float valve |
| Weekly while running | Drain and wipe the tank, rinse portable-unit pads |
| Mid-season | Check water level, float valve, pump, belt and pad condition |
| End of season | Drain, remove minerals, dry, protect the tray from rust, cover the unit |
Hard water shortens every interval, so clean more often if you see white crust on the pads.
Stay safe
Unplug the cooler and shut off the water supply before you touch anything inside. Wear gloves and eye protection, especially when working with vinegar solutions overhead or on a roof. Never mix vinegar with bleach, because the combination releases chlorine gas.
Power off and water off comes first, every time you open a swamp cooler.
Step 1. Power down and pull the pads
Start by cutting power and water, draining the unit and removing the pads. Doing this in order keeps you safe and keeps water off the motor.
Cut power and drain the unit
Unplug a portable cooler or switch off the breaker or disconnect for a window or roof unit. Close the water supply valve on a plumbed cooler. Then drain the tank or pan. Most units have a drain plug or a drain hose. For a portable cooler, carry the tank outside and pour it out.
Open the cabinet and remove the pads
Remove the side panels or the back cover. Before you lift anything out, take a photo of how the pads sit so you can put them back facing the right way. Slide the pads out gently, since wet or brittle pads tear. Cover the motor with a plastic bag or towel so rinse water stays off it.
With the pads out, the water pan and distribution parts are exposed. Use the wet/dry vacuum to pull out leaves, dust and flaked scale before you add any liquid. Pulling out dry debris first keeps your cleaning solution from turning into sludge.
Photograph the pad layout before you remove anything, because pad direction affects airflow.
Step 2. Clean or replace the cooling pads
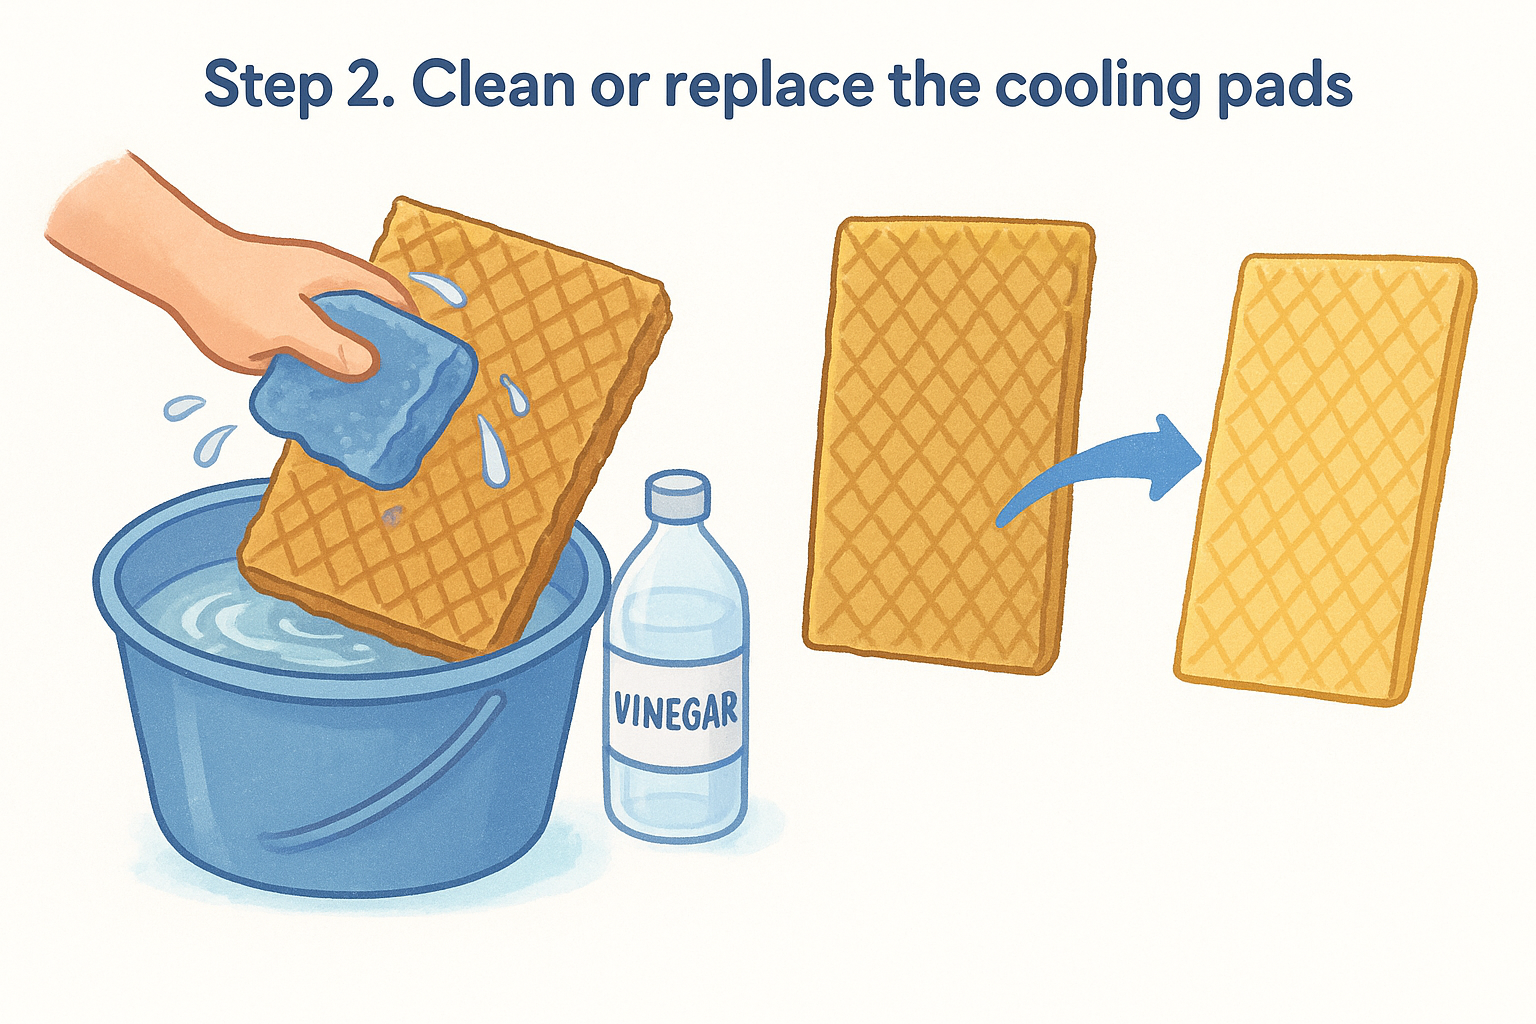
To clean swamp cooler pads, soak or rinse them in a 50-50 solution of white vinegar and water, rinse with clean water and let them dry fully. Pads that stay stiff with minerals or smell musty after cleaning need replacing instead.
Soak and rinse rigid or honeycomb pads
Rigid honeycomb pads, common in portable units, clean up well. Follow these steps:
- Mix equal parts white vinegar and water in a tub or bucket.
- Rinse or soak the pads in the mix until the mineral crust loosens.
- Rinse with clean water until the vinegar smell is gone.
- Air dry completely, out of direct pressure or sharp edges.
- Hold them out of the cooler until the tank is clean and ready.
For portable units, rinse the pads weekly and give them the vinegar treatment when you drain the tank.
Know when to replace instead
Aspen fiber pads, common in whole-house and window units, are inexpensive and are usually replaced rather than scrubbed. Replace pads that are crumbling, packed with mineral deposits or still smelling like a swamp after cleaning, because that smell means mold or mildew in the material. Many manufacturers recommend new pads at least once a year, and some advise a mid-season swap. In hard-water areas, expect to change them more often. Always match the size and type your manufacturer specifies.
Clean pads move more air, and pads past saving should be replaced, not scrubbed.
Step 3. Scrub the tank, tray and water lines
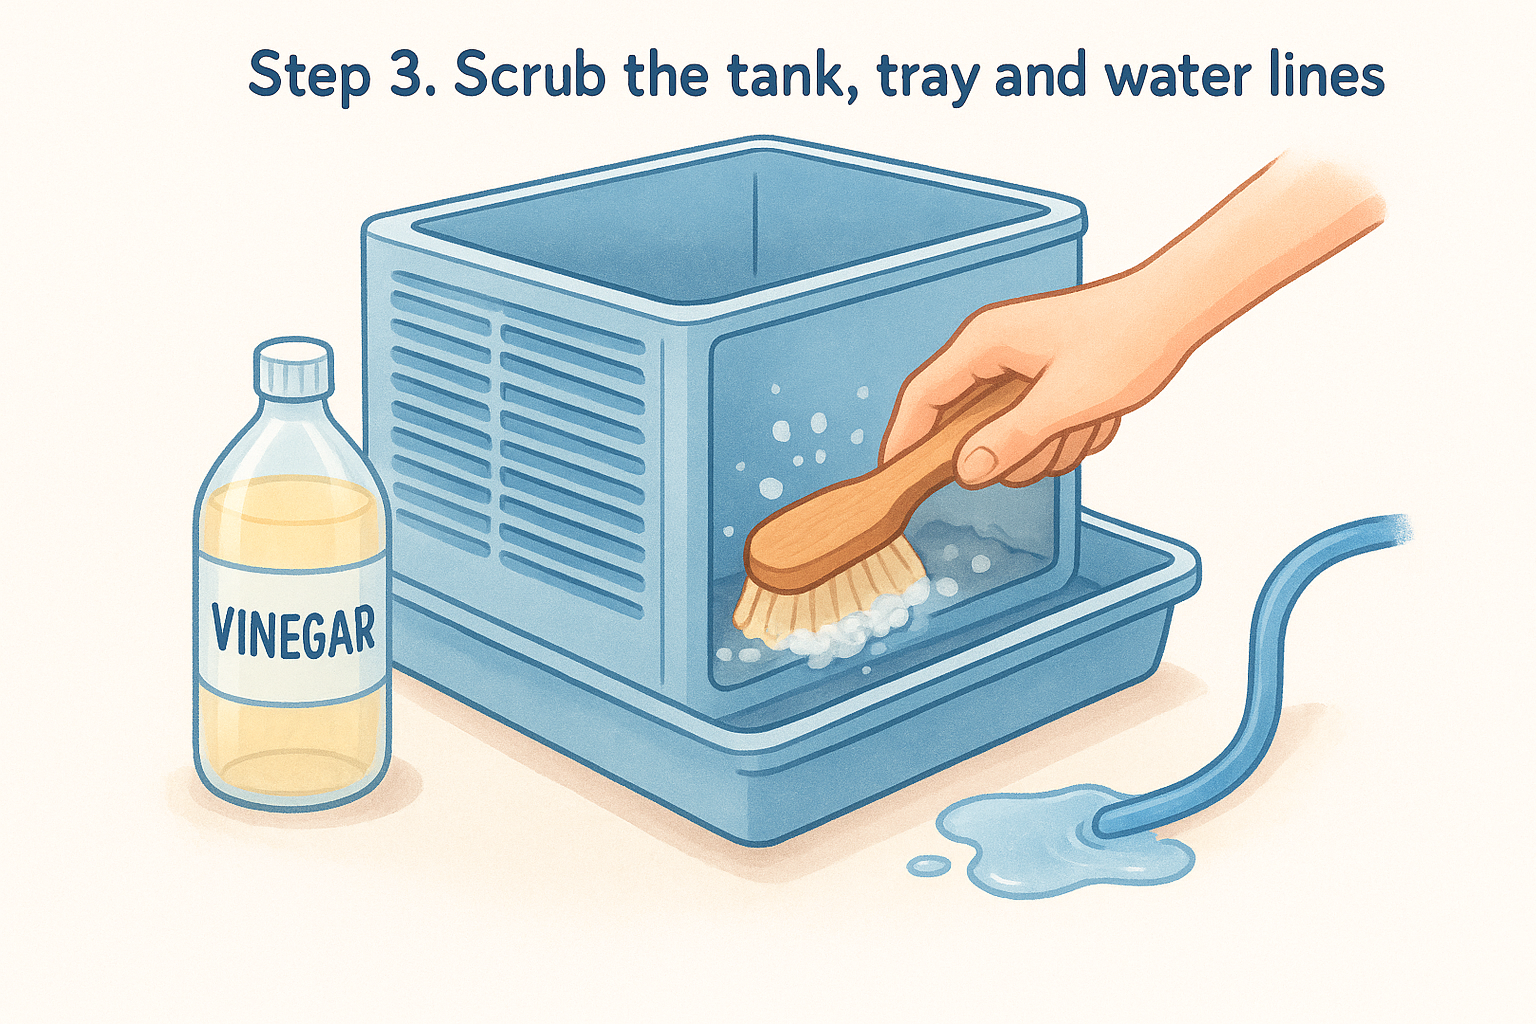
Scrub the tank and tray with white vinegar, then flush the pump and lines with the same vinegar mix. Rinse with clean water and run the fan on an empty tank to clear the smell.
Soak and scrub the tank and tray
Pour distilled white vinegar into the empty reservoir or tray and let it sit for about an hour. The acid softens scale and film. Then scrub with a soft brush and scrape stubborn deposits gently with a plastic scraper so you do not gouge the metal or plastic. Check the water trough for clogged holes and clear them. Inspect the tray for cracks, split seams and rust spots that could leak.
For a lighter clean, wipe the tank with a soft cloth and warm water, or mild soapy water, then flush it with clean water.
Flush the pump and lines
Mix equal parts vinegar and water, refill the tank with it and run the pump for about 30 seconds so the solution reaches the distribution lines. Drain and rinse the system with clean water. Then run the fan on high with the tank empty for 10 to 15 minutes, which keeps the vinegar smell out of the pads. Finally, fill with clean water and run the pump a couple of minutes to flush the last vinegar. If the pump is gummed up, take it out and wipe it clean with a damp cloth.
Choose vinegar, CLR or a descaler
Vinegar is mild and safe for most cooler materials, so start there. CLR is a stronger acid-based cleaner that removes heavy calcium and rust faster, but it can attack metal finishes and plastics if left on or poorly rinsed. Use it only if your manual allows it, dilute it as the label says and rinse thoroughly. For heavy scale or a facility with several units, the Eco Safeway Industrial Evaporative Cooler Cleaner & Non-Acid Descaler is a non-acid option sold from 1 gallon to a 275 gallon tote. Check your cooler manufacturer's guidance before using any cleaner.
Try vinegar first, and move to stronger descalers only when the manual allows it.
Step 4. Reassemble, test and keep it running
Reinstall the dry pads, reconnect water, check the water level and belt, then test the cooler before relying on it. A few minutes of adjustment now prevents leaks and noise later.
Put it back together and test
Slide the pads back in following your photo and replace the panels. Reconnect the water line, turn the supply on and check the float valve. Water in the tray should sit about one inch below the top of the tray and below the overflow pipe. Bend the float arm to adjust it, and replace the valve if it sticks and the tray overflows.
On whole-house units, press the belt. It should give about half an inch. If the motor or blower has an oil port, add a few drops of the oil your manual specifies, commonly a lightweight non-detergent motor oil. Run the pump a few minutes before the fan so the pads saturate evenly.
Winterize and extend the lifespan
At season's end, drain the water, clean the tray, dissolve minerals with vinegar and dry it thoroughly. Coat the tray with a rust-preventive sealer, disconnect the water line and blow it out to prevent freezing, then cover the cooler.
A well-maintained cooler can run for many seasons, while neglected units fail early from scale, rust and burned-out pumps. Call a repair professional for leaks from the pump or supply line, electrical faults, a motor that hums without starting, or a unit that will not turn on after you check the breaker.
A cooler cleaned at start-up and winterized at season's end avoids most failures.
Keep your cooler clean all season
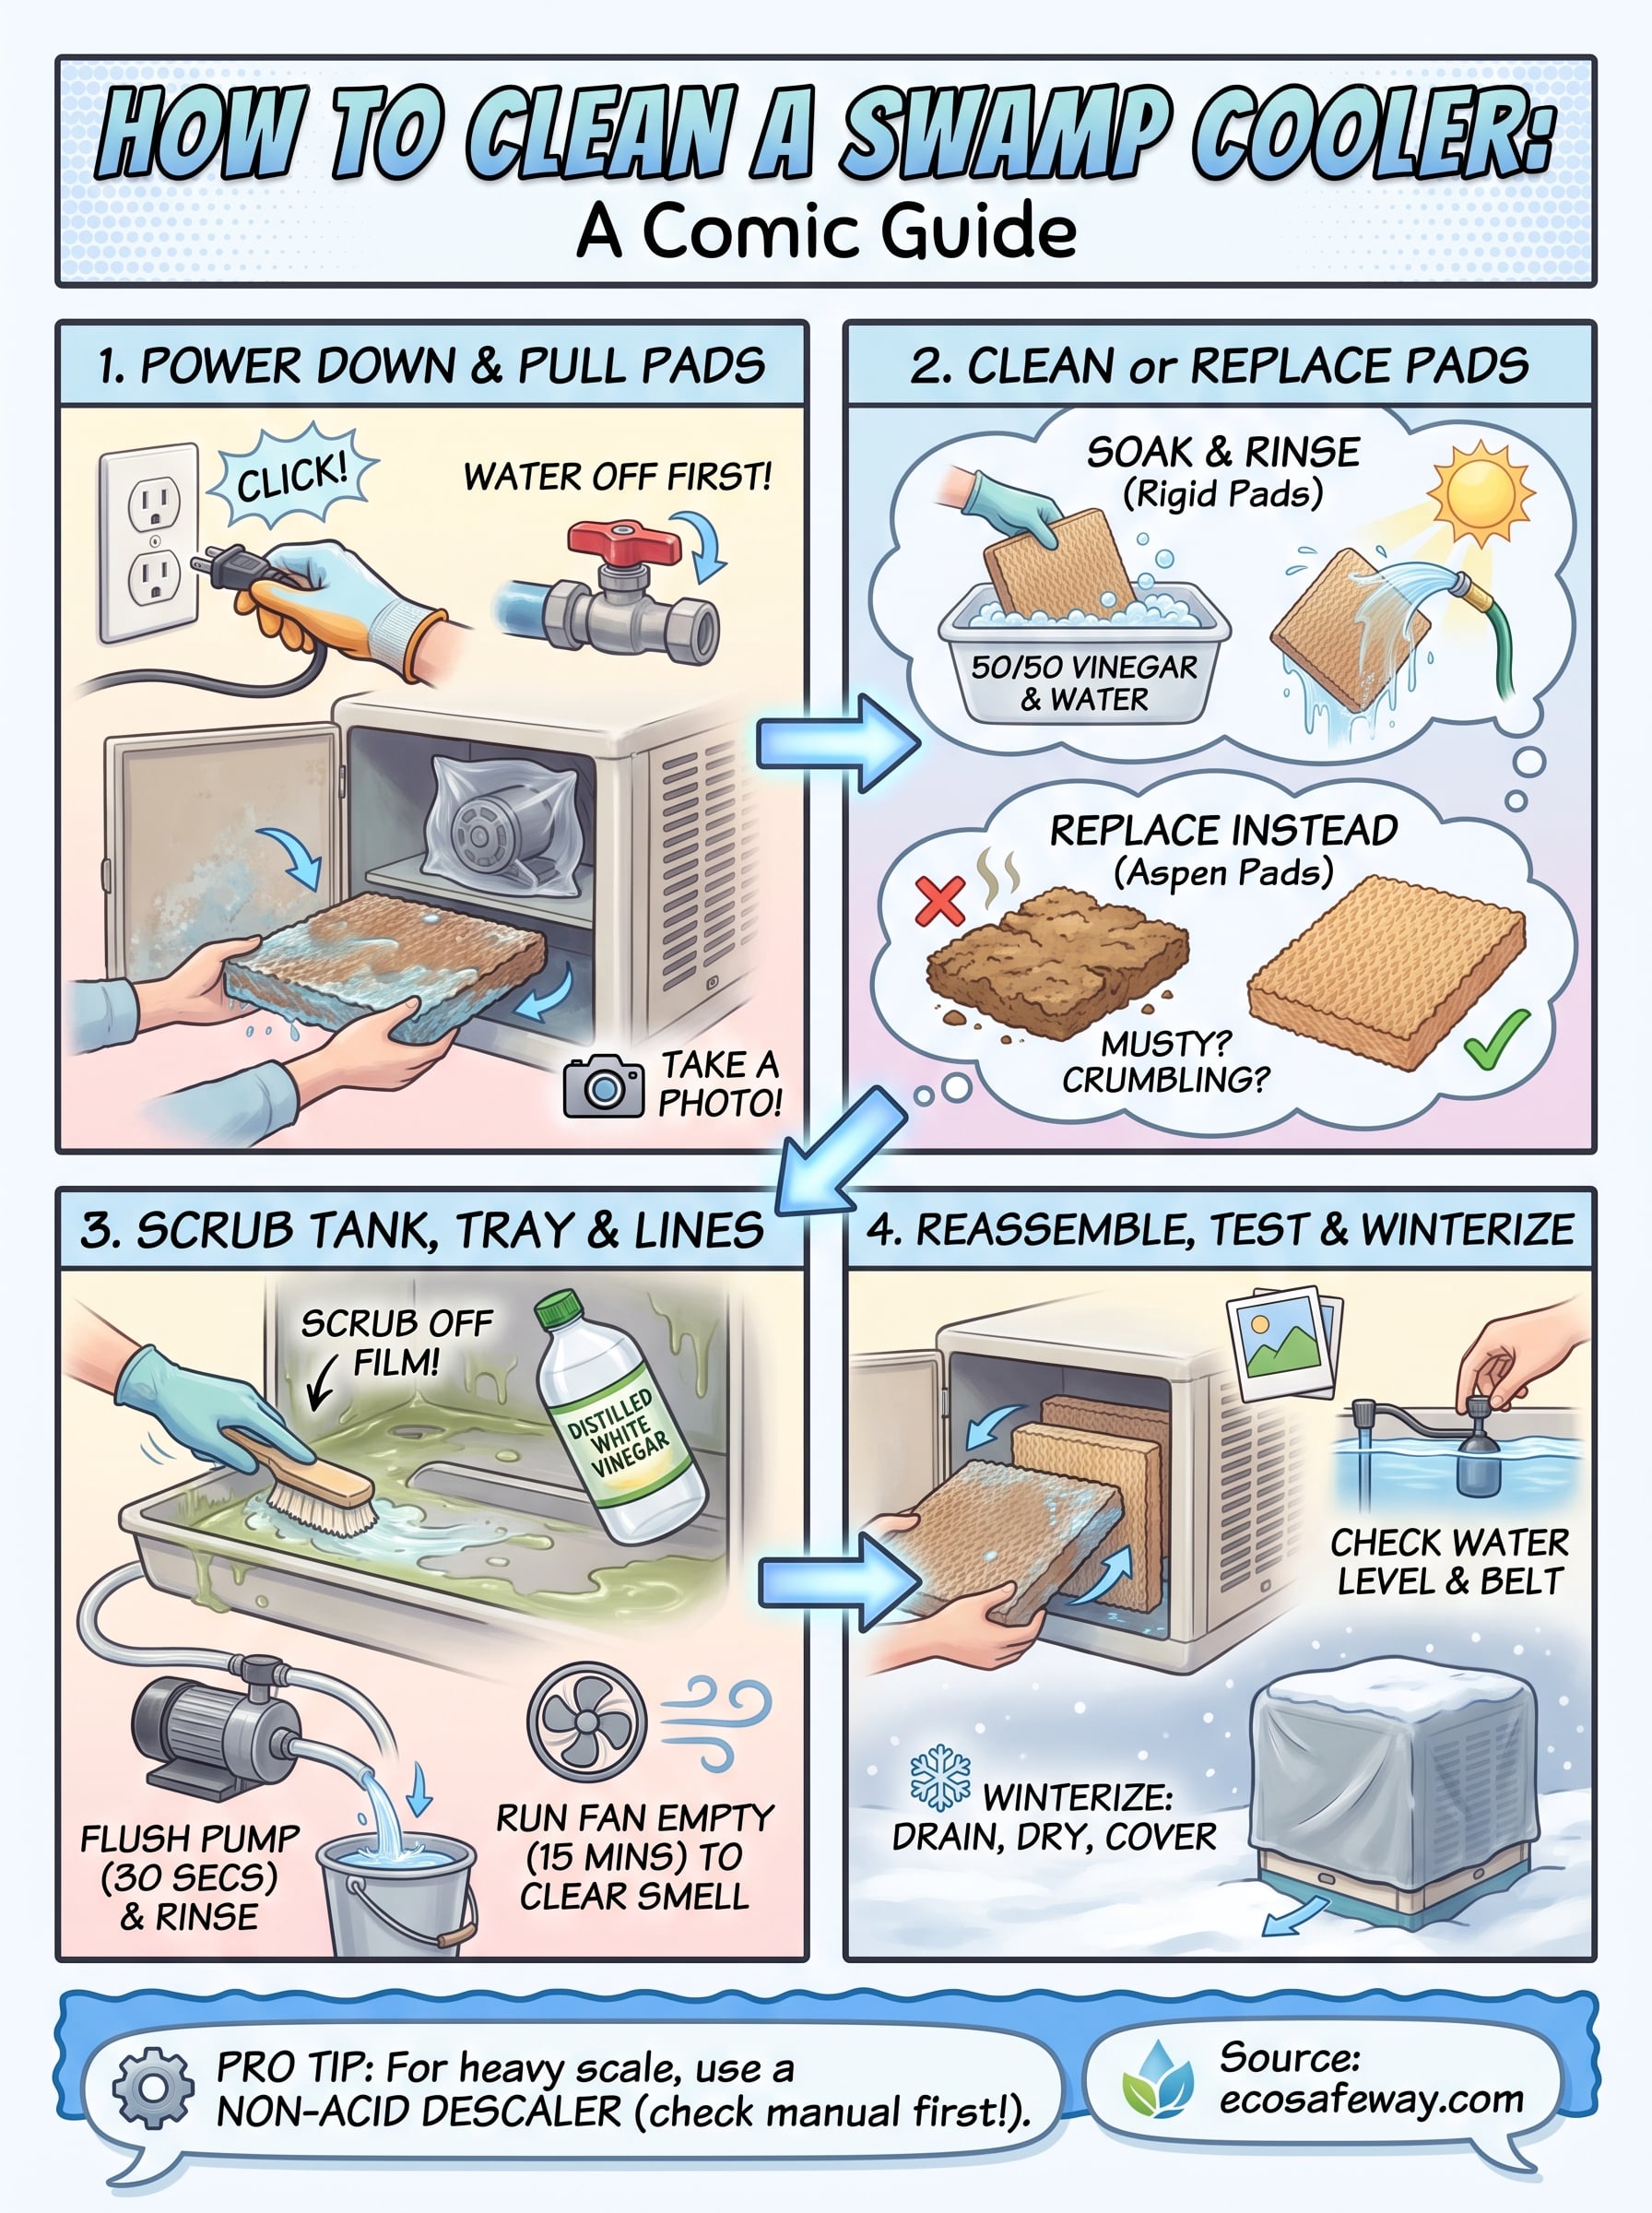
Cleaning a swamp cooler comes down to a repeatable routine. Power down and pull the pads. Soak them in 50-50 vinegar and water, scrub the tank and tray, flush the lines, reassemble and check the water level. Repeat it on the schedule above, and replace pads once they stop cleaning up.
If hard water keeps leaving heavy scale on your pads, basin or pump lines, a stronger non-corrosive descaler can save you repeat work. Eco Safeway's industrial evaporative cooler cleaner and non-acid descaler is made to clean swamp coolers, including their pads, tanks and pump lines.


