





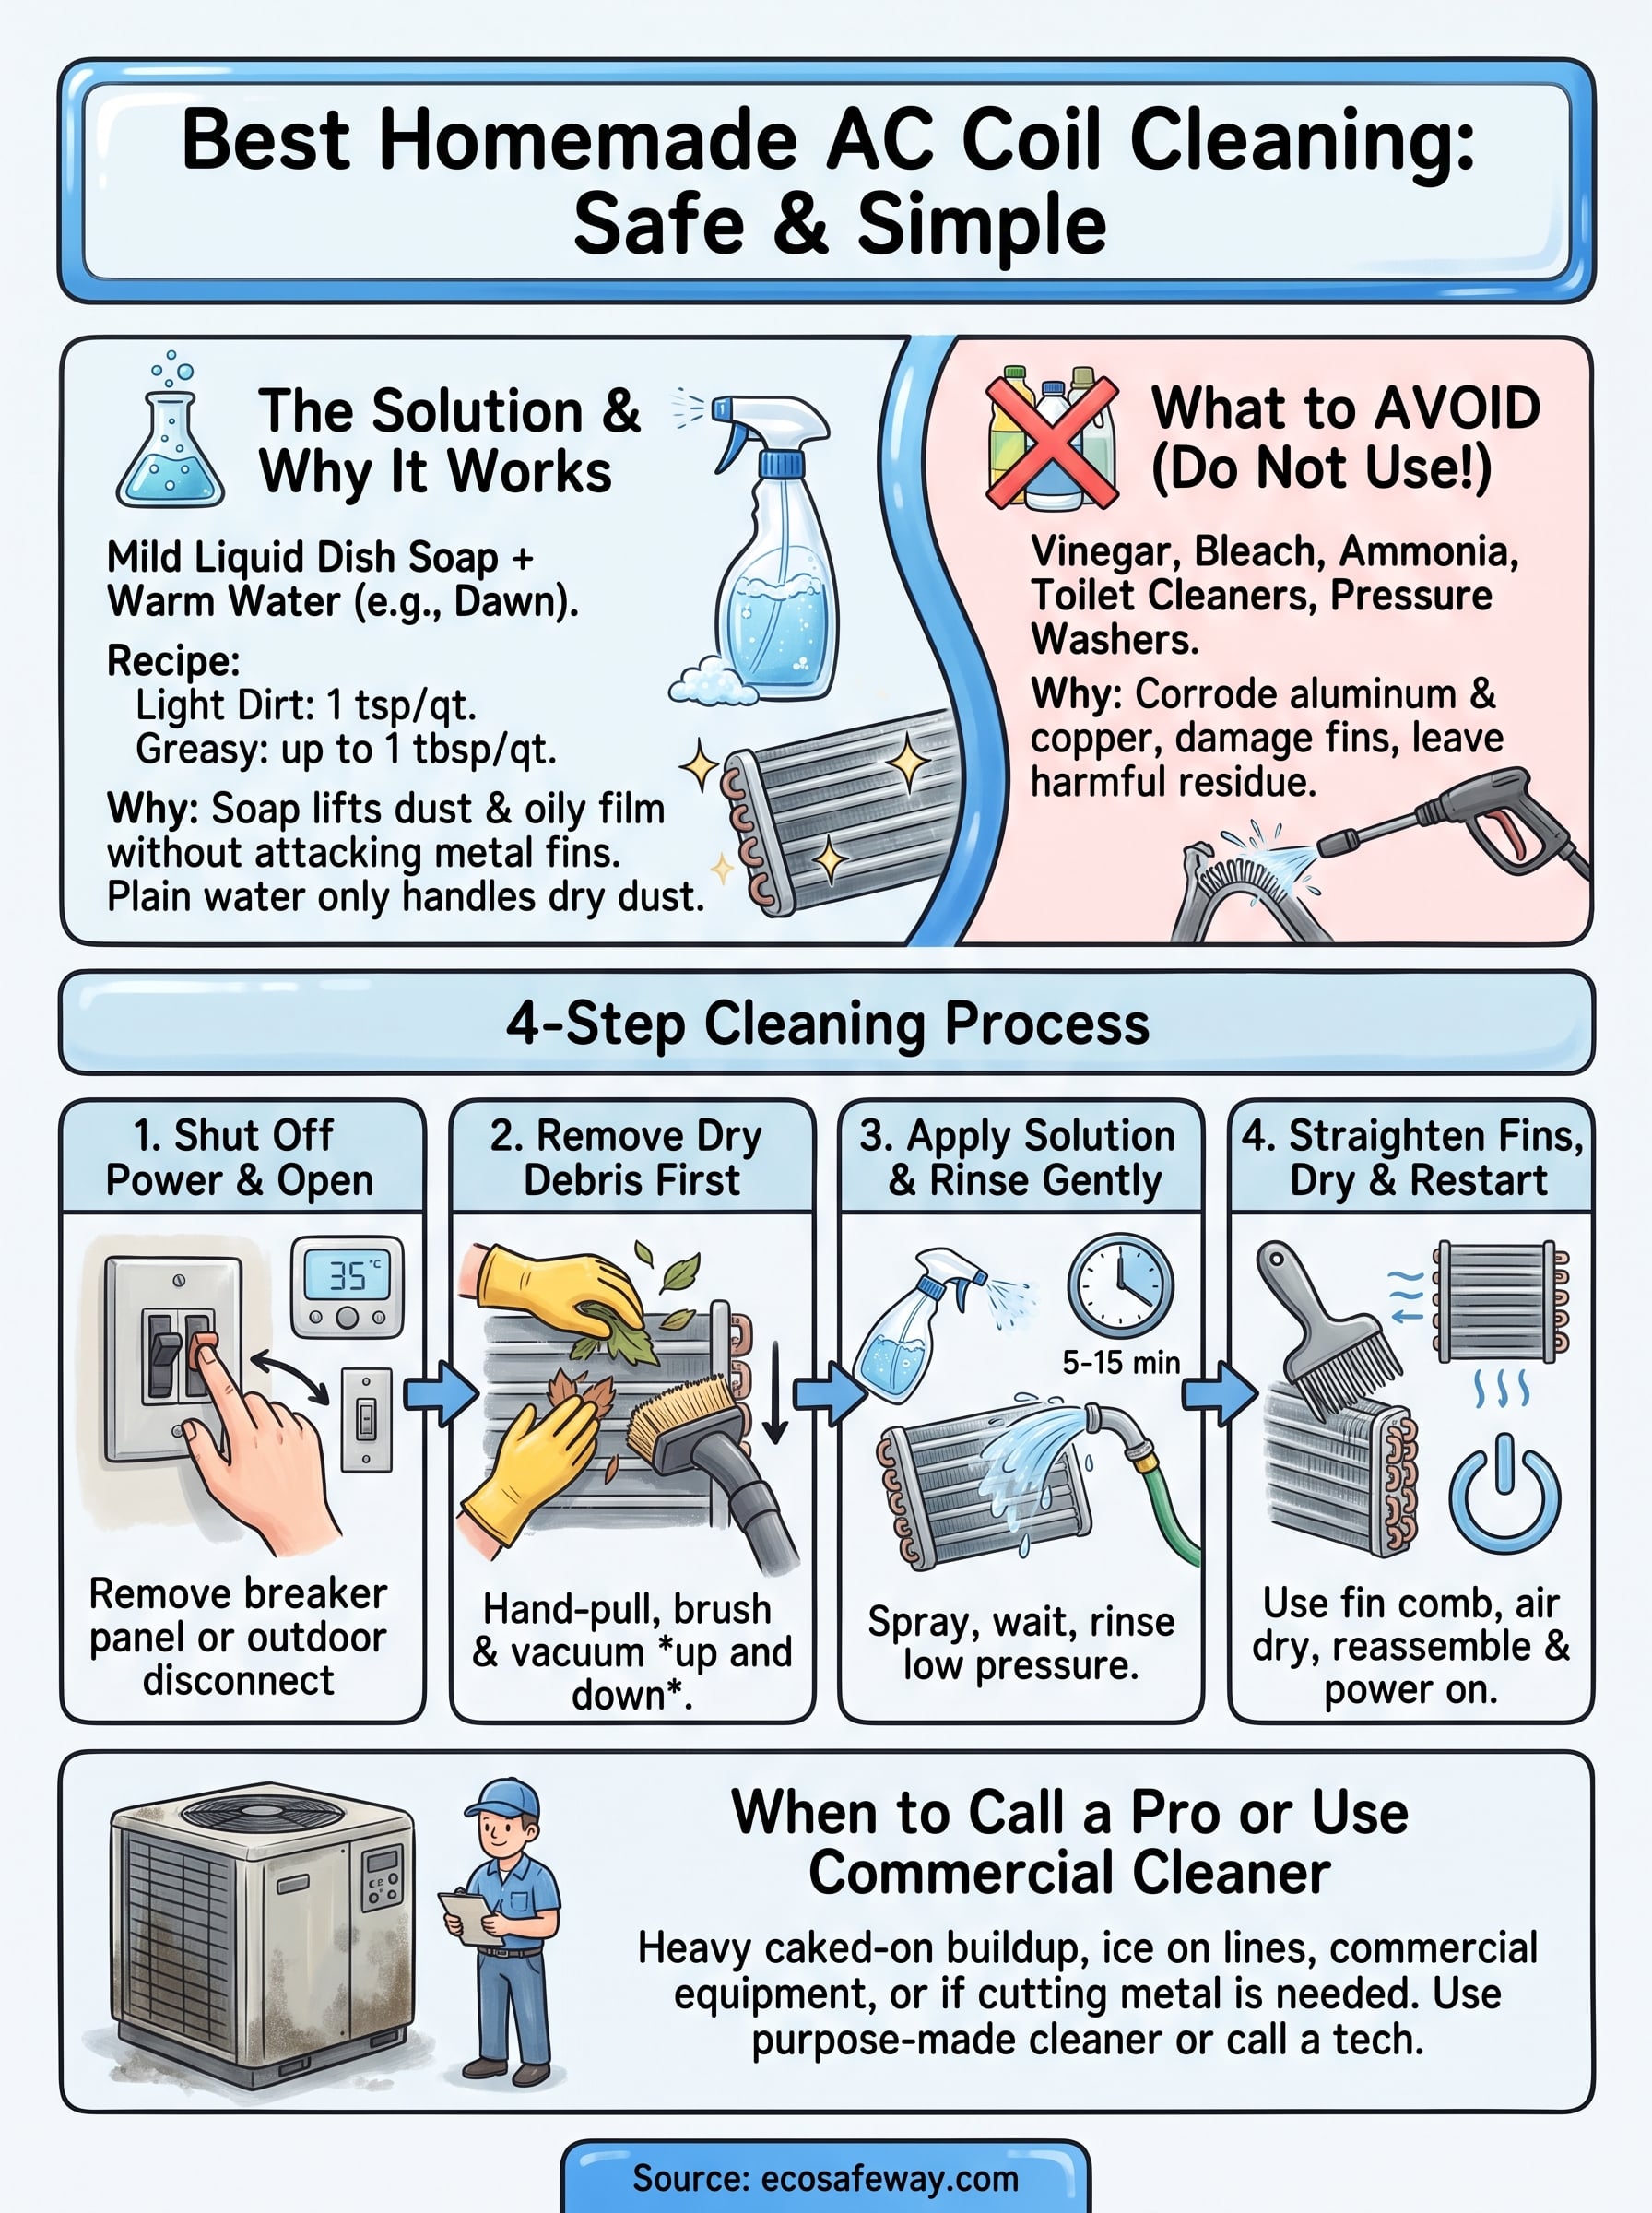
The best homemade AC coil cleaning solution is simple: a few drops to a teaspoon of mild liquid dish soap per quart of warm water, applied with a spray bottle after you brush off the dry debris. Let it sit 5 to 15 minutes, then rinse gently with clean water. Skip vinegar, bleach and other harsh chemicals, because they can attack the thin aluminum fins and copper tubing.
Dirty coils are one of the most common reasons an air conditioner struggles in summer. A film of dust, pollen and grease on the evaporator coil, or cottonwood and grass clippings packed into the condenser, keeps heat from moving where it should. The unit runs longer and cools less. Forums are full of conflicting recipes, and some of them, like toilet tank cleaner, can do real damage.
This guide covers the mix, what to avoid, and four steps for cleaning both your condenser and evaporator coils yourself. It also shows when a store-bought cleaner or a technician is the smarter call. Eco Safeway makes coil cleaners for commercial equipment, so we know where homemade mixes stop working.
Why dish soap works and which mixes to avoid
Dish soap works because coil dirt is mostly dust bound by a light oily film, and soap lifts both without attacking metal. Plain water handles dry dust, but soap handles the film. A homemade cleaner is a good fit for routine yearly cleaning of lightly dirty coils.
The dish soap recipe
Use any plain, mild liquid dish soap, Dawn included. Avoid versions with bleach or added moisturizers. Mix it in a clean spray bottle:
- Light dirt: 1 teaspoon of soap per quart of warm water.
- Greasy film (near a kitchen or garage): up to 1 tablespoon per quart.
- Batch size: a 1 gallon batch at light strength is 4 teaspoons (1 tablespoon plus 1 teaspoon) of soap.
Stir gently so it does not foam up. Keep a second bottle of plain water for rinsing.
Mild soap in warm water is the only homemade mix worth putting on your coils.
Ingredients to skip
| Ingredient | Verdict | Why |
|---|---|---|
| Dish soap and warm water | Use | Lifts dust and light grease without attacking metal |
| Plain water | Use | Good for rinsing and for light dust |
| White vinegar | Avoid | Acid can etch thin aluminum fins and copper over time |
| Bleach | Avoid | Corrodes metal, and fumes travel through your ducts from the indoor unit |
| Ammonia, toilet bowl or tank cleaners | Avoid | Harsh chemistry and residue you cannot fully rinse out |
| Pressure washer | Avoid | Bends fins and can drive dirt deeper into the coil |
When a store-bought cleaner makes more sense
Soap struggles with heavy, caked-on buildup, and it is not designed for large or commercial equipment. A purpose-made coil cleaner is formulated for coil metals and for the job. If you maintain commercial or multi-unit equipment, Eco Safeway's coil cleaner for commercial and industrial HVAC comes in sizes from a 32 oz spray up to drums. For a home unit, check your manual first, since some manufacturers specify cleaners.
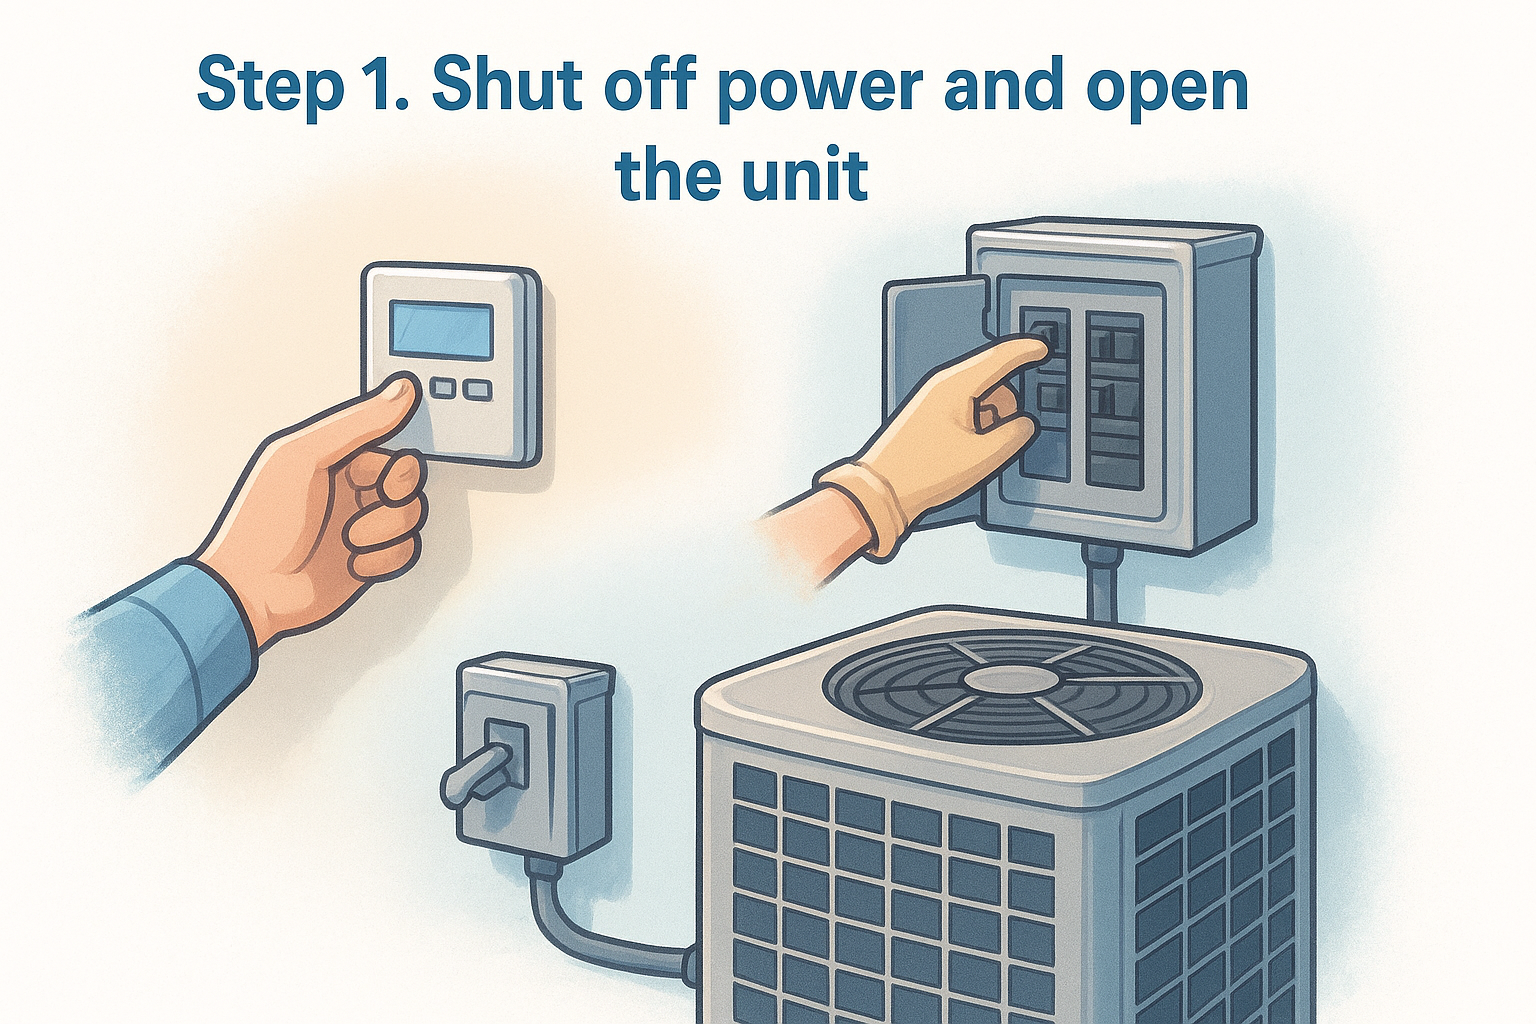
Step 1. Shut off power and open the unit
Before you touch anything, turn the system off at the thermostat, then switch off the breaker and the outdoor disconnect. Water and live electrical parts do not mix, so do not skip any of the three.
Gather your supplies
You need:
- Your soap solution and a bottle of plain water
- Screwdriver or cordless drill
- Soft-bristle brush and a shop vacuum with a brush attachment
- Fin comb
- Garden hose with a gentle nozzle
- Gloves, safety glasses, a flashlight and rags
Get to the coils
The condenser coil sits inside the outdoor unit. Remove the top or side panels and the grille. If the fan is mounted on the lid, lift it aside without stretching the wires. The evaporator coil, usually an A shape, sits behind a screwed-on access panel on the indoor air handler in an attic, closet, garage or basement.
If reaching the evaporator coil means cutting or breaking a sealed metal plenum, stop and call a technician. Never touch the refrigerant lines.
If you cannot reach a coil without cutting metal or stretching wires, hand the job to a pro.
Step 2. Remove dry debris first
Clean dry before you go wet. Soap and water turn leaves and dust into mud that clogs the gaps between fins, so remove everything loose first.
Condenser coil
Pull out sticks, leaves and grass clippings by hand. Then brush the fins gently with the soft brush, moving up and down along the fins, never side to side. Vacuum the loosened dust with the brush attachment.
Evaporator coil
Vacuum the face of the coil lightly. If the dust layer is thin, blow compressed air through the coil opposite the normal airflow direction, which pushes dirt out the way it came in. On a window AC unit, remove the case and follow the same dry-first routine on both coils.
Dry cleaning first keeps loose debris from turning into mud inside the fins.
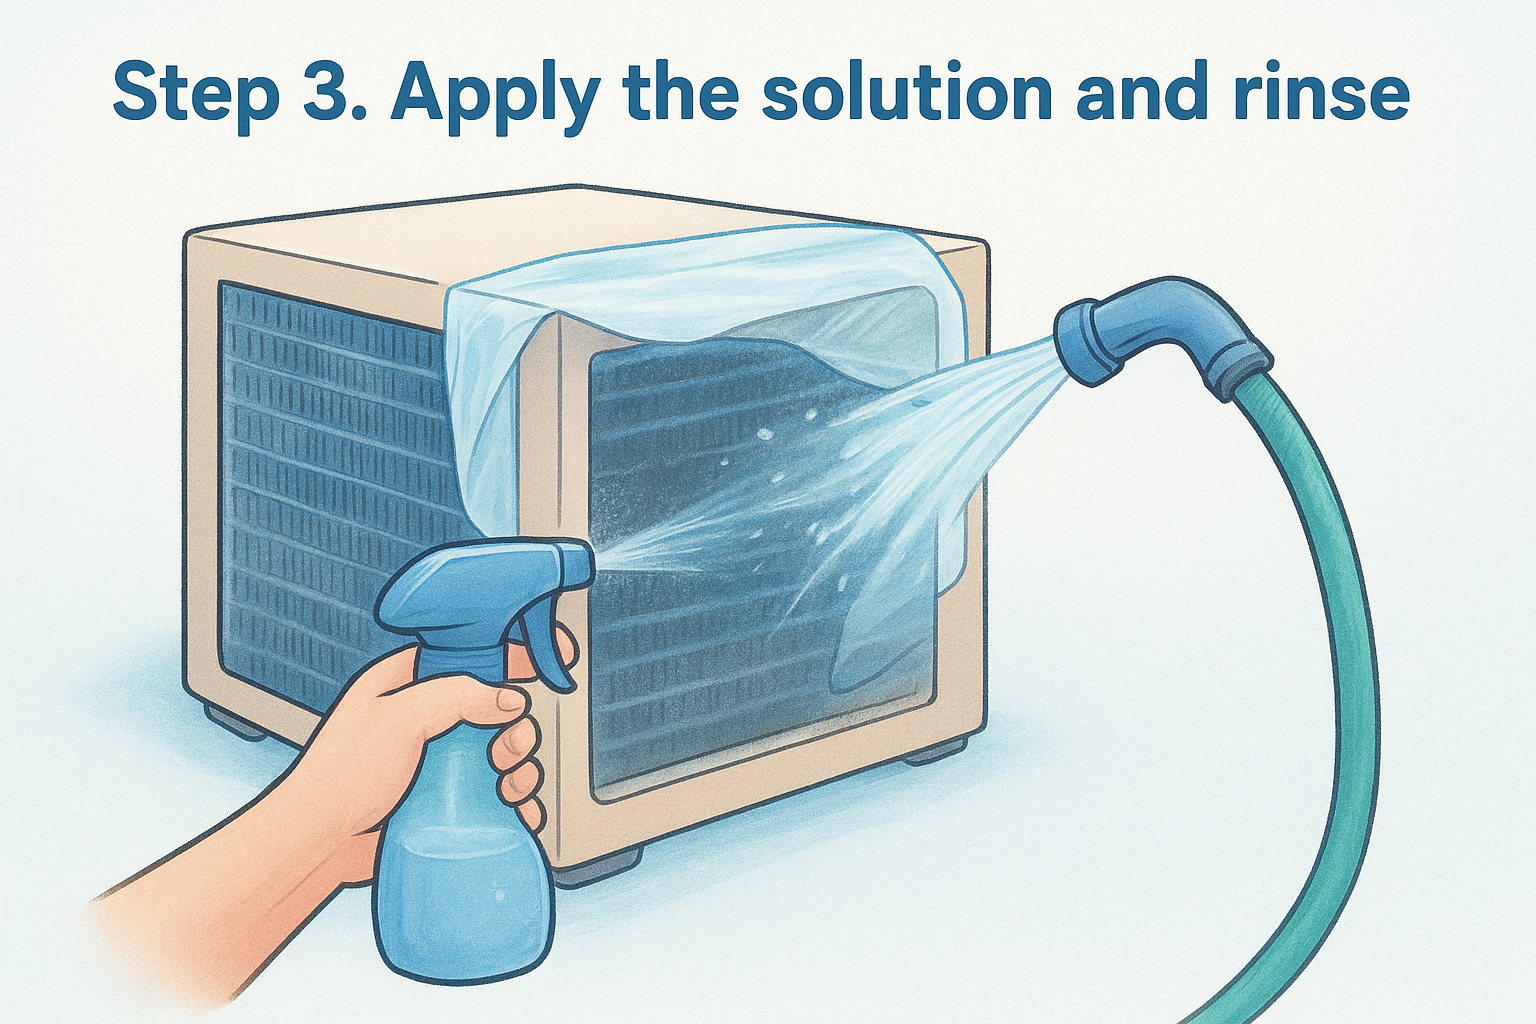
Step 3. Apply the solution and rinse
Soak the coil, wait, then rinse low and slow. The goal is to loosen the film without driving dirt deeper or soaking electrical parts.
Condenser coil
Cover the control box and any exposed wiring with plastic. Spray the solution on the inside face of the coil on all sides and wait 5 to 15 minutes. Then hose from the inside out at a downward angle, using low pressure, and rinse the outside from the top down. Keep water off the disconnect and electrical components. If grime remains, repeat once.
Evaporator coil
Spray the solution lightly on both sides of the coil if you can reach them, and wait 5 to 10 minutes. Rinse with a spray bottle of clean water, not a hose. The rinse runs into the condensate drain pan, so first confirm the pan and drain line flow freely. Use as little liquid as possible, and do not let it reach the blower motor or controls.
Rinse low and slow: a hose on full blast bends fins and pushes dirt deeper.
Step 4. Straighten fins, dry and restart
Finish by correcting bent fins, letting everything dry, and restarting the system. This part decides whether the cleaning actually improves airflow.
Fix the fins and reassemble
Check the coil with a flashlight. Slide a fin comb that matches your fin spacing through bent areas, moving up and down. Wipe the area with rags, give the coil time to air dry, then refit the panels and grille. Restore power at the breaker and disconnect, then turn the thermostat on.
How often to repeat it
Plan on about 2 to 3 hours for both coils. Cleaning once a year is a common baseline, and you may need it more often near cottonwood trees, lawns or dusty roads. Call a technician if you see ice on the lines, heavy greasy buildup, widespread bent fins, or weak cooling after a clean.
A clean coil with bent fins still restricts airflow, so always comb before you close up.
Clean coils, not harsh chemistry
For most homes, a mild dish soap solution, a dry-first approach and a gentle rinse are all a coil needs. Keep vinegar, bleach and acids away from the metal, avoid high pressure, and do it once a year.
If your equipment is commercial or heavily soiled, a purpose-made cleaner saves effort and risk. Eco Safeway's fast-acting condenser coil cleaner is made for commercial HVAC coil cleaning.


