





That cloudy ice and musty smell coming from your countertop unit usually means mineral buildup or mold, and grabbing the wrong bottle off the shelf can make things worse. A good portable ice machine cleaner clears scale, kills bacteria, and gets your machine back to producing clear, odor-free ice without leaving behind a chemical aftertaste. Skip the guesswork and you'll save the compressor and the ice bin from premature wear.
The short answer: descale monthly with a food-safe, nickel-safe cleaner, or use plain white vinegar diluted with water if you want a DIY option, then flush thoroughly before running a fresh ice cycle. Both routes work, but the right choice depends on how hard your water is and how often you run the machine.
This guide walks through step-by-step cleaning instructions, compares commercial descalers against vinegar and citric acid, and covers how often you should be doing this so scale never gets the chance to build up in the first place.
What you need before cleaning your ice maker
Gather everything before you start, because a half-finished cleaning cycle with a disassembled ice maker sitting open on your counter invites dust and bugs into the machine. You need a food-safe descaling solution (commercial cleaner, white vinegar, or citric acid), a soft-bristle brush or old toothbrush, a microfiber cloth, distilled or filtered water for rinsing, and a container large enough to hold the removable ice basket and scoop. Skip steel wool or abrasive scrubbers. They scratch the plastic interior and create tiny grooves where mineral scale and bacteria collect faster next time.
Deciding which cleaning agent to use matters more than most owners realize, since some ice makers have nickel-plated evaporator plates that corrode with the wrong acid. Check your owner's manual for a "nickel-safe" or "food-safe" designation before you pour anything in. Commercial ice machine cleaners are formulated to be safe on these components and typically work faster, while vinegar and citric acid are cheaper but need longer contact time and more elbow grease on stubborn scale, so it helps to compare biodegradable, non-corrosive descalers before you buy.
The wrong cleaner can corrode nickel-plated parts faster than the mineral buildup you're trying to remove.
Comparing your cleaning options
Here's how the three most common choices stack up against each other:
| Cleaner | Cost | Contact time | Nickel-safe | Best for |
|---|---|---|---|---|
| Commercial descaler | $10-$20 | 10-20 min | Yes (check label) | Heavy scale, monthly maintenance |
| White vinegar (1:1 water) | Under $5 | 30-60 min | Usually, but verify with manual | Light buildup, budget cleaning |
| Citric acid powder | $5-$10 | 20-30 min | Yes, generally | Hard water areas, odor removal |
Notice that vinegar needs roughly double the soak time of a purpose-built cleaner. That's the tradeoff: cheaper upfront, slower results, and a lingering smell that takes an extra rinse cycle to fully clear.
Setting up your workspace
Pick a spot near a sink with good drainage, since you'll be flushing water and cleaning solution through the machine multiple times. Unplug the unit and move it to this location before you open the manual, the compressor doesn't need to run during any part of this process and leaving it plugged in is just a shock risk you don't need. Lay a towel down under the drain plug area too, because most portable units release a surprising amount of standing water the moment you tilt them.
Quick pre-cleaning checklist
- Owner's manual open to the cleaning/descaling section
- Descaling solution chosen and diluted per instructions
- Soft brush, microfiber cloth, and empty basin ready
- Distilled water on hand for final rinses
- Unit unplugged and positioned near a drain
- Towel down to catch spills
Once you've checked off this list, you're ready to move into the actual teardown and cleaning steps, and you won't have to stop halfway through to hunt for a missing tool or double-check whether your cleaner is safe for the machine's internals.
Step 1. Turn off and drain the machine
Begin by unplugging the unit completely rather than just switching it off at a control panel button, since many portable ice makers keep the compressor on standby even when the display looks dark. Locate the drain plug on the back or bottom of the unit, usually a rubber stopper or small threaded cap, and remove it over the towel you laid down earlier. Water will come out fast at first, then slow to a trickle as the reservoir empties, so give it a full minute before you assume it's done.
Emptying the reservoir and ice basket
Tilt the machine slightly toward the drain opening to coax out the last bit of standing water, since portable units almost never drain completely flat. Take out the removable ice basket and scoop, then dump any leftover ice or slush into the sink. Check the bottom of the basket for a thin film of scale or discoloration; that's the mineral buildup you're about to tackle, and seeing it now gives you a baseline for how thorough the cleaning needs to be.
A machine that isn't fully drained just dilutes your cleaning solution and wastes the whole cycle.
Wiping down before you add anything
Once the reservoir is empty, run a microfiber cloth around the interior walls and the evaporator plate, the finned metal surface where ice actually forms. This picks up loose mineral flakes and any visible mold spots before they get pushed further into the machine by rinse water later. Don't use paper towels here, they shed fibers that catch on the evaporator fins and are annoying to pick out one by one.
Double-check that the drain plug is back in place and seated tight before moving to the next step. A loose plug means your descaling solution leaks out before it has time to work, and you'll end up repeating this entire step. With the machine drained, wiped, and sealed again, you're ready to introduce the actual cleaning agent.
Step 2. Add a cleaning or descaling solution
Pour your chosen solution into the reservoir once the drain plug is snug, filling to the line marked in the manual rather than guessing at the amount. Overfilling the tank pushes solution up through the ice-making lines before it's fully mixed, leaving gritty residue behind instead of dissolving it. Whichever product you picked, this is the step where a dedicated portable ice machine cleaner actually earns its keep, breaking down the calcium and lime coating the evaporator fins.
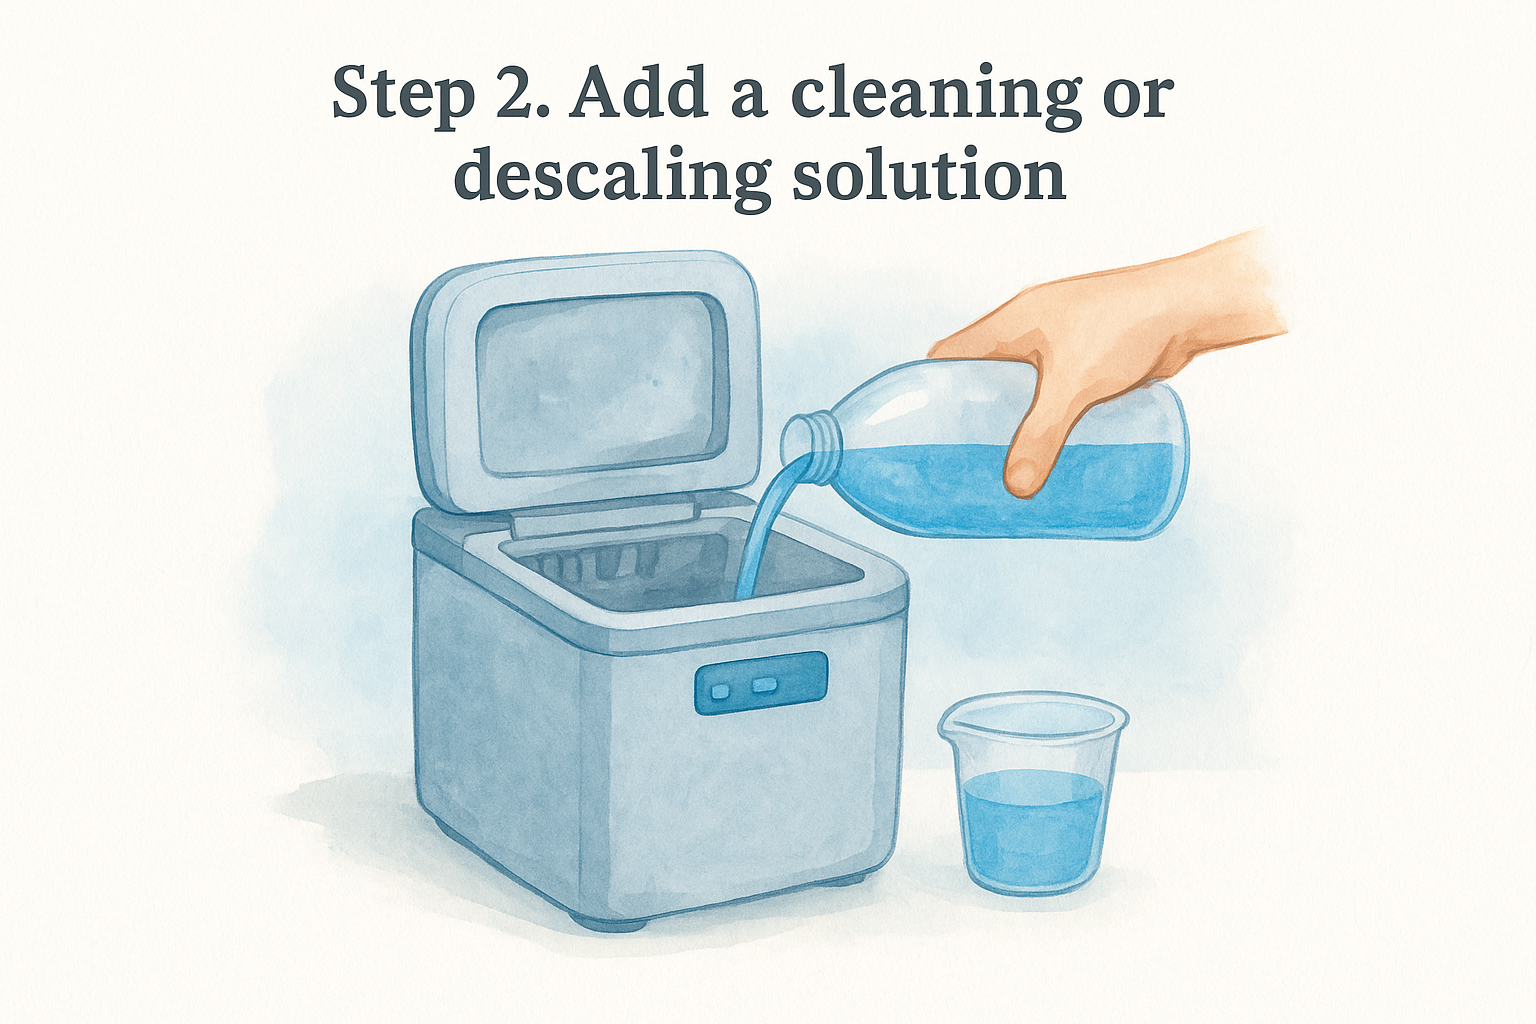
Mixing your own solution
Skip store-bought descaler and you can still get solid results with pantry staples, provided you measure carefully instead of pouring freehand.
DIY descaling recipes (mix in a clean container first):
- White vinegar: 1 part vinegar to 1 part water
- Citric acid: 2 tablespoons powder per quart of warm water
- Commercial descaler: follow bottle ratio (usually 1 capful per quart)
Stir the mixture before adding it to the reservoir so the acid distributes evenly instead of settling at the bottom of your mixing container. Citric acid dissolves faster in warm water than cold, which matters if your kitchen tap runs cool.
Letting the solution sit
Close the lid and let the solution sit for the contact time noted on your product label or in the earlier comparison table, and don't rush this part by running a cycle immediately. Vinegar needs the full 30 to 60 minutes to break down stubborn scale, while most commercial descalers finish the job in under 20.
Cutting the soak time short is the single most common reason a "cleaned" ice maker still tastes off.
Now that the solution has had time to loosen the mineral deposits, you're ready to run it through the machine and start scrubbing the parts it couldn't reach on its own.
Step 3. Run a cleaning cycle and scrub components
Plug the machine back in and start a normal ice-making cycle, letting the descaling solution circulate through the same lines and pump that normally handle water. This step forces the loosened mineral deposits out of tight spots your cloth can't reach, like the pump intake and the tubing that feeds the evaporator plate. Run the cycle once through completely, then stop the machine and unplug it again before you touch anything inside.
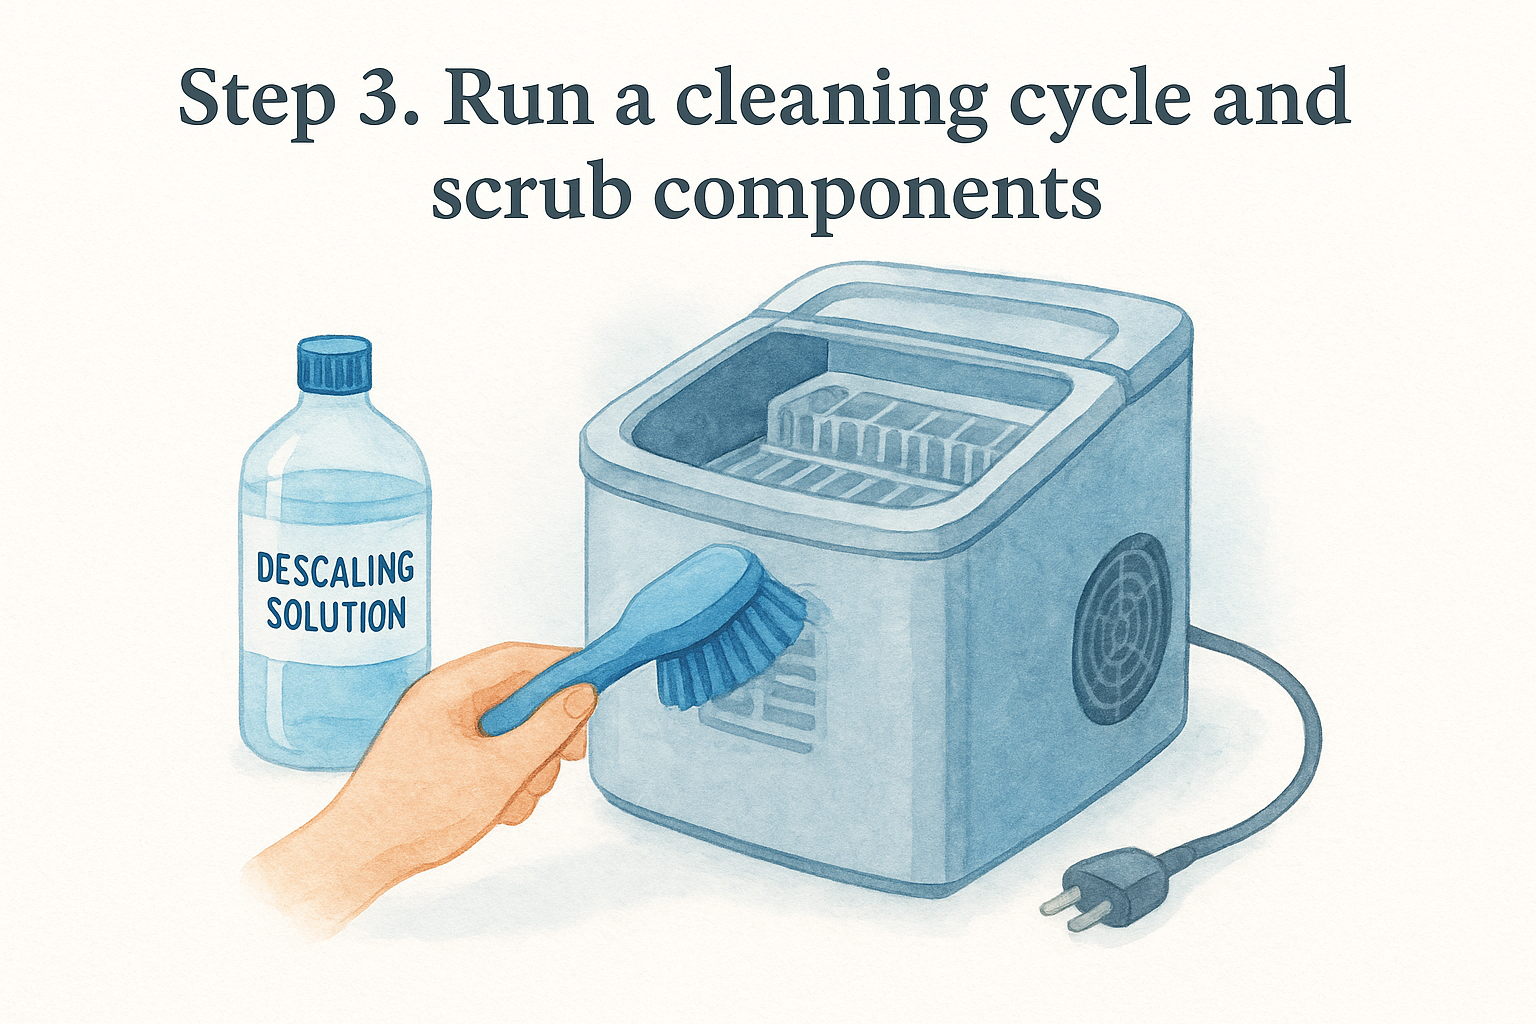
Scrubbing the evaporator and interior
With the machine off, dip your soft-bristle brush in the remaining solution and work it over the evaporator fins, the ridged metal grid where ice forms. Go slowly here, since bent fins reduce ice output and are annoying to straighten back out. Scrub the reservoir walls, the ice basket, and the scoop next, paying close attention to seams and corners where mold tends to hide.
A machine that looks clean on the surface can still have scale packed into corners a cloth never touches.
Checking the hard-to-reach spots
Inspect these areas specifically before moving on, since they're the spots owners skip most often:
- Underneath the ice basket lip, where drips collect and mold grows
- The pump intake screen, if your model has one
- Rubber gaskets around the lid, which trap moisture
- The drain plug threads, where mineral crust builds up unnoticed
Catching buildup in these spots now saves you a repeat cleaning session in two weeks, because leftover scale acts as a starting point for new deposits to latch onto faster.
When to run a second cycle
Heavy scale sometimes needs a second pass, especially if you're descaling a portable ice maker that's been neglected for several months. Look at the water coming out of the reservoir after the first cycle; if it's still cloudy or has visible flecks, mix a fresh batch of solution and repeat the cycle and scrub before moving forward. Skipping this check means you rinse and reassemble a machine that's only partway clean, and you'll be back at Step 1 sooner than you'd like.
Step 4. Rinse, dry, and reassemble
Drain the descaling solution completely, then refill the reservoir with clean water and run a full cycle just to flush the lines. Leftover acid left in the pump or tubing gives your next batch of ice a sour or metallic taste, so don't skip straight to drying. Repeat this rinse cycle twice if you used vinegar, since its smell clings to plastic longer than a commercial descaler's residue does.
Flushing every line the solution touched
After the second rinse cycle, pull the drain plug again and let the machine empty over your towel one more time. Check the water as it comes out; if you still catch a whiff of vinegar or see any cloudiness, run a third rinse with distilled water before moving on. Skipping this check is how owners end up with ice that tastes faintly of cleaner for the first few batches after reassembly.
Ice that tastes like your cleaning solution means you rinsed too fast, not that the descaler failed.
Drying the parts before they go back in
Set the ice basket, scoop, and any removable trays on a clean towel and let them air dry fully rather than toweling them dry, since lint sticks to damp plastic and ends up in your ice. Wipe the interior reservoir and evaporator fins with a dry microfiber cloth to catch any lingering droplets, paying attention to seams where water pools. Give everything at least 15 minutes before you reassemble, since sealing moisture inside the housing invites the same mold you just scrubbed out.
Putting the machine back together
Reinsert the drain plug first and seat it firmly, then place the ice basket and scoop back in their original positions. Confirm the lid gasket sits flush before closing it, since a gap here lets warm air in and slows ice production. Plug the unit back in, run one final cycle, and discard that first batch of ice; it carries trace mineral flakes loosened during cleaning that you don't want in your drink. Once that batch is gone, your portable ice machine cleaner routine is finished and the unit is producing clear ice again.
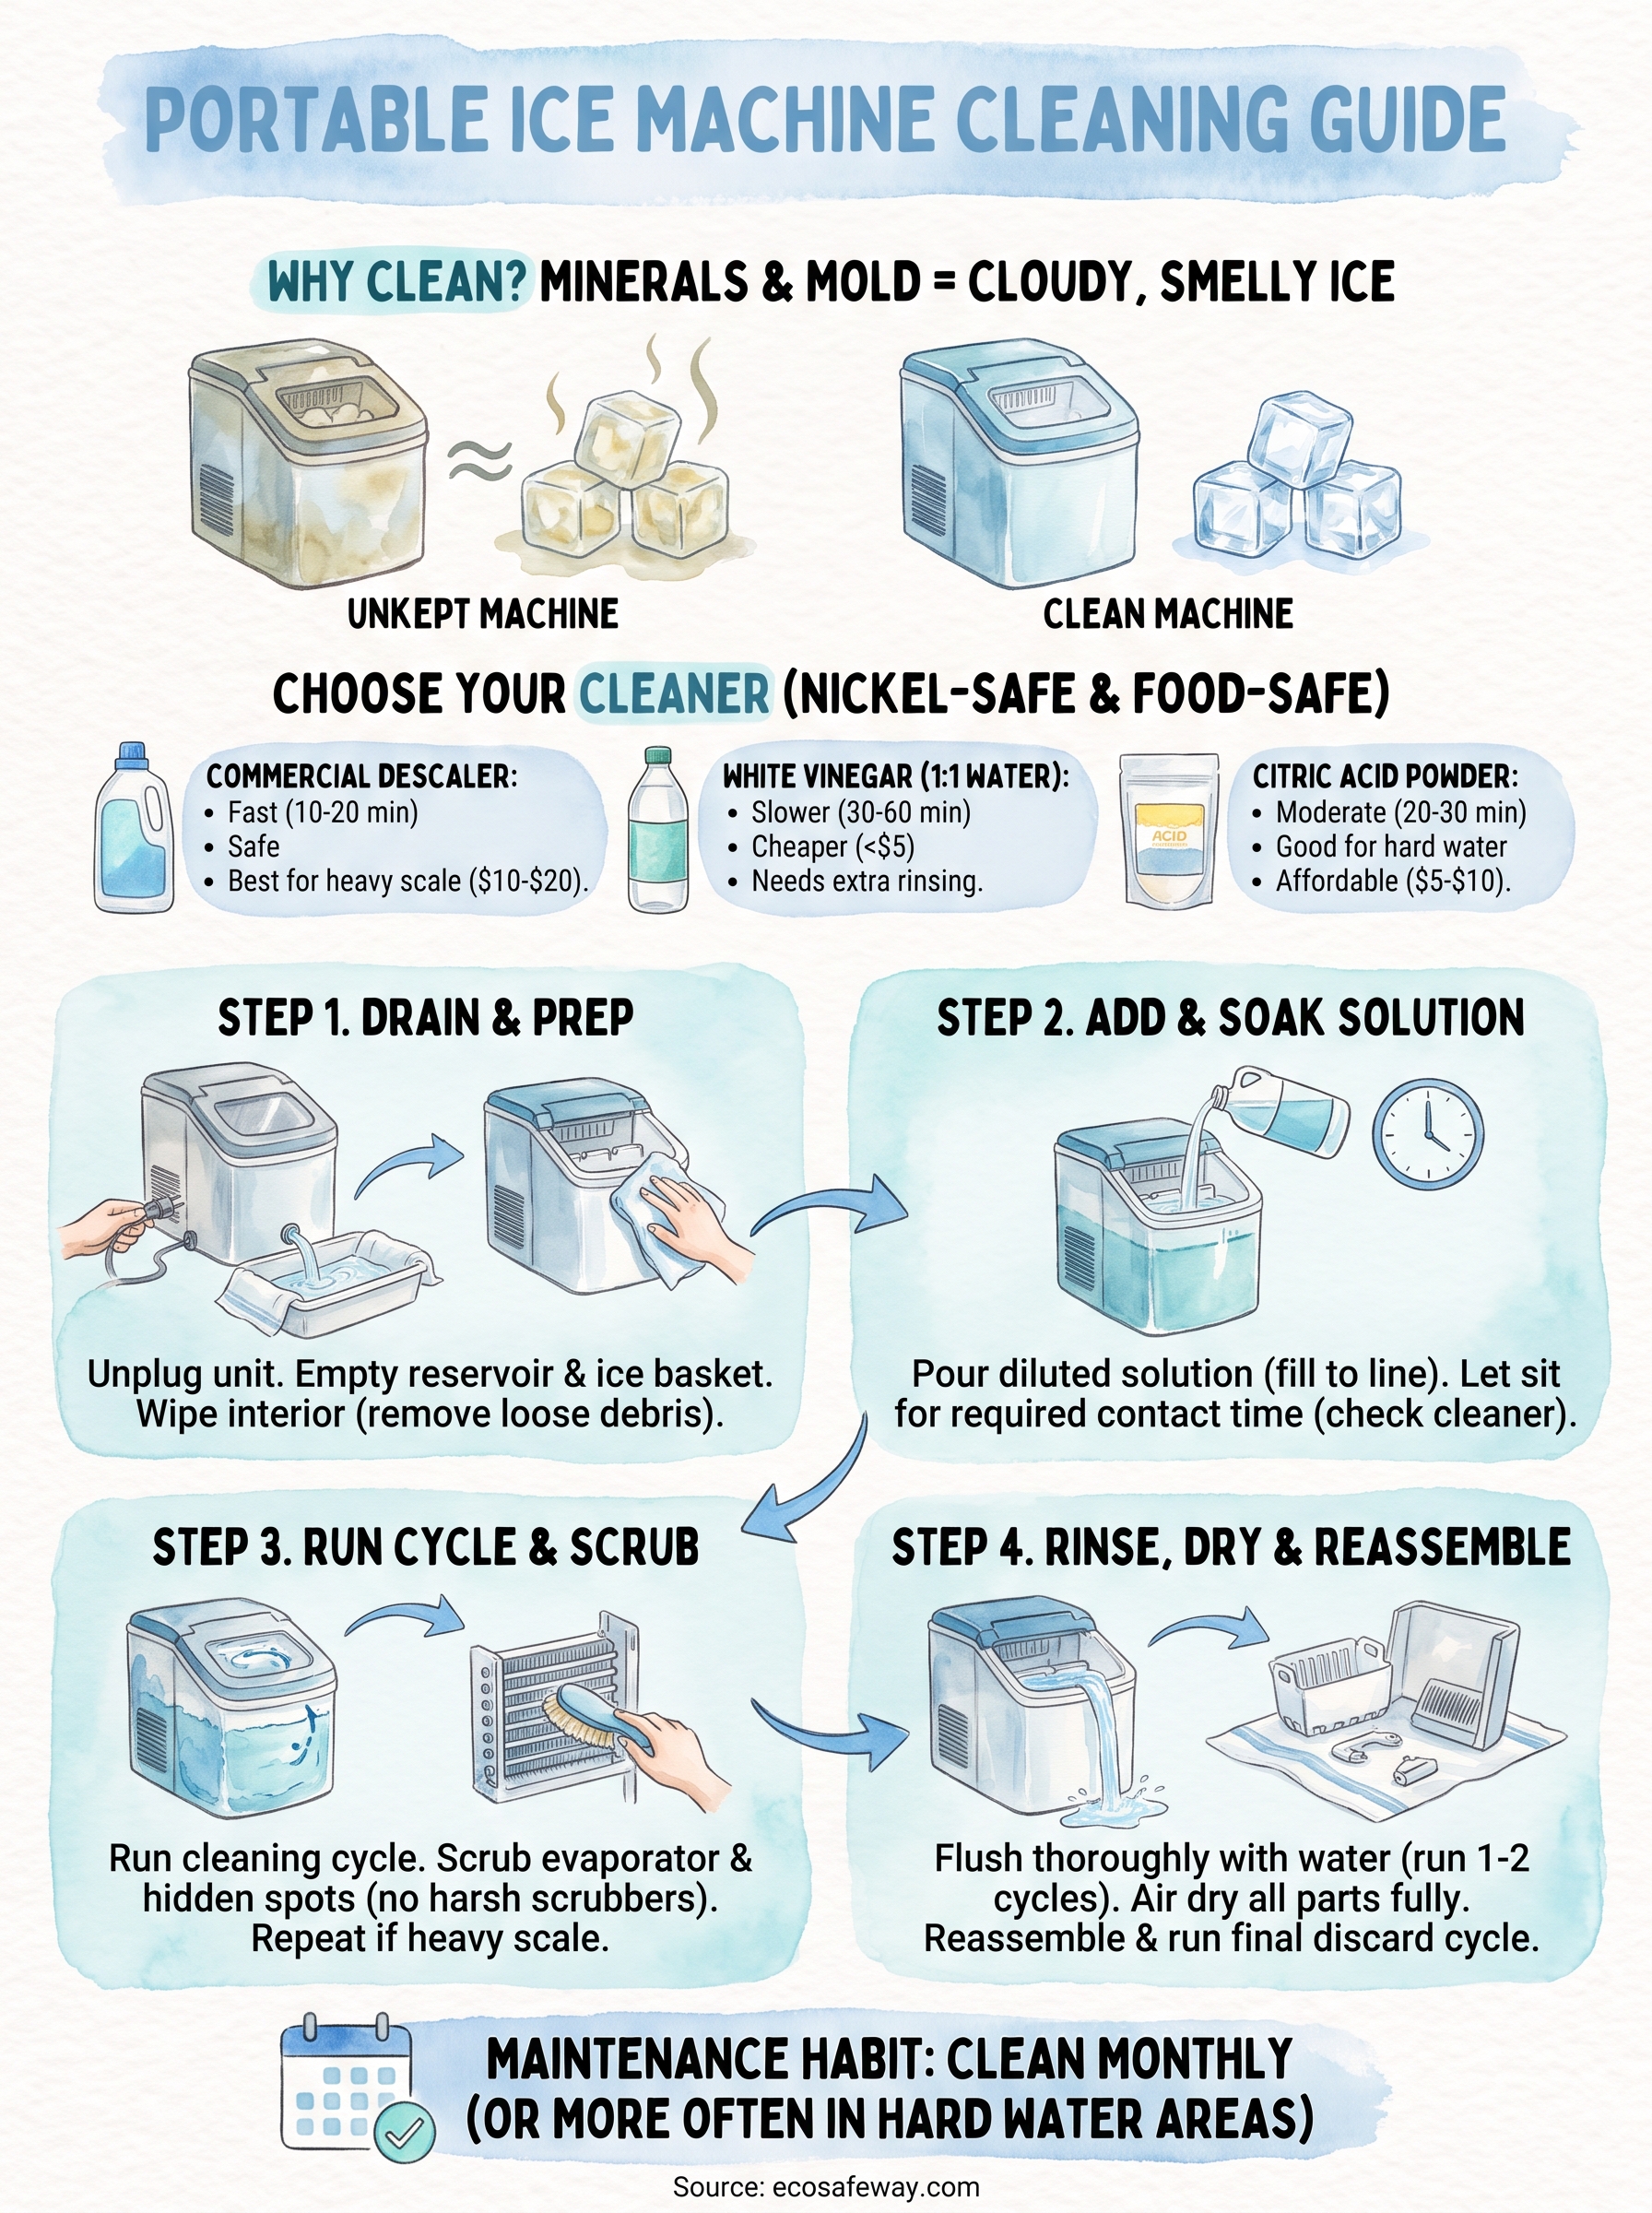
Making ice maker cleaning a regular habit
A clean machine comes down to consistency, not luck. Set a monthly reminder on your phone the same way you would for changing an HVAC filter, and you'll never let scale build up enough to need a second cleaning cycle. If you're in a hard water area, bump that to every three weeks since minerals accumulate faster than the manual usually accounts for.
Running through these four steps regularly keeps your ice clear, your compressor healthy, and your countertop unit smelling like nothing at all, which is exactly what you want from a portable ice machine cleaner routine. Skip the guesswork on which product is actually safe for your evaporator plate, and reach for something built for the job. Eco Safeway's nickel-safe, food-safe ice machine cleaner and descaler dissolves scale fast and skips the lingering vinegar smell entirely.


