





A portable AC that runs all day but barely cools the room is usually not broken. It is dirty. Dust, lint, and pet hair pack into the fins, airflow drops, and the compressor works harder for less cold air. If that sounds like your unit, a portable ac coil cleaner is the fastest fix you can do yourself.
The short answer: use a foaming, no-rinse coil cleaner made for evaporator and condenser coils. Unplug the unit, remove the filter and rear panel, spray the coils, and let the foam work for the time on the label. As it breaks down grime, it drips into the condensate pan and drains out. Choose a product that is safe on aluminum fins and copper tubing, and skip acidic cleaners you cannot rinse off a small indoor unit.
Below, you will learn how to pick the right cleaner, what tools you need, and the step-by-step process for cleaning both coils. We also cover how often to repeat it. Eco Safeway makes coil cleaning products for HVAC and marine systems, so we focus on methods that protect the equipment, not just clean it.
Why portable AC coils need cleaning
Every portable air conditioner moves room air across two coils. The evaporator coil absorbs heat from your room, and the condenser coil releases that heat outside through the exhaust hose. Both are lined with thin aluminum fins, and both clog faster than most owners expect.
What buildup does to cooling
A film of dust and grease acts like a blanket on the fins. Air cannot pass through freely, and heat cannot move into the metal. The result is reduced airflow and weaker heat transfer, so the unit runs longer to reach the same temperature.
Small units have little margin for this. The filter catches large debris, but fine dust slips past and bakes onto the hot condenser fins. On the evaporator side, a dirty coil can ice over, then thaw and leave a musty smell. Using a portable ac coil cleaner on a regular schedule removes that layer before it causes those problems.
A clean coil lets the same compressor deliver more cooling in less runtime.
Signs your coils are dirty
Watch for these symptoms before you reach for the spray. They show up gradually over a season, so they are easy to blame on hot weather instead of the unit.
| Symptom | Likely coil-related cause |
|---|---|
| Weak airflow, room never reaches set temperature | Clogged fins restrict air movement |
| Unit runs nonstop | Poor heat transfer forces longer cycles |
| Frost on the front coil | Too little air crossing the evaporator |
| Musty or sour smell | Moisture and grime trapped on the evaporator |
Not every cooling problem is a coil problem. Check that the exhaust hose is not kinked and the filter is clean first. If those are fine and the symptoms remain, dirty coils are the most likely cause. A refrigerant leak or failing compressor needs a qualified technician, not a cleaner.
Step 1. Gather tools and pick the right cleaner
Prep takes about ten minutes and prevents most mistakes. Lay everything out before you open the unit, because wet coils and a missing screwdriver make a poor combination.
Tools to have on hand
Most units hold the rear panel with a handful of screws, so a Phillips screwdriver and a soft brush cover most of the job. Add the rest of this short list:
- Phillips screwdriver
- Soft brush and a vacuum with a brush attachment
- Fin comb for bent fins (optional)
- Towels and a shallow pan
- Gloves and safety glasses
Picking the right cleaner
Cleaner choice matters more than the tools. A foaming no-rinse spray clings to vertical fins, loosens grime, and drips into the condensate pan as it breaks down, the same chemistry used in a professional cleaner for evaporator and condenser coils. Check that the label says it is safe for aluminum and copper.
Choose a no-rinse foam made for coils, because a small indoor unit gives you nowhere to flush harsh chemicals.
| Cleaner type | Fit for a portable AC |
|---|---|
| Foaming no-rinse coil cleaner | Best choice, drains with condensate |
| Acid-based, rinse required | Avoid, hard to flush indoors |
| Dish soap and water | Last resort, can leave residue |
Step 2. Unplug the unit and open the housing
Safety comes first, and this step is mostly about access. You are about to work near electrical parts and a pan of water, so power off before anything else and give yourself room to see what you are doing.
Shut down and drain
Turn the unit off, then unplug it from the wall. Do not trust the power button alone. Empty the condensate pan through the drain plug into your shallow pan, so nothing sloshes when you move the unit.
Never spray a portable ac coil cleaner on a unit that is still plugged in.
Open the housing and reach the coils
Next, pull the unit a foot or two from the wall so you can reach the back. Then work through this order:
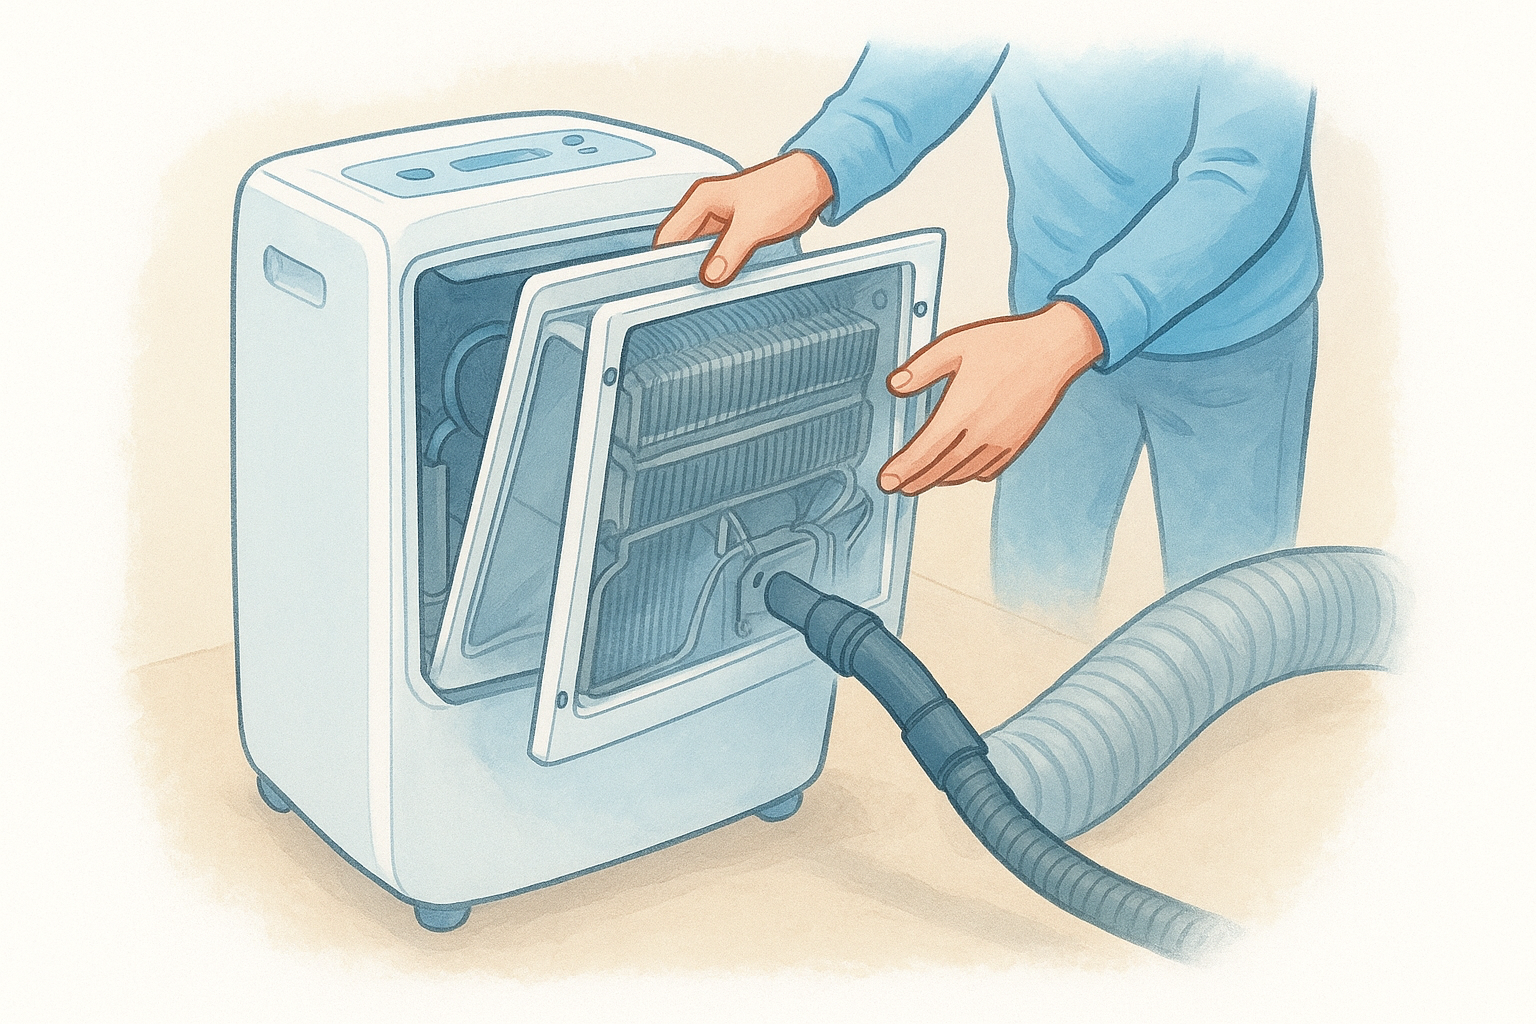
- Slide out the air filter and set it aside to wash later.
- Remove the rear panel screws and keep them in a cup.
- Lift off the panel. Take a phone photo of any wiring or clips before you disconnect anything.
- Find the coils. The evaporator sits behind the intake grille, and the condenser sits nearer the exhaust hose.
- Vacuum loose dust with the brush attachment, moving along the fins, never across them.
If a panel will not budge, stop and check the manual. Forcing plastic clips breaks them, and bent fins cut airflow just as dirt does.
Step 3. Apply the coil cleaner to evaporator and condenser
Now the real cleaning starts. Work while the coils are dry and cool, and keep the spray away from the fan motor and wiring. A towel over the control board takes ten seconds and prevents a costly mistake.
Spray the evaporator coil
Shake the can, then hold it 6 to 8 inches from the fins and follow the label. Spray from top to bottom so the foam does not pool at the base.
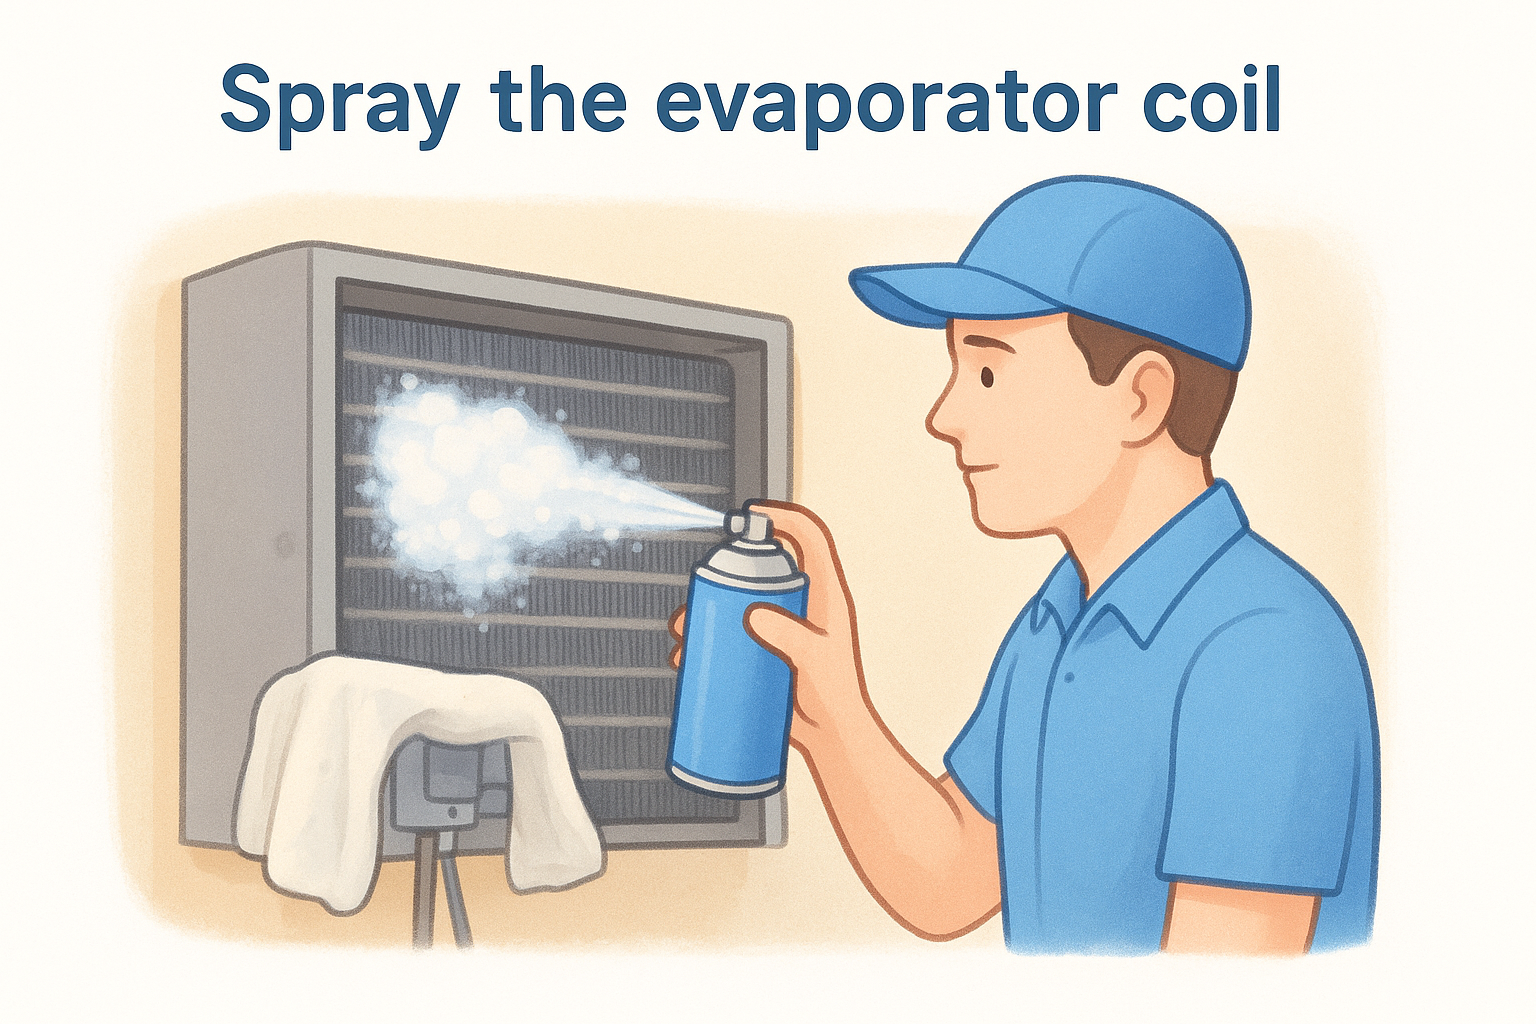
- Cover the control board and motor with a towel.
- Spray the coil face in slow, overlapping passes.
- Wait the full time on the label without wiping.
- Watch the condensate pan catch the dirty drips.
Cover the electrical parts, spray the fins evenly, and give the foam its full dwell time.
Treat the condenser coil
The condenser usually holds the heavier grime, so give it a second, slower pass. Apply the same portable ac coil cleaner only to the fins, never to the compressor or terminals.
Stubborn spots may need help. Once the foam has sat, brush lightly along the fins with the soft brush, never across them. If runoff is still dark after the dwell time, apply a second light coat and wait again.
If you spot bent fins, straighten them gently with a fin comb before moving on.
Step 4. Rinse, dry and test the cooling
Finishing takes about an hour, and most of it is waiting. Rushing the drying time or powering on with a loose panel undoes the work you just did.
Rinse and dry
Most foaming no-rinse cleaners need no flushing. The foam liquefies and drains into the condensate pan along with the grime. If your label calls for water, use a light mist from a spray bottle, never a hose.
Afterward, let the coils air dry for 30 to 60 minutes. Meanwhile, wash the filter with mild soap and water. Make sure it is completely dry before it goes back in. Then reattach the rear panel and empty the pan once more.
Never restart a damp unit. Let the coils and filter dry first.
Test the cooling
Reconnect the unit and run this check after using your portable ac coil cleaner:
- Plug in the unit, set it to cool, and turn the fan to high.
- Run it for 15 minutes with the exhaust hose straight.
- Hold your hand at the cool air outlet. The air should feel colder and stronger than before.
- Check the pan, the floor, and the back panel for leaks or a chemical smell.
If cooling is still weak, repeat the foam treatment once, then recheck the hose and filter. A unit that stays warm after a clean coil likely has a refrigerant or compressor fault, so book a qualified technician.
Keeping your portable AC cooling all season
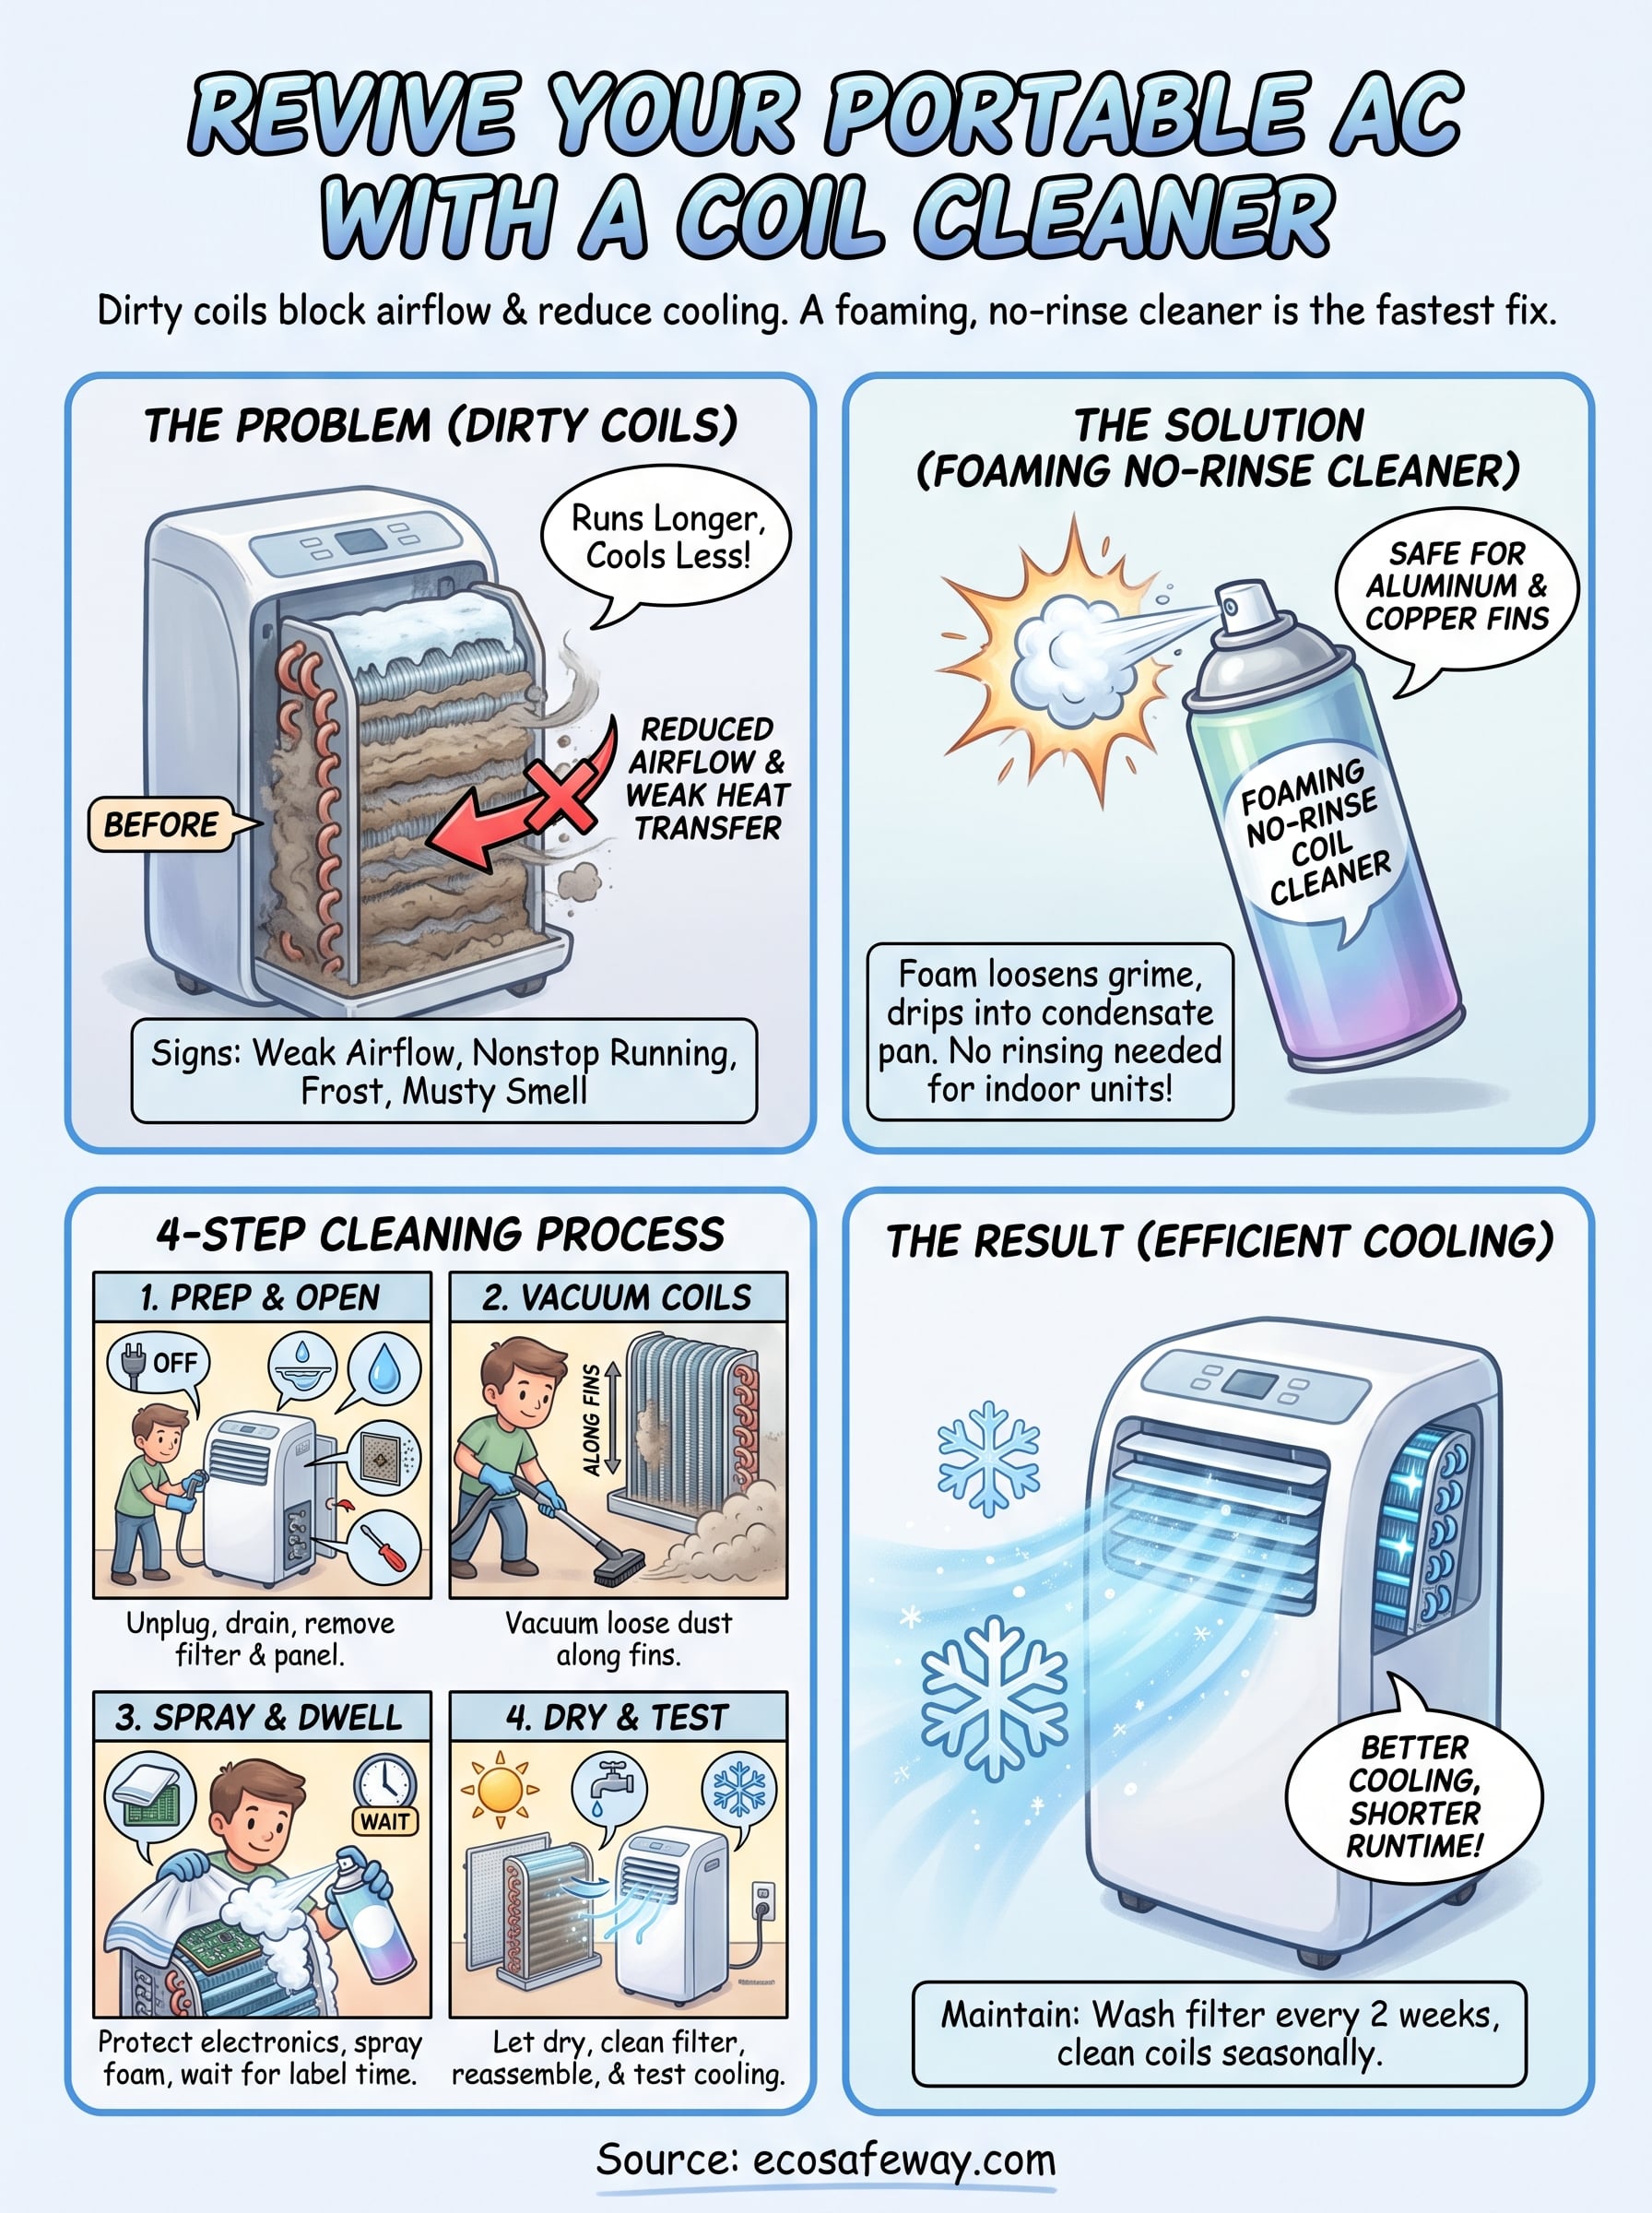
A dirty coil is the most common reason a portable AC stops cooling, and a foaming no-rinse cleaner fixes it in about an hour. Unplug the unit, spray both coils, let the foam dwell, dry everything, and test. To keep the results, wash the filter every couple of weeks and clean the coils at least once per season. Do it more often with pets or dusty rooms. A straight exhaust hose helps too.
If you also maintain larger HVAC equipment, Eco Safeway's heavy-duty condenser coil cleaner for commercial HVAC systems lets you use the same spray, dwell, and dry routine at scale. Always read the label and safety data sheet for your equipment before you start.


