





Your KitchenAid ice machine is spitting out cloudy cubes, running slower cycles, or throwing an error code, and you're pretty sure it needs a cleaning. The right ice machine cleaner kitchenaid owners trust removes the scale buildup inside the water lines and evaporator plate without damaging food-contact surfaces or leaving behind chemical residue that ends up in your drinks.
This guide answers the two questions you actually came here for: which cleaner works safely in a kitchenaid ice machine cleaner cycle, and exactly how to run it. We'll walk through the descaling process step by step, including how long to soak, how many rinse cycles you need, and the warning signs that tell you scale has already damaged internal components.
We'll also cover cleaning frequency based on your water hardness, why nickel-safe formulas matter for units with nickel-plated evaporators, and what separates a proper descaler from a generic all-purpose cleaner. If you manage a commercial kitchen with multiple ice machines, you'll also find guidance on building a maintenance schedule that keeps every unit compliant and running at full capacity year-round.
Why and when to clean your KitchenAid ice machine
Hard water is the root cause of nearly every ice machine cleaning problem you'll run into. As water evaporates during the freeze cycle, minerals like calcium and magnesium stay behind and bond to the evaporator plate, water lines, and pump. This scale buildup restricts water flow, forces the compressor to work harder, and eventually shows up as thin, cloudy, or oddly shaped cubes. Left unchecked, scale doesn't just slow ice production, it shortens the lifespan of expensive components like the water pump and evaporator assembly, turning a $20 bottle of cleaner into a several-hundred-dollar repair bill.
Scale buildup that's ignored for too long doesn't just slow ice production, it permanently damages the parts a cleaning cycle can't fix.
Cleaning frequency based on your water hardness
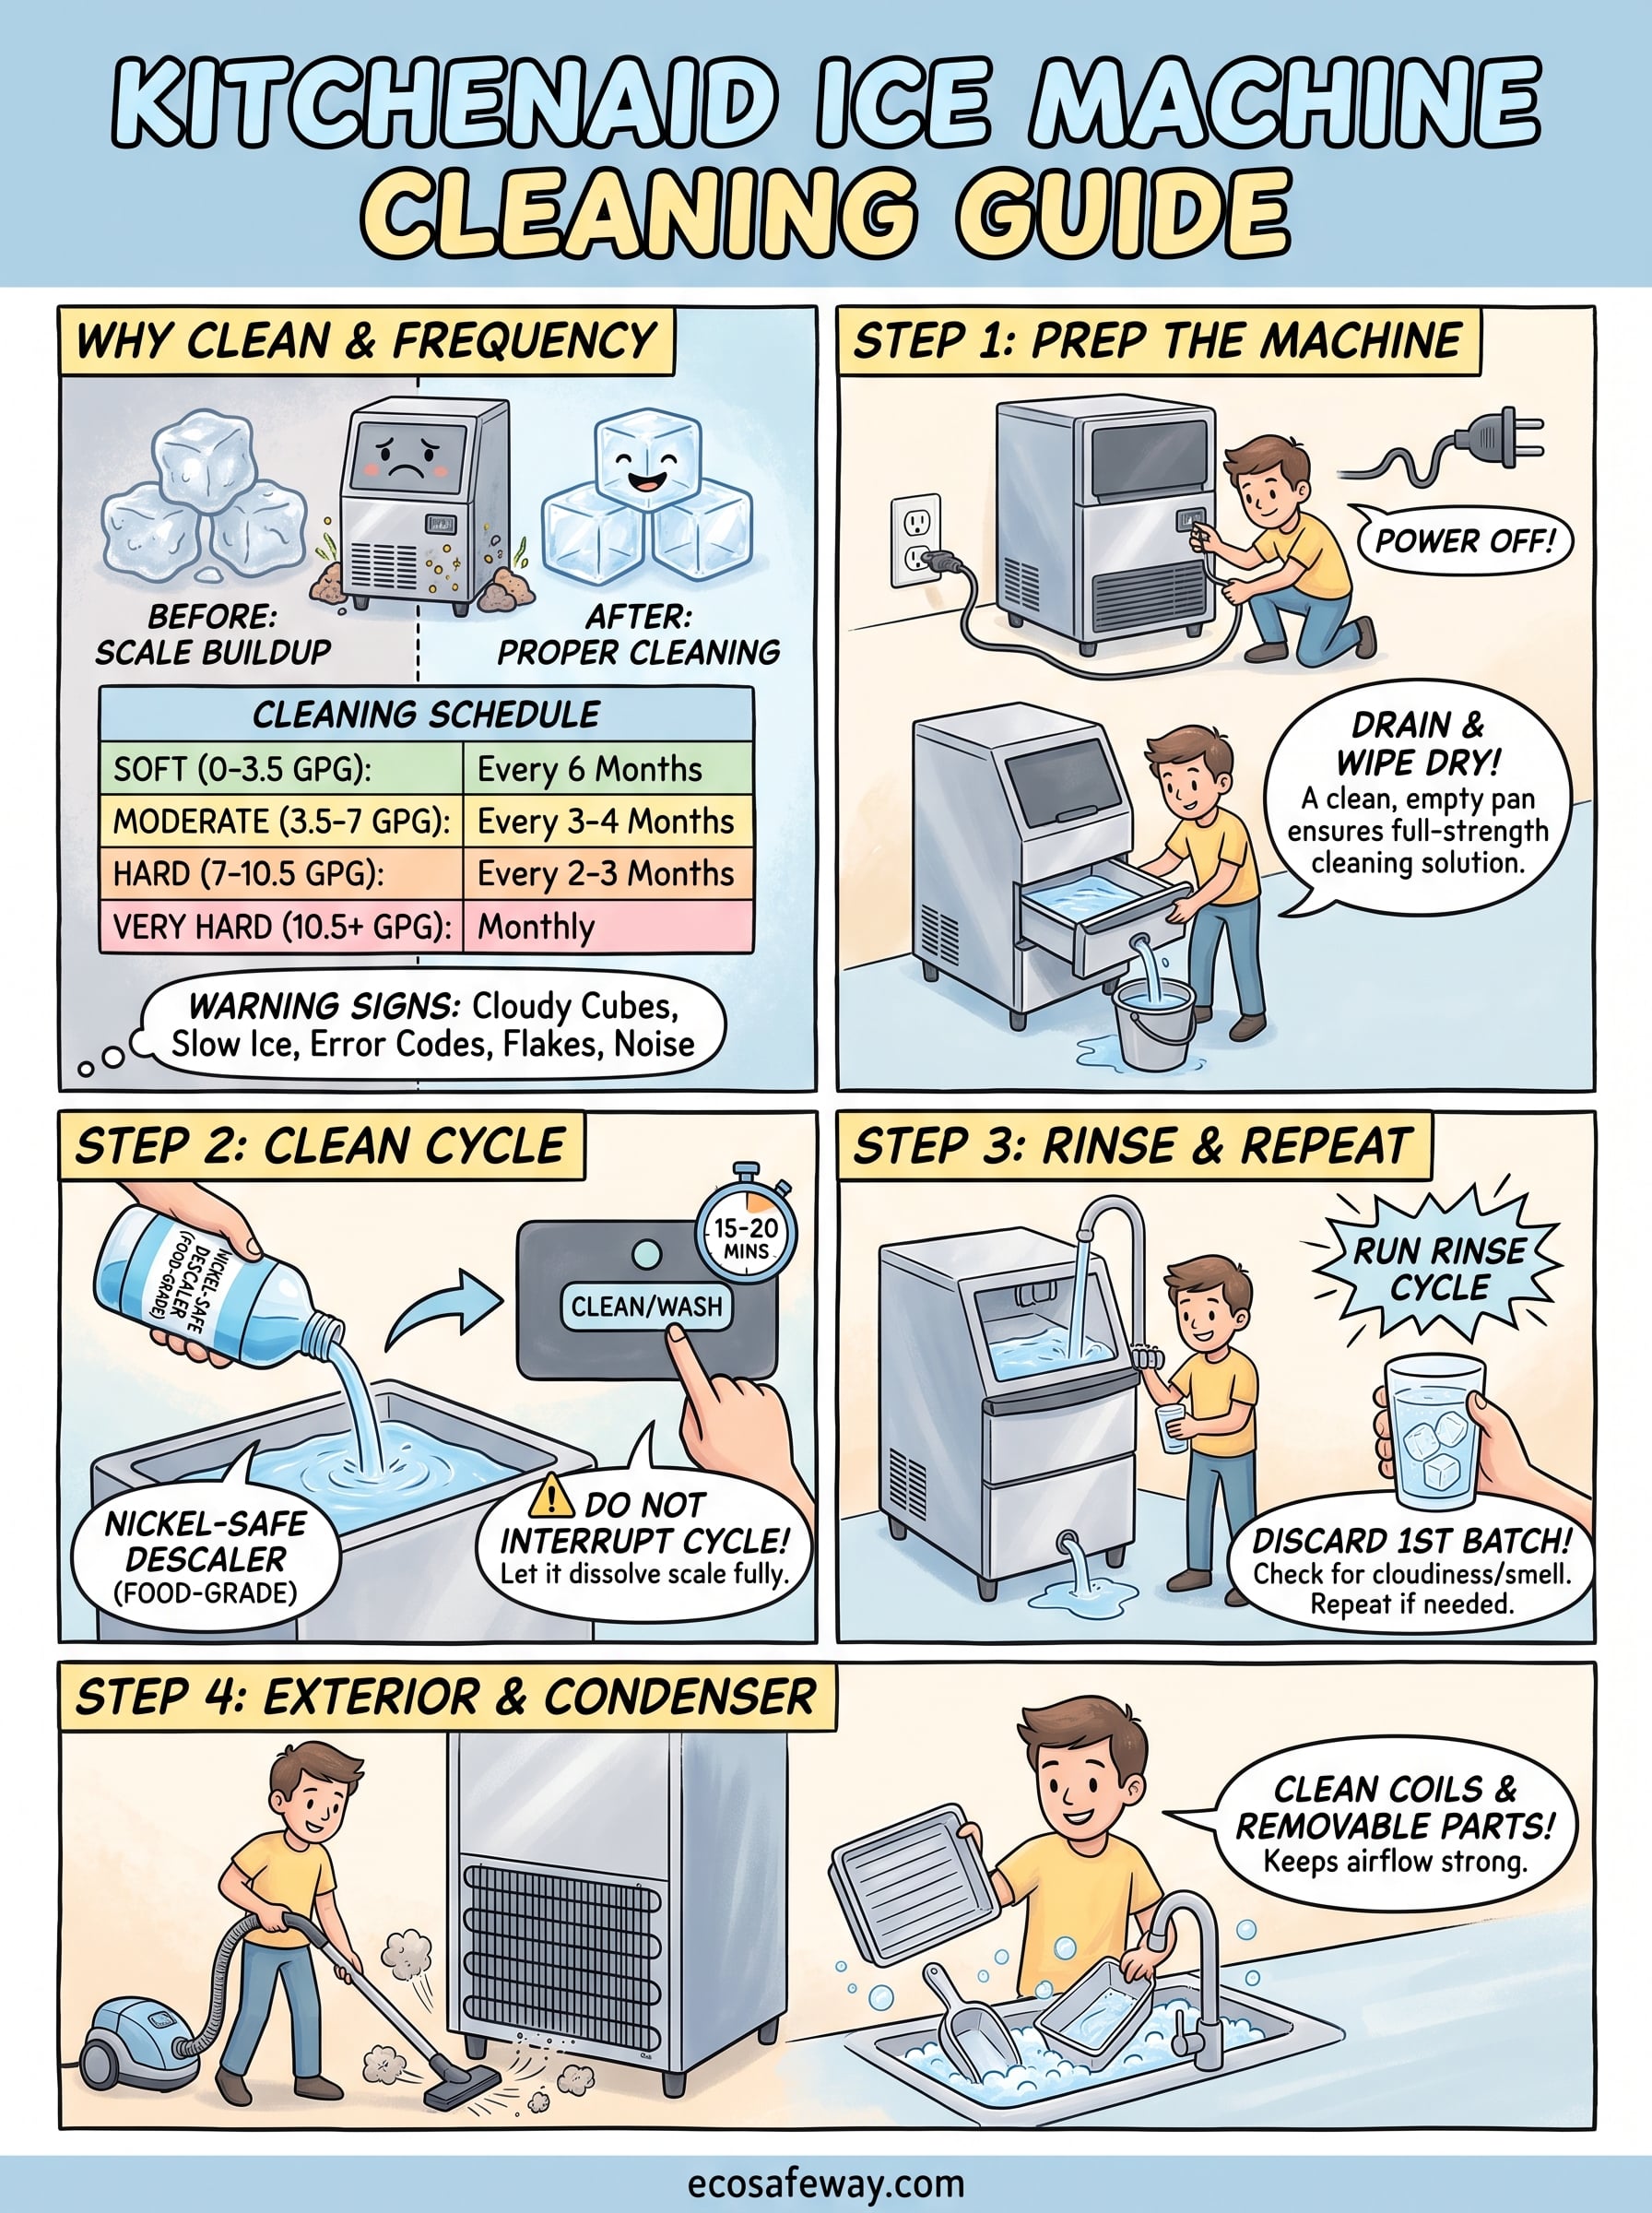
KitchenAid recommends running a dedicated ice machine cleaner kitchenaid technicians approve for food-contact surfaces on a fixed schedule rather than waiting until you spot a problem. How often you need to run it depends almost entirely on the mineral content of your water supply. If you're on municipal water in a region with known hard water, or you've noticed white or gray flaking around your faucets, plan on cleaning more often than the manufacturer's baseline suggestion. The table below gives you a starting point based on grains per gallon (GPG), a standard measurement your local water utility or a home test kit can confirm; the USGS water hardness guide explains how these classifications are measured.
| Water Hardness | Grains Per Gallon (GPG) | Recommended Cleaning Frequency |
|---|---|---|
| Soft | 0-3.5 | Every 6 months |
| Moderately hard | 3.5-7 | Every 3-4 months |
| Hard | 7-10.5 | Every 2-3 months |
| Very hard | 10.5+ | Monthly |
Commercial kitchens running multiple units around the clock should treat the high end of that range as the default, since heavier ice production means more mineral cycling through the same lines every single day.
Warning signs you've waited too long
Signs rarely announce themselves clearly, so it helps to know exactly what to watch for before ice quality tanks completely. Most KitchenAid units will give you a mix of mechanical and visual cues once mineral deposits cross a threshold that the machine's sensors can detect:
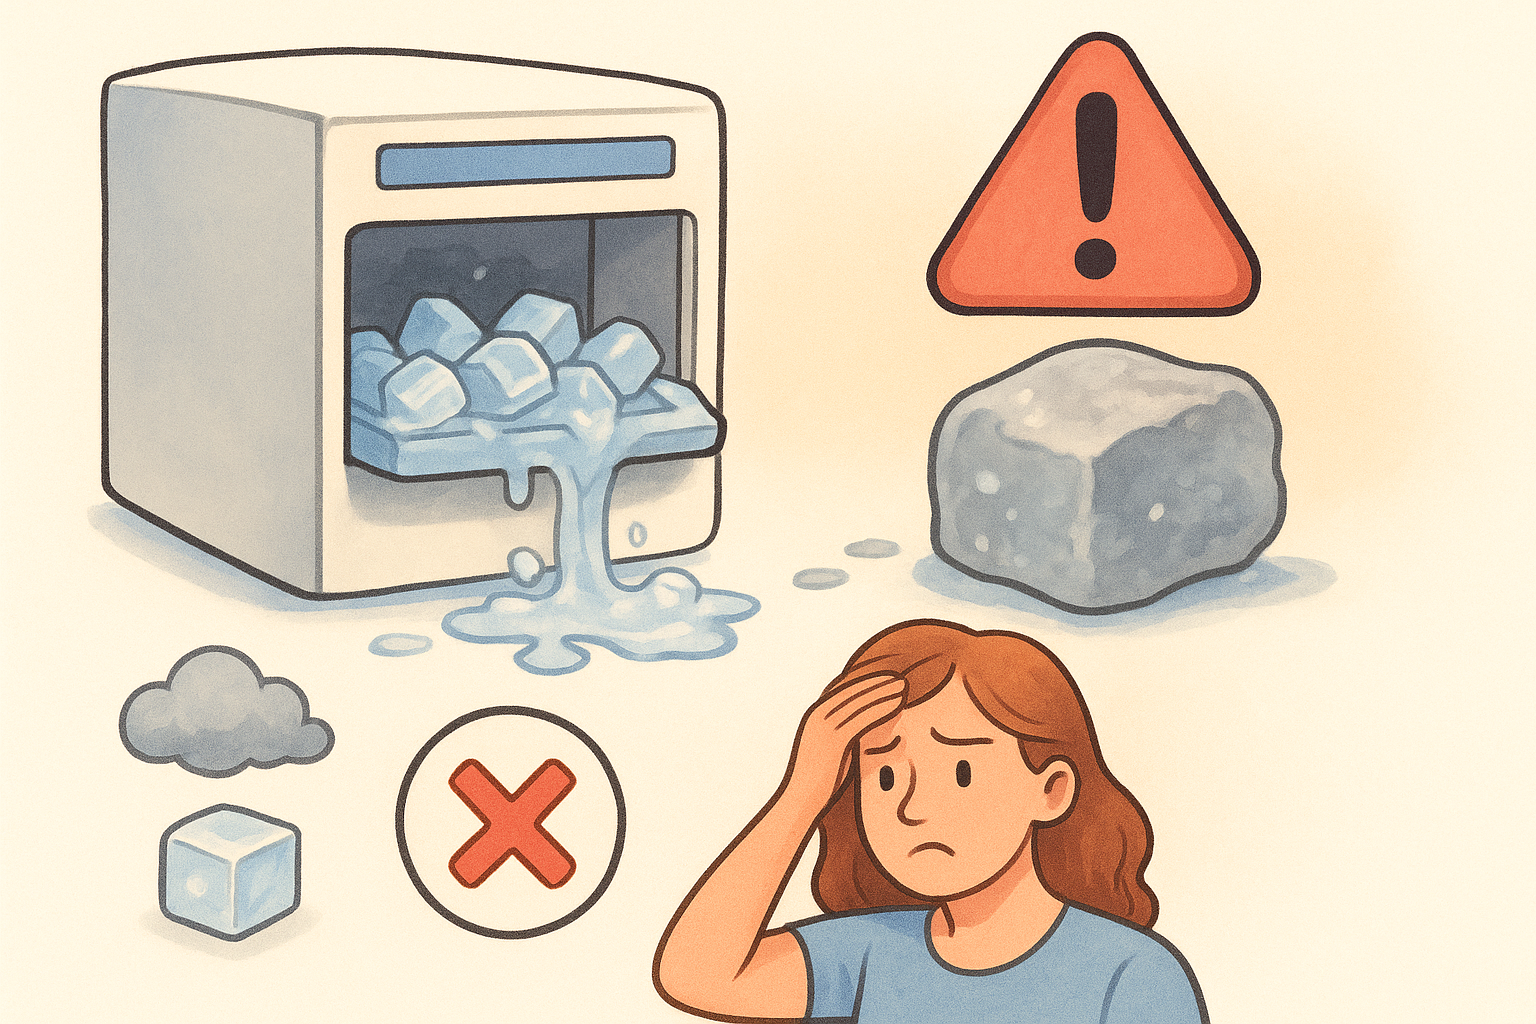
- Ice cubes coming out smaller, thinner, or slower than usual
- Cloudy or oddly shaped cubes instead of clear ones
- An error code or flashing light related to water flow or the freeze cycle
- Visible white or gray flakes in the ice bin or on the evaporator plate
- A longer freeze cycle time than the machine's rated output
- Unusual grinding or straining noise from the compressor
Noticing two or more of these at once means scale has likely built up enough to affect water flow through the system, and you should run a full descaling cycle before the next batch of ice rather than waiting for your regular schedule.
Step 1. Turn off the machine and drain the water pan
Before you pour any ice machine cleaner kitchenaid formula into the system, you need to cut power completely and clear out the standing water. Skipping this step is the fastest way to end up with a half-diluted cleaning solution that never sits on the scale long enough to break it down.
Powering down safely
Start by unplugging the unit from the wall outlet rather than just switching it off at a control panel, since some models keep the compressor cycling even in standby mode. Wait a few minutes for the compressor to fully spin down before you touch any internal components. If your ice machine is hardwired into a dedicated circuit, as many commercial built-in units are, shut off the breaker instead and confirm with a voltage tester before opening the front panel.
Draining the water pan and reservoir
Locate the water pan or reservoir underneath the ice-making mechanism, usually accessible after removing the front grille or lower access panel. Most KitchenAid models use a drain plug or a removable pan you can lift straight out; check your owner's manual if you're not sure which style yours uses. Empty any remaining water into a bucket or sink, then wipe down the interior with a clean cloth to remove loose sediment before it gets carried into the cleaning cycle.
A clean, fully drained water pan is what lets the descaling solution work at full strength instead of getting watered down before it reaches the scale.
Follow this checklist to confirm you're ready for step two:
- Unit unplugged or breaker shut off, compressor fully stopped
- Water pan or reservoir emptied completely
- Loose sediment and debris wiped from the pan interior
- Ice bin emptied of any remaining cubes
- Drain plug reinserted or pan reseated correctly
Getting the pan bone-dry now matters more than it seems, since it's easy to treat this stage as housekeeping rather than actual cleaning. A fully drained pan means the concentrated solution you add in the next step spends its full strength dissolving mineral deposits, not diluting into leftover tap water. Rushing straight into the cleaning cycle with water still sitting in the pan is one of the most common reasons owners end up running two or three cycles instead of one.
Step 2. Add the cleaning solution and run the clean cycle
Now that the pan is dry, you're ready to introduce the actual descaling agent. Choosing the right ice machine cleaner kitchenaid technicians recommend matters here, since generic all-purpose descalers often contain sulfamic or phosphoric acid concentrations that aren't formulated for food-contact plastics and can leave a chemical taste in your ice. A nickel-safe formula is non-negotiable if your evaporator plate has a nickel coating, which most modern KitchenAid units do, because standard acid-based cleaners can strip that plating and expose the aluminum underneath, so look for a food-safe descaler made for ice makers.
Mixing and pouring the solution
Check the product label for the exact dilution ratio, since concentrations vary between brands. A typical mix runs somewhere between 4 to 6 ounces of cleaner per gallon of warm water, but never guess. Pour the mixed solution directly into the water reservoir you drained in step one, filling it to the same line the machine normally uses during a regular ice-making cycle.
A cleaner that isn't nickel-safe can strip the evaporator's protective coating faster than scale itself would ever damage it.
Running the clean cycle
Most KitchenAid units have a dedicated clean or wash setting on the control panel, separate from the normal ice cycle. If your model lacks that button, consult your owner's manual for the manual override sequence, which usually involves holding two buttons simultaneously for several seconds. Once the cycle starts, follow this sequence:
- Power the unit back on and select the clean/wash cycle, or trigger the manual override
- Let the solution circulate through the water lines and over the evaporator plate for the full cycle length, typically 15 to 20 minutes
- Avoid opening the front panel mid-cycle, since interrupting it resets the timer and wastes solution
- Listen for the pump running steadily; a sputtering or uneven sound often means air is trapped in the lines
- Let the cycle complete fully before moving to any rinse steps
During this stage, the solution is actively dissolving the mineral deposits coating the evaporator and lines, so resist the urge to shortcut the timing even if the water looks clear early on. Scale that's been building for months doesn't dissolve in the first five minutes, and an incomplete cycle just means you'll be running this whole process again next week instead of on your regular schedule.
Step 3. Rinse the system and repeat if needed
Once the clean cycle finishes, don't assume you're done. Leftover cleaning solution left inside the lines is just as much of a problem as the scale you removed, since any residue that makes it into your ice will affect taste and, in commercial settings, can trigger a health inspection flag. Rinsing thoroughly is what separates a proper descaling process from a half-finished job that just moves the problem downstream.
Draining and refilling for the rinse cycle
Drain the water pan again the same way you did in step one, removing every trace of the cleaning solution before adding fresh water. Fill the reservoir with plain water to the same fill line, then run a full ice-making or rinse cycle exactly as the machine would during normal operation. This flushes the lines, pump, and evaporator plate with clean water and pushes out any dissolved mineral residue that broke loose during the clean cycle.
Skipping the rinse cycle means your first few batches of ice carry the taste of the cleaner you just used to remove the scale.
Checking the rinse water and cubes
After the rinse cycle completes, discard the first batch of ice the machine produces rather than using it. Inspect the cubes and the water pan for any of these signs before you consider the job finished:
- Cloudiness or a chemical smell in the rinse water
- A slight residue film left in the pan after draining
- Ice cubes that taste off or slightly bitter
- Visible white flakes still clinging to the pan walls
If you spot any of these, run a second full rinse cycle before returning the unit to normal service. It's a five-minute step that saves you from serving customers or family members ice that tastes like a cleaning product.
When to repeat the entire cleaning process
Heavier scale buildup sometimes needs more than one full clean-and-rinse cycle to fully dissolve. If the rinse water still looks cloudy or you notice grinding or straining sounds from the pump after the first pass, repeat step two in full: drain, add fresh solution, and run the clean cycle again. Units that have gone well past their recommended cleaning schedule, especially in very hard water areas, often need two full passes before the evaporator plate is genuinely scale-free. Trying to shortcut this by running just one cycle on a heavily scaled unit usually means you're back to troubleshooting cloudy ice within a few weeks.
Step 4. Clean the exterior, condenser, and removable parts
Descaling the internal water system only solves half the problem. Dust and grease on the condenser coils and grime on removable parts can slow ice production just as badly as scale, so don't skip this stage even when the internal cycle already looks clean. Grabbing a soft brush and a mild degreaser now takes ten minutes and prevents the airflow restrictions that make a freshly descaled machine still run warm.
Vacuuming and brushing the condenser coils
Locate the condenser coils, usually behind a rear or bottom grille depending on whether your unit is air-cooled or water-cooled. Unplug the unit again before you touch this area, since you're working near the compressor. Use a soft-bristle brush to loosen dust and lint buildup, then vacuum with a narrow attachment to pull debris out from between the fins without bending them. A condenser caked in dust forces the compressor to run longer to hit the same freeze temperature, which is exactly the kind of strain that shortens compressor life the same way ignored mineral deposits do inside the water lines, and heavier grease buildup on the fins usually calls for a dedicated condenser coil cleaning solution.
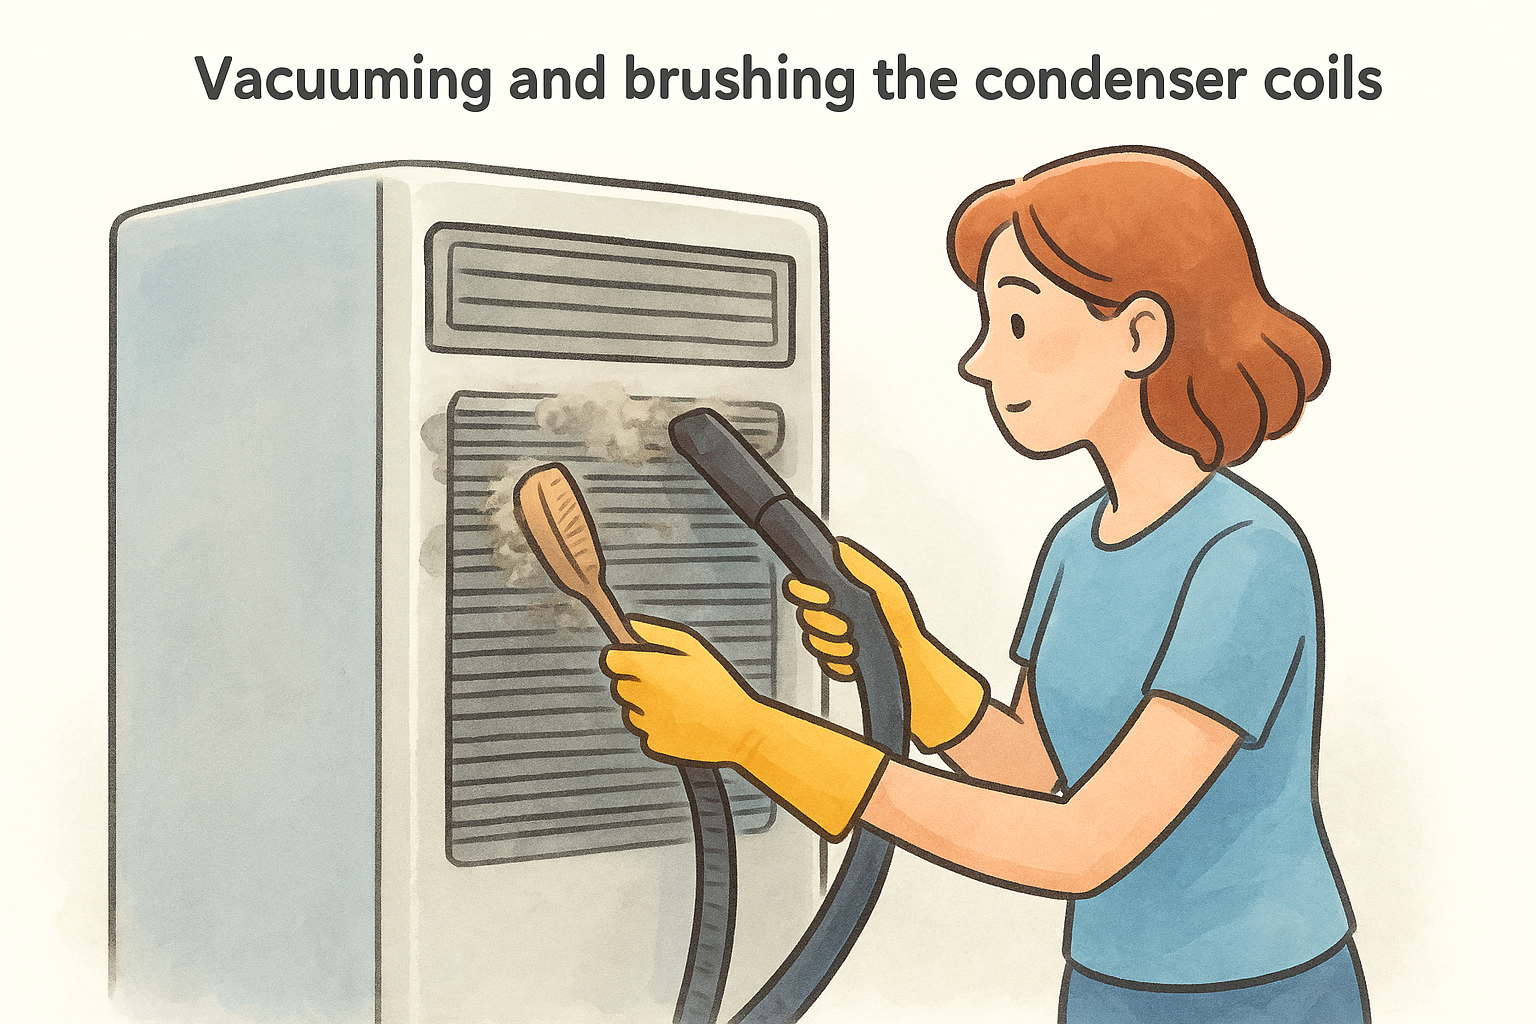
A dusty condenser makes the compressor work overtime even after you've descaled every internal line perfectly.
Cleaning removable trays, scoops, and bins
Pull out every removable component, the ice bin, scoop, water tray, and any splash guards, and wash them separately in warm water with a mild dish soap or a food-safe sanitizer. Rinse thoroughly and let each piece air dry completely before reinstalling, since trapping moisture inside a reassembled bin invites mold growth in the exact spot your ice sits before serving. Wipe down the interior walls of the ice storage bin too, since scale flakes and mineral dust often settle there even after a full internal descale.
Wiping the exterior and control panel
Use a soft cloth with a stainless-steel-safe cleaner on the exterior panels to remove fingerprints and grease buildup, avoiding abrasive pads that scratch the finish. Wipe the control panel with a barely damp cloth, never spraying cleaner directly onto the buttons or display, since moisture can seep behind the panel and cause electrical faults. Before you finish, run through this final checklist:
- Condenser coils vacuumed and free of dust
- Removable parts washed, rinsed, and fully dry
- Ice bin interior wiped down
- Exterior panels and control panel cleaned
- All parts reseated correctly before powering back on
Keeping your ice maker running smoothly
A scheduled descale beats an emergency repair every time. Stick to the cleaning frequency that matches your water hardness, drain the pan completely before each cycle, and never skip the exterior and condenser work that keeps airflow strong. Follow those four steps consistently and your KitchenAid unit will keep producing clear, odor-free ice for years instead of struggling through cloudy batches and error codes.
The cleaner itself matters just as much as the technique. A generic descaler can strip nickel plating and shorten the life of components a proper cycle should protect. If you're restocking supplies for a home unit or managing a commercial kitchen with several machines running daily, choose a formula built specifically for food-contact surfaces and nickel-plated evaporators. Eco Safeway's non-corrosive ice machine cleaner and descaler is formulated for exactly this job, giving you a reliable, food-safe option for every scheduled cleaning going forward.


