





If your kitchen drains smell like a dumpster on a hot day or your grease trap overflows every few weeks, you already know the problem. Learning how to clean a grease trap properly is the difference between a quick 30-minute task and an emergency call to a plumber. Restaurants, cafeterias, and any commercial kitchen with a fryer or dish pit deal with this same buildup of fats, oils, and grease, and most health codes require documented cleanings on a set schedule.
This guide gives you the exact steps to clean your grease trap safely, from shutting off equipment and scooping out solids to scraping walls and disposing of waste correctly. You'll also see how often the job needs doing based on your kitchen's volume, since cleaning frequency varies a lot between a small café and a full-service restaurant.
We'll walk through the tools you need, the safety precautions that keep you compliant with local grease disposal rules, and the maintenance habits that stretch time between deep cleanings. If you're also dealing with lingering drain odors after cleaning, that's a separate issue worth solving with enzyme-based treatments built for grease-heavy plumbing, which we cover in more detail elsewhere on this site.
What you need before cleaning a grease trap
Before you touch the lid, gather everything in one trip. Running back and forth for tools while grease cools and hardens on the walls makes the job take twice as long. Most of what you need for cleaning a grease trap costs less than a service call, and you likely already own half of it.
Tools and supplies to gather
Start with the basics that let you remove and scrape without improvising. A shop vac rated for wet waste saves you from bailing sludge by hand, and it's the single tool that turns this from a miserable job into a manageable one.
- Wet/dry shop vacuum with a long hose
- Plastic putty knife or grease scraper (avoid metal on fiberglass traps)
- Heavy-duty scrub brush
- Sealable containers or grease disposal drums rated for FOG (fats, oils, grease) waste
- Degreasing cleaner labeled safe for grease trap interiors
- Flashlight or headlamp
- Garden hose or bucket for rinsing
Safety gear and disposal setup
Grease trap waste isn't just smelly, it's a slip hazard and a bacterial breeding ground once it sits for a few days. Skipping protective gear here is how a routine cleaning turns into a trip to urgent care.
Never open a grease trap without gloves, eye protection, and a plan for where the waste is going.
Put on nitrile gloves, safety glasses, and old clothes you don't mind tossing. Line your disposal containers before you start, and confirm your local rules on grease waste, since most municipalities prohibit pouring it down a drain or into a storm sewer. Check with your hauler or health department if you're unsure, because improper disposal often carries fines separate from any health code violation for the trap itself.
Step 1. Locate the trap and run cold water
Grease traps usually sit under the three-compartment sink or just outside the kitchen wall in an in-ground unit near the dish pit. If you're not sure where yours is, check your original plumbing permit or ask whoever installed it, since local codes typically dictate placement close to the fixtures producing the most FOG waste. Larger interceptors serving a full commercial kitchen often sit outside, covered by a manhole-style lid in the parking lot or side yard.
Why cold water matters here
Run cold water through the sink for a minute or two before you open anything. Cold water keeps grease congealed and floating rather than melted and clinging to every surface, which makes the whole grease trap cleaning process faster once you get inside.
Hot water dissolves grease temporarily, then lets it re-harden deeper in your pipes, so cold water is your friend here, not your enemy.
Shut down connected equipment
Turn off dishwashers, disposals, and any equipment draining into the trap. This prevents a fresh slug of grease-laden water from flowing in while you're mid-scrape, and it keeps the tank level stable enough to see what you're actually dealing with.
Step 2. Remove the lid and skim the grease layer
Pry the lid loose with a flathead screwdriver, working around the edges before lifting straight up. Grease traps seal tight to keep odors in, so expect some resistance and a strong smell the moment the seal breaks. Set the lid on a towel or cardboard, not directly on grass or pavement, since residue on the underside will drip.
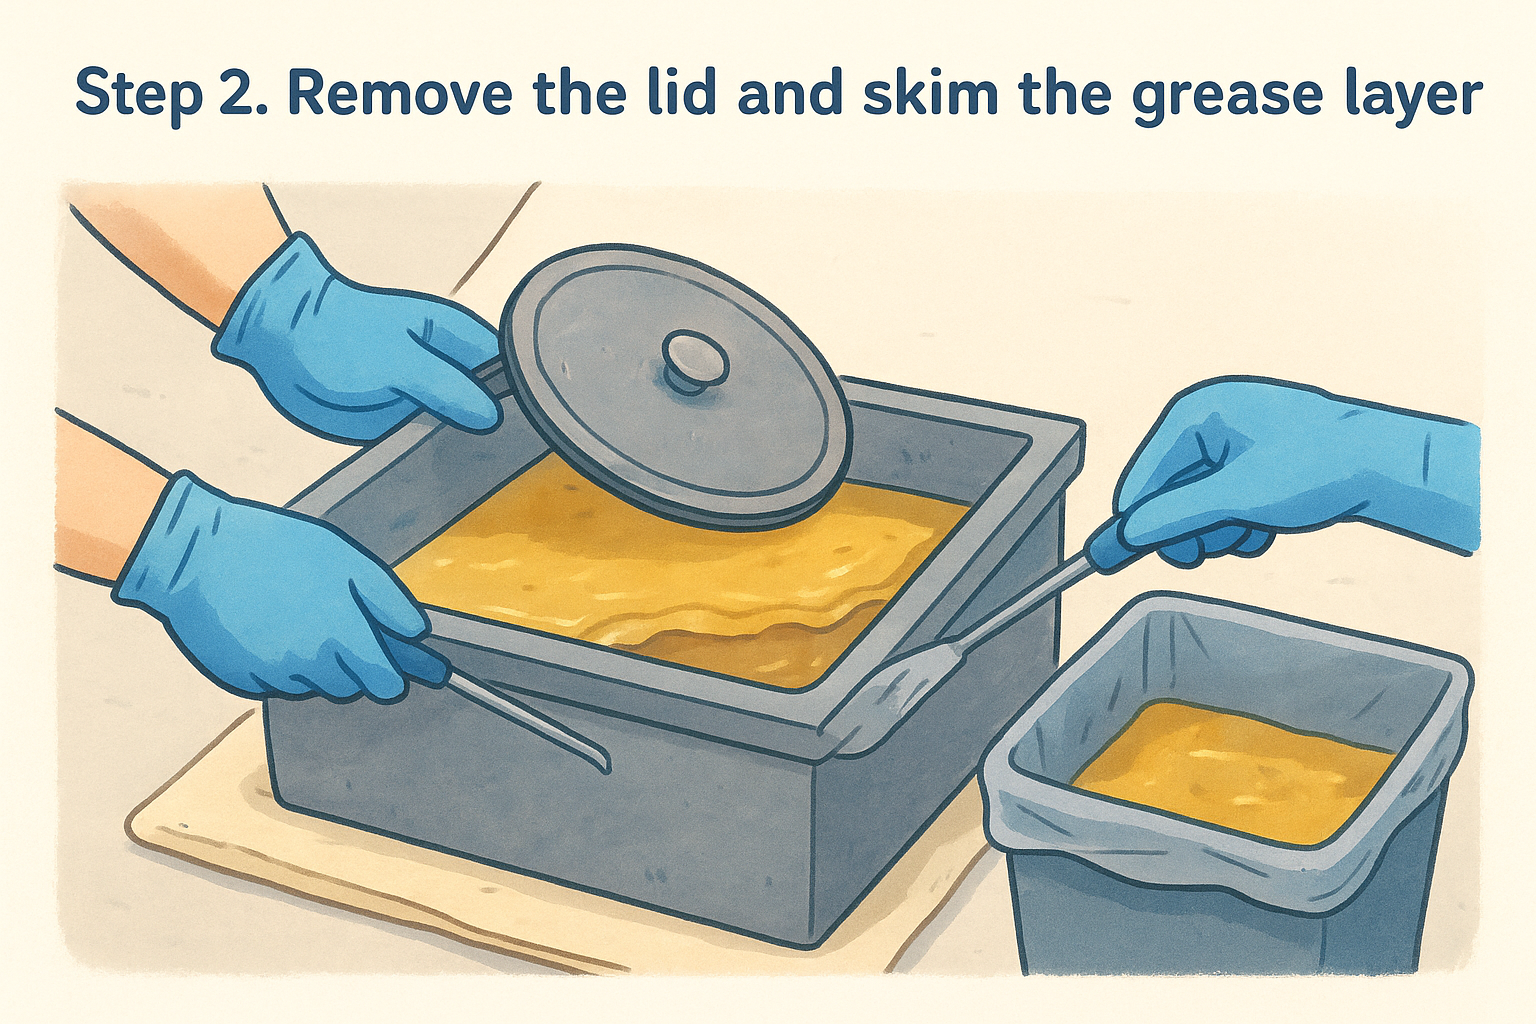
Grab your scraper and start skimming the top layer of solidified fat before it warms up and turns liquid again. This floating grease layer is usually the thickest part of the job and the reason people avoid grease trap maintenance in the first place.
The floating layer holds most of the fat by volume, so removing it first makes everything underneath easier to handle.
Work in sections:
- Scrape the surface layer into your lined disposal container
- Check the baffle walls near the surface for hardened buildup
- Note the water line so you can confirm proper flow later
Don't rush this step. A thorough skim now means less scrubbing once you get to the tank floor.
Step 3. Vacuum and scrub the tank and baffles
Once the surface layer is gone, switch to your shop vac and pull out the remaining sludge sitting on the tank floor. This layer is denser and smells worse than the skimmed grease, so keep your respirator or mask on if fumes are strong. Work the hose into corners first, since solids settle fastest wherever water flow is slowest.
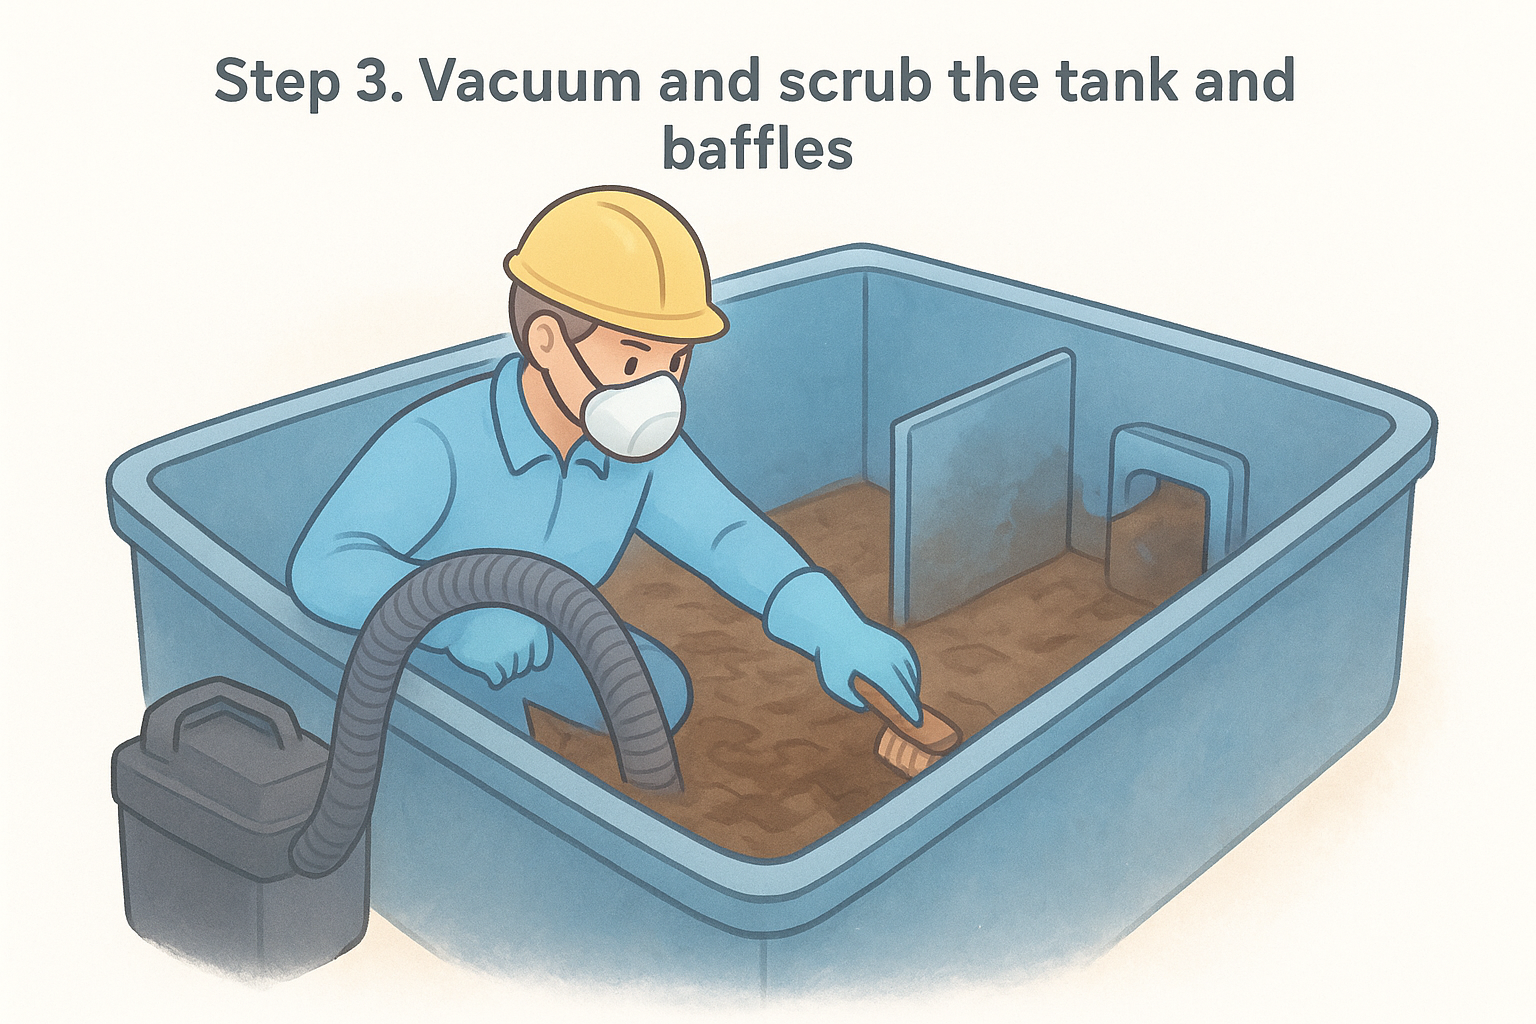
Clearing the baffles
Baffles are the internal walls that force water to slow down and separate grease from liquid, and they clog faster than any other part of the tank. Reach in with your scrub brush and knock loose anything caked on both sides. A flashlight helps here, because missed buildup on the baffle walls is the number one reason traps fail inspection days after a cleaning.
A grease trap is only as clean as its baffles, since a spotless tank floor with clogged baffles still blocks proper separation.
Scrubbing the tank walls
Apply your eco-friendly degreaser spray to the tank walls and scrub in circular motions, working top to bottom. Rinse your brush often in a bucket of water rather than letting grease build up on the bristles, which just spreads it back around instead of removing it.
Step 4. Rinse, reassemble, and test the flow
Once the walls and baffles are scrubbed clean, flush the tank with a hose or several buckets of water to carry loose debris toward the outlet. Watch where the water exits, since a slow drain at this stage usually means you missed a clog somewhere in the baffle slots. Vacuum up the rinse water along with any last bits of sediment before moving on.
Reassembling the lid correctly
Wipe down the lid and gasket area before setting it back in place, since leftover grease on the seal is a common reason traps start smelling again within days. Press the lid down evenly and confirm it sits flush, especially on in-ground units where a gap invites dirt and pests.
A trap that's spotless inside but sealed wrong will smell just as bad as one you never cleaned.
Running a test flow
Turn your equipment back on and run water through the sink for a few minutes. Check the following before calling the job done:
- Water drains at a normal speed with no backup
- No grease odor escapes around the lid
- The water level settles at the marked line you noted earlier
If drainage still lags, you likely missed buildup deeper in the outlet pipe.
Keeping your grease trap running smoothly
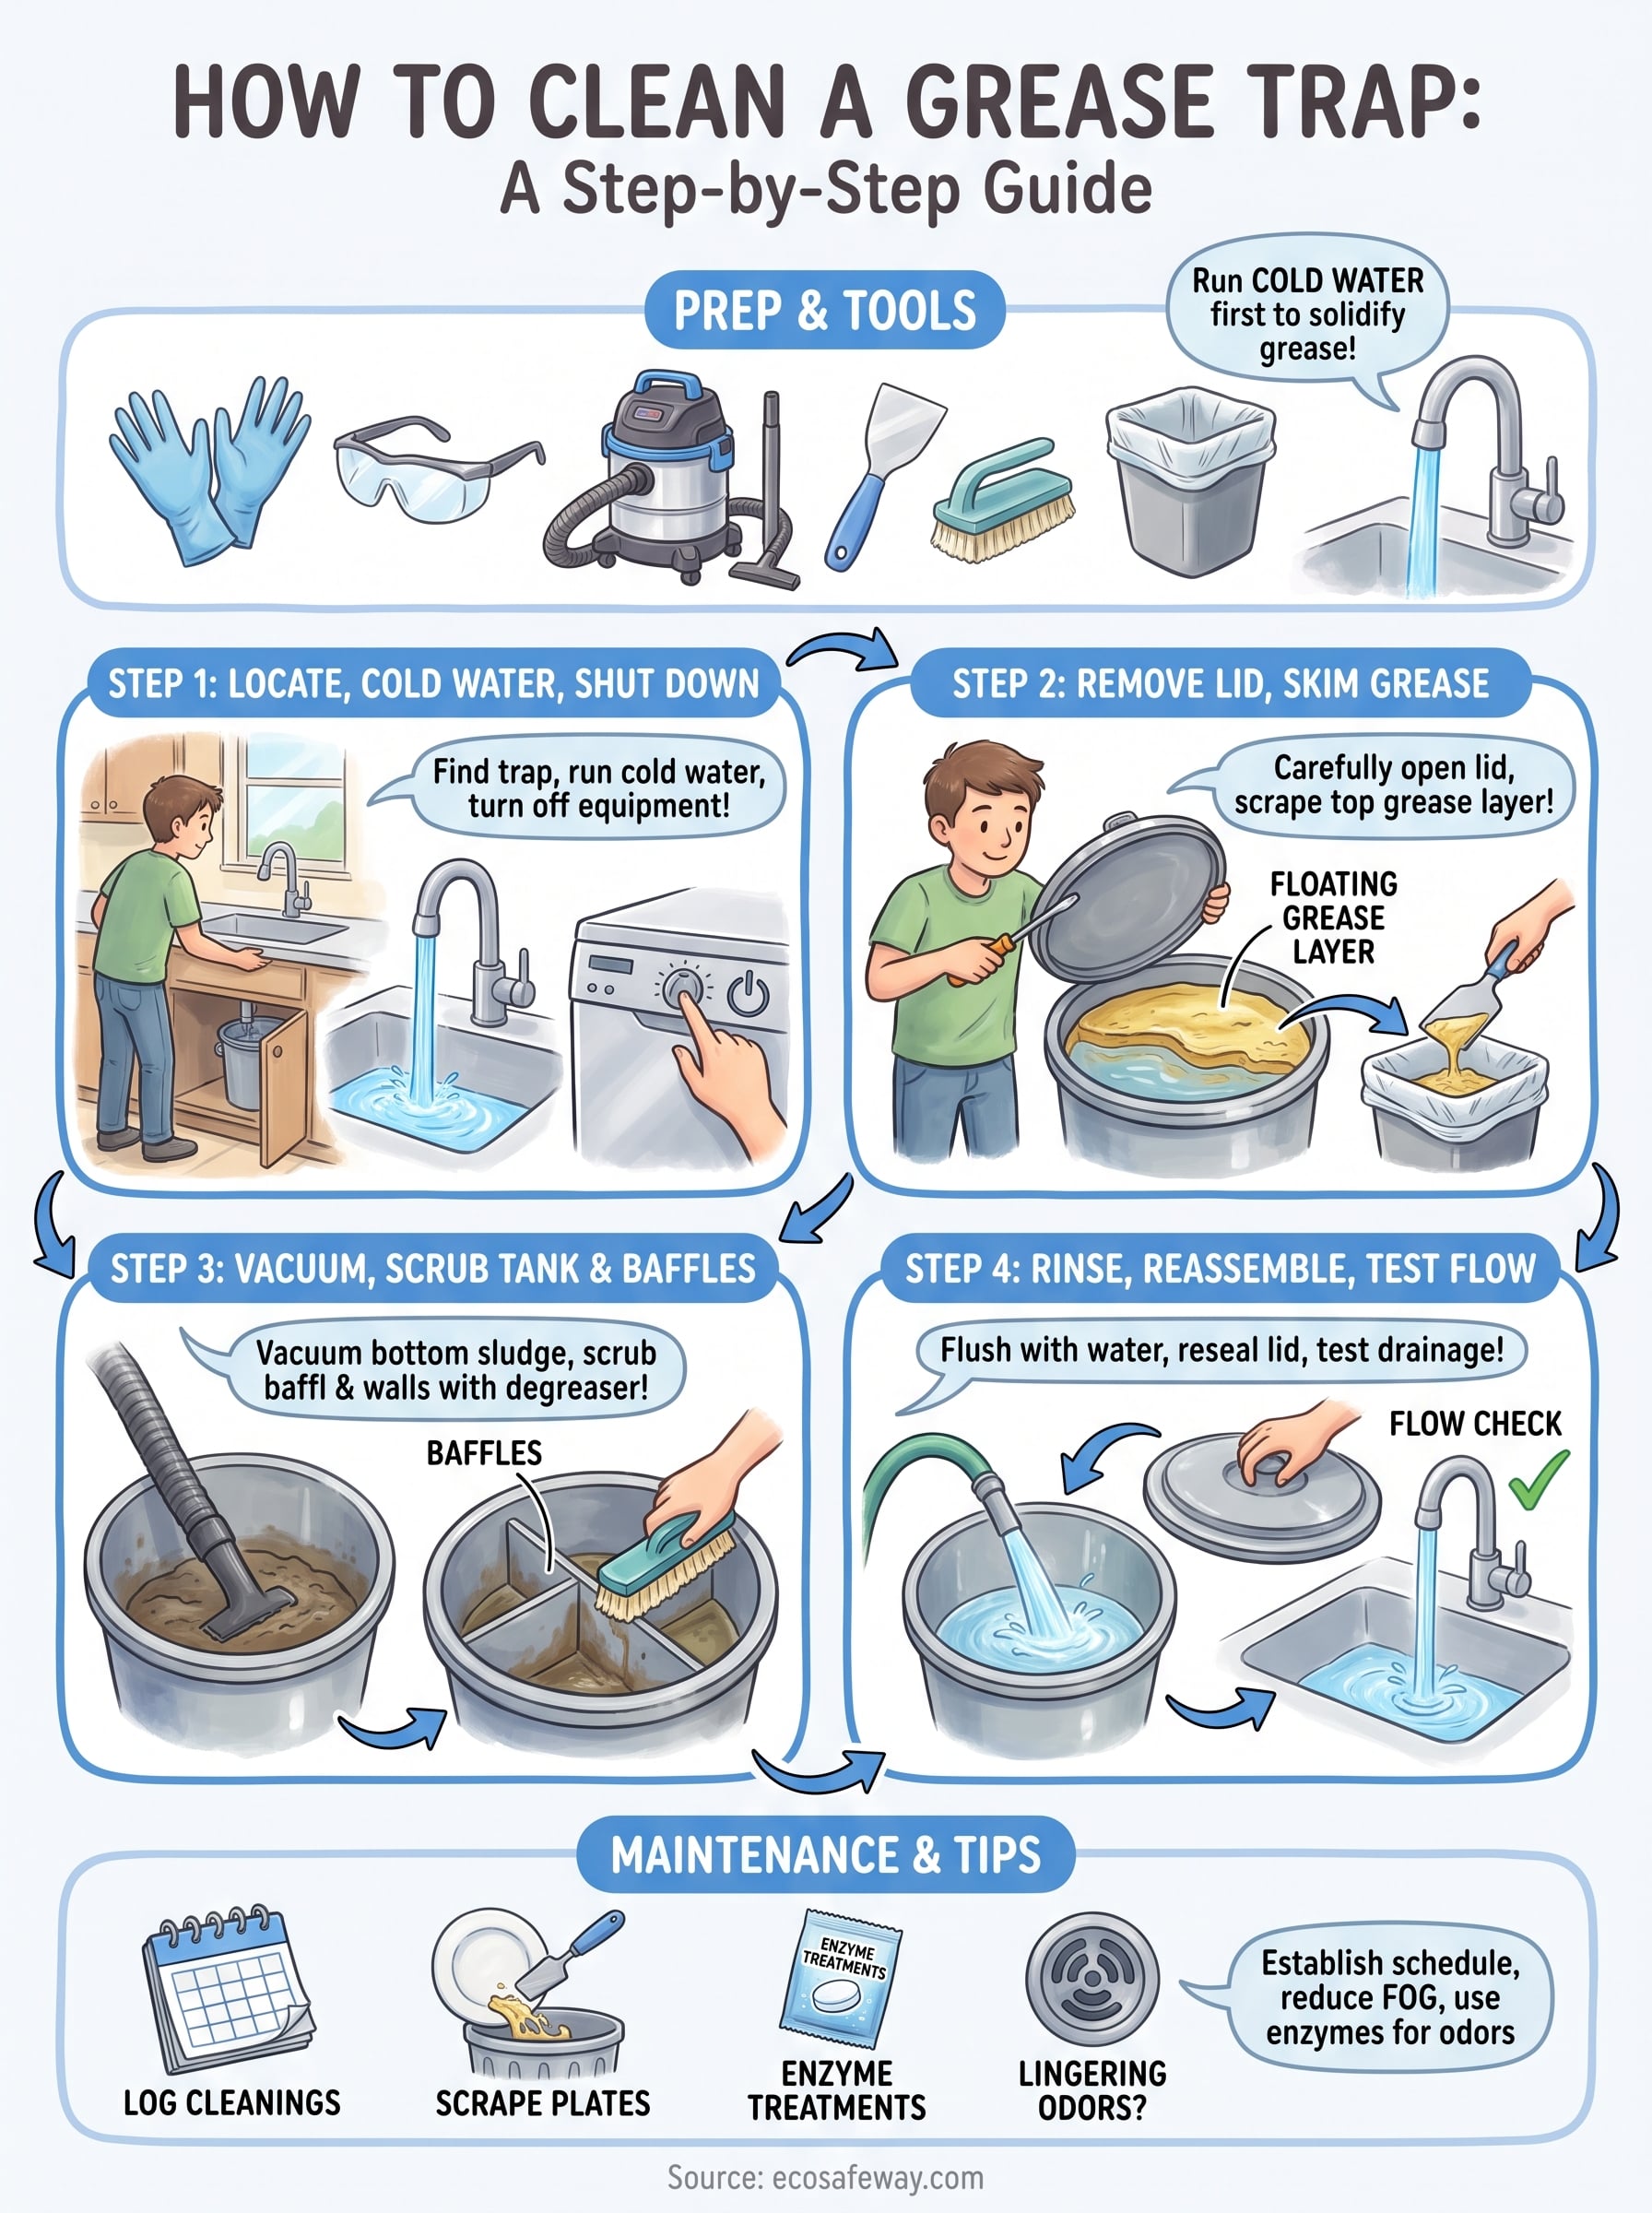
A clean grease trap isn't a one-time fix, it's a rhythm. Once you've gone through skimming, vacuuming, scrubbing, and rinsing, write down the date and what you found inside. That log tells you whether your cleaning schedule needs to shrink from monthly to biweekly, especially if you're pulling out a thick grease layer every time you open the lid. Kitchens running fryers daily fill traps faster than a coffee shop with light dishwashing, so let your own findings set the pace instead of guessing.
Between cleanings, scrape plates before washing and skip pouring hot grease down the drain, since both habits do more to extend your interval than any product on the shelf. If odors linger in your drain lines even after a thorough scrub, the smell is often bacterial buildup further down the pipe, not the trap itself. Our enzyme-powered drain and dishwasher cleaner tablets break down that residue and keep drains smelling clean between grease trap services.


