





Dirty coils are the quiet reason your energy bills climb and your compressor works harder than it should. A layer of dust, grease, or biofilm on your evaporator or condenser coil acts like insulation, blocking heat transfer and forcing the system to run longer to hit the same setpoint. If you've noticed weaker airflow, warm spots, or a spike in your utility costs, HVAC coil cleaning is probably overdue, and it's a task you can handle without calling a technician for every visit.
This guide walks you through the actual process: what tools you need, which coil cleaning solutions work for evaporator versus condenser coils, and the sequence of steps that gets coils back to bare metal without damaging the fins. We also cover realistic cleaning frequency, so you're not guessing between quarterly and annual service.
Whether you manage a rooftop unit, a split system, or a bank of commercial coils, the fundamentals stay the same. You'll get a repeatable checklist you can hand to maintenance staff, plus guidance on when coil buildup signals a bigger problem, like corrosion or mineral scale from hard water that needs an industrial HVAC descaler, that a standard cleaning won't fix.
What you need before cleaning HVAC coils
Safety gear first
Before you touch a fin or open a cleaner bottle, protect yourself. Coil cleaners are formulated with acids or alkaline agents strong enough to strip years of grease and biofilm, and they'll irritate skin and eyes just as fast. Put on chemical-resistant gloves, safety glasses, and a respirator rated for acid mist if you're working indoors or on a rooftop unit with poor ventilation. A long-sleeve shirt and old clothes save you from bleach spots on your work uniform.
Tools you'll want on hand
Gather everything before you start so you're not tracking chemical residue back into the house or shop looking for a screwdriver. A basic HVAC coil cleaning kit includes:
- Nut driver or screwdriver set to remove access panels
- Fin comb to straighten bent aluminum fins
- Low-pressure garden hose or pump sprayer for rinsing
- Soft-bristle brush for stubborn buildup
- Plastic sheeting or a drop cloth to protect the floor or landscaping below a condenser
- Wet/dry shop vacuum for loose debris
Picking the right coil cleaner
Matching the cleaner to the coil matters more than most homeowners realize. Evaporator coils sit indoors near ductwork and drain pans, so a no-rinse, foaming, non-acid formula is usually the safer call. Condenser coils outdoors can handle a stronger acid-based cleaner rinsed with a hose. Eco Safeway's commercial and industrial coil cleaning solution is formulated for both applications without leaving a hazardous residue behind.
The wrong cleaner on the wrong coil either fails to cut through the grime or corrodes metal it was never meant to touch.
| Coil type | Recommended cleaner | Rinse required |
|---|---|---|
| Evaporator (indoor) | No-rinse foaming cleaner | No |
| Condenser (outdoor) | Acid-based or alkaline cleaner | Yes |
| Heavily scaled coils | Concentrated descaler | Yes |
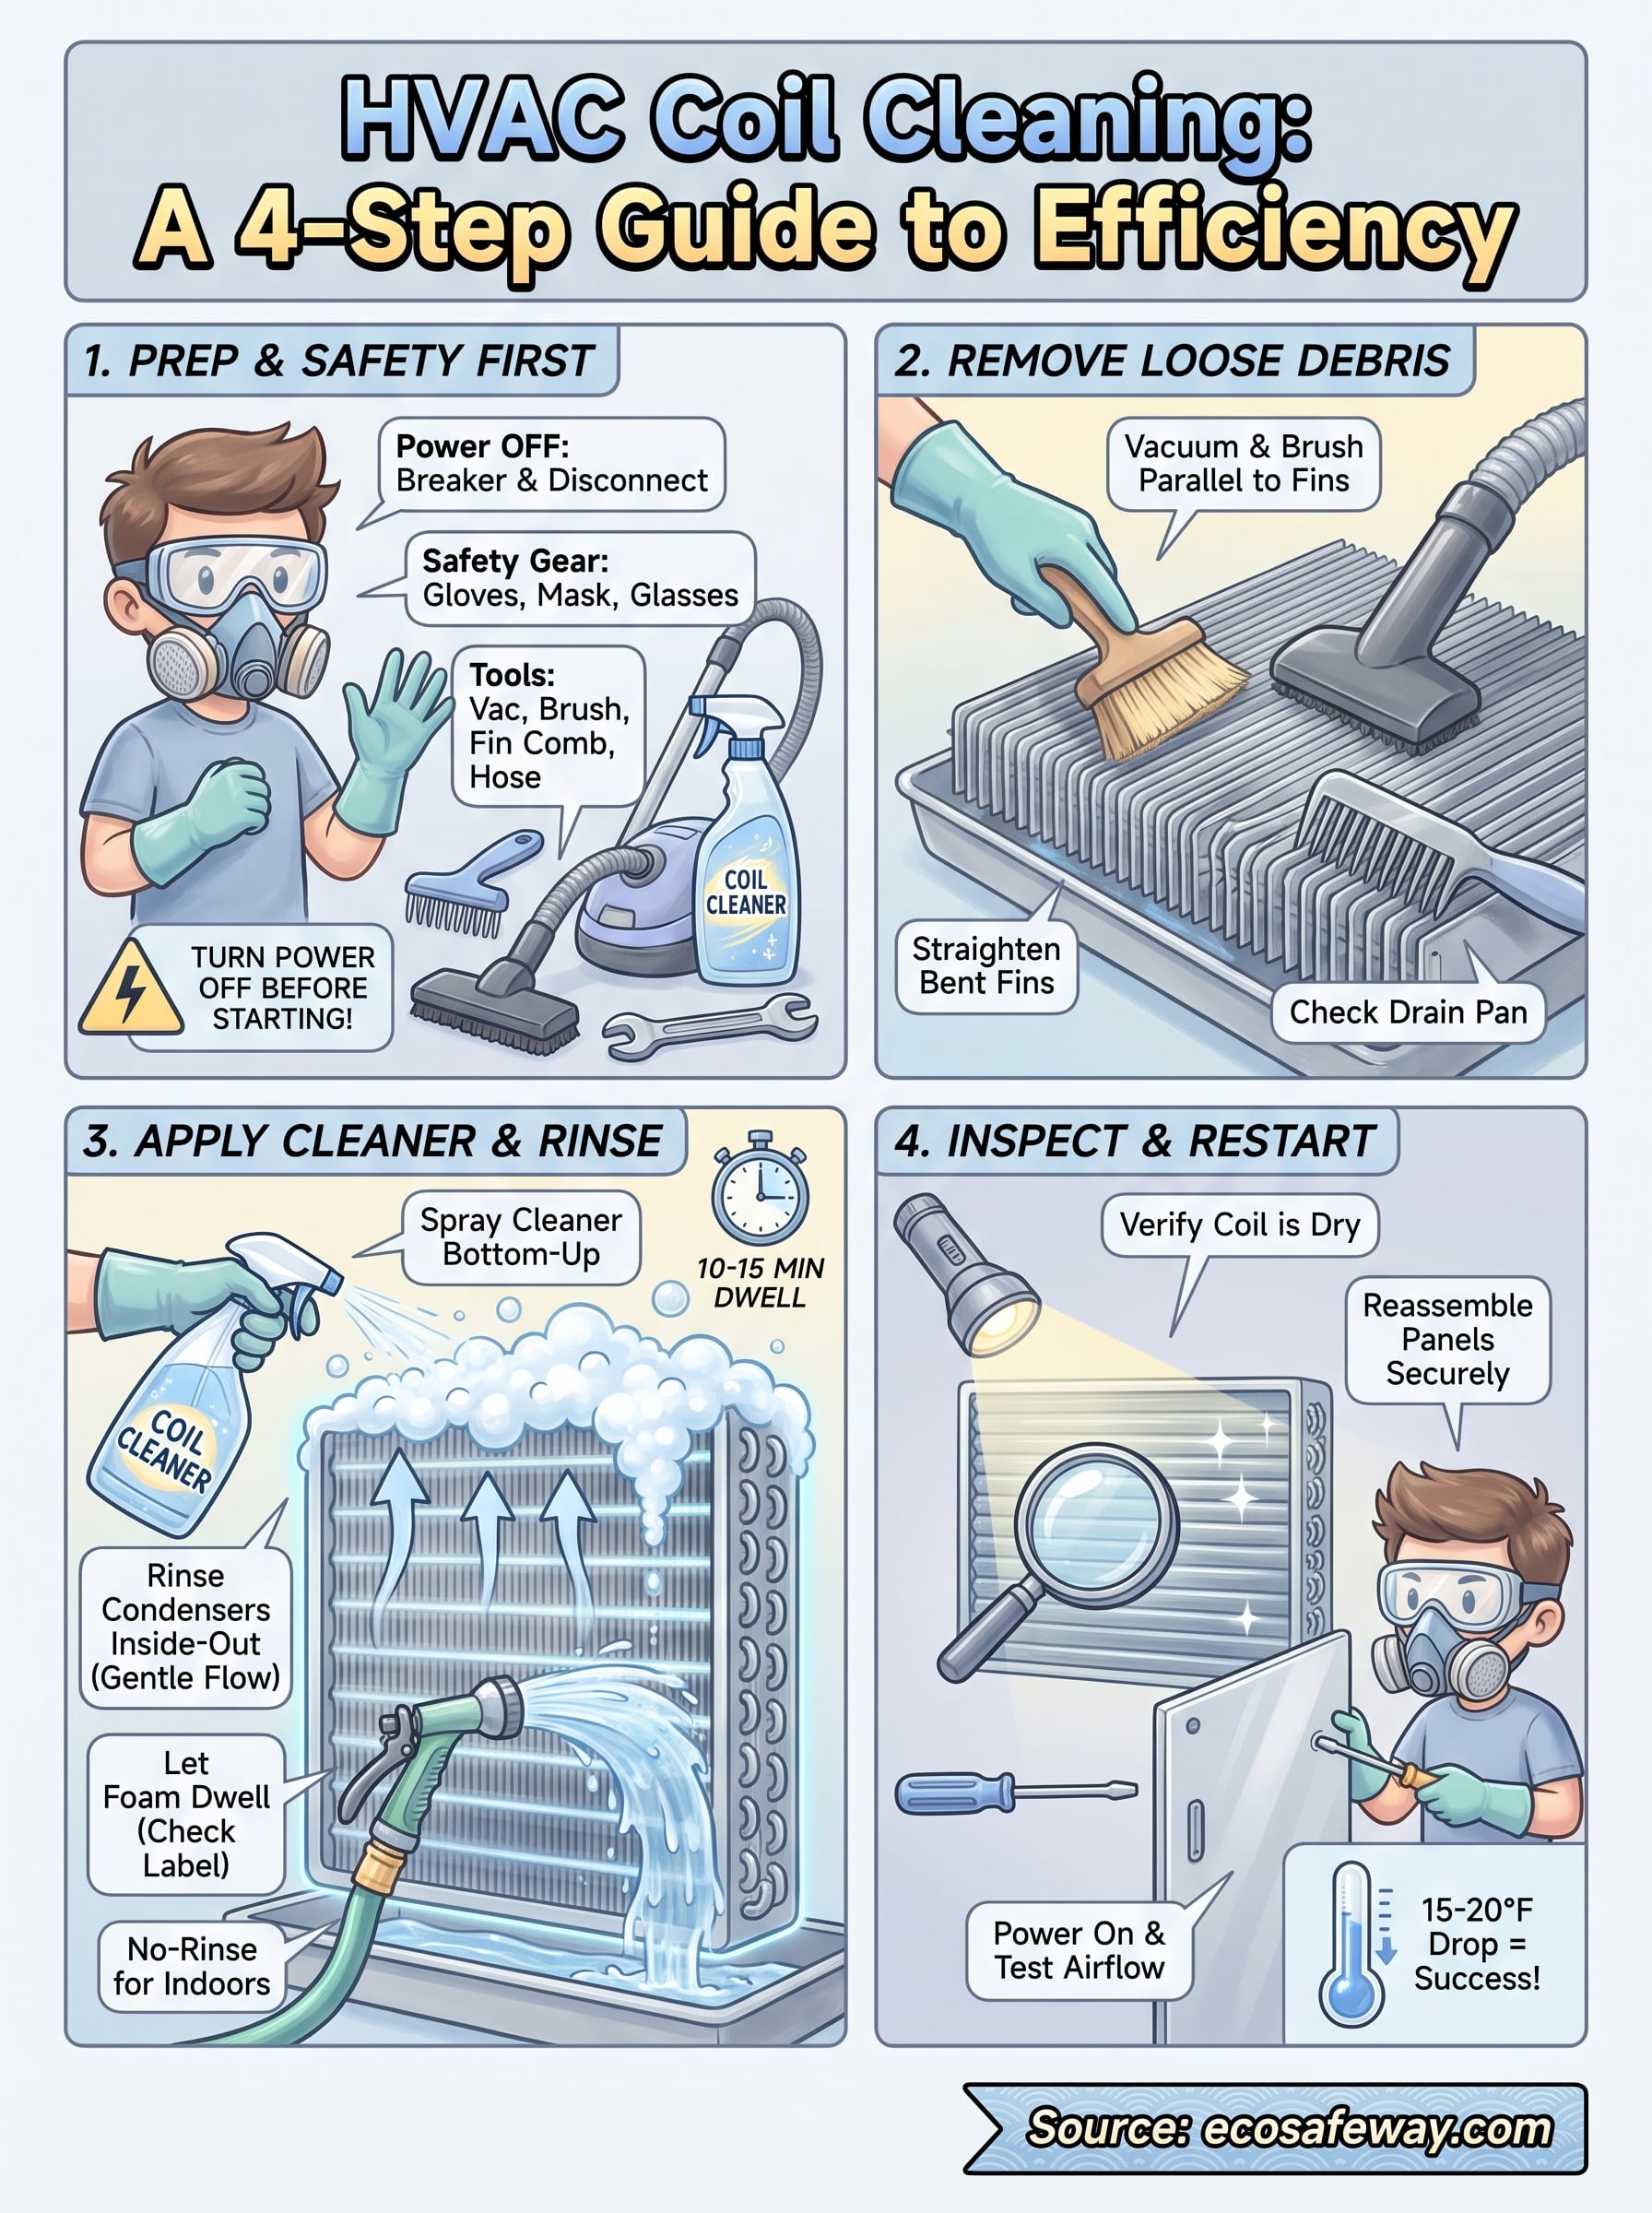
Step 1. Turn off the power and access the coil
Killing power before you touch anything isn't optional. Locate the disconnect switch near the outdoor condenser unit and flip it off, then head inside and shut off the breaker feeding the air handler or furnace blower. Test that the unit is dead by trying to start it from the thermostat. If the fan doesn't kick on, you're clear to open panels.
Removing panels and locating the coil
Getting to the coil looks different depending on the equipment. On a split system, the evaporator coil usually sits inside a metal cabinet above or beside the furnace, held shut with sheet metal screws. On a rooftop or packaged unit, you'll pull a service panel secured with quarter-turn fasteners. Condenser coils are more straightforward: remove the top fan grille and the surrounding cabinet panels to expose the coil fins from both the inside and outside faces.
Skipping the power shutoff is the single most common way DIY coil cleaning turns into an ER visit.
Protecting what's nearby
Before any cleaner touches the coil, lay down plastic sheeting or a drop cloth to catch runoff, especially near landscaping, electrical components, or a condensate drain pan you don't want contaminated. Cover the blower motor and any exposed wiring with a plastic bag secured with tape. Ten minutes of prep here saves you from a corroded motor or a dead lawn later.
Step 2. Remove loose dust and debris
Before any chemical touches the coil, get the loose material off first. Chemical cleaners work by dissolving grease and biofilm, not by pushing through a thick mat of pet hair, pollen, or construction dust. Skipping this step just turns your cleaner into mud that's harder to rinse out.
Vacuum and brush the surface
Start with a wet/dry shop vacuum fitted with a brush attachment and run it along the fin lines, moving in the same direction as the fins rather than across them. Follow up with a soft-bristle brush on any caked-on sections the vacuum couldn't lift, again brushing parallel to the fins to avoid bending them flat.
Skip the pre-clean and you're not cleaning the coil, you're just spreading dirty foam around it.
Straighten bent fins as you go
While you're working the surface, run a fin comb over any crushed or bent sections. Bent fins block airflow just as effectively as dirt does, and they're easy to miss once cleaner and rinse water are involved. Match the comb's teeth spacing to your coil's fin count, usually printed on a sticker near the coil casing, and pull it through gently.
Check the condensate drain
While the coil is exposed, glance at the condensate drain pan and line. If they're already slimy or clogged, clear them now, since cleaner runoff will only add to the mess otherwise.
Step 3. Apply a coil cleaner and rinse
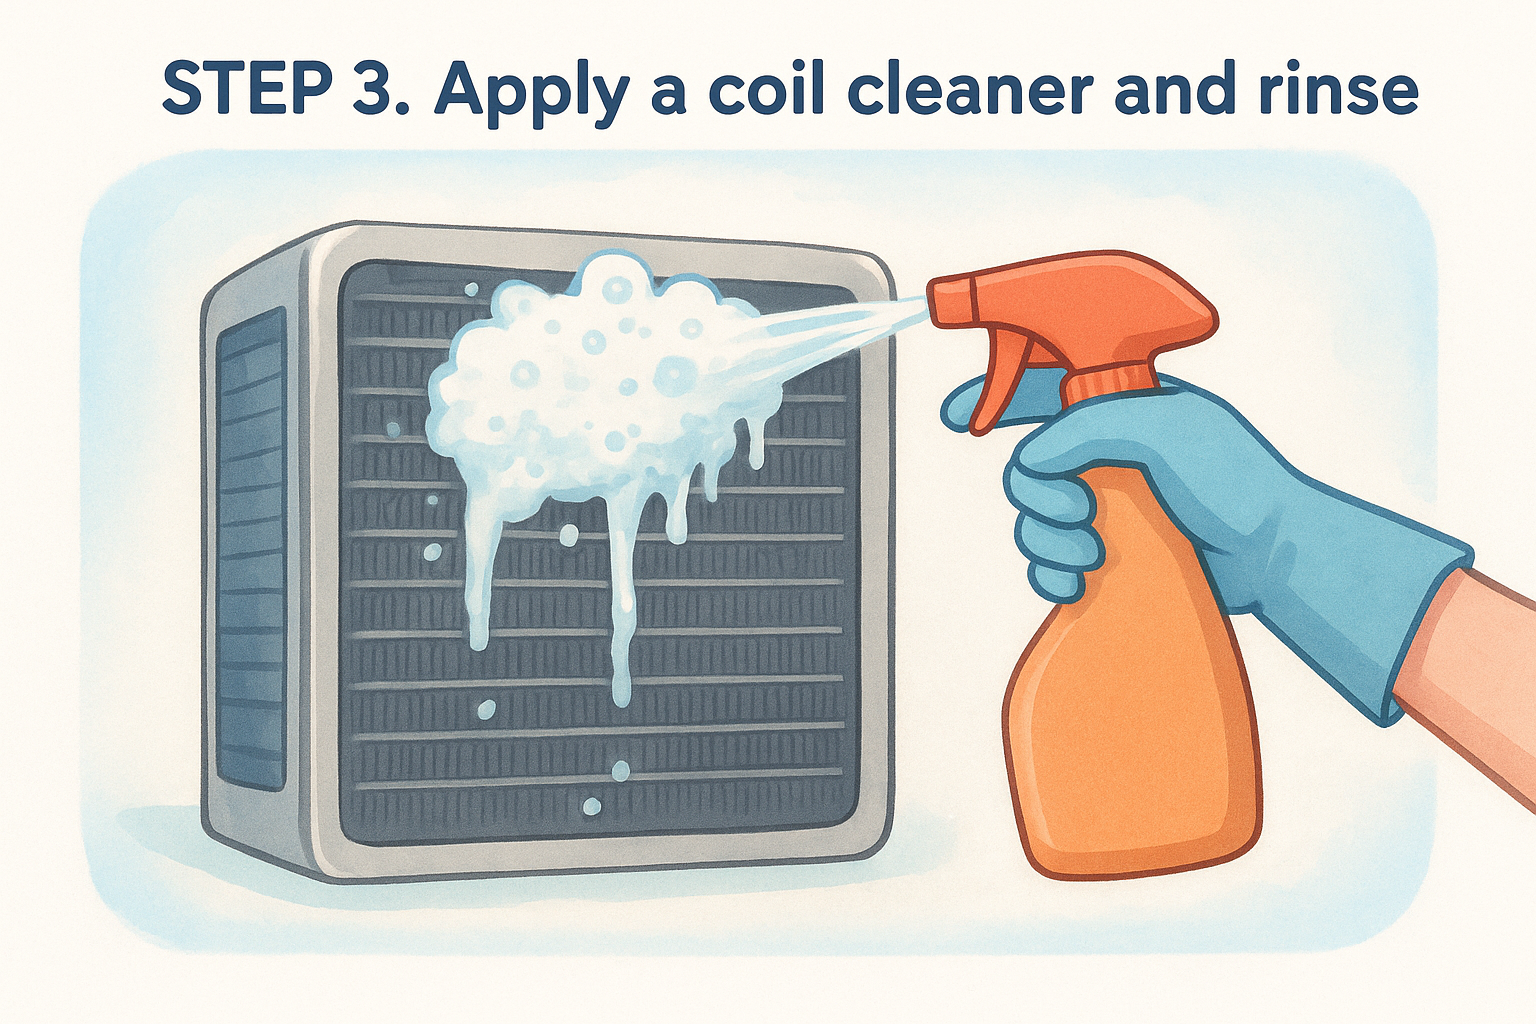
With the loose debris gone, you're ready for the chemical stage of HVAC coil cleaning. Spray the cleaner from bottom to top so the foam works its way down through the fins as it activates, pulling grease and biofilm out as it travels. Hold the sprayer six to eight inches from the coil face and cover every section evenly rather than dousing one spot heavily.
Let the cleaner dwell
Give the product time to work before you rinse anything. Most foaming coil cleaners need 10 to 15 minutes of dwell time to break down grease and mineral scale, though heavily soiled condenser coils outdoors may need a second application. Check the product label, since dwell times vary between acid-based and alkaline formulas.
A cleaner that never gets time to dwell never gets time to work, and you'll just be rinsing dirt back into the fins.
Rinse from the inside out
Once the dwell time passes, rinse condenser coils with a low-pressure garden hose, working from the inside face outward so loosened grime exits rather than gets pushed deeper into the coil. Keep pressure gentle, high-pressure nozzles bend fins and undo the straightening work from Step 2. Indoor evaporator coils cleaned with a no-rinse formula skip this step entirely; the foam dries and drips into the drain pan on its own.
Step 4. Inspect, reassemble, and restart the system
Once the coil is dry, take a flashlight and look between the fins for streaks or dark patches you missed. A second light pass with the foaming cleaner on stubborn spots beats reassembling the unit and discovering it still runs warm next week.
Confirm the coil is fully dry
Grime hides in shadowed corners near the coil casing, so check both faces and the underside where runoff pools. Feel along the fins with a gloved hand; any tackiness means cleaner residue is still active and needs another rinse before you close anything up.
A coil that looks clean under a flashlight is the only coil worth closing back up.
Reassemble and power up
Replace panels in the reverse order you removed them, checking that screws are snug but not stripped, since a loose panel vibrates loose again within weeks. Flip the breaker back on, then the outdoor disconnect switch, and set the thermostat to call for cooling.
Run an airflow test
Let the system run for ten minutes and check supply vent temperatures with a simple thermometer. A properly cleaned coil should show a 15 to 20 degree drop between return and supply air. Anything less suggests either missed buildup or a separate refrigerant issue worth flagging to a technician.
Staying on top of coil maintenance
Clean coils aren't a one-time fix. Dust, pollen, and grease rebuild steadily, so plan on inspecting condenser coils every three months outdoors and evaporator coils once or twice a year indoors, more often if you're near construction dust, agricultural fields, or heavy pet traffic. Grabbing a flashlight for a quick look each season catches buildup before it costs you airflow or a compressor replacement.
Running through the four steps above, prep, debris removal, chemical cleaning, and reassembly, keeps your system working at the efficiency it was designed for instead of quietly losing capacity year after year. Coils that stay clean mean lower utility bills and fewer emergency service calls. When you're ready to restock your cleaning kit or want a formula built specifically for stubborn commercial buildup, grab a heavy-duty condenser coil cleaner for commercial HVAC systems and keep your next cleaning session as fast and effective as this one.


