





Dirty AC coils quietly drain your energy bills and shorten equipment life long before you notice a problem. If your unit is blowing warm air or running longer than it used to, buildup on the coils is probably the culprit, and a homemade ac coil cleaner can often fix it without a service call.
You don't need a specialty product from the hardware store to get real results. A simple diy ac coil cleaning solution made from dish soap, water, or a diluted vinegar mix cuts through grime, dust, and grease just as well as many commercial sprays, and it costs a fraction of the price. The key is matching the cleaning strength to your coil type so you loosen debris without damaging the delicate fins.
We work with facility managers and equipment operators every day who care about safe, effective maintenance that doesn't rely on harsh chemicals. In this guide, we walk through tested recipes, the tools you need, and a safe cleaning method for both evaporator and condenser coils, so you can restore airflow and keep your system running efficiently.
What to know before you clean your own AC coils
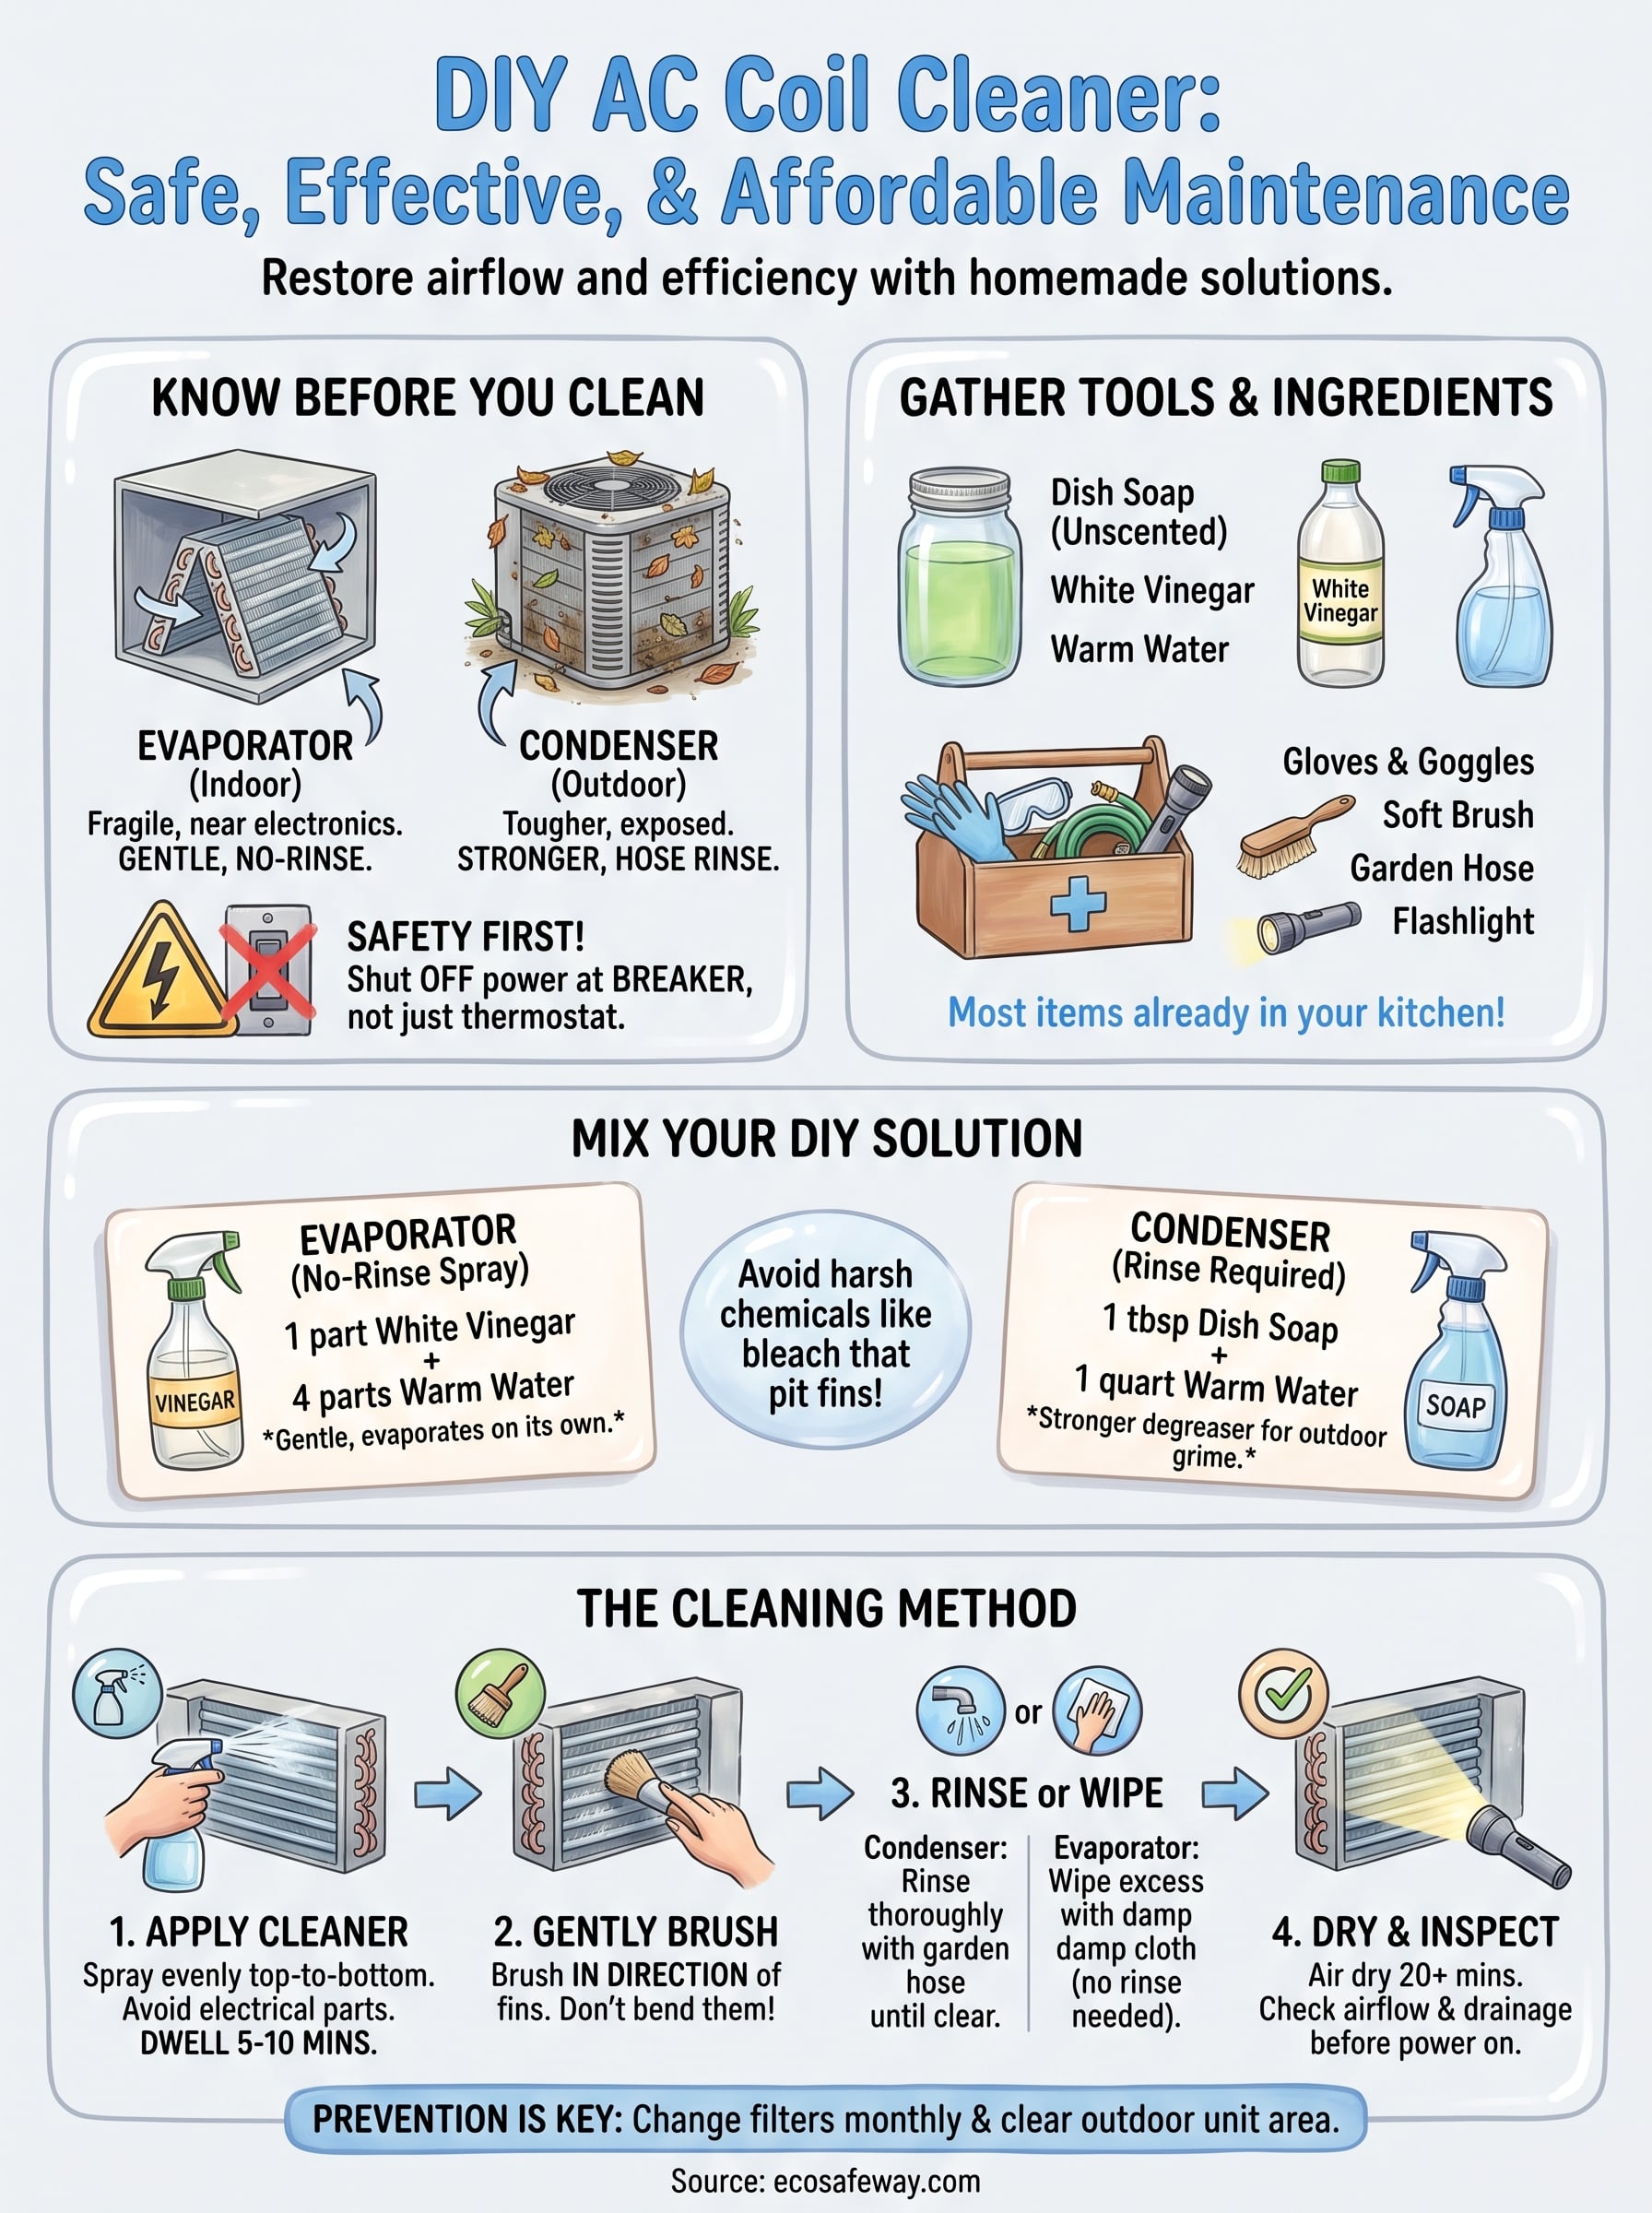
Before you mix anything, take a minute to understand what you're actually cleaning. Evaporator coils sit inside the air handler and collect dust, mold, and biological slime from the air passing over them. Condenser coils live outside and get coated in grass clippings, pollen, and road grime. Each type needs a slightly different approach, so knowing which one you're tackling keeps you from wasting solution or damaging fins that were never built for heavy scrubbing.
Coil type changes your cleaning approach
Evaporator coils are more fragile and sit close to electrical components, so they call for a gentler no-rinse formula and a light touch. Condenser coils are tougher and exposed to the weather, so they can handle a stronger spray and a full hose rinse. Skipping this distinction is the most common mistake homeowners make with a diy ac coil cleaner.
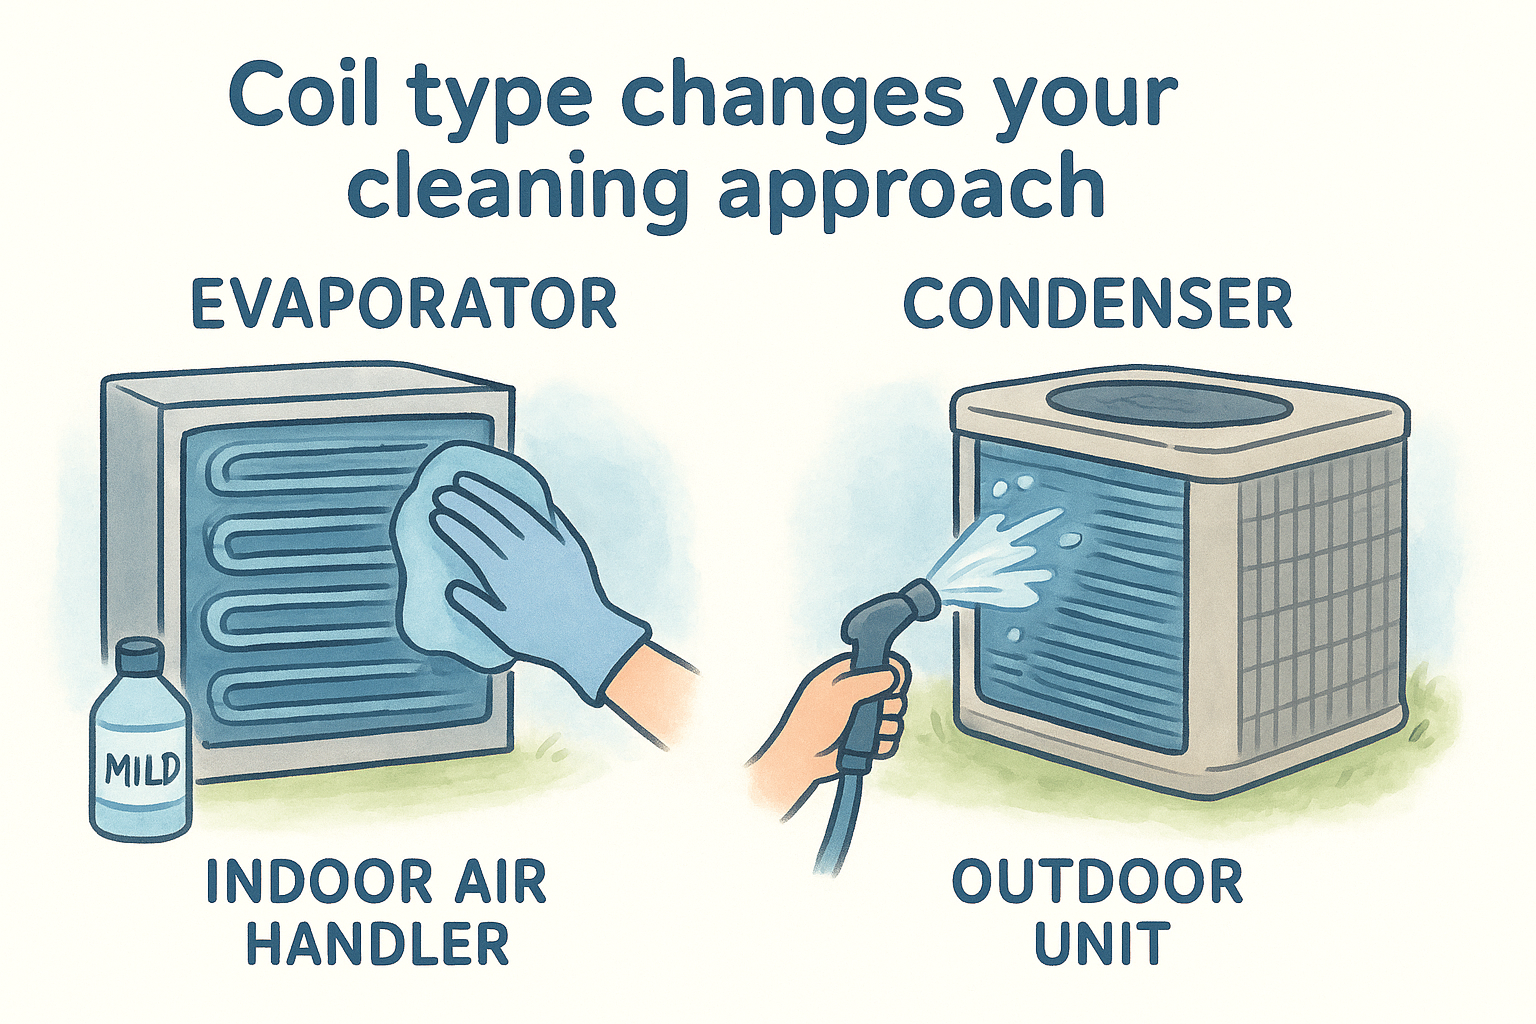
| Coil type | Location | Cleaner strength | Rinse method |
|---|---|---|---|
| Evaporator | Indoor air handler | Mild, no-rinse | Light wipe or none |
| Condenser | Outdoor unit | Stronger, degreasing | Garden hose |
Safety comes before the recipe
Grabbing supplies matters less than shutting the system down correctly first. Cutting power at the breaker, not just the thermostat, prevents the fan from kicking on while your hands are inside the cabinet.
Cut the power before you touch a single coil, no cleaner is worth an electrical accident.
Wear gloves and eye protection, since even mild homemade solutions sting if they splash into your eyes. If you spot heavy corrosion, bent fins, or refrigerant oil residue, stop and call a licensed technician instead of pushing forward with a DIY fix.
Step 1. Gather your tools and ingredients
Gathering everything upfront saves you from stopping mid-job with soap on your hands and a wet coil half-rinsed. Most of what you need for a homemade hvac coil cleaner is already sitting in your kitchen or garage, so this step rarely costs more than a few dollars.
Ingredients for your cleaning solution
Stick to simple, non-abrasive ingredients that won't corrode aluminum fins or copper tubing:
- Dish soap (grease-cutting, unscented)
- White vinegar
- Warm water
- A spray bottle or pump sprayer
Tools that make the job easier
A few basic tools turn this into a safe cleaning method instead of a guessing game:
- Work gloves and safety glasses
- A soft-bristle brush or fin comb
- A garden hose with adjustable nozzle (for condenser coils)
- A shop vacuum with a brush attachment
- A flashlight for checking deep into the coil fins
Lay everything out near the unit before you cut power, so you're not hunting for supplies once the cabinet is open.
Step 2. Mix a homemade coil cleaning solution
Mixing your own diy ac coil cleaner takes about two minutes once your ingredients are laid out. For evaporator coils, combine one part white vinegar with four parts warm water in a spray bottle, since this dilution is gentle enough to skip rinsing. For condenser coils, mix a tablespoon of unscented dish soap into a quart of warm water in a pump sprayer, giving you a stronger degreasing solution for outdoor grime.
Two recipes, one purpose
Evaporator coil spray (no-rinse)
1 part white vinegar
4 parts warm water

Condenser coil spray (rinse required)
1 tbsp unscented dish soap
1 quart warm water
Shake each bottle well before use so the ingredients stay blended through the whole job.
A weak, well-matched solution beats a harsh one that eats through your fins.
Skip bleach, ammonia, or anything labeled as a heavy-duty degreaser, since these can pit aluminum fins and shorten coil life, which is why a professional coil cleaner formulated for evaporator, condenser, and air-handler coils is the safer choice when a homemade mix isn't enough. Test your homemade hvac coil cleaner on a small, hidden section of the coil first if you're using a new ratio, just to confirm it doesn't discolor the metal before you spray the whole surface.
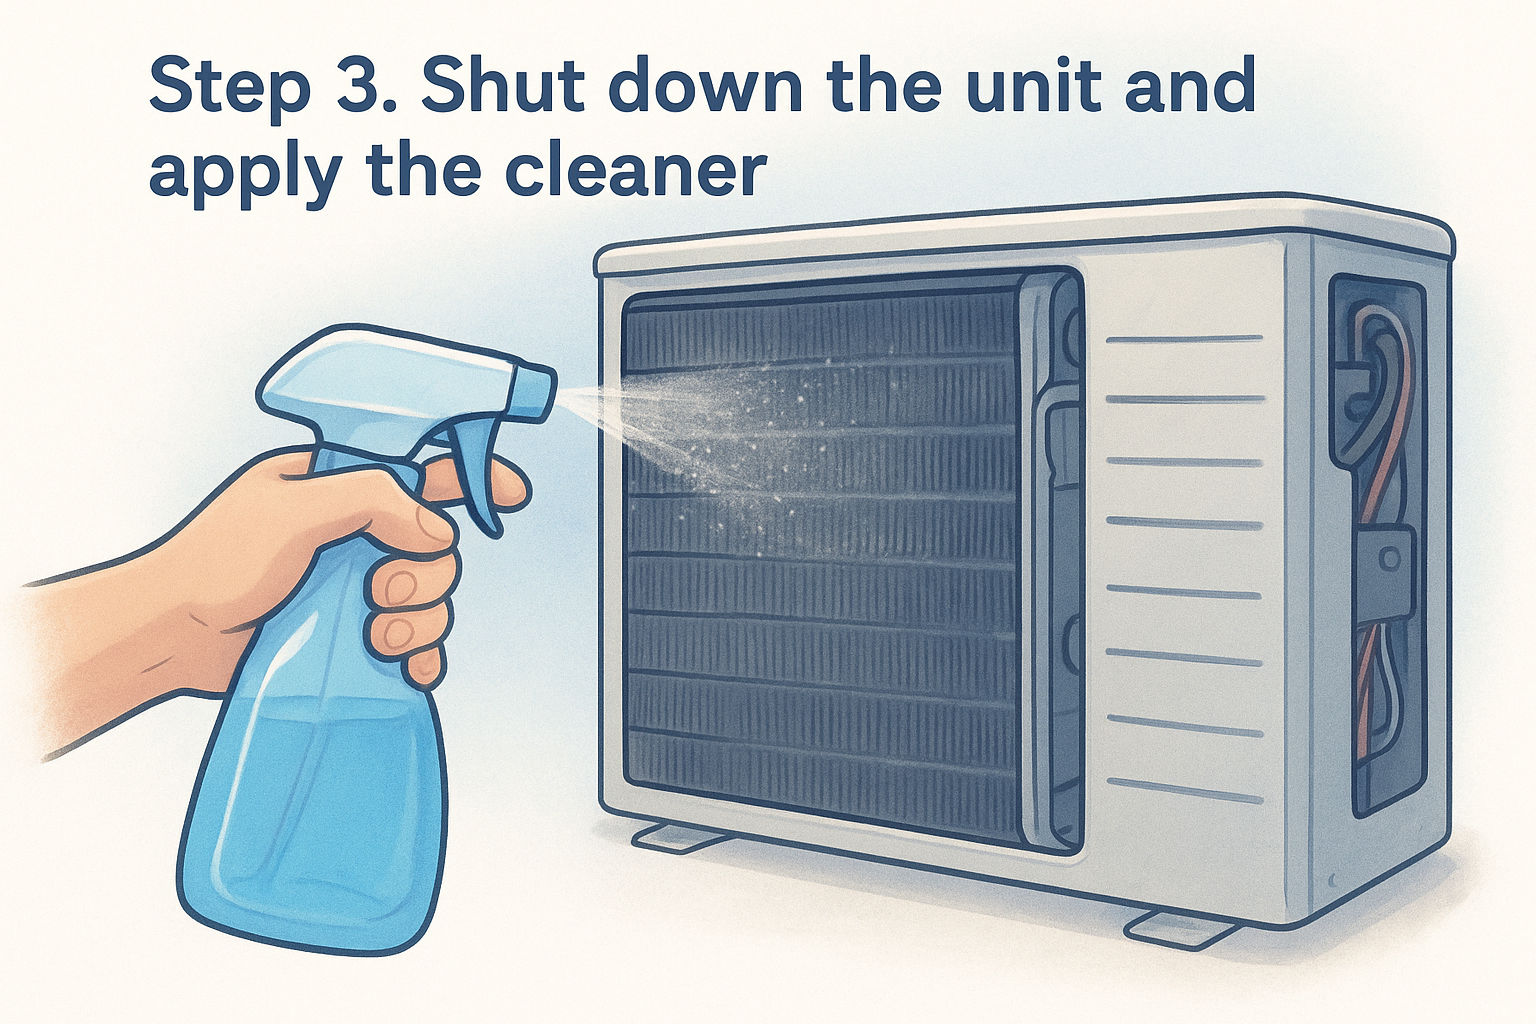
Step 3. Shut down the unit and apply the cleaner
Once your solution is mixed, turn off power at the breaker before you open any panel. Confirm the unit is dead by trying the thermostat, then remove the access panel to expose the coils directly.
Applying the spray correctly
Spraying evenly matters more than spraying heavily. Work from the top of the coil down, coating the fins in a light, even layer rather than soaking them.
- Hold the sprayer six to eight inches from the coil surface
- Apply the diy ac coil cleaning solution in slow, sweeping passes
- Let it sit for 5 to 10 minutes to loosen grime
- Avoid spraying directly into electrical connections or the motor housing
Let the solution do the work, scrubbing too soon just pushes dirt deeper into the fins.
Gently work a soft-bristle brush along stubborn spots after the dwell time, always brushing in the direction of the fins rather than across them. Bent fins block airflow and are hard to fix, so patience here saves you a repair bill later. Condenser coils can handle a second, heavier coat if grime is thick, while evaporator coils rarely need more than one light pass.
Step 4. Rinse, dry, and inspect the coils
Now you rinse, and this step depends entirely on which coil you just treated. Condenser coils need a thorough hose-down at moderate pressure, starting from the top and working downward until the runoff looks clear instead of soapy. Evaporator coils, on the other hand, usually need no rinse at all since the diluted vinegar solution evaporates on its own, so wipe away any excess with a damp microfiber cloth instead of blasting water into the air handler.
Drying and airflow check
After rinsing, let the coil air dry for at least 20 minutes before restoring power, since moisture near electrical components is a real hazard. Point a flashlight through the fins to confirm water is draining freely and nothing is pooling at the base of the coil, and if the drain line tends to clog, an automatic drain pan dispenser keeps it clear between cleanings.
A coil that looks clean but stays wet inside the cabinet isn't finished yet, give it time to dry fully.
Final inspection
Run your hand lightly across the fins to check for straightness, then restart the system at the breaker and confirm cool air returns within a few minutes. If airflow still feels weak, the blockage may sit deeper than a homemade rinse can reach.
Keeping your coils clean between cleanings
Regular upkeep beats any single deep clean, no matter how good your diy ac coil cleaner turns out. Swap or wash your air filter every one to three months, since a dirty filter is the fastest way to reload your evaporator coil with dust. Trim back grass and shrubs at least two feet from the outdoor unit so the condenser coil isn't constantly pulling in clippings and pollen. Quick monthly checks with a flashlight let you catch buildup early, long before it slows airflow or spikes your energy bill.
A homemade solution handles routine maintenance well, but heavier grease, scale, or years of neglected buildup call for something built specifically for the job. When you want a stronger, ready-to-use option that still respects your fins and your budget, reach for our heavy-duty condenser coil cleaner on the next deep clean.


