





Scale buildup inside a heat exchanger doesn't announce itself until your energy bills climb or your cooling system starts short-cycling. Mineral deposits such as calcium carbonate, lime, and rust coat the tubes over time, restricting flow and reducing heat-transfer efficiency before the symptoms become obvious. Reaching for a heat exchanger cleaner that relies on hydrochloric or phosphoric acid can clear the scale, but it also risks pitting copper and brass, and it turns a routine maintenance job into a hazmat handling situation.
There's a better way for many applications. Non-toxic descaling products are formulated to dissolve calcium, lime, and rust deposits without corroding metal surfaces or requiring gloves, respirators, and special disposal procedures. The right choice still depends on the deposit type, severity, and tube material, so always confirm compatibility before treating a specific system.
This guide walks through the full process step by step: how to identify scale buildup, which safe descaling method fits your system type, how to circulate or soak the cleaner correctly, and how to flush and verify results afterward. Whether you're maintaining a cooling tower, a coil bank that needs an aluminum-safe condenser coil cleaner, or a marine heat exchanger, you'll leave with a repeatable procedure that protects both your equipment and your maintenance team.
What is a heat exchanger cleaner?
A heat exchanger cleaner is a chemical cleaning solution formulated to remove deposits that build up on heat-transfer surfaces, including calcium carbonate, lime scale, rust, and other mineral fouling. These cleaners are used on shell-and-tube heat exchangers, plate heat exchangers, condensers, chillers, and similar equipment where deposits restrict flow or interfere with heat transfer.
The right cleaner for a given job depends on the deposit type, equipment design, tube metallurgy, and the manufacturer's cleaning requirements. Always confirm material compatibility and follow the equipment manufacturer's instructions before chemical cleaning.
Signs a heat exchanger needs cleaning
Scale and fouling tend to show up as a cluster of symptoms rather than one obvious sign:
- Reduced heat-transfer performance or output
- Rising approach temperature (the gap between fluid and refrigerant/coolant)
- Reduced flow rate through the loop
- Increasing pressure drop across the unit
- Higher operating temperature under the same load
- Increased energy consumption for the same output
- Visible mineral deposits, scale, or rust at accessible tube ends
- Fouling that recurs shortly after a previous cleaning
Catching these early, rather than waiting for a full performance drop, is what keeps a descaling job routine instead of urgent.
Why use a non-toxic cleaner on your heat exchanger
Acid-based descalers work fast, but that speed comes at a price. Hydrochloric and phosphoric acid attack the base metal along with the scale, leaving microscopic pits in copper and brass that become the starting point for the next round of corrosion. Repeated acid treatments shorten the service life of a heat exchanger that should otherwise run for decades, and any technician using them needs gloves, goggles, and a respirator just to stay safe.
A cleaner that damages the metal it's supposed to protect isn't solving your scale problem, it's just trading it for a corrosion problem.
Compare the two approaches side by side and the difference becomes obvious:
| Factor | Acid-based descaler | Non-toxic descaler |
|---|---|---|
| Corrosion risk to copper/brass | High | Minimal with a compatible, non-corrosive formula |
| PPE required | Gloves, goggles, respirator | Typically none required (verify product label) |
| Shipping classification | Often hazmat | Standard ground shipping |
| Disposal | Neutralization required | Biodegradable, drain-safe in most jurisdictions |
| Scale removal effectiveness | Depends on deposit and concentration | Depends on deposit and concentration |
What HMIS 0-0-0 certification actually means
Eco Safeway's heat exchanger and coil cleaning products carry an HMIS 0-0-0 rating, meaning zero health hazard, zero flammability, and zero physical hazard. That rating isn't a marketing label, it's the same system OSHA-trained facility managers use to evaluate chemical risk on a job site. A phosphate-free, EPA compliant formula also means you're not creating a downstream water treatment problem every time you flush the system.
Getting this right matters most in facilities where you can't afford downtime for hazmat handling procedures: hospitals, data centers running CRAC and CRAH cooling, and marine engine rooms where a spill has real consequences. Equipment-safe cleaning lets your team run maintenance on schedule instead of waiting on safety sign-off.
Step 1. Identify the deposit and equipment
Before treating a heat exchanger, confirm what you're dealing with: the deposit type (calcium carbonate, lime, rust, or biofilm), the tube material, and the equipment manufacturer's cleaning requirements. This assessment determines which cleaner and cleaning method are appropriate, and it's the step most maintenance schedules skip before reaching for a heat exchanger cleaner.
Step 2. Isolate and prepare the heat exchanger
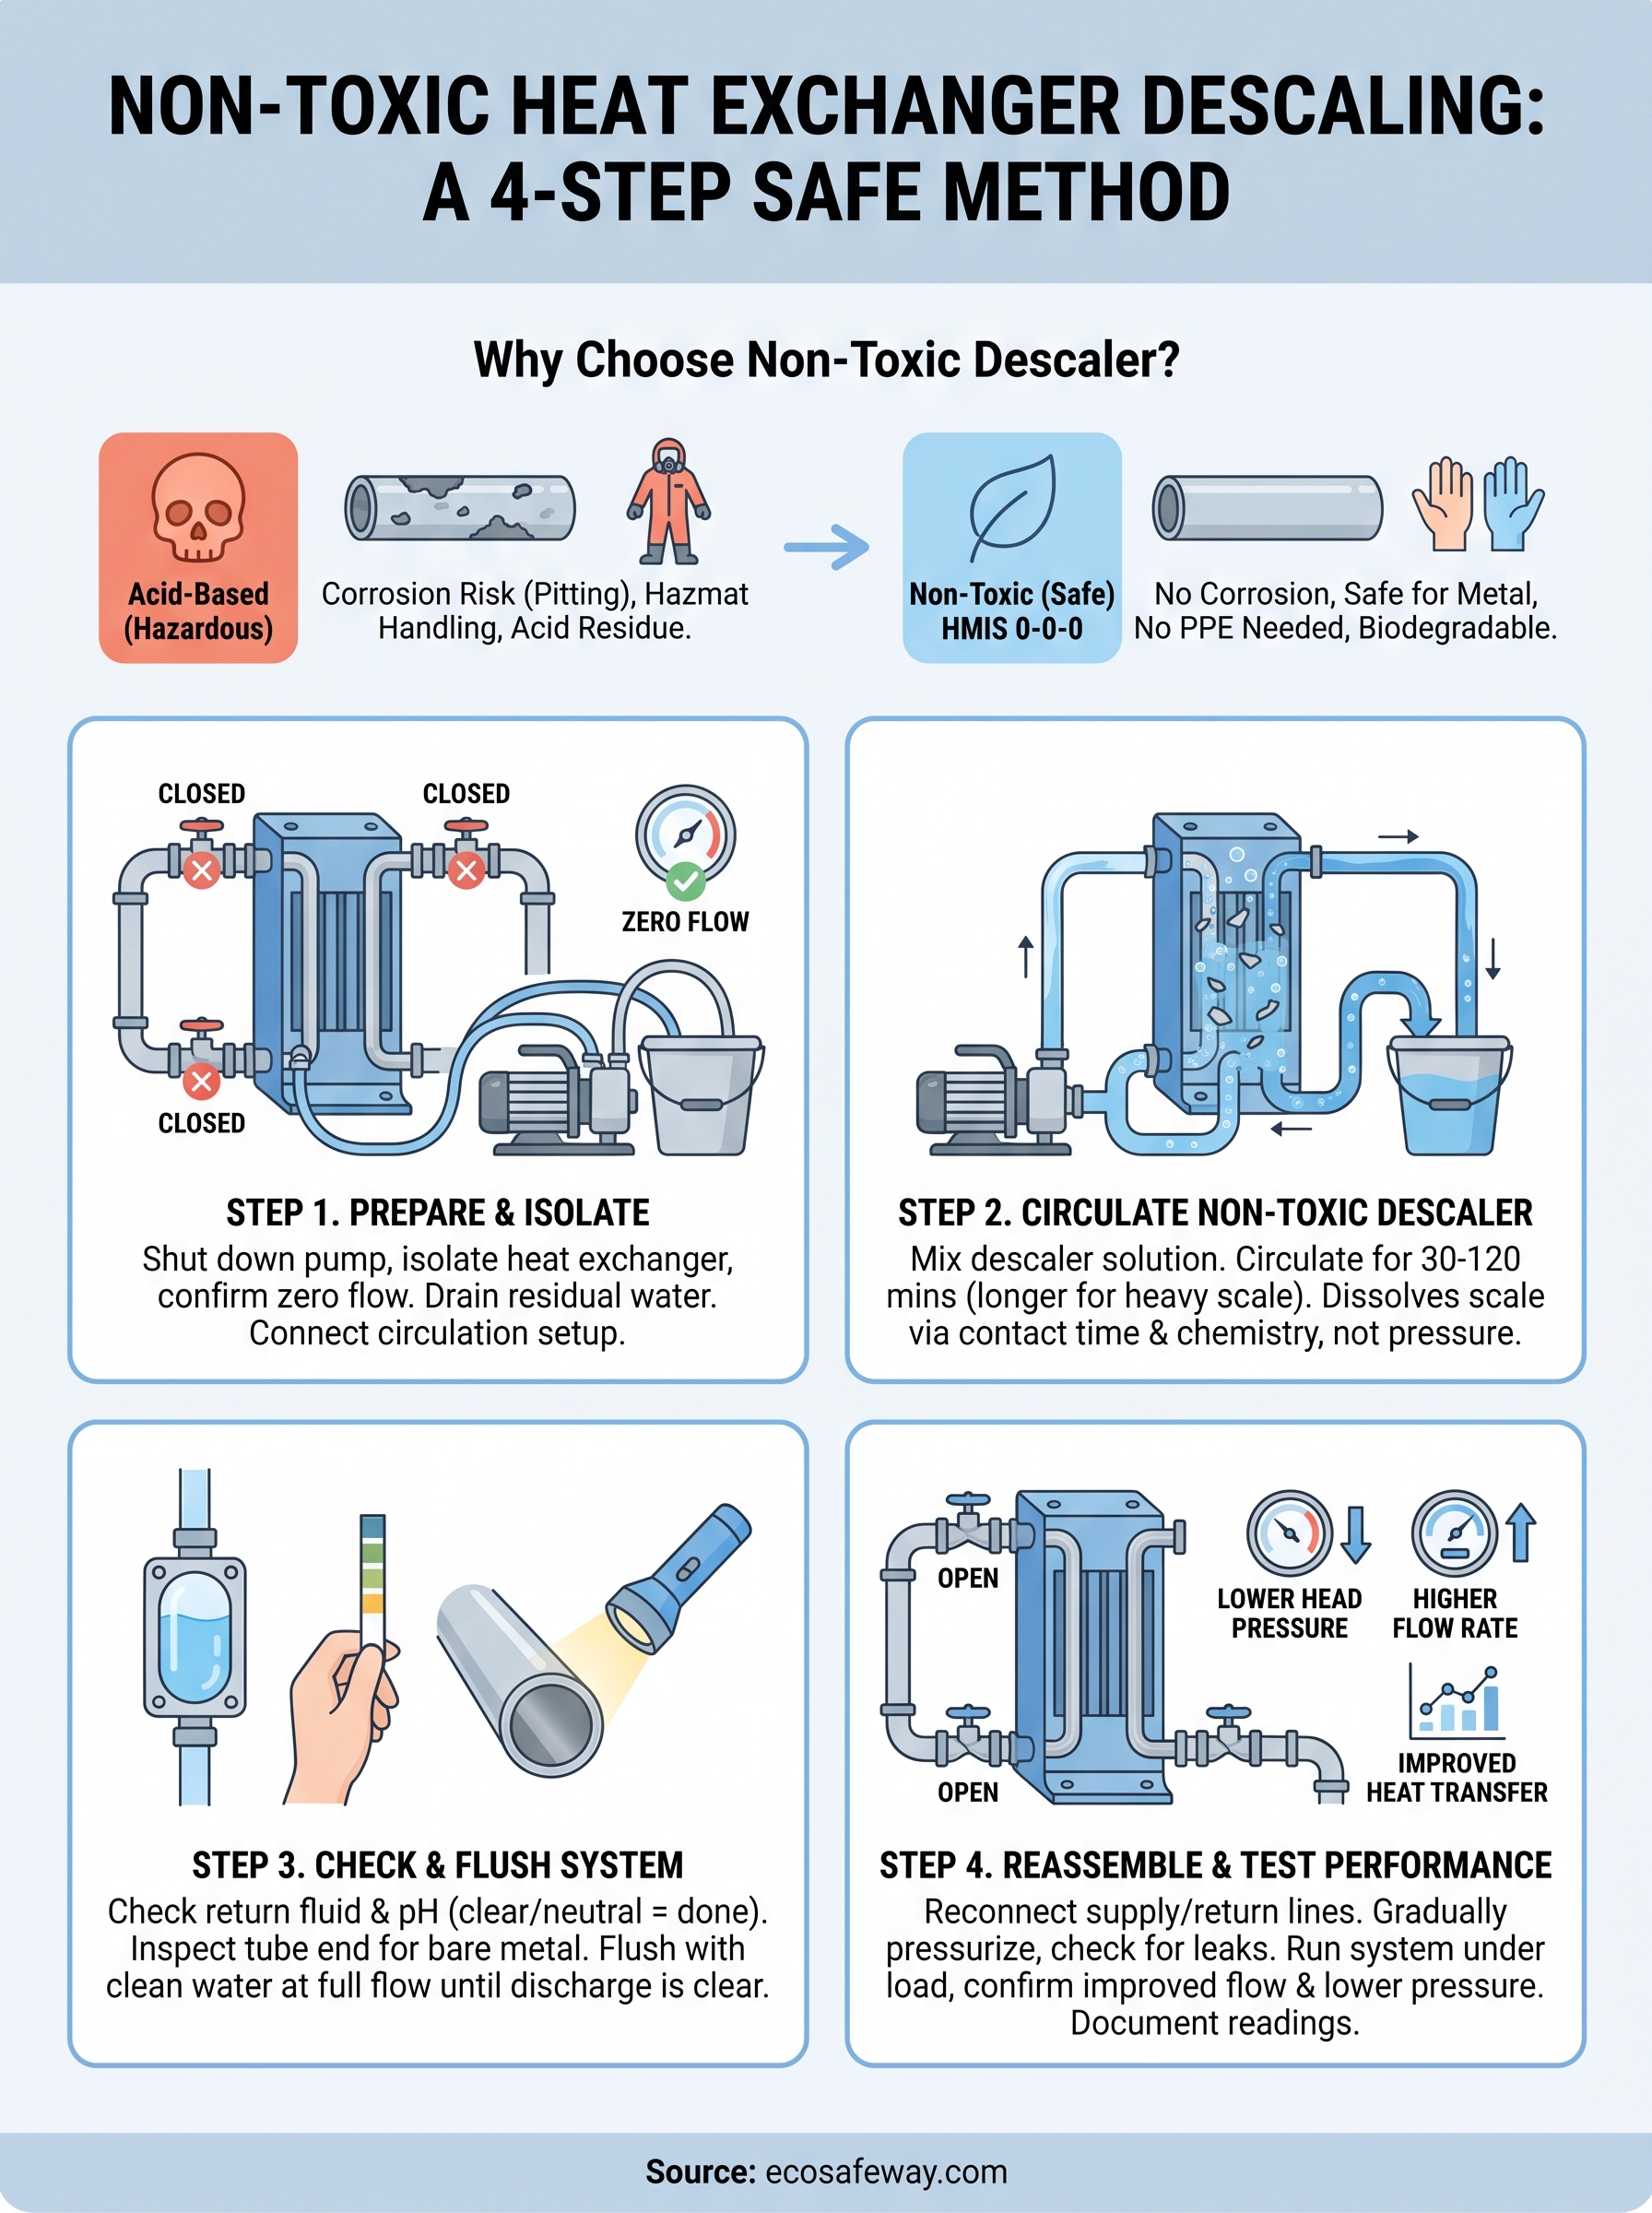
Shut down the pump and isolate the heat exchanger from the rest of the loop before you introduce any heat exchanger cleaner. Close the inlet and outlet valves, then confirm zero flow with a pressure gauge or sight glass. Skipping isolation is the most common reason a descaling job goes wrong: cleaner gets diluted into the main loop and you end up treating symptoms instead of the actual scale.
Isolation isn't a formality, it's what turns a cleaning job into an actual repair instead of a temporary fix.
Next, connect your circulation setup. Most facilities use a portable pump-and-bucket rig or a dedicated descaling cart with flexible hoses clamped to the drain and fill ports.
Pre-cleaning checklist
- Confirm the exchanger is fully isolated from the main system
- Drain residual water and inspect for visible scale, rust, or biofilm
- Attach circulation hoses to inlet and outlet ports
- Check hose clamps and fittings for leaks before starting flow
- Verify the cleaner is compatible with your tube material (copper, cupro-nickel, titanium)
Because a non-toxic descaler carries an HMIS 0-0-0 rating, you can skip the usual PPE staging and hazmat containment prep that acid-based jobs require. That alone can cut your setup time by approximately 20 to 30 minutes on a typical HVAC system or on a marine loop treated with an eco-friendly marine descaler.
Step 3. Select and circulate a compatible cleaner
Once the loop is isolated, mix your non-toxic descaler according to the concentration listed for your scale thickness. Eco Safeway's chiller and heat exchanger descaling chemical typically calls for approximately a 10 to 25 percent solution in warm water, with heavier lime or calcium buildup pushing toward the higher end. Pour the mixture into your circulation reservoir and start the pump at low flow to avoid splashing.
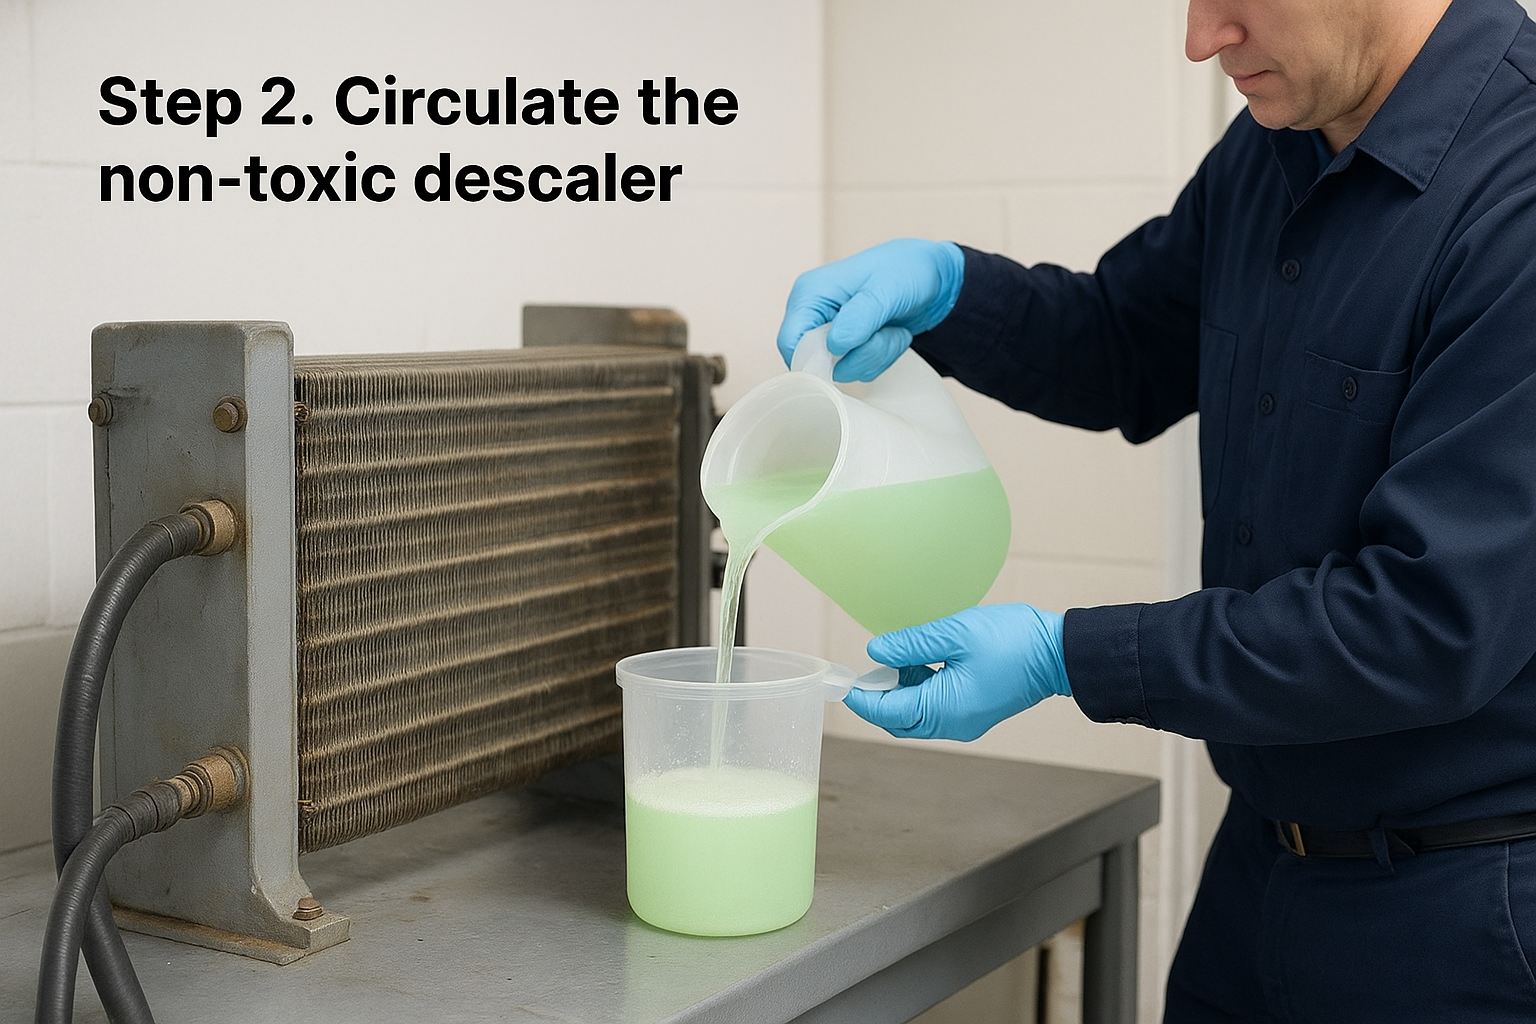
Letting the solution work is where most of the cleaning happens, not the flow rate itself.
Scale dissolves through contact time and chemistry, not brute-force pressure, so patience saves your tubes.
Running time depends on deposit severity:
- Light scale (thin white film): circulate 30 to 45 minutes
- Moderate buildup (visible flaking): circulate 1 to 2 hours
- Heavy calcification: circulate 2 to 4 hours, checking pH every hour
During circulation, watch the return line through a clear sight glass if you have one. Cloudy or discolored fluid confirms the descaler is actively lifting mineral deposits and rust off the tube walls. Because the formula is non-corrosive, you don't need to rush the timer or worry about acid eating into solder joints while you wait. Tanks running low-flow recirculation also let you step away and handle other maintenance tasks without babysitting the equipment the whole time.
Step 4. Flush and inspect the system
Stop the pump once your circulation window ends and check the fluid before you touch a valve. Pull a small sample from the return line and check its color and pH against a test strip. If the solution still looks clear and the pH sits close to where you started, the scale is gone. If it's cloudy or the pH has dropped noticeably, run another 30-minute cycle before moving on.
Grab a flashlight and inspect an accessible tube end or end cap if your unit allows it. You're looking for bare metal, not the chalky white or rust-brown coating you started with. This visual check matters more than the timer, because deposit thickness varies even within the same unit.
Trust what you see in the tubes over the clock on the wall, because scale doesn't dissolve on a fixed schedule.
Once you confirm the buildup is gone, flush the loop with clean water at full flow for 10 to 15 minutes. This step matters:
- Open drain valves fully to purge loosened debris
- Run water until discharge is visually clear
- Check inline strainers or filters for trapped scale flakes
- Confirm outlet pressure has returned to baseline
Because the non-toxic descaler is biodegradable and drain-safe in most jurisdictions, this flush water typically needs no neutralization step before disposal.
Step 5. Reassemble and verify performance
Disconnect the circulation hoses and reconnect the heat exchanger to its normal supply and return lines. Tighten every fitting to spec, since a loose clamp after descaling is the most common callback technicians see. Open the isolation valves slowly rather than all at once, letting the system pressurize gradually so you can spot leaks before they become a mess.
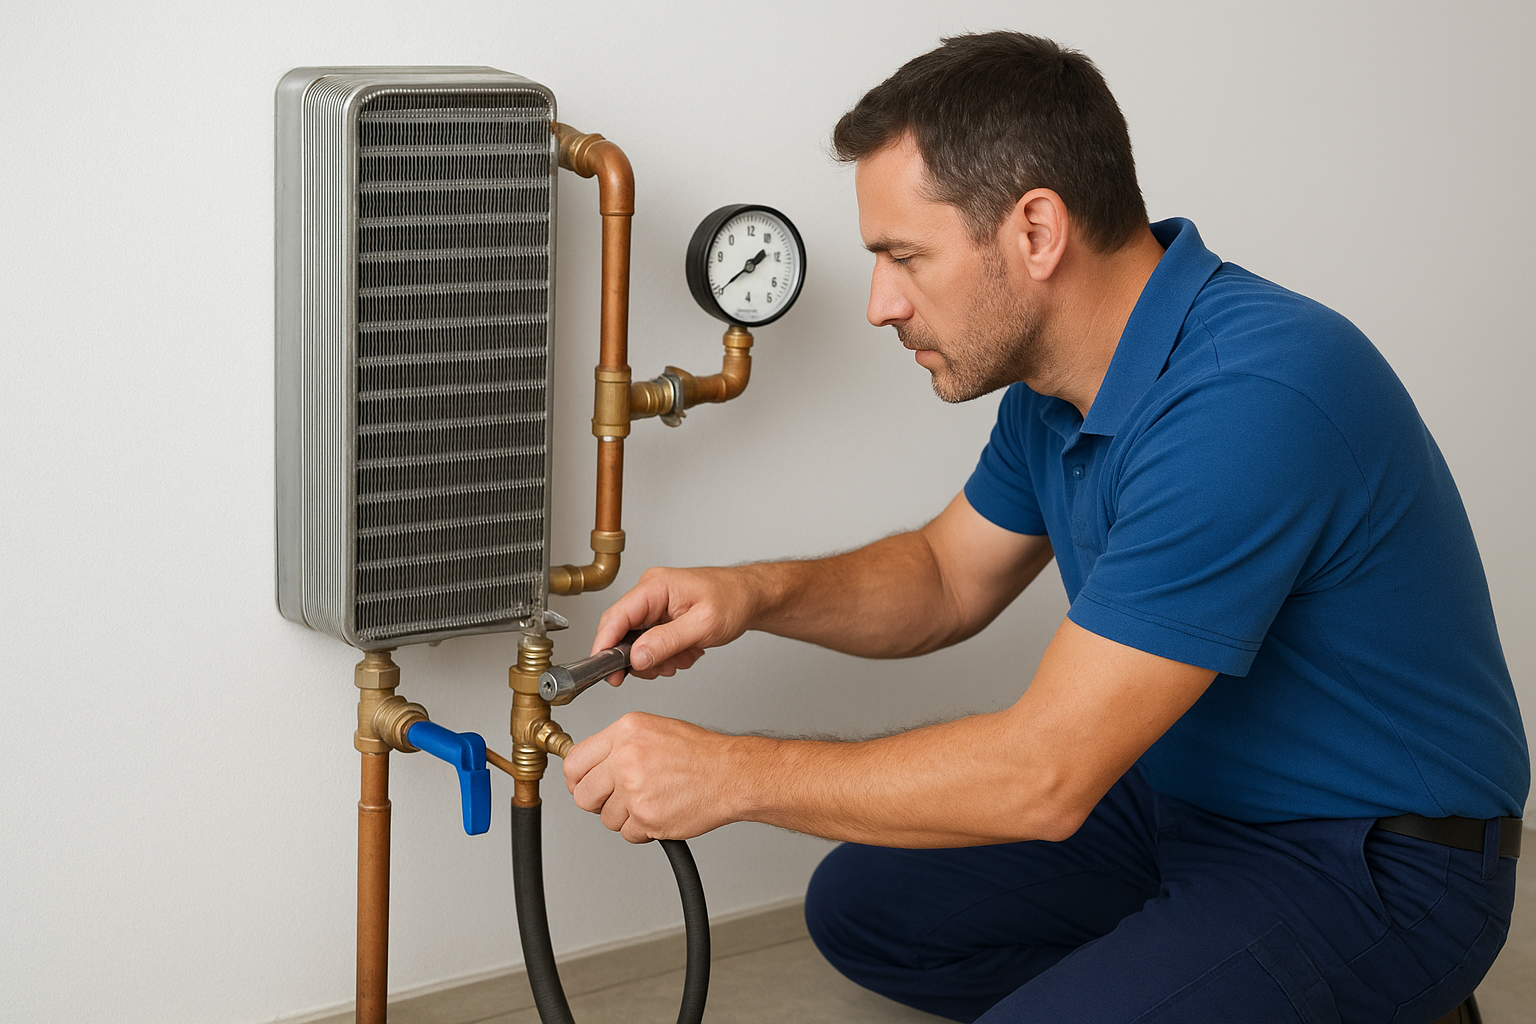
Watch the pressure gauge as flow resumes. A properly cleaned exchanger should show lower head pressure and higher flow rate than your pre-cleaning readings, since you recorded those numbers before starting, right?
If you didn't log baseline pressure and temperature before cleaning, you're guessing at your results instead of measuring them.
Run the system under normal load for at least 30 minutes and confirm these benchmarks:
- Flow rate matches or exceeds the manufacturer's rated spec
- Head pressure drops compared to your pre-cleaning reading
- Approach temperature (the gap between fluid and refrigerant or coolant) narrows, showing improved heat transfer
- No leaks at any reconnected fitting or valve
Because the non-toxic descaler left no acid residue or pitting behind, you won't see the slow post-cleaning corrosion that acid treatments often trigger weeks later. Document these readings; they become your baseline for the next service interval and proof the job was done right.
Heat exchanger material compatibility
Not every heat exchanger cleaner is suited to every tube material. Confirm compatibility before treating a specific system:
| Heat exchanger material | What to consider |
|---|---|
| Copper | Compatibility must be verified against the product label |
| Brass | Compatibility must be verified against the product label |
| Stainless steel | Verify formulation compatibility before use |
| Titanium | Confirm manufacturer and product compatibility |
| Aluminum | Requires particular caution; use only a product specifically approved for the application |
Never assume a cleaner suitable for one heat exchanger material is automatically suitable for another. Confirm compatibility with the equipment manufacturer and the product's technical documentation before cleaning.
Heat exchanger cleaning methods
Different fouling situations call for different approaches:
- Chemical descaling - best for mineral scale and deposits that dissolve chemically, using a non-corrosive heat exchanger descaler circulated through the loop
- Mechanical cleaning - brushing or rodding where physical access to the tubes permits it
- CIP/circulation cleaning - circulating a cleaning solution through the heat exchanger without removing it from service
- Combination cleaning - heavily fouled systems sometimes need mechanical cleaning followed by chemical descaling
Where heat exchanger cleaning is used
Heat exchangers are a component inside many larger systems, and the same descaling principles apply across most of them: chillers, condensers, boilers, HVAC systems, industrial process equipment, marine cooling systems, and data-center cooling infrastructure. Whatever the application, matching the cleaner to the deposit and the tube material stays the deciding factor in a safe, effective descaling job.
Keeping your heat exchanger running efficiently
Scale buildup is a maintenance problem, not an equipment failure, and treating it that way keeps your heat exchanger running at rated capacity for years instead of months. The four-step process here (isolate, circulate, flush, verify) works whether you're servicing a chiller loop, a marine cooling system, or a condenser bank, because the chemistry does the work without attacking the metal underneath it. Regular descaling on a fixed schedule, rather than waiting for head pressure to spike, is what separates facilities that get decades out of their exchangers from ones replacing tubes every few years.
Skip the acid, skip the hazmat paperwork, and give your team a safe descaling method they can run without special training or protective gear. If you're managing an industrial HVAC system or a cooling tower loop that needs the same non-corrosive approach at scale, check out the industrial HVAC and cooling tower descaler built for exactly this job.


