





Dirty coils quietly wreck your AC's efficiency long before anyone notices a problem. Dust, grease, and biofilm build up on the fins, airflow drops, and your compressor works harder to hit the same temperature. Picking the right ac coil cleaner matters more than most facility managers realize, because the wrong product can corrode aluminum fins or leave residue that attracts more dirt.
This guide answers the real question behind every search for the best condenser coil cleaner: which formula actually breaks down grime without damaging equipment, and how do you apply it correctly. We compare foaming and liquid cleaners, no-rinse versus rinse-required products, and explain when a low-pH cleaner is worth the extra cost over a generic degreaser.
You'll get a straightforward walkthrough covering coil types, application steps with the right sprayer, safety precautions for technicians, and how cleaning frequency affects long-term equipment life. Whether you manage a rooftop unit, an air-cooled data center CRAC coil system, or a fleet of HVAC assets, this comes from the same commitment to evidence-based product performance and equipment protection that guides everything we recommend at Eco Safeway.
What to look for in an AC coil cleaner
Walking down the cleaner aisle at a supply house, you'll find dozens of bottles promising the same result. Most facility managers just grab whatever's cheapest, but the formula you choose determines whether you're extending equipment life or slowly eating away at it. The best coil cleaner for commercial and industrial HVAC work isn't the strongest acid on the shelf; it's the one matched to your coil material, your fouling type, and how you plan to rinse it.
Check the pH before anything else
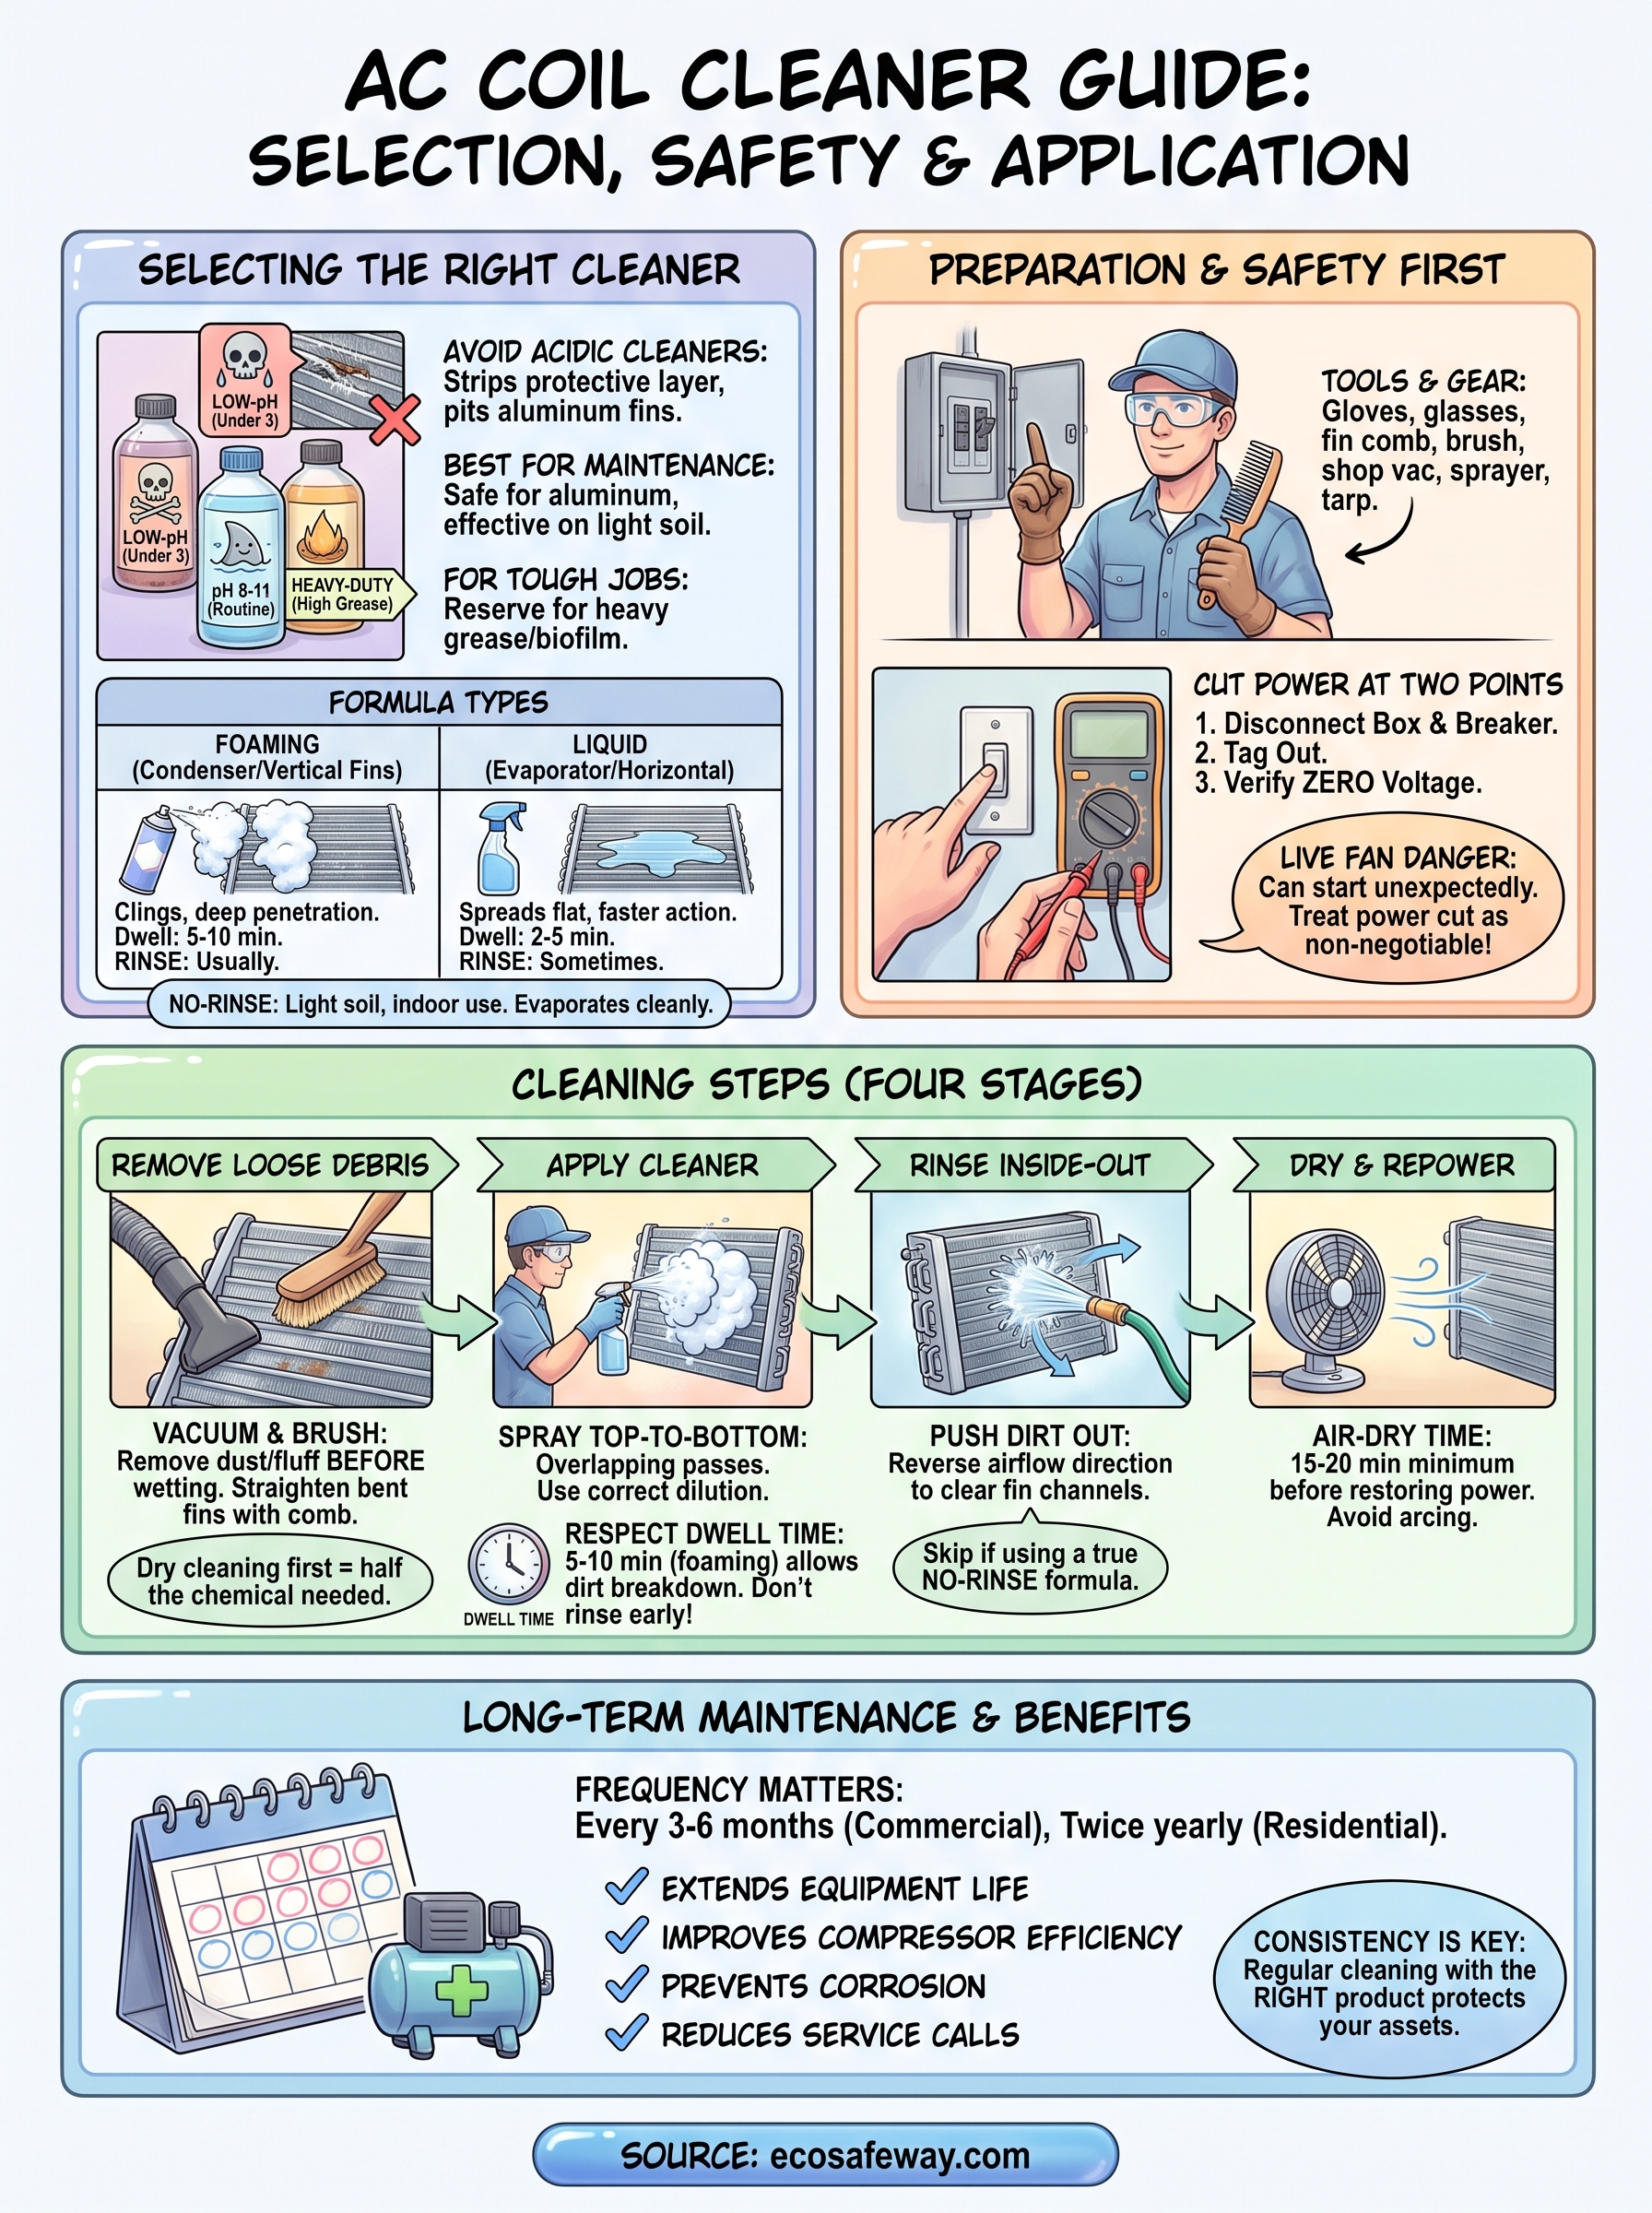
Aluminum fins are thin, soft, and vulnerable to acidic cleaners marketed as "heavy-duty degreasers." A low-pH cleaner under 3 can strip the protective oxide layer off aluminum in minutes, leaving pitted fins that corrode faster with every future cleaning cycle. Look for coil cleaners with a pH between 8 and 11 for routine maintenance, and reserve anything more aggressive for coils with heavy grease or biofilm that a mild formula won't touch.
A cleaner that damages your coils faster than dirt would have is not a bargain, no matter what it costs.
Foaming vs. liquid formulas
Foaming cleaners cling to vertical coil faces long enough to penetrate deep between fins, which makes them the better pick for condenser units outdoors. Liquid formulas spread thinner and work faster on flat, horizontal evaporator coils where gravity does some of the work for you.
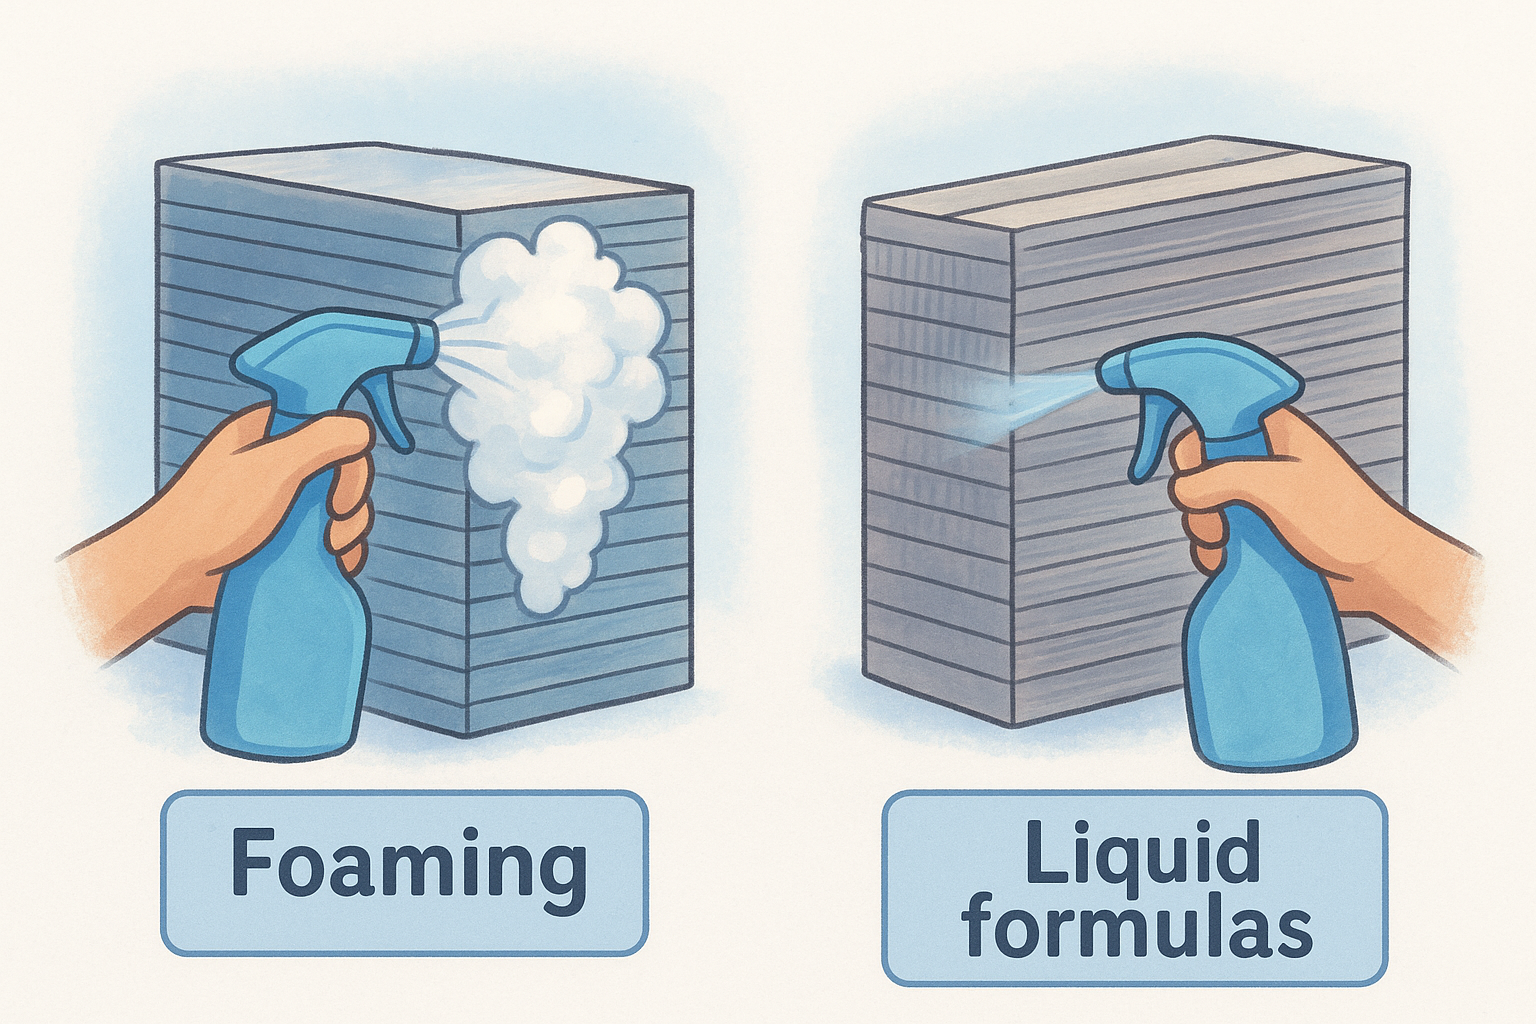
| Formula type | Best for | Dwell time | Rinse required |
|---|---|---|---|
| Foaming | Condenser coils, vertical fins | 5-10 minutes | Usually yes |
| Liquid spray | Evaporator coils, light dust | 2-5 minutes | Sometimes |
| No-rinse | Indoor coils near drywall/electronics | 0 minutes | No |
No-rinse convenience vs. rinse-required strength
Questioning whether a no-rinse product can really match a rinse-required cleaner is fair. No-rinse formulas evaporate cleanly and suit indoor coils near electrical panels or finished spaces, but they generally handle lighter soil loads. Rinse-required cleaners cut through grease and biofilm more aggressively, which is why most commercial condenser work still calls for a hose afterward. Reading the label's dwell time and rinse instructions before you buy tells you more about real-world performance than any marketing claim on the front of the bottle.
Step 1. Gather your tools and safety gear
Before you touch a single fin, lay out everything you need within arm's reach. Running back to the truck for a forgotten pair of gloves halfway through a job wastes time and tempts you to skip a safety step you'd normally never skip. Proper preparation cuts your cleaning time in half and keeps you from improvising with the wrong chemical mix.
Build your kit
Here's what a solid setup looks like for most residential and light commercial jobs:
- Coil cleaner matched to your coil material and pH range from the checklist above
- Pump sprayer or dedicated coil cleaner sprayer rated for the cleaner's dilution ratio
- Fin comb to straighten bent aluminum fins before you spray
- Soft-bristle brush for loosening caked-on debris
- Garden hose with adjustable nozzle for rinse-required formulas
- Nitrile gloves and safety glasses rated for the chemical's pH
- Plastic sheeting or tarp to protect nearby landscaping, siding, or equipment
- Shop vac for dry debris removal before wet cleaning
Skipping the fin comb is how a five-minute cleaning job turns into an hour of untangling bent aluminum.
Match your sprayer to your cleaner
A condenser coil cleaner sprayer built for foaming products won't atomize a thin liquid formula the same way, so check the manufacturer's spec sheet before you buy one sprayer for every job. Pump sprayers with adjustable nozzles give you the control to switch between a wide fan pattern for open coil faces and a narrow stream for tight fin gaps. Read the dilution instructions on your cleaner's label now, not after you've already mixed a batch, since concentrated formulas often need different water ratios depending on the coil's soil load.
Step 2. Cut the power and access the coils
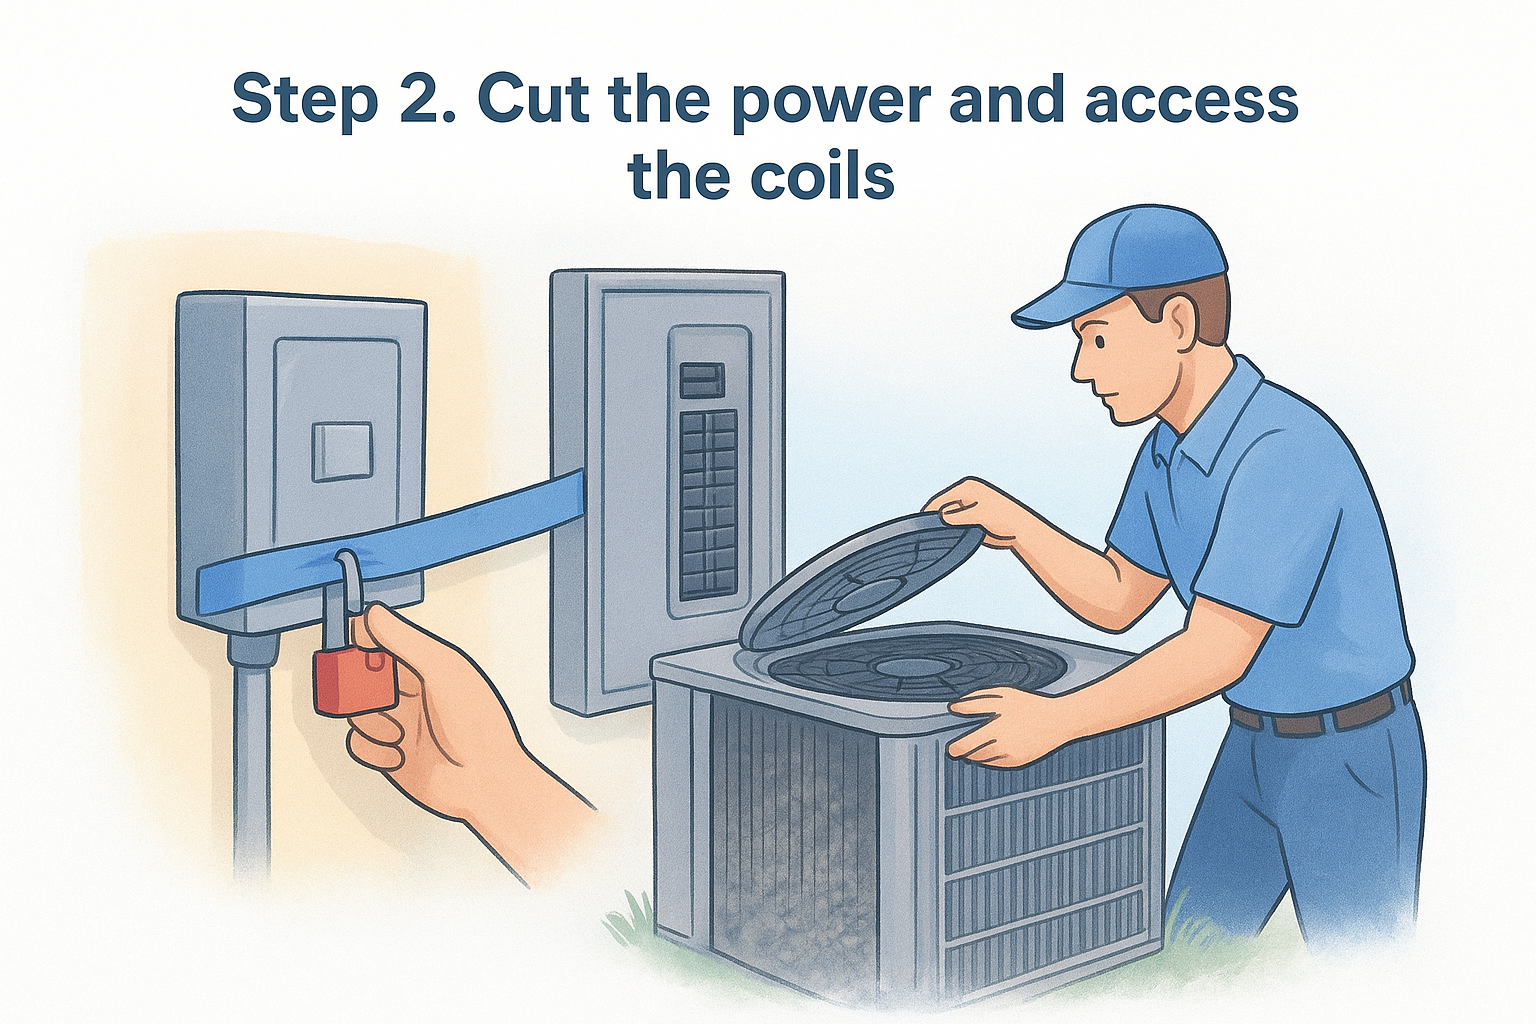
Skipping the power-down step is the single most common way technicians get hurt on a coil cleaning job. Coil cleaner sprays create a fine mist that can drift into an energized disconnect box, and a live condenser fan can start unexpectedly if a thermostat call comes through mid-clean. Treat this step as non-negotiable, even on a unit you've serviced a hundred times.
Kill the power at two points
Don't rely on the thermostat or a single breaker. Cut power at both the electrical disconnect and the breaker panel:
- Locate the outdoor disconnect box next to the condenser and pull the fused block or flip the switch
- Go to the breaker panel and shut off the dedicated AC circuit
- Tag both points with lockout tape so nobody re-energizes the unit while you're mid-spray
- Verify zero voltage with a multimeter across the contactor terminals before opening anything
Never trust a single power-off point when you're about to spray liquid into an electrical cabinet.
Open the cabinet and expose the fins
Once power's confirmed off, remove the top fan shroud or side access panels using a nut driver, setting screws aside where you won't lose them in the grass. Pull the fan assembly straight up if it's wired to the shroud, giving yourself full clearance to spray both the inside and outside faces of the coil. This full coil access is what separates a real cleaning from a surface rinse that only knocks the visible dust off the fins.
Step 3. Remove loose dirt and debris
Spraying cleaner directly onto a coil packed with pet hair, cottonwood fluff, or dry leaves just turns that debris into a soggy paste that clogs the fins worse than before. Clearing the loose material first means every drop of your coil cleaning solution actually reaches the metal instead of getting soaked up by lint. Give this step five extra minutes and you'll cut your rinse time in half later.
Vacuum before you spray anything
Run a shop vac with a brush attachment over both faces of the coil, working in the same direction as the fins so you don't bend them further. For heavier buildup, a soft-bristle brush loosens caked debris that the vacuum alone won't lift, especially in the corners where the coil meets the cabinet frame.
A coil vacuumed clean of loose debris needs half the chemical to finish the job right.
Straighten fins as you go
Bent fins trap dirt in pockets a sprayer can't reach, so this is the moment to run your fin comb across any crushed sections before they get wet. Working through this now, rather than after cleaner is already applied, keeps the coil surface even and lets liquid or foam spread across the full fin area instead of pooling in low spots.
- Vacuum with the fin direction, never against it
- Brush stubborn debris loose before wetting anything
- Comb bent fins flat while they're still dry
- Check both coil faces, not just the visible side
Step 4. Apply, rinse, and dry the coil cleaner
With loose debris cleared, mix your cleaner to the label's dilution ratio and load your sprayer before you touch the coil. Working section by section keeps the coil cleaning solution wet long enough to break down grease instead of drying into a film that just adds another layer of grime.
Spray top to bottom and respect dwell time
Start at the top of the coil and work downward in overlapping passes, holding the nozzle a few inches from the fin surface so the foam or liquid actually penetrates instead of running off. Check your product's label for the exact dwell time, usually 5 to 10 minutes for foaming formulas, and don't rinse early just because the coil looks clean; the chemical needs that full window to lift embedded soil.
Rinsing a coil cleaner off too early wastes the chemical and leaves the same grime you started with.
Rinse from the inside out
If your cleaner isn't a no-rinse formula, hose it down from the inside face outward, pushing dissolved dirt in the opposite direction airflow normally travels. Reversing the flow this way clears debris out of the fin channels instead of driving it deeper toward the coil's core, where it's nearly impossible to reach next time.
Let it dry before restoring power
Give the coil at least 15 to 20 minutes of air-dry time, more in humid climates, before reassembling panels or flipping the breaker. Restoring power to a still-wet cabinet risks arcing at the contactor and undoes the safety work from Step 2.
Keeping your coils clean for the long run
Clean coils aren't a one-time project. Grease, dust, and biofilm start rebuilding the moment you restore power, so plan on a full cleaning every three to six months for commercial units and closer to twice a year for residential systems in dusty or coastal climates. Between deep cleans, a quick vacuum pass and visual check catch problems before they cost you compressor efficiency or a service call. The coil cleaner you choose matters just as much the tenth time as the first, since a mismatched pH or the wrong dwell time still risks corroding fins no matter how careful your technique is.
If you're managing commercial HVAC assets and need a formula built for repeat use without the corrosion risk of generic degreasers, put this heavy-duty condenser coil cleaner for commercial HVAC systems on your next maintenance cycle.


