





Cloudy ice, slow production, or a funky taste coming out of your machine usually means mineral scale and biofilm have taken over the water lines and evaporator plate. Reach for the wrong ice maker cleaning solution and you risk pitting stainless components or leaving behind residue that ends up in someone's drink. This guide sorts out what actually works so you're not guessing with random descalers pulled off a shelf.
If you searched for this, you want a straight answer: what to buy or mix, and how to run it through your machine without damaging seals, sensors, or the compressor. We'll walk through nickel-safe descaling agents built for commercial ice machines, plus a couple of food-safe DIY options using vinegar or citric acid for smaller countertop units where a full commercial cleaner isn't necessary.
Below you'll find step-by-step cleaning and descaling instructions, how often to run them based on your water hardness, and the signs that tell you it's time to clean now rather than wait for the next scheduled service. Whether you're running a hospital ice machine or a bar unit, the same core process applies, just adjusted for scale and frequency.
What you need before you start
Gathering the right supplies first saves you from stopping mid-job with wet hands and a half-drained bin. You'll want a soft-bristle brush (an old toothbrush works for tight corners), a clean bucket, food-safe sanitizer, and either a commercial nickel-safe descaler or the ingredients for a DIY citric acid solution if you're working on a countertop unit. Check your owner's manual too. Manufacturers like Manitowoc and Hoshizaki spec exact dilution ratios, and running something stronger doesn't clean faster, it just eats away at solder joints and rubber gaskets over time.
Picking the correct ice maker cleaning solution matters more than most people assume. A non-corrosive nickel-safe descaler is formulated to dissolve calcium and lime scale without corroding the nickel-brazed joints found in most commercial evaporators. Vinegar and citric acid work fine on smaller residential or countertop machines, but they're too mild for heavy scale buildup in high-volume commercial units, and repeated vinegar use can degrade some plastic components faster than a purpose-built descaler.
Match the cleaner to the machine, not the other way around, or you'll trade cloudy ice for a corroded evaporator plate.
| Cleaner type | Best for | Typical dilution | Contact time |
|---|---|---|---|
| Nickel-safe commercial descaler | Commercial ice machines, evaporator plates | Per manufacturer label (often 4-6 oz per gallon) | 15-20 minutes |
| Citric acid (food-grade powder) | Countertop and residential units | 1-2 tbsp per quart of warm water | 10-15 minutes |
| White vinegar | Light scale, small home units | 1:1 with warm water | 20-30 minutes |
Don't skip protective gear either. Nitrile gloves and eye protection keep descaling agents off your skin, and a few clean towels make the rinse-and-dry stage go faster once you're through the heavier steps ahead.
Step 1. Turn off and drain the ice maker
Start by killing power at the switch, not just the ice production cycle, so the compressor and pump don't kick on while you're mid-clean. Most units have a dedicated on/off/wash switch on the control panel; flip it to "off" or "clean" mode depending on the model, and unplug the machine if you can reach the outlet safely.
Next, pull any remaining ice from the bin and let it melt or scoop it out into a sink. Locate the water supply valve feeding the machine and shut it off before you open any panels. This stops fresh water from mixing with the scale and grime you're about to flush out.
Drain the reservoir and water lines completely. Commercial units usually have a drain plug or hose at the base; residential countertop models often need tilting or a manual scoop of the reservoir.
Skipping the drain step is the fastest way to end up cleaning diluted scale instead of removing it.
Before moving on, run through this quick checklist:
- Power and water supply both off
- Bin emptied of leftover ice
- Reservoir and lines fully drained
- Drain plug or hose accessible for the next steps
Once drained, you're ready to pull the removable parts for hand-washing.
Step 2. Remove and hand-wash the removable parts
Pull the ice bin, curtain, and diverter first since these collect the most biofilm and are usually held on with a simple twist or slide-out mechanism. Check your model's panel for a water distribution tube or spray nozzle too, as these tiny openings clog fastest with mineral scale and are easy to miss during a quick wipe-down.
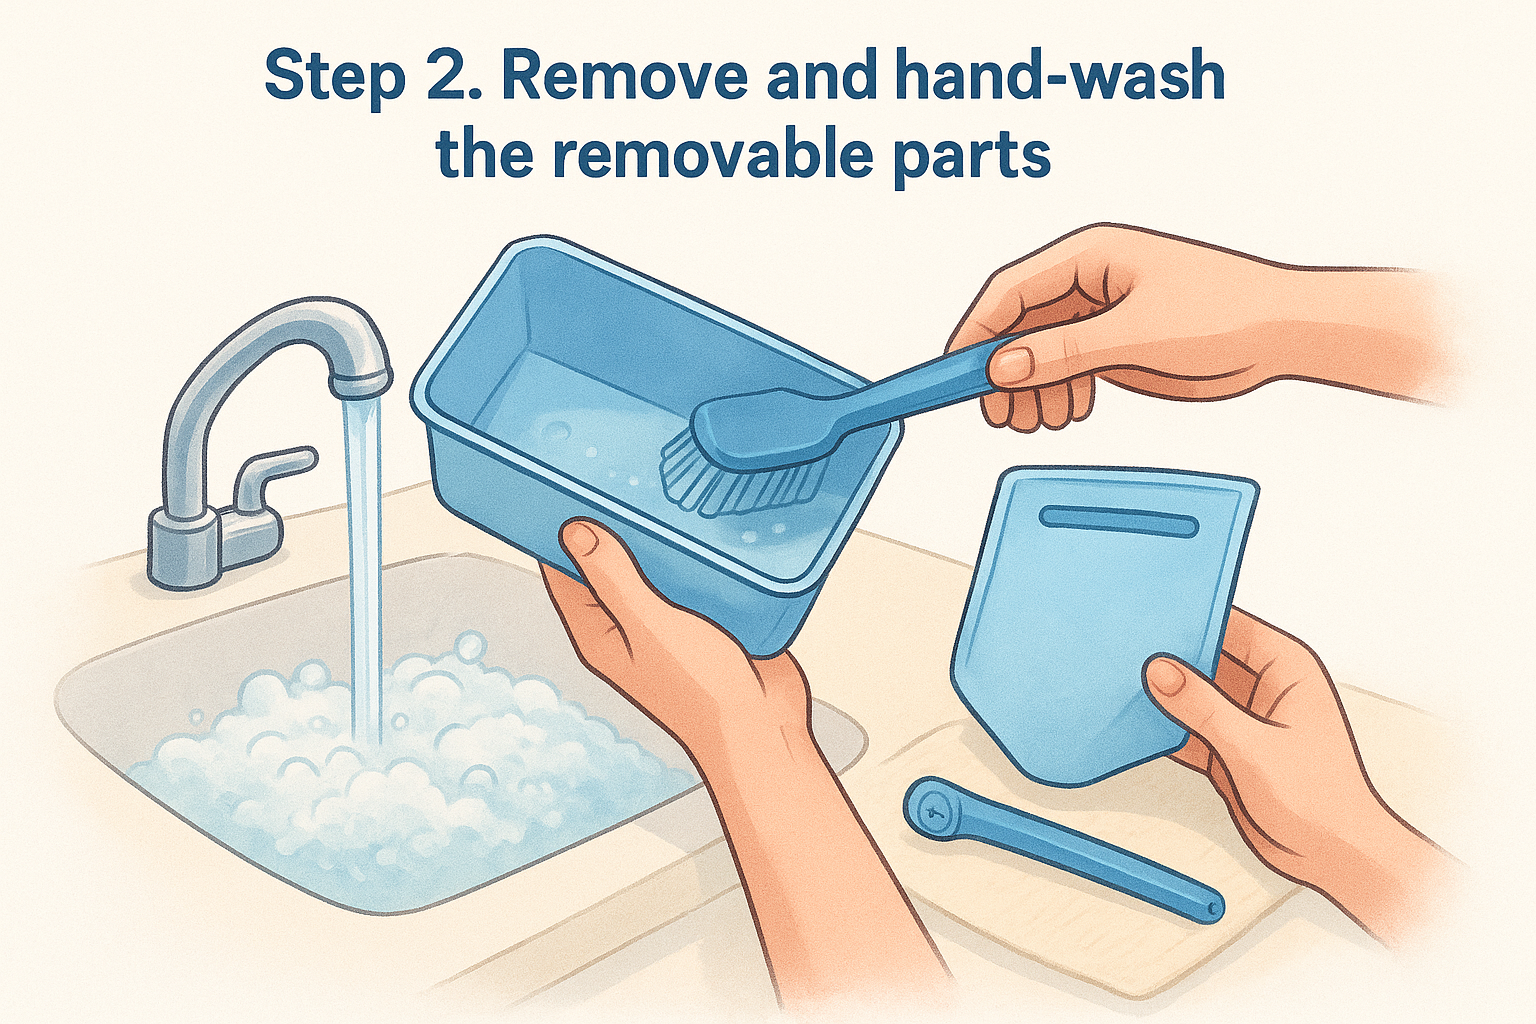
Wash every removable piece in warm water with a mild dish soap, then scrub with your soft-bristle brush to knock loose any slimy residue clinging to plastic ridges or seams. Pay close attention to the underside of the ice bin and the curtain track, both spots where mold likes to hide.
A machine can look spotless up top and still be growing biofilm in the parts you never look at.
Rinse everything with clean water afterward, no soap residue should remain before these parts go back near food-contact surfaces. Set the pieces aside on a clean towel to air dry while you move on to the machine's interior.
Here's what typically needs pulling and washing:
- Ice bin and scoop
- Curtain or flap covering the ice chute
- Diverter and water distribution tube
- Air filter, if your model has one
Once these are clean and drying, you're ready to treat the interior with your chosen ice maker machine cleaner.
Step 3. Apply the cleaning solution and run a cycle
Pour your prepared descaling solution into the reservoir once the machine's interior parts are back in place, minus the removable pieces you already washed. For commercial units, mix the nickel-safe descaler exactly to the label ratio, don't eyeball it. For countertop machines, stir citric acid powder into warm water until it fully dissolves, since undissolved granules can scratch plastic surfaces during the wash cycle.
Switch the machine to "clean" or "wash" mode if it has one. This routes the solution through the water lines, spray nozzles, and evaporator plate instead of just sitting in the reservoir. Let it circulate for the full contact time from the table above, usually 15 to 20 minutes for commercial descalers and 10 to 15 for citric acid.
The cycle only works if the solution actually reaches the evaporator plate, not just the bin walls.
Watch for foaming or bubbling around scaled areas, that's the solution breaking down mineral deposits. Heavier scale might need a second short cycle rather than a longer single one, since extended contact time on some models can stress rubber seals.
Quick reference for this step:
- Mix solution to spec, no guessing on ratios
- Run on "clean" or "wash" mode
- Time the cycle, don't eyeball it
- Repeat once for heavy scale instead of extending contact time
Step 4. Rinse, refit the filter, and clean the exterior
After the cycle finishes, drain the descaling solution completely and refill the reservoir with clean water for a rinse cycle. Run this rinse at least twice, since leftover descaler residue left in the lines can flavor your ice or irritate anyone with sensitive skin who handles it. Taste-test a batch of ice from the third or fourth cycle; if you still catch a chemical edge, run one more rinse before trusting the machine again.
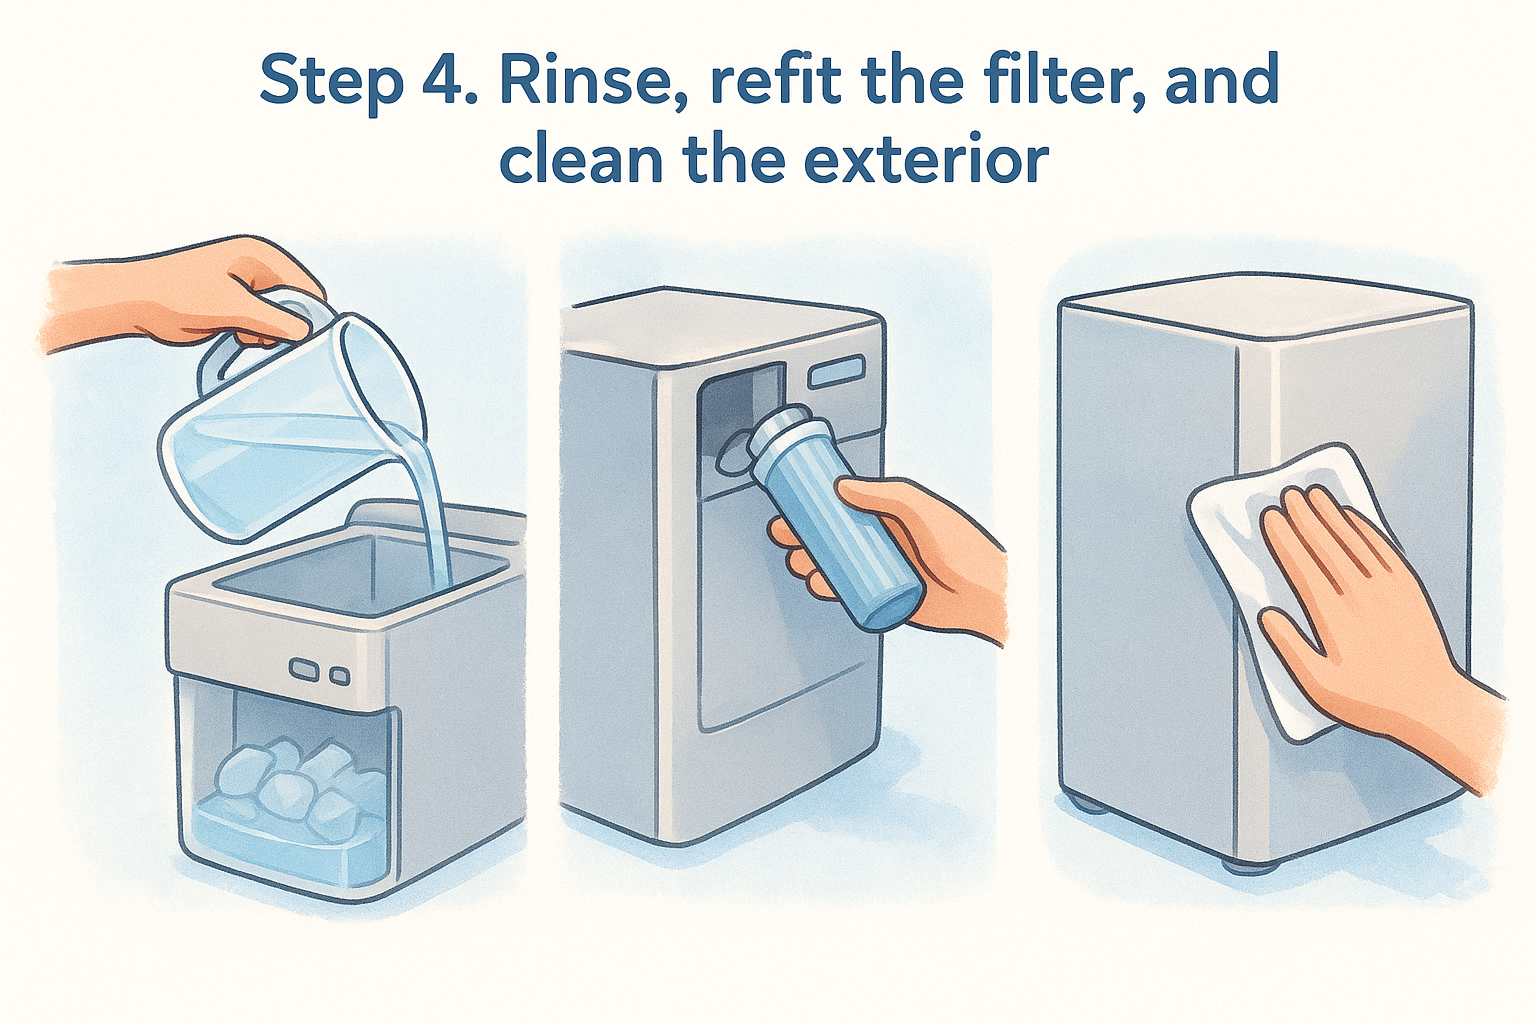
No ice maker cleaning solution belongs anywhere near a drink until the rinse water runs completely neutral.
Once rinsed, refit the water filter if your model uses one, and check the manufacturer's replacement schedule while you're at it since a clogged filter undoes half the work you just did. Reassemble the bin, curtain, and diverter you washed in Step 2, making sure they click or slide back into their original position rather than sitting loose.
Finish with the exterior. Wipe down the cabinet, door gaskets, and control panel with a food-safe sanitizer, paying attention to handle areas where hands touch most.
Before powering back on, confirm:
- Rinse water tastes clean, no chemical residue
- Filter reinstalled and dated for its next swap
- Bin, curtain, and diverter seated correctly
- Exterior wiped down and dry
Flip the switch back to normal operation and let the machine cycle a full batch before serving ice from it.
Keeping your ice maker fresh going forward
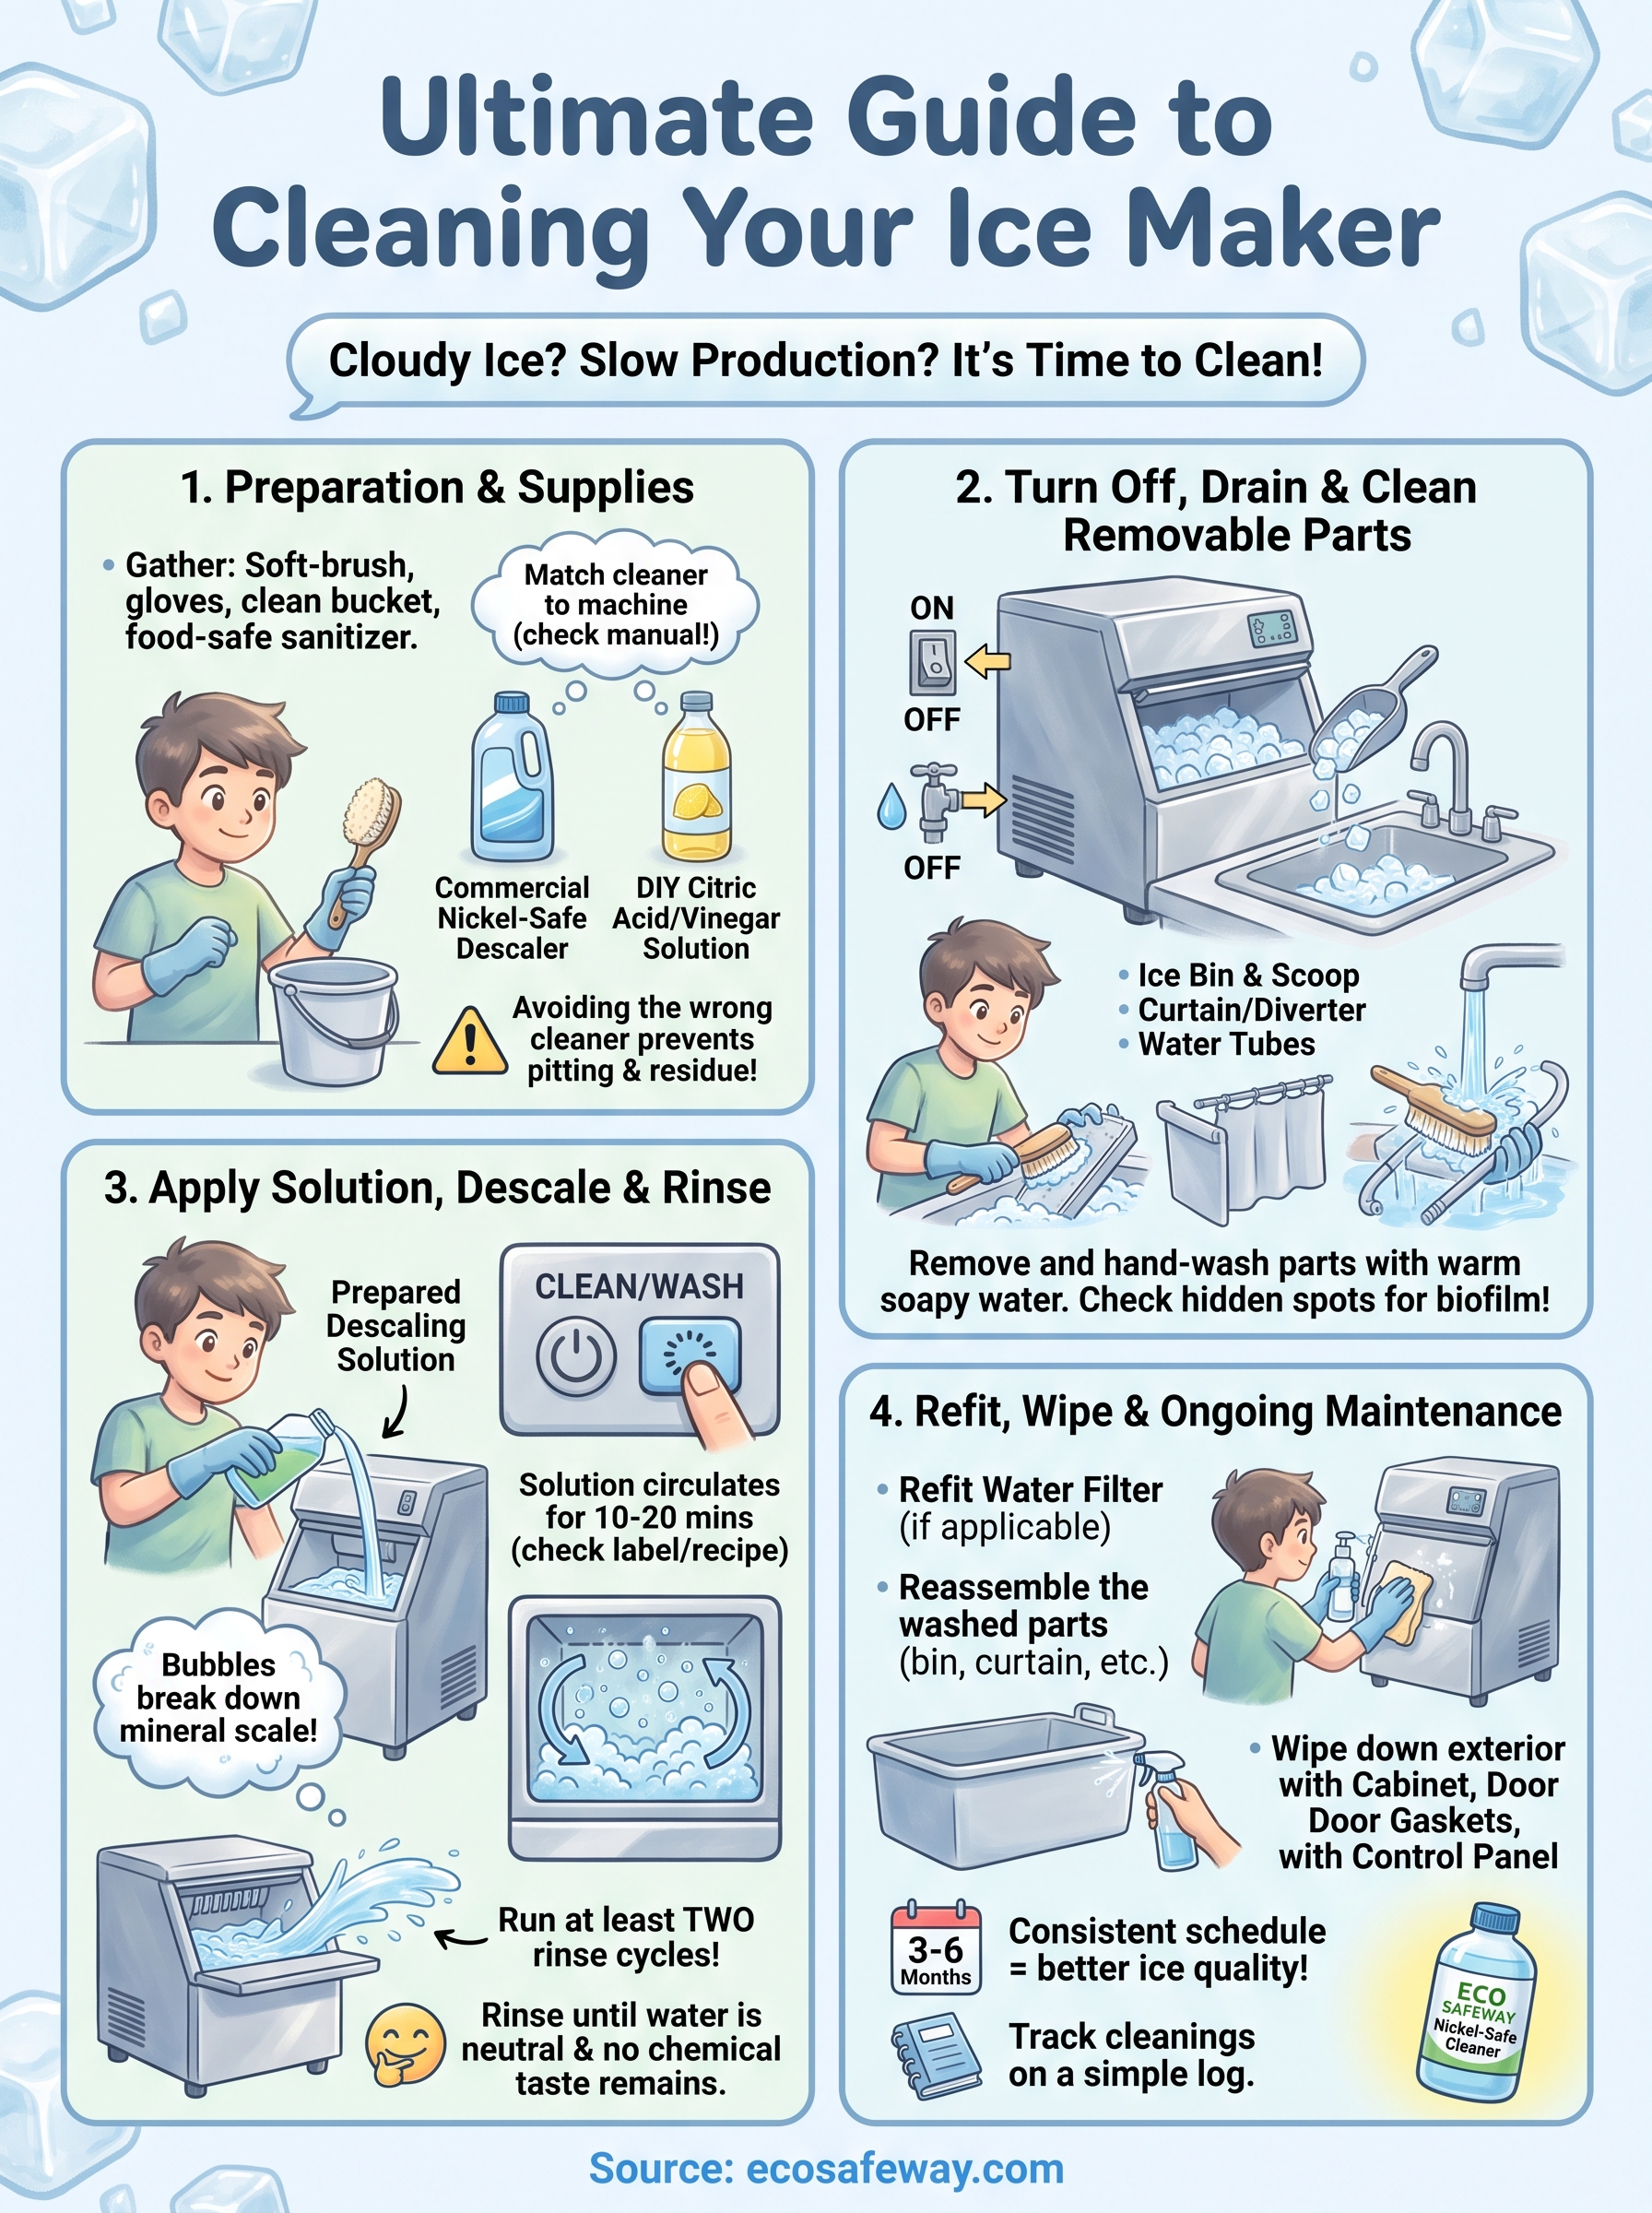
Running this process every three to six months keeps scale from rebuilding faster than you can chase it, and if your water hardness runs high, lean toward the shorter end of that window. A consistent cleaning schedule does more for ice quality than any single deep clean, since biofilm and mineral scale both build fastest in the gaps between services.
Track your cleanings on a simple log taped inside the cabinet door. Date, solution used, and any scale you noticed help you spot patterns before cloudy ice or slow production shows up again. Set a recurring reminder if you're managing several units across a facility, since it's the machines that get skipped that end up needing emergency service calls.
Grab a properly formulated nickel-safe ice machine cleaner built for commercial descaling rather than reaching for whatever's under the sink. Eco Safeway's food-safe ice machine cleaner is formulated to protect nickel-brazed evaporators, so you get clean ice without corroding the machine that makes it.


