

Your washing machine cleans everything you throw into it, but nothing cleans the washing machine itself. Over time, detergent residue, fabric softener buildup, and trapped moisture create the perfect breeding ground for mold, mildew, and that unmistakable musty smell that transfers right onto your freshly washed clothes. If you've noticed your laundry coming out less than fresh, learning how to clean a washing machine is probably overdue.
The good news: a deep clean isn't complicated, and you don't need harsh chemicals to get it done. In fact, using corrosive or toxic cleaners inside your machine can damage rubber seals, corrode drum components, and leave behind chemical residues that end up against your skin. That's exactly why we developed Eco Safeway's washing machine cleaner, a non-toxic, biodegradable formula with an HMIS 0-0-0 safety rating that removes buildup and odors without putting your machine or your household at risk.
This guide walks you through the full process for both front-load and top-load machines, from running a cleaning cycle to scrubbing the gasket and dispensers. You'll learn which cleaning agents actually work, how often to repeat the process, and the maintenance habits that prevent odors from coming back. Let's get into it.
What to do before you start
Before you run a single cleaning cycle, take a few minutes to set yourself up correctly. Skipping prep is the most common reason people end up with streaks in the drum, half-cleaned dispensers, or a machine that still smells bad two days later. Knowing your machine type and having the right supplies on hand makes the whole process faster and more effective.
Identify your machine type
Front-load and top-load washers trap grime in different places, so the cleaning approach differs between them. Front-loaders are notorious for mold buildup inside the rubber door gasket because the door seal stays damp after each cycle. Top-loaders tend to accumulate detergent residue and mineral deposits along the drum walls and under the agitator.
Knowing which type you have before you start means you won't miss the spots that cause most of the odor and buildup problems.
Check your machine's model number (usually on a sticker inside the door frame or on the back panel) if you want to pull up the manufacturer's specific maintenance recommendations. This takes two minutes and can save you from using a method that voids your warranty.
Gather your supplies
You don't need a cabinet full of products to do this properly. The right combination of supplies covers every part of the machine without overlap or waste. Here's what to have ready before you start:
- Washing machine cleaner (Eco Safeway's formula works for both front-load and top-load machines)
- White distilled vinegar (for supplemental odor control)
- Baking soda (for light scrubbing and deodorizing)
- A few old toothbrushes or small cleaning brushes
- Microfiber cloths or clean rags
- A small bucket or bowl
- Rubber gloves (optional, but useful for gasket scrubbing)
Avoid bleach if your machine has rubber gaskets, stainless drum components, or if you plan to follow up with a vinegar rinse. Mixing bleach and vinegar produces chlorine gas, which is a genuine safety hazard in an enclosed laundry space.
Do a quick pre-check
Before you touch the drum, run a quick visual inspection of the machine. Open the door and look inside the drum for visible mold spots, soap scum lines, or standing water that didn't drain. Pull open the detergent and softener dispensers and check for dried residue or dark buildup in the compartments.
Check that the machine is empty and that there's no laundry left inside. It sounds obvious, but starting a hot cleaning cycle with a forgotten towel at the bottom of the drum means you'll need to rewash it. Also, make sure you have at least 30 to 90 minutes available, depending on how thorough you want to be, since the drum cycle alone takes time to complete before you move on to scrubbing the smaller components by hand.
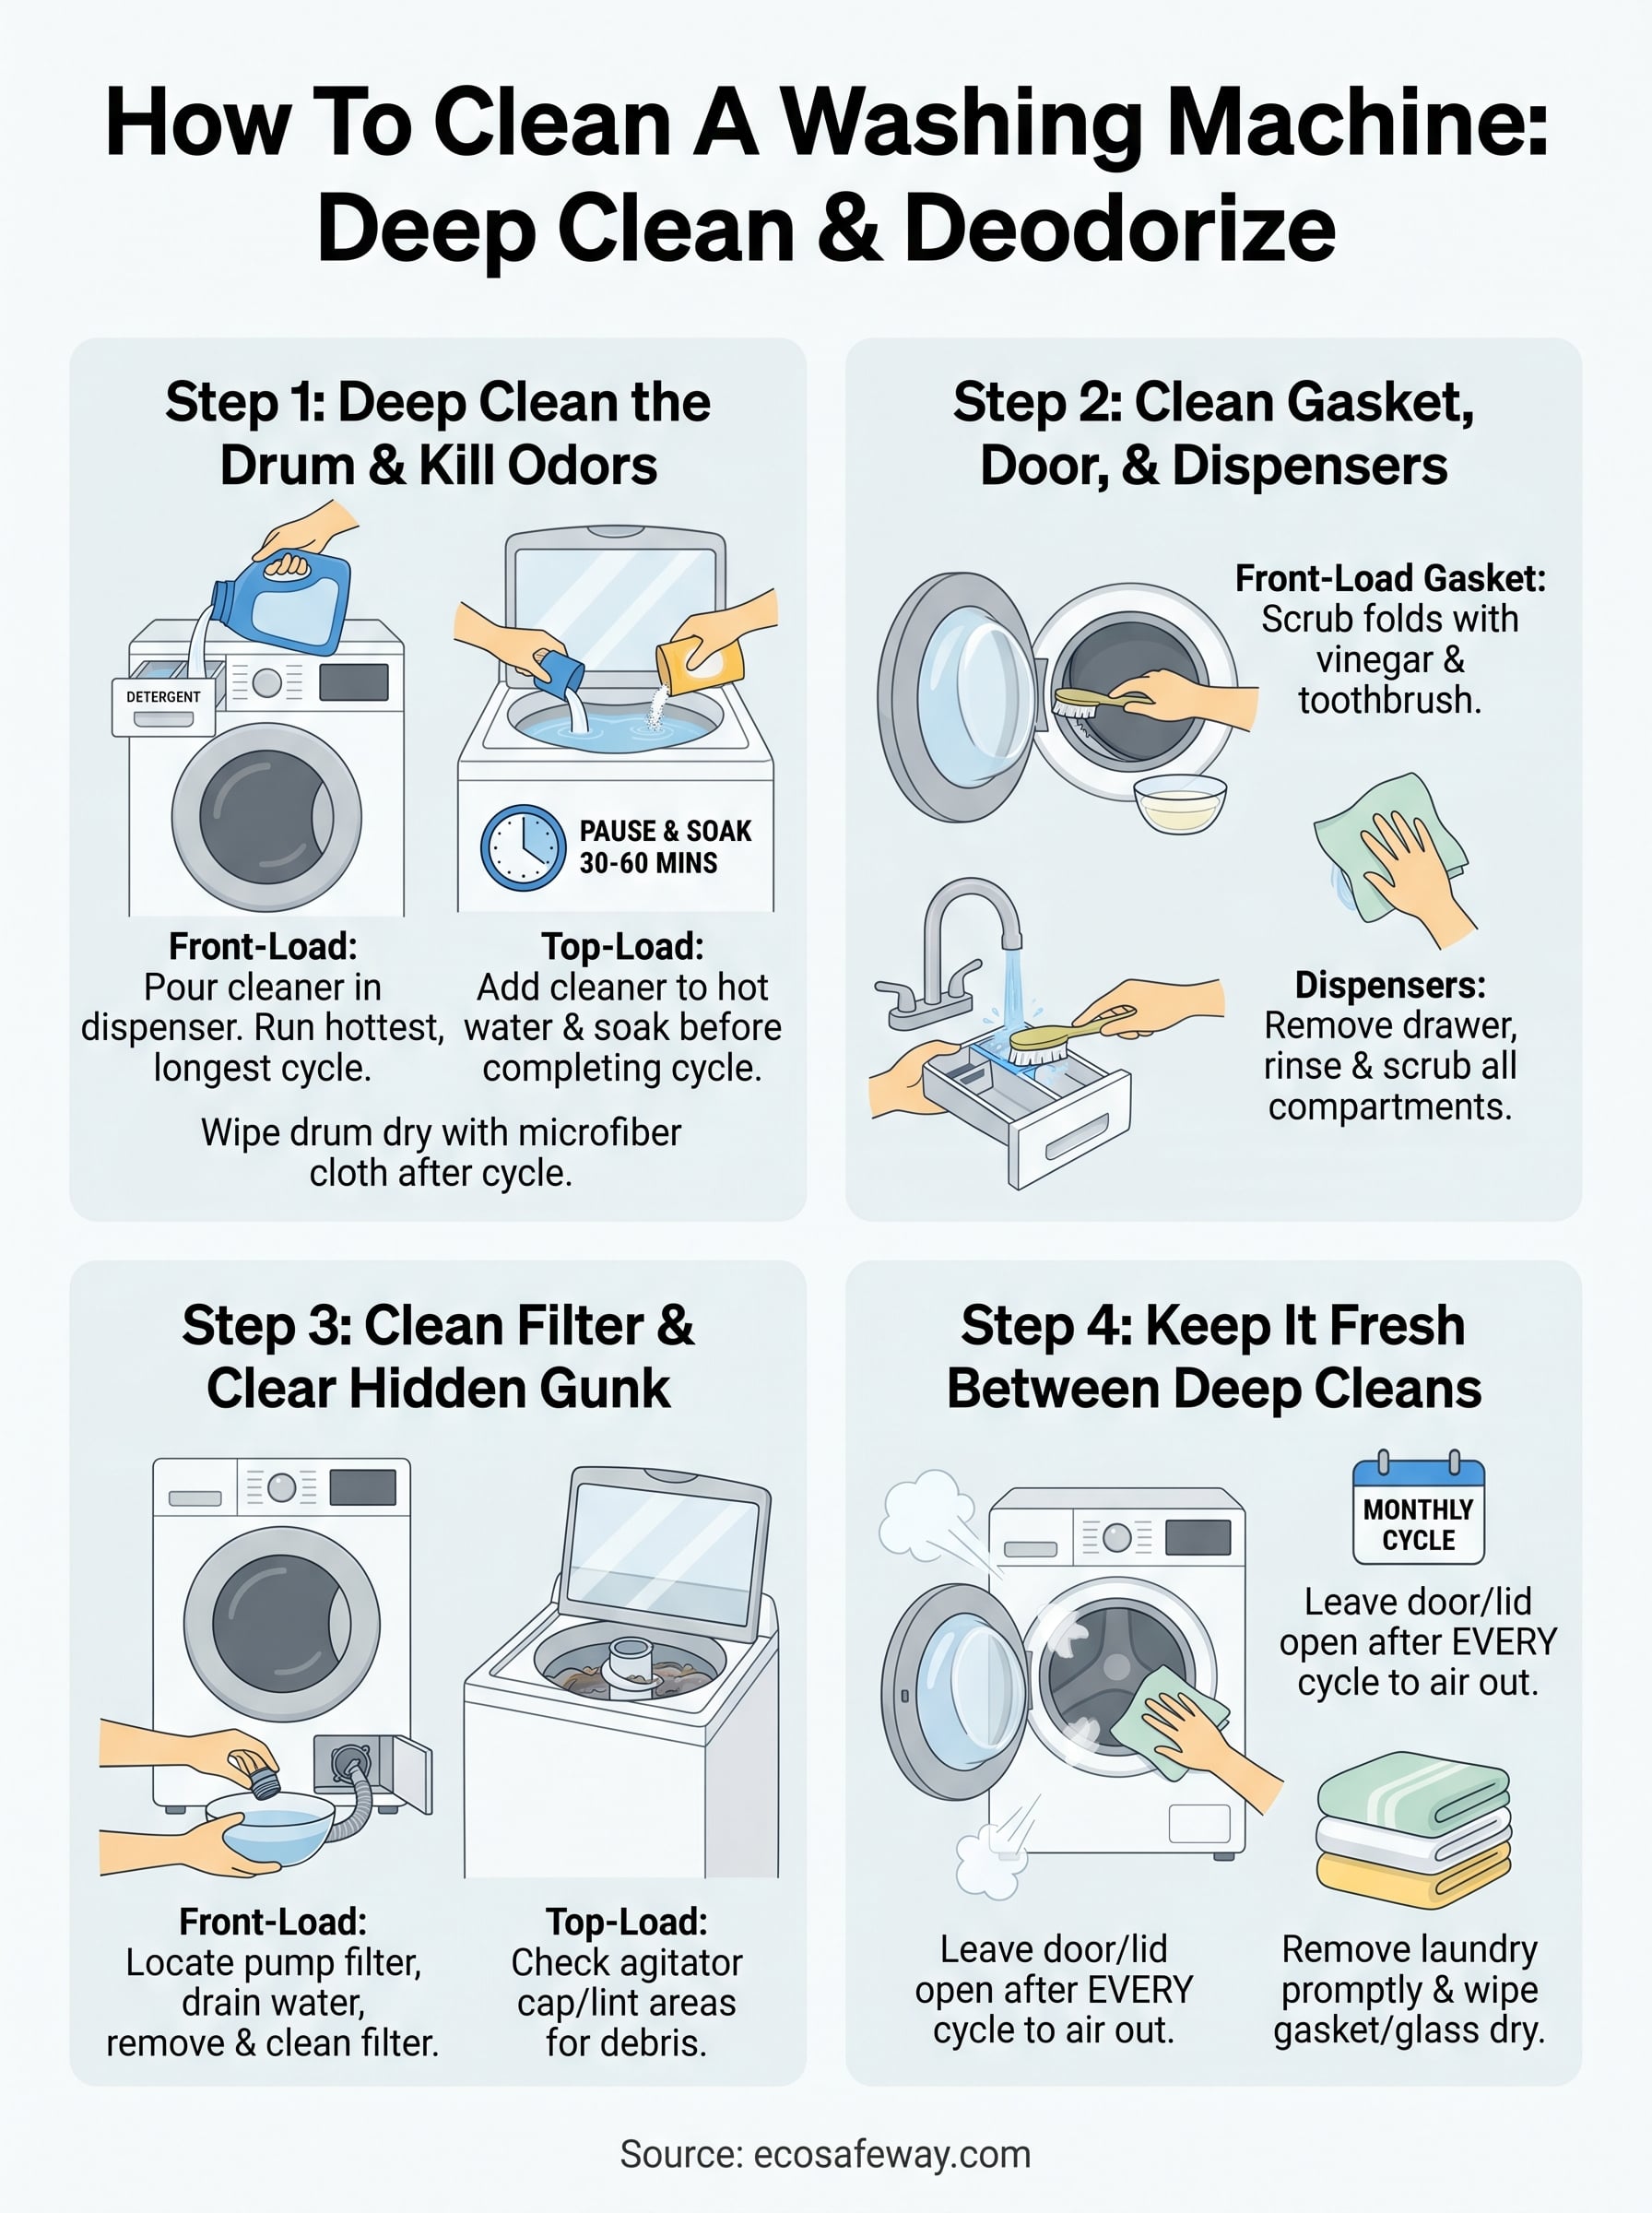
Step 1. Deep clean the drum and kill odors
The drum is where most odors originate, so this is the most critical step in learning how to clean a washing machine correctly. Residue from detergent, minerals from hard water, and biological buildup from damp conditions accumulate on drum surfaces over time. Running a proper cleaning cycle with the right cleaning agent removes that buildup at the source rather than masking the smell temporarily.
Front-load machines
Pour one cap of Eco Safeway's washing machine cleaner directly into the detergent dispenser, not the drum itself. Set your machine to the hottest water setting and the longest cycle available. Once the cycle finishes, wipe the inside of the drum with a dry microfiber cloth to pull out any remaining moisture before closing the door.
Quick steps for front-loaders:
- Add cleaner to the detergent dispenser
- Select the hottest, longest cycle (often "Clean Washer," "Tub Clean," or "Sanitize")
- Run the full cycle without interruption
- Wipe drum dry with a microfiber cloth immediately after
Leaving the door cracked open after every wash cycle, not just after cleaning, dramatically cuts moisture retention and prevents mold from coming back.
Top-load machines
Fill the drum with hot water first by starting a cycle and letting it fill completely, then pause the machine. Add one cap of Eco Safeway's cleaner directly into the water, along with half a cup of baking soda if you're dealing with strong odors. Let the mixture soak for 30 to 60 minutes before resuming the cycle to completion. That soak time gives the cleaner direct contact with the drum walls, agitator, and any buildup sitting below the waterline.
After the cycle completes, run a short rinse-only cycle with plain water to flush any remaining residue out of the machine. This extra rinse is especially worth doing if you added baking soda, since powder residue can settle into crevices near the drum if it doesn't fully dissolve during the main cycle.
Step 2. Clean the gasket, door, and dispensers
The drum cleaning cycle handles the inside of the barrel, but the gasket, door glass, and dispensers stay dirty unless you scrub them by hand. These spots hold trapped moisture and detergent residue that the cycle never reaches, and they're often the actual source of the smell even after you've run a full cleaning cycle. This is a step that many guides on how to clean a washing machine skip over, but skipping it means the odor returns quickly.
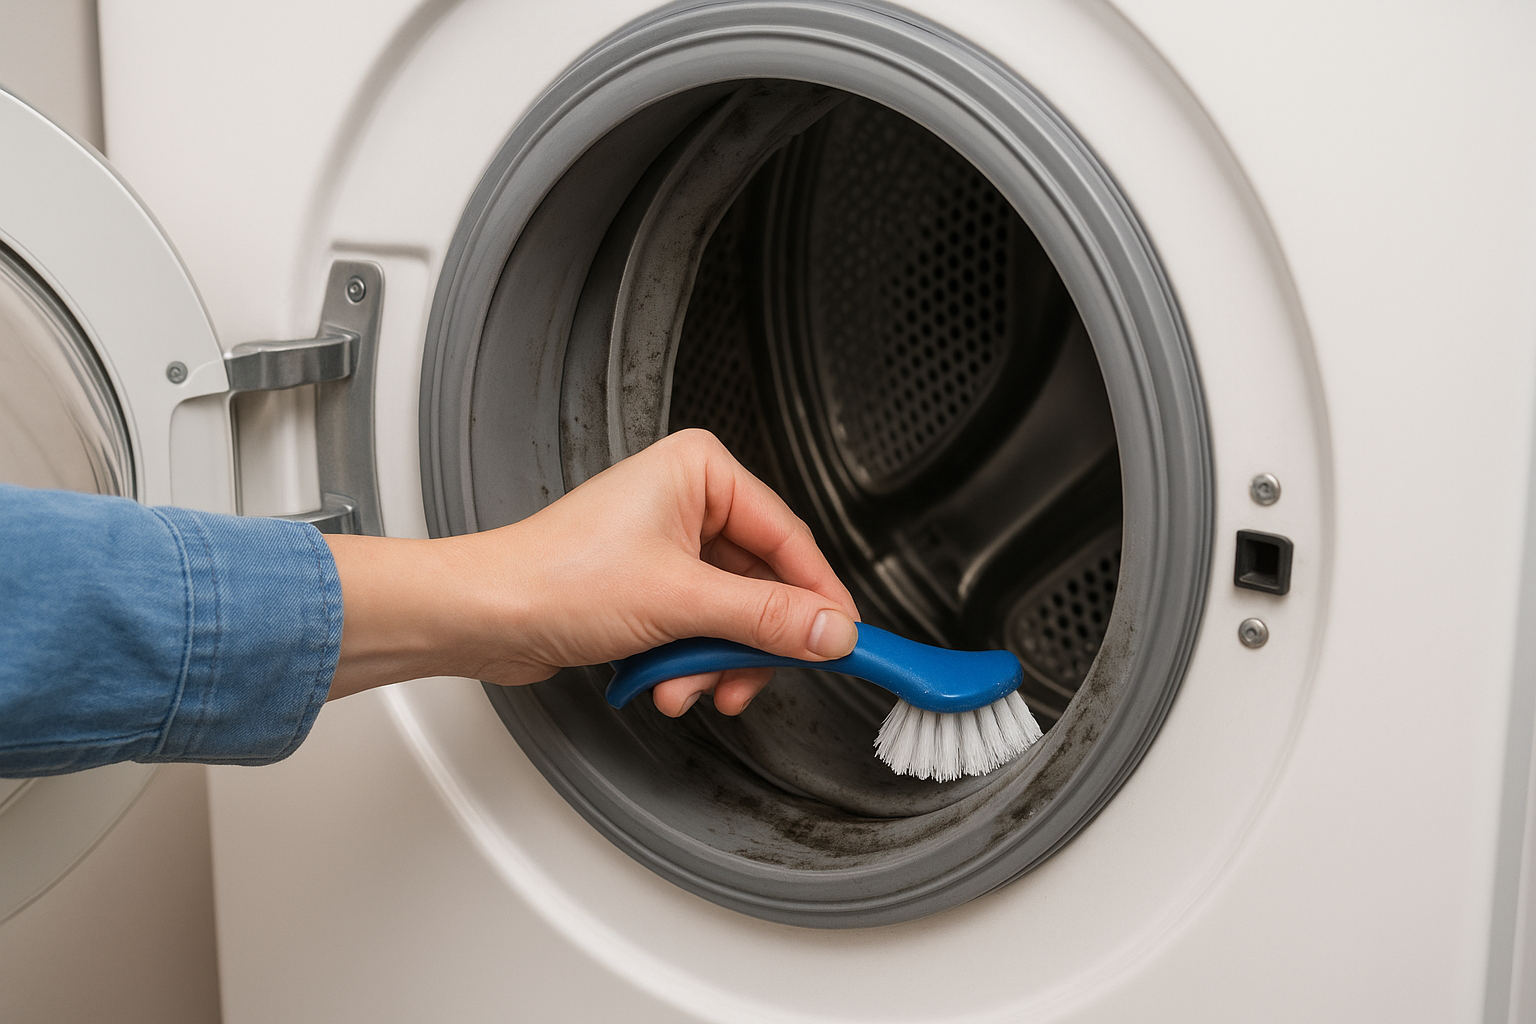
The door gasket (front-loaders)
The rubber gasket on a front-load washer is the single biggest mold trap in your laundry room. Peel back the gasket folds one section at a time and look for black or gray spots, which are mold colonies, not just discoloration. Mix equal parts white vinegar and warm water in a small bowl, then use an old toothbrush dipped in that solution to scrub inside each fold. Work all the way around the seal without rushing, since mold hides deep in the creases where a cloth alone won't reach.
If you see mold that doesn't lift with vinegar scrubbing, apply a baking soda paste directly to the spot, let it sit for five minutes, then scrub again before wiping clean.
The door glass and frame
Wipe the inside of the door glass with a microfiber cloth dampened with the vinegar-water solution. Hard water deposits and soap film build up on the glass over time and come off easily at this stage while the machine is already open. Follow up with a dry cloth to prevent streaks and residue from resettling.
The detergent and softener dispensers
Pull the dispenser drawer completely out of the machine since most models release with a press tab. Rinse it under warm running water and use a toothbrush to break up dried detergent or sticky softener caked into the compartment walls. Here's a quick reference for each compartment:
| Compartment | What Builds Up | How to Clean |
|---|---|---|
| Detergent | Dried soap residue | Warm water and toothbrush |
| Fabric softener | Waxy, sticky buildup | Vinegar soak for 5 minutes |
| Bleach (if present) | Residue and discoloration | Rinse thoroughly with warm water |
Step 3. Clean the filter and clear hidden gunk
The filter is the most overlooked part of learning how to clean a washing machine properly, and it's often the actual reason a machine still smells bad even after you've run a drum cleaning cycle. Both front-load and top-load machines trap lint, hair, small debris, and stagnant water in areas that never get flushed during a normal wash. Clearing those spots takes less than 10 minutes and makes a noticeable difference in both odor and drainage performance.
Front-load filter: locating and cleaning it
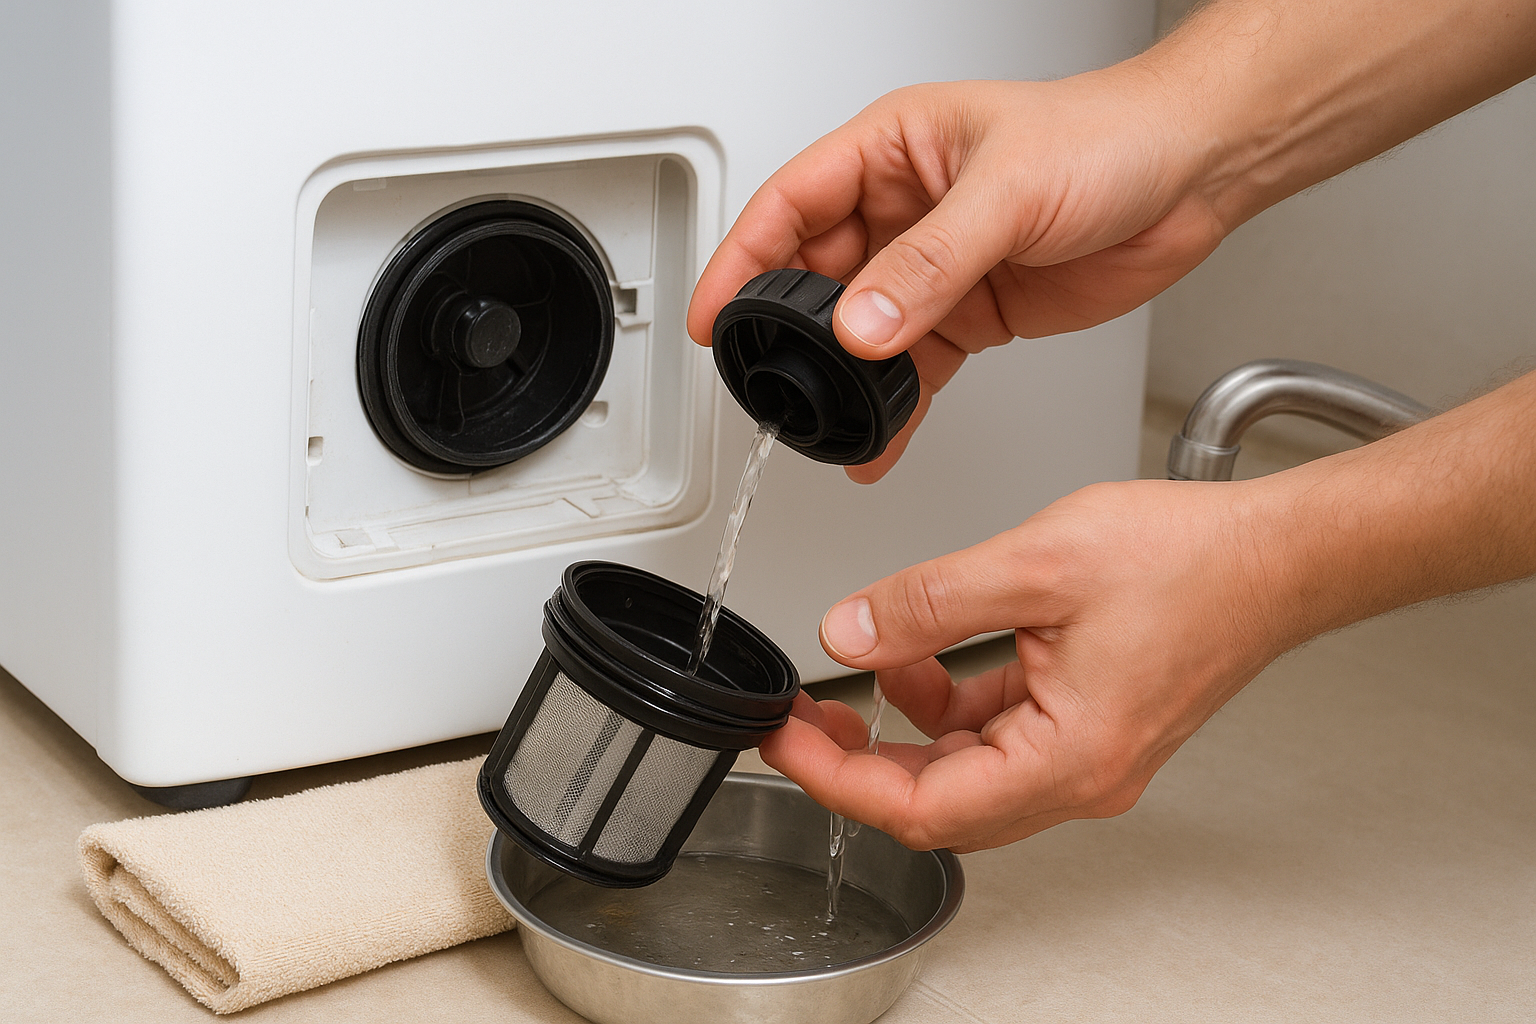
Front-loaders have a pump filter (sometimes called a coin trap or debris filter) located behind a small access panel on the lower front of the machine. Before you unscrew the cap, place a shallow bowl or folded towel underneath it to catch the water that drains out. That water can come out faster than you expect, so have your bowl ready before you start turning anything.
Follow these steps to clean a front-load filter:
- Open the small access panel on the lower front of the machine
- Pull out the small drain hose (if present) and let it empty into your bowl
- Slowly unscrew the filter cap counterclockwise
- Pull the filter out and rinse it under warm running water
- Scrub the filter mesh with a toothbrush to clear trapped debris
- Wipe the inside of the filter housing with a damp cloth
- Screw the filter cap back in firmly and close the panel
A clogged filter forces the pump to work harder, which increases wear and can trigger drainage error codes on the display panel.
Top-load machines and hidden debris spots
Top-loaders don't always have an accessible pump filter, but they collect lint and residue in several spots you won't see without looking. Pull the agitator cap off (it usually lifts straight up or unsnaps with a firm pull) and check for compacted hair and lint packed around the base before rinsing the area with warm water.
Common debris locations in top-load machines:
| Location | What Accumulates | How to Clear It |
|---|---|---|
| Lint filter near agitator | Hair, lint, fabric fibers | Rinse under warm water |
| Agitator base | Residue and compacted lint | Wipe with damp cloth |
| Water inlet mesh screens | Mineral deposits, debris | Remove and rinse under water |
Step 4. Keep it fresh between deep cleans
A deep clean solves the current problem, but what you do between sessions determines how quickly the smell and buildup return. Most odor and mold issues in washing machines are caused by preventable daily habits rather than anything wrong with the machine itself. Fixing those habits takes less than a minute per laundry load.
After every wash cycle
The single most effective thing you can do is leave the door or lid open after every cycle, not just after cleaning. This lets moisture escape the drum rather than sitting against the rubber gasket and drum walls where mold grows. On front-loaders, pulling the gasket folds slightly apart after you open the door helps the creases dry faster.
Three habits that prevent buildup between deep cleans:
- Remove laundry promptly once the cycle finishes rather than letting wet clothes sit in the drum
- Wipe the gasket and door glass dry with a cloth after the last load of the day
- Leave the detergent drawer slightly open so the dispenser compartments can air out instead of trapping humidity inside
These three habits, done consistently, can cut how often you need to perform a full deep clean in half.
How often to run a cleaning cycle
For most households doing four to six loads per week, running a full cleaning cycle once a month keeps buildup and odors under control. If you have hard water, use liquid fabric softener regularly, or wash heavily soiled items often, move that schedule to every two to three weeks instead.
Knowing how to clean a washing machine on a regular schedule is simpler when you treat it like any other appliance maintenance task. Set a recurring reminder on your phone for the first weekend of each month and pair it with the after-cycle habits above. Using a non-toxic cleaner like Eco Safeway's formula on that monthly schedule also means no harsh residue accumulating inside the drum between sessions, which protects the machine while keeping your laundry genuinely clean.
Your washer should smell clean now
If you followed each step in this guide, your machine is now free of mold, detergent residue, and the odor buildup that comes from months of neglect. Knowing how to clean a washing machine properly means more than running a single cycle, and you now have the full process: drum cleaning, gasket scrubbing, dispenser clearing, and filter maintenance covered from start to finish.
The habits you build after today are what keep the problem from coming back. Leaving the door open, removing laundry promptly, and running a monthly cleaning cycle on a consistent schedule will keep your machine performing the way it should. For the cleaning cycle itself, skip the harsh chemicals and use something that won't damage your seals or leave residue against your skin. Our enzyme-powered washing machine cleaner tablets are non-toxic, biodegradable, and built specifically for this job.