





A neglected cooling tower doesn't just waste energy. It grows biofilm, scales up your heat exchangers, and creates the exact conditions Legionella bacteria need to thrive. If you're responsible for a facility's HVAC system, cooling tower maintenance isn't optional paperwork. It's the difference between a system that runs efficiently for years and one that triggers a health department visit or an unplanned equipment replacement.
This guide gives you the actual inspection checklist facility managers use, broken down by daily, weekly, monthly, and quarterly tasks. You'll get the specifics on water treatment monitoring, drift eliminator checks, basin cleaning, and the descaling steps that keep mineral buildup from choking your condenser coils, including commercial condenser coil cleaning that restores airflow. No vague advice about "regular upkeep," just the concrete tasks and intervals that prevent breakdowns.
We'll also cover where Legionella prevention fits into your routine and why the cleaning products you choose matter as much as the schedule itself. Harsh acid descalers can pit metal surfaces and create hazmat handling headaches, so we'll point out where non-corrosive, biodegradable alternatives get the job done without the added risk to your equipment or your crew.
What you need before maintaining your cooling tower
Before you touch a single valve, get your gear staged. Walking up to a cooling tower without the right personal protective equipment and testing tools wastes time and, worse, exposes you to aerosolized water droplets where Legionella risk is highest. Cooling tower cleaning can expose workers to aerosols, biological contaminants, chemicals, and other hazards. Follow your facility's OSHA-required safety program, applicable water management plan, OEM instructions, and chemical SDS requirements. Where respiratory protection is required, use the respiratory protection program and equipment specified by your safety professional.
Testing and measurement tools
You can't manage what you don't measure, so your kit needs to include real-time water chemistry testing tools. At minimum, gather a conductivity meter, pH test strips or a digital pH meter, and a Legionella test kit or sampling supplies if your facility follows a formal water management plan under guidance like ASHRAE 188. A flow meter and thermometer help you confirm the tower is actually rejecting heat at the rate it's designed for, which tells you whether scale or biofilm has already started reducing efficiency before you see it visually.
Cleaning tools and access equipment
Basin cleaning and fill media inspection require physical access, so plan for a wet vacuum or sump pump to remove standing water and sediment, stiff brushes for scrubbing basin walls, and a pressure washer for rinsing fill media without damaging the PVC sheets. If your tower sits above ground level, confirm ladder access and fall protection are in place before shutdown, since most cooling towers require the system to be offline during a full basin cleaning.
Choosing the right treatment chemicals
Here's where a lot of maintenance plans go wrong. Traditional acid-based descalers strip mineral scale, but they also pit galvanized steel and copper components over repeated use, shortening the life of the exact equipment you're trying to protect. A non-corrosive cooling tower descaling chemical avoids that trade-off entirely.
A descaler that damages the metal it's cleaning isn't solving your maintenance problem, it's creating a new one.
| Consideration | Acid-based descaler | Non-corrosive descaler |
|---|---|---|
| Metal compatibility | Can pit copper, steel | Safe on most metals |
| Shipping/handling | Often hazmat classified | No special handling |
| Runoff/discharge | Requires neutralization | Biodegradable, EPA compliant |
| PPE needs | Full acid-handling gear | Standard gloves/glasses |
Eco Safeway's cooling tower descaler is HMIS 0-0-0 rated, meaning it carries no health, flammability, or physical hazard rating, so you skip the hazmat shipping fees and the acid burns risk entirely.
Baseline records
Finally, pull your last inspection log, water treatment vendor reports, and equipment manufacturer specs before you start. Knowing your tower's baseline conductivity, flow rate, and last descaling date turns today's inspection into a comparison instead of a guess.
Step 1. Inspect the tower structure and water flow
Walk the tower before you touch the water. Structural inspection catches the small problems (a cracked panel, a loose fastener, a sagging fill support) before they become the reason your tower goes down mid-summer when cooling demand peaks. Start at ground level and work up, checking the casing, access doors, and fan stack for corrosion, cracks, or gaps that let debris or sunlight into the basin. Sunlight exposure inside a tower accelerates algae growth, so any gap in the casing is worth sealing immediately, not noting for later.
Check the structure and casing
Grab a flashlight and look closely at every panel seam, since that's where corrosion typically starts on galvanized towers. Look for:
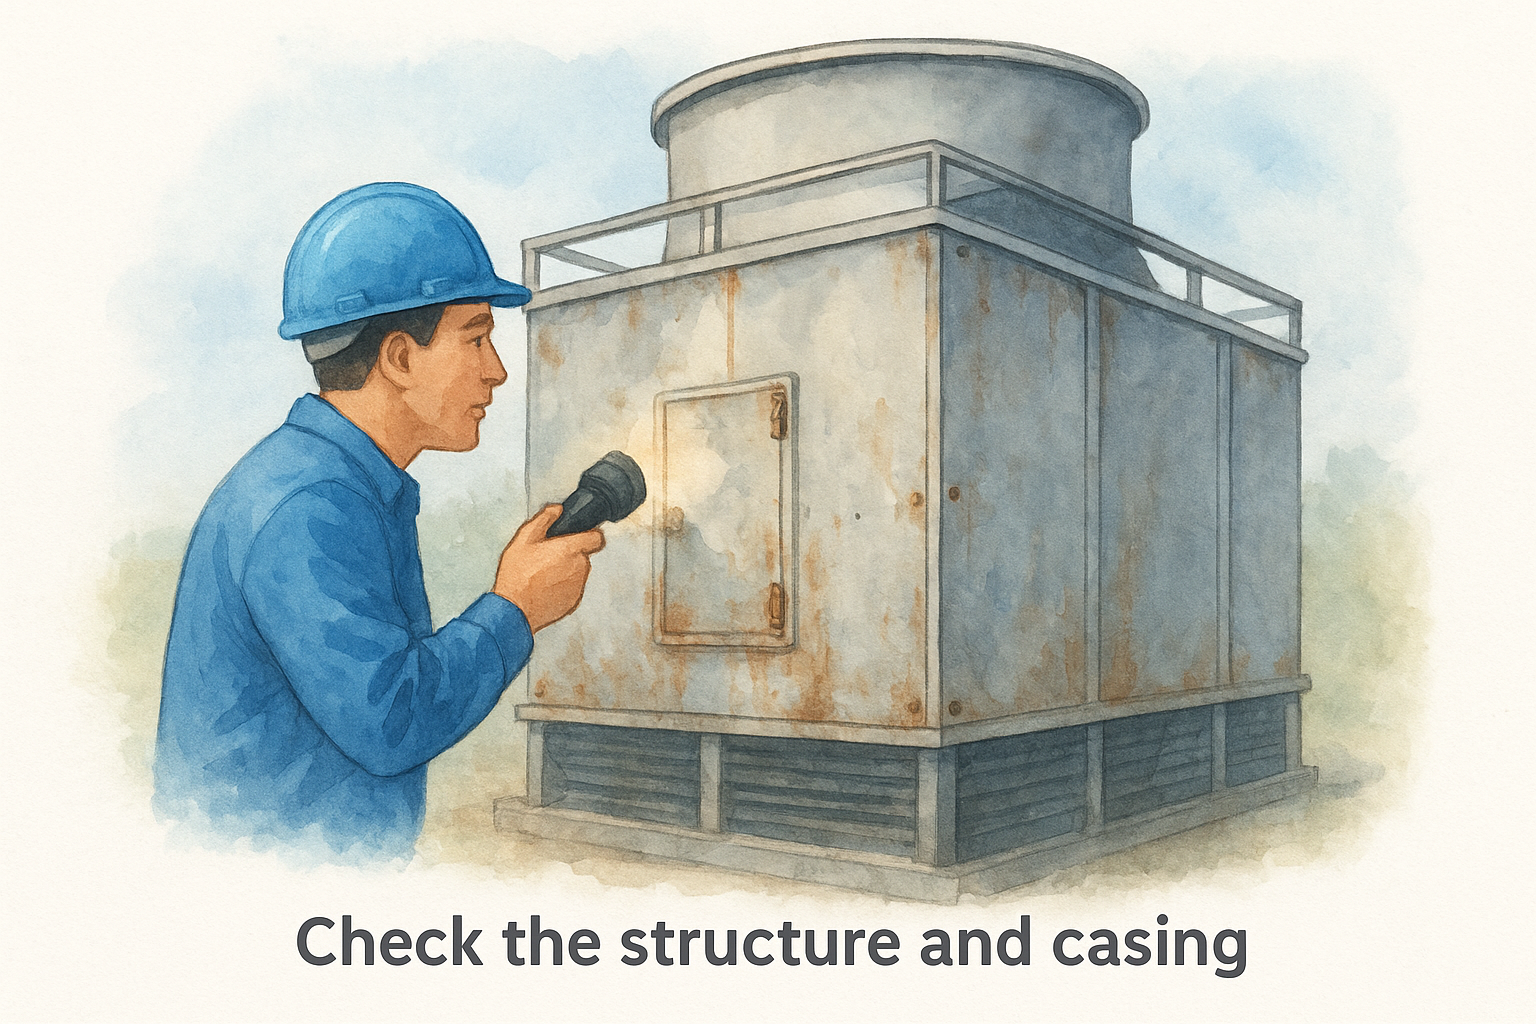
- Rust streaks or flaking paint on the casing and fan deck
- Cracked or warped fiberglass panels
- Loose or missing fasteners on access doors
- Gaps around pipe penetrations where sunlight or debris can enter
- Corrosion on the fan stack and support structure
Document anything you find with a photo and a note on severity, since a small crack this quarter becomes a structural repair job next year if it's ignored.
Verify water flow and distribution
Next, confirm the tower is actually moving water the way it's designed to. Water flow inspection means watching the distribution deck while the system runs and checking that spray nozzles or distribution basins are delivering even coverage across the fill media. Uneven flow creates dry spots where scale forms faster and wet spots where biofilm thrives, so a five-minute visual check here saves you a bigger cleaning job later.
An uneven spray pattern today is scale buildup or biofilm growth next month.
Check the drift eliminators for cracks or gaps, since damaged eliminators let treated water escape as fine mist, wasting chemical treatment and increasing Legionella exposure risk around the tower. Finally, compare your flow meter reading against the manufacturer's rated flow. A significant drop from the rated flow can indicate a clogged strainer, a partially blocked distribution nozzle, a pump issue, or another distribution problem worth addressing before it affects heat rejection.
Step 2. Clean and disinfect the basin, sump, and fill media
Once the structural check is done, shut the system down for the deeper work. Basin cleaning matters because standing water and organic debris at the bottom of the sump give bacteria a stable place to colonize between water treatment cycles. Poorly maintained basins can support conditions favorable to Legionella growth, so skipping this step for even one quarter works against the biological control your water treatment program is designed to provide.
Draining and scrubbing the basin
Drain the basin completely with your sump pump, then remove accumulated sediment, leaves, and sludge from the corners and drain screen before it dries and hardens. Scrub the basin walls and floor with a stiff brush, paying close attention to areas around the makeup water fill valve where mineral deposits build up fastest. Check the following before refilling:
- Basin floor and walls free of sludge and slime buildup
- Drain screen and overflow line clear of debris
- Makeup water valve seated and functioning correctly
- No visible cracks or leaks at the basin seams
A basin you can't see the bottom of is a basin that's already growing biofilm.
Disinfecting the sump and fill media
After scrubbing, apply a biodegradable disinfectant to the basin and sump rather than a chlorine-heavy product that corrodes fittings and requires careful neutralization before discharge. Let it dwell per the label instructions, then rinse thoroughly before pulling the fill media sheets for a closer look. Fill media should show water running freely between the PVC sheets; if you see channeling or a waxy film coating the surface, that's scale and biofilm working together, and it's time for a full descaling treatment rather than another rinse cycle. A non-corrosive descaler handles this without pitting the media frames or requiring the acid-handling PPE a stronger chemical would demand. Descaling frequency depends on water chemistry, cycles of concentration, and equipment condition, so let inspection findings and performance data, not a fixed calendar alone, tell you when the next treatment is due.
Step 3. Test and balance the water chemistry
With the basin clean, shift your attention to the water itself. Water chemistry testing determines whether your tower is protecting equipment or slowly destroying it, since out-of-range conductivity or pH accelerates both scale formation and corrosion at the same time. Pull a water sample from the basin and run it through your conductivity meter before adjusting anything, because that single reading tells you how many cycles of concentration your tower is running at right now.
Track cycles of concentration and conductivity
Cycles of concentration measure how much the minerals in your makeup water have concentrated through evaporation, and running too high invites scale while running too low wastes water and chemical treatment. Compare your reading against these general targets, then adjust your bleed-off rate to bring the tower back into range:
| Parameter | Target range |
|---|---|
| Conductivity | 1,500-3,000 µmhos/cm |
| Cycles of concentration | 3-6 cycles |
| pH | 7.0-8.5 |
| Free chlorine/biocide residual | Per your water treatment vendor's program |
Water chemistry you haven't tested this week is a guess, not a control.
Adjust pH and biocide dosing
Once conductivity is dialed in, check pH and confirm your biocide feed is actually delivering the residual your Legionella prevention plan calls for. Low biocide residual, even for a day or two, gives biofilm the opening it needs to reestablish itself in fill media you just cleaned. Verify your chemical feed pumps are calibrated and the injection points aren't clogged, since a pump that reads correctly on the controller but delivers nothing downstream is a common blind spot. Document every reading in your log alongside the date and technician name, because a pattern of drifting conductivity over several weeks tells you more about a failing bleed valve than any single reading ever will.
Step 4. Service the fan, motor, and distribution system
Mechanical failure is the most expensive way to discover a maintenance gap, so this step protects the parts of the tower that actually move air and water. Fan and motor inspection catches bearing wear, belt slippage, and vibration issues before they cascade into a burned-out motor or a fan blade failure that takes the whole tower offline. Shut down and lock out the fan motor before opening any guards, since this is the one step where skipping proper lockout/tagout procedures has caused serious injuries on cooling towers.
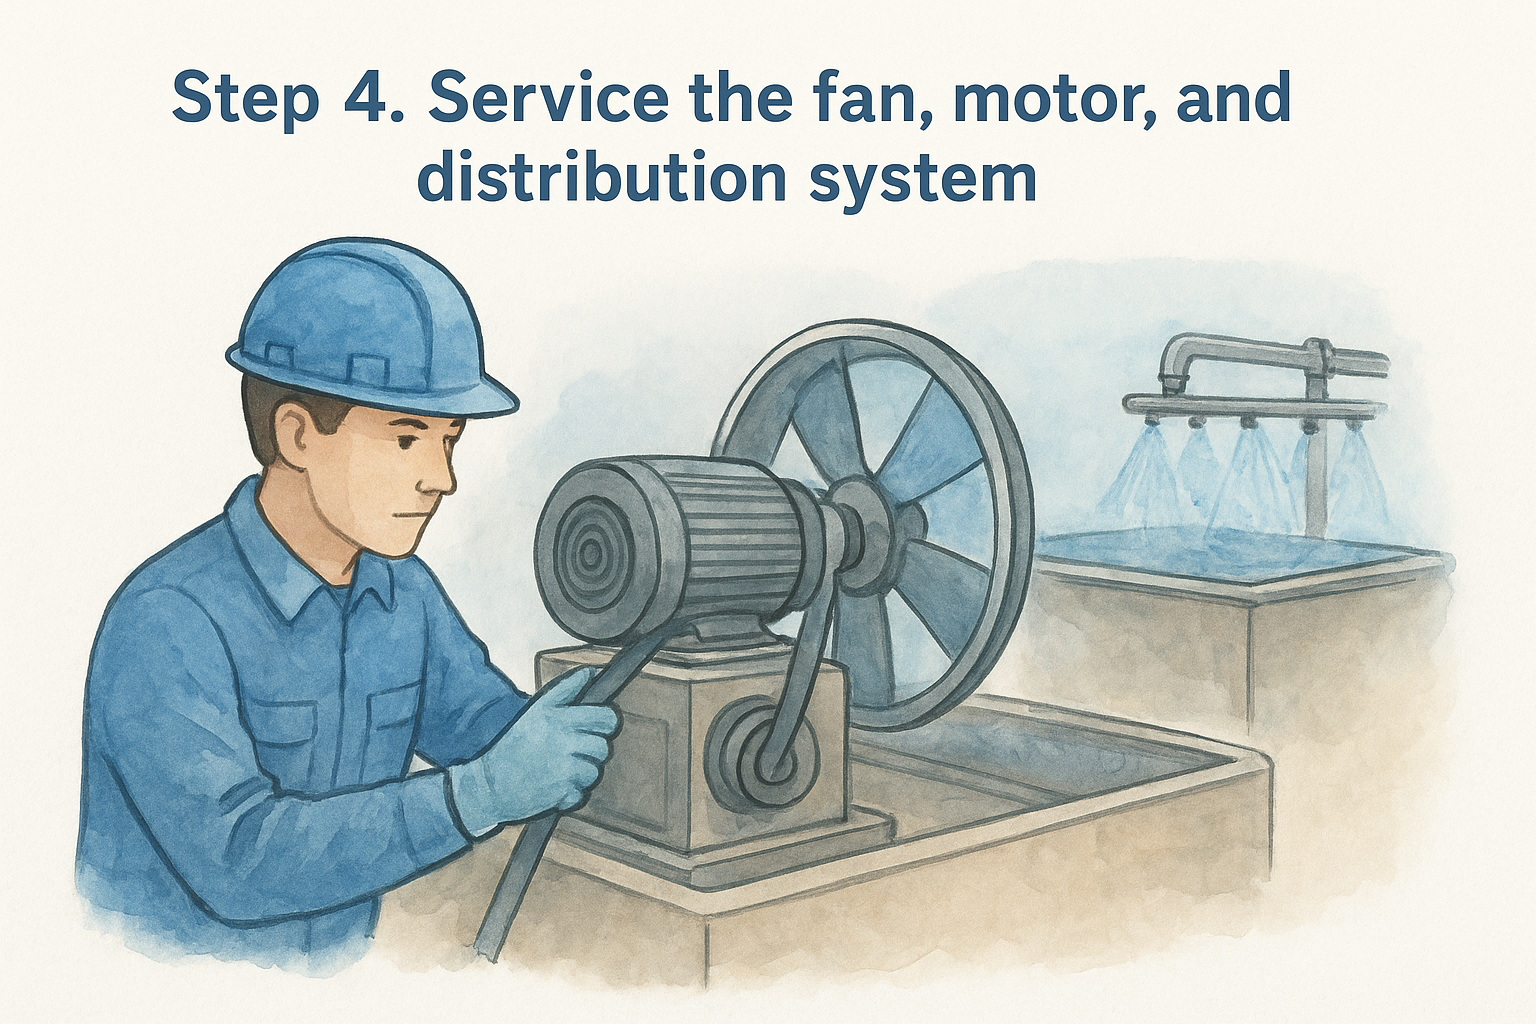
Inspect the fan and motor assembly
Start by checking belt tension and alignment, then rotate the fan blades by hand to feel for grinding or resistance in the bearings. Look for:
- Oil leaks or discoloration around the gear reducer
- Excessive belt wear, cracking, or glazing
- Loose fan blades or visible pitting on the blade edges
- Unusual vibration or noise during a test run
- Motor amperage readings outside the manufacturer's rated range
A fan that vibrates today is a bearing failure you'll be replacing next season.
Grease bearings per the manufacturer's schedule, and don't assume more grease is better since over-lubrication traps heat and attracts debris just as effectively as running dry.
Verify the water distribution system
Once the mechanical side checks out, restart the system and watch the distribution system in action. Confirm spray nozzles are clear and delivering full coverage across the fill media, since a single clogged nozzle creates a dry zone that scales up faster than the rest of the tower. Check the distribution basin cover for cracks that let sunlight in, and confirm the makeup water float valve shuts off cleanly without sticking. This is also the point to re-run your flow meter check from Step 1 and compare readings, since a functioning fan and clean distribution system should bring your flow rate back within a few percent of the manufacturer's spec.
Making maintenance a routine, not a reaction
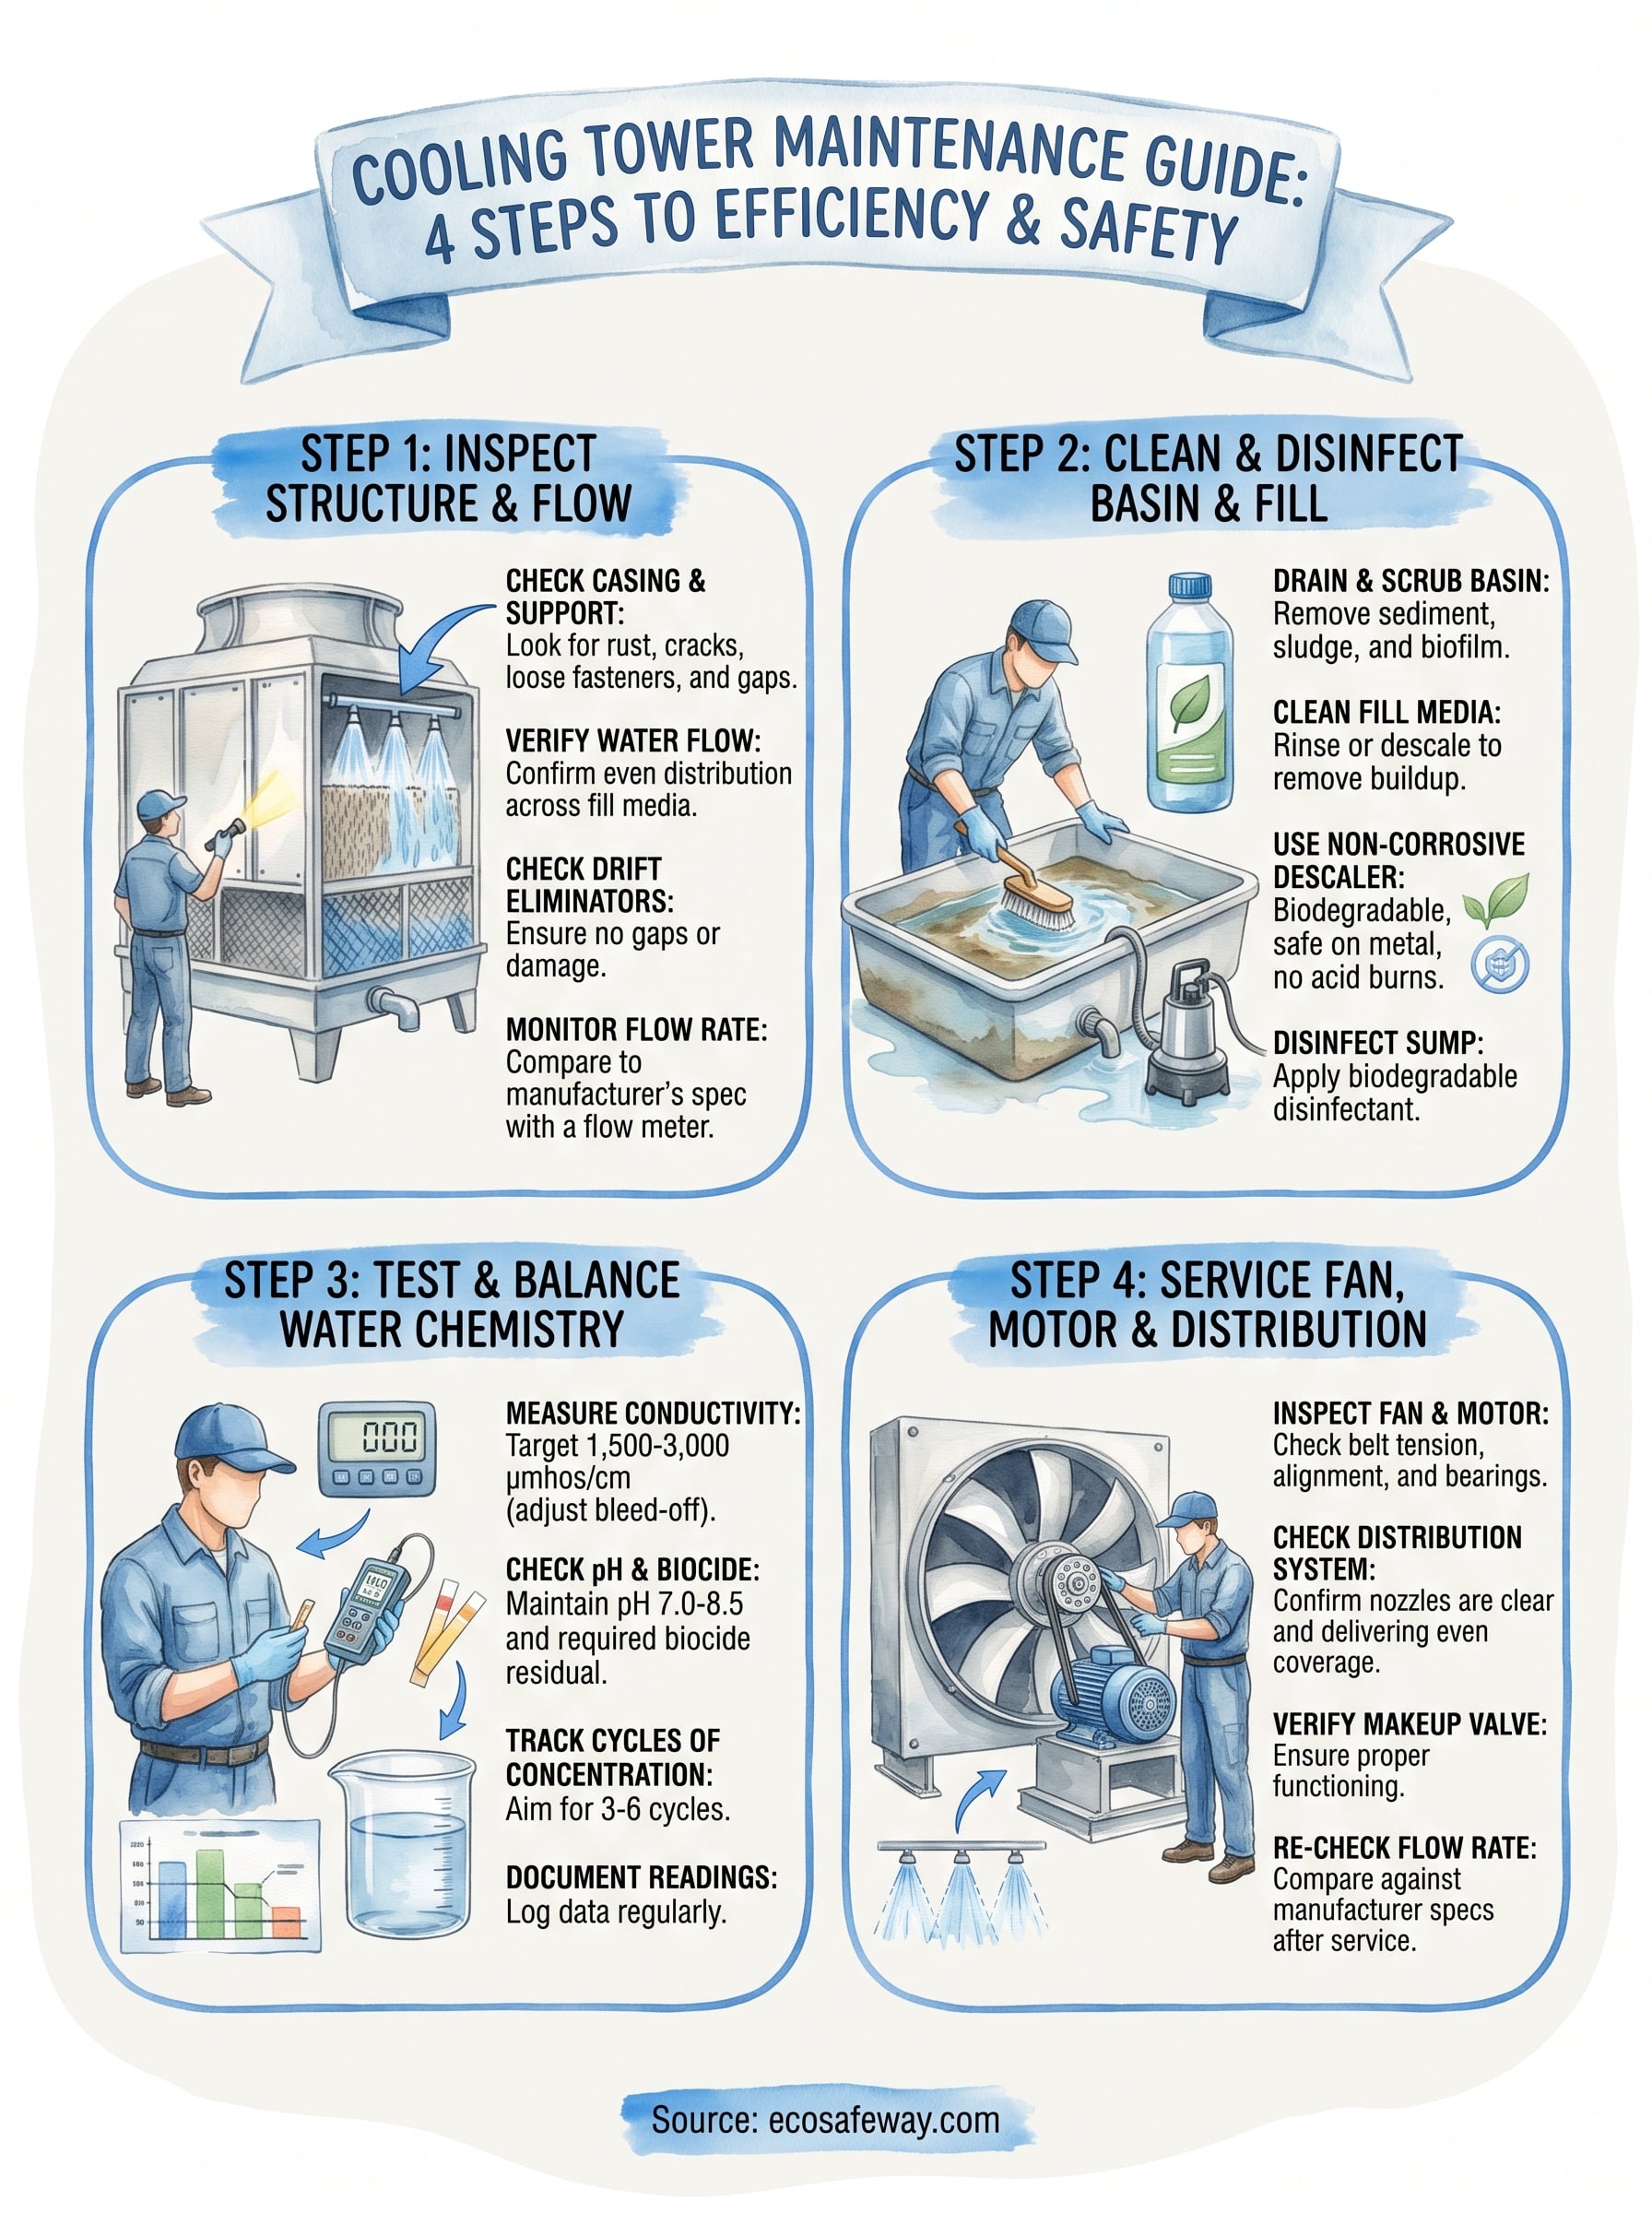
None of these four steps works as a one-time fix. Cooling tower maintenance only pays off when inspection, cleaning, water chemistry testing, and mechanical service run on a fixed calendar, not whenever someone notices a smell or a spike in energy bills. Facilities that treat this checklist as routine catch scale and biofilm while they're still cheap to remove, instead of discovering them after a health inspector or a failed compressor forces the issue.
Build the schedule around your basin cleaning and descaling intervals first, since those are the tasks most often skipped when staff get busy, and everything downstream depends on them. Choosing a non-corrosive descaler for those cleanings means you're not trading one maintenance problem for pitted metal and hazmat paperwork down the line. If your tower is due for descaling, take a look at Eco Safeway's industrial HVAC and cooling tower descaler and get the next cycle on the calendar.


